My Holiday Baking Success Secrets

BBs, it’s time. The holidays are a home baker’s Super Bowl, and I am determined to have a small army of BwB community members who knock everyone’s proverbial socks off during this season. I want y’all to be undeniably successful with all of your holiday bakes this year, so I’ve put together my best tips and resources to ensure that you have crowning achievements on your holiday dessert tables!

In this Post:

Practice. Practice. Practice

Friends. FRIENDS. Hear me on this one:

Please do not serve anything on a holiday table that you haven’t made before. And, by “made”, I mean that you’ve done the entire recipe, from start to finish, and you’ve tasted it! Please, please, please don’t serve anything to the aunties and grammies that you haven’t made at least once! (And, if you do and it flops, please keep my name out of it. 😂)

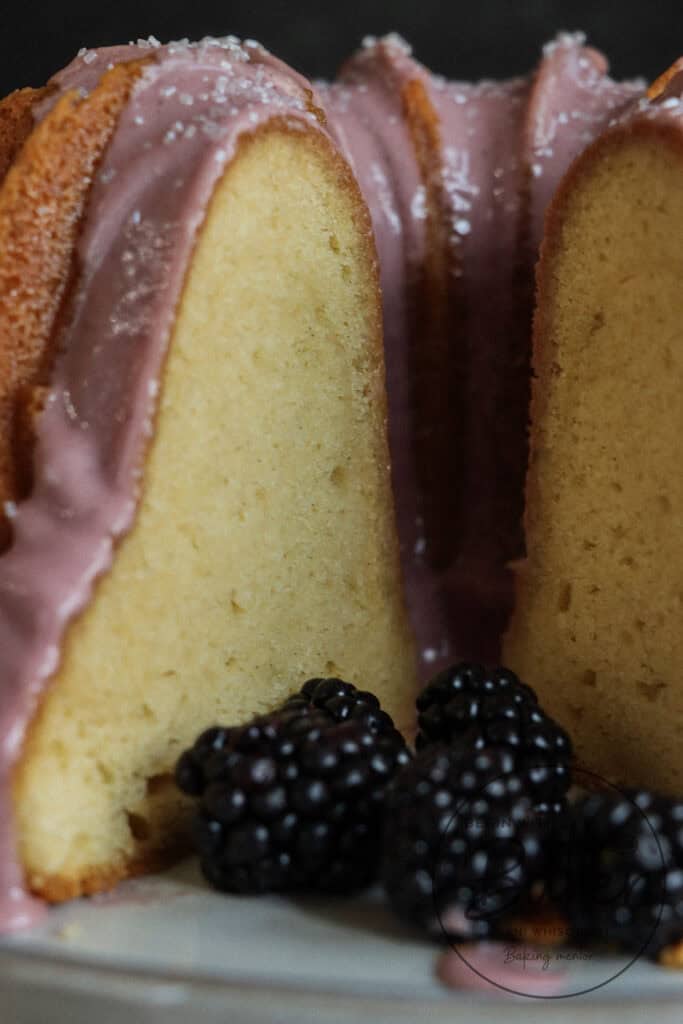
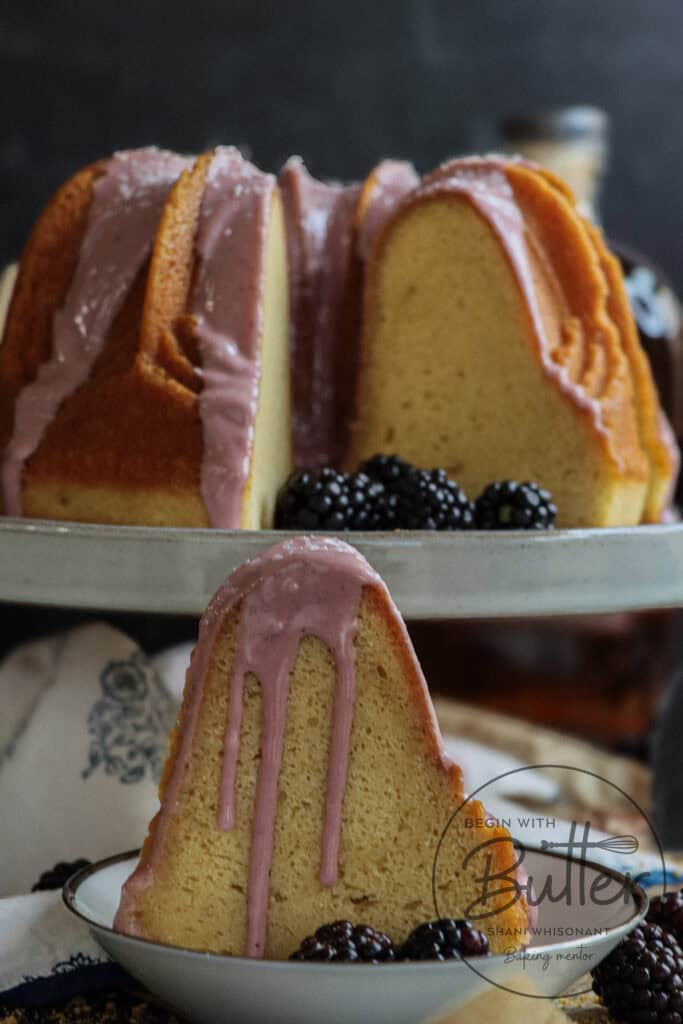
Essential techniques like “creaming butter and sugar until light and fluffy“, or achieving that perfect drip-worthy glaze for your pound cake, take practice to master. A trial run helps you iron out any challenges before the pressure of holiday baking begins. You get to have your proverbial (and literal) cake and eat it too! There’s literally no downside to practicing before the big day.

When you practice and test your recipes beforehand, you know what modifications (if any) or improvements in your techniques that you need to make before the final product hits the dessert table. (And guess what? If you taste it and want to modify, but don’t know how to modify, you can always email bakingbestie@beginwithbutter.com for help!)

Master Mise en Place

Mise en place, friend, is a beautiful, lyrical French phrase that simply means “everything in its place.” In baking (and cooking!) usage, it means that you have your ingredients prepped and ready to use. It’s a perfect way to ensure that you have all of the ingredients that you need before you start, and it’s an incredible technique to help you gain kitchen confidence.

For example, in my Pineapple Carrot Pound Cake, the ingredient list calls for for 250 grams (1 cup) of boiling water, and 218 grams (1 1/2 cups) of raisins. In the recipe instructions, however, it states that I have to place the raisins in the boiling water for a period of time, in order to plump up the raisins and prepare them to go into the cake. That’s mise en place, friends. The act of having ingredients at the ready to go into your recipe. Not the act of having your ingredients out on the counter, ready to be measured.

I am very passionate about mise en place, BB. So much so, that I wrote a whole blog post about it! Want to get a full understanding of how to properly prep your mise en place, bestie? Check out the post! (spoiler alert: proper mise en place starts with reading the recipe from start to finish, so that you can get an idea of how to prep your ingredients.)

Common mise en place steps:

  • Combine dry ingredients and sift them into a large bowl
  • Crack eggs into a separate container, to ensure that you don’t get egg shells in your final product
  • Add fats (butter, oil, cream cheese, or even dulce de leche) to your mixing bowl
  • Place sugar in a medium bowl, or in my favorite prep container of all time…the deli cup (I often add citrus zest or vanilla beans to the sugar as well)
  • Place extracts in a small container (or a teeny jar) and set them aside (if using a vanilla bean, make sure to slice it down the middle very carefully, and scrape out the vanilla bean goodness!)

There are other steps that are recipe-specific, but these steps are a great place to start. Do this and you’re guaranteed to have a calm, confident bake instead of a frazzled, terrible one. And let’s be honest, with the holidays upon us, we need all the baking cheat codes right about now. 😂

Use Metric Measurement and a Digital Kitchen Scale

There are two general types of unit that are used in baking: volume (think: ounces and cups) and metric (think: grams and kilograms). I live in the United States, and volume measurement reigns supreme here. Those dry measuring cups get a workout in just about every home kitchen across this country.

BUT (you knew there was a “but”, BB!)

Baking is a game of inches, Friend. And, for that specific reason, the most accurate results will come from using the smallest units of measurement. And the smallest units of measurement are – you guessed it – metric units. When we use these tiniest of units of measurement, our bakes get more accurate and consistent. We eliminate the “great today, terrible tomorrow” bakes, and develop the skillset to reproduce the same excellent result over, and over, and over again.

I recommend using metric measurement because this one step improved my baking exponentially in one afternoon in 2014. It was actually right in that moment that I realized why I’d been such a miserable baker my whole life…I didn’t know how to measure ingredients to get a good result. 🤯 I’ve not gone back to volume measurement since.

For many pound cakes, we use 384 grams (3 cups 😩) of all-purpose flour, right? If we use metric units, we know that we will always come up with 384 grams (give or take 3-5 grams) of flour. With measuring cups, no matter the technique that we use (scoop and sweep, aerate, pray for a miracle and scoop, etc.), we will almost always add too much flour to our cake (and not just a little too much!). That is because every “cup” of flour that we measure has a different weight, and, left unchecked, we are naturally heavy-handed with ingredients. So, with volume measurement, we never truly know how much of an ingredient we’re adding to our recipes. This is a death knell for good bakes.

What to measure in metric units, and how to do it

The ingredients that I use metric measurement for are my flour, sugar, butter, liquid, and sometimes my eggs. You can continue to use teaspoons and tablespoons for things like salt, spices, leavening, and pure vanilla extract.

The how is easy. A lil’ $15.00 digital kitchen scale will set you right.

Want to Scale a Recipe? Use Your Scale

The holidays are a peak time for indulgent treats. To that end, that means that we need a lot of sweets during this time. What that means for many of us is that we need to scale a recipe up, in order to avoid having to make two, three, or four batches of the same thing.

To successfully scale a recipe, the most important thing to remember is to use a digital kitchen scale and metric measurement.

Want to go in-depth about how to scale a recipe? You’re my kind of baker! Check out this post for rules of thumb about scaling.

Why metric measurement + a digital scale is important for scaling recipes

When you scale a recipe, precision is key. Too little liquid and your cakes won’t reach their pillowy, rich best. Too much flour and your cookies will be a crumbly mess.

When you use volume measurement (think:cups), the likelihood of over- or under-measuring ingredients goes up exponentially. And, since baking is a game of precision, it’s critically important to accurately measure ingredients, whether you’re making one dozen cookies or five dozen.

Time is an Ingredient

Time to get philosophical, BB. And it’s also time for me to share something that my Mommy taught me in her kitchen.

Time is an ingredient.

You see, you wouldn’t approach a baking project without flour. Or sugar. Or eggs. If you did try to power through without any of those main ingredients, you know that you’d be setting yourself up for failure. So you know not to do something as silly as trying to make a cake without flour.

What if I told you that time is as important as any other ingredient? Without adequate time, you’re almost certainly setting yourself up for an unintended (read: bad) result from your bake. And you’re definitely certainly setting yourself up for an extremely anxious bake.

When you give yourself the gift of enough time to do a baking project, and you allow yourself to truly enjoy the process of the bake without unnecessary clock-watching, it’s a magical experience that can lead to the best outcomes.

So, read the recipe. Reverse engineer the timing of the recipe. Be honest with yourself about whether you have enough time. And then make a decision about whether to proceed. I guarantee that your friends and family would rather eat that store-bought something-or-other that you didn’t want to buy, rather than the raw-in-the-middle-burnt-on-the-outside pound cake that you didn’t truly have “time” to make.

Prep Ahead When You Can

Y’all, let me tell you something that took me way too long to learn: some of our favorite holiday treats actually taste better when made in advance! And I’m not just saying that to help you manage your time (though it definitely will).

Take my Sweet Potato Pie, for instance. Those warm spices and that rich filling? They need time to get to know each other, BB. Making it a day or two ahead lets all those flavors dance together like a senior prom slow dance in 1994. And my Perfect Sunday Dinner Rolls? You can make the dough ahead (reducing the yeast by half) and let it do its first rise in the fridge – it’s like letting them take a spa day before the big show. That “low and slow” rise time will only improve the final taste of your dinner rolls.

My Southern Rice Pudding? Chile, listen. That creamy comfort food actually develops deeper, richer flavors after it chills out in the fridge for a day. It’s like how Whitney Houston’s voice got even better with time – some things just need that extra moment to reach perfection.

Just remember to wrap everything properly (we’re not trying to serve Aunt Clara freezer-burned anything, or worse, serve her something that will make her stomach all topsy turvy), and make sure you know which treats can handle being made ahead and which ones need to be served a la minute. When in doubt, your baking bestie is just an email away!

Temperature is Also an Ingredient

Back to our Philosophy 201: the philosophy of baking course. 👓 BB, temperature is also an ingredient. There are a couple of things to note as you go forward with your bakes that can help you achieve baking zeniths that you never believed possible.

Make sure that cold ingredients reach room temperature before starting: This refers to your butter, eggs, and liquid (e.g. milk, cream cheese, sour cream, crushed pineapple, etc.). You need these ingredients to be room temperature in order to create a fully cohesive batter or dough. If they’re too cold, they might not ever fully combine and become the cohesive, silky, beautiful batter or dough that you’re envisioning. (Want to learn how to identify whether you’ve reached room temperature? This is an outstanding skill to learn and it will help your bakes tremendously! You can find more information in this blog post.)

Oven Temperature: This one is key, friend. Our ovens mean well, but they often lie to us. Some of them have devastating hot spots that burn everything that dares come their way. Or, some of them have spots that never. quite. get. to. the. right. temperature, no matter how hard we try. Most of them scoff at the set temperature of our oven. (Mine actually laughs when I set it to 325°F, because it knows that it won’t go a single solitary degree over 297.1°F. 😂) To avoid the headache of uneven baking, an oven thermometer is key.

Instant Read Thermometer: Friend, let me tell you, I’m not using toothpicks or skewers to test a thing. The way I’ve been let down by those little pieces of wood…😮‍💨. Instead, I use an instant-read thermometer to test the doneness of cakes. I use an instant-read thermometer to test the internal temperature of bread dough. I use an instant read thermometer to test the doneness of delicious cinnamon rolls. Internal testing, using my favorite ThermoWorks ThermoPop, has led to consistently amazing results. Because who among us wants to hold their breath and pray that there’s no river of unbaked cake batter when Aunt Clara cuts into our holiday cakes? The answer is…not me.

Honor Tradition, But Don’t be Afraid to be Different

This one hits home for me. You see, my Mommy was a prolific baker. The absolute best. She was so good, that if people knew that she was bringing dessert, they would often decline to do the same. She was humble about her gift, but she saw how much joy it brought to our friends and family.

And she shared every family recipe. She wrote them on 4″ x 6″ index cards in her meticulously beautiful handwriting, hoping that the recipe recipient would be able to replicate her special recipe. To this day, my aunts and uncles still boast about how she took the time to write out a recipe for them.

It is with this blog that I honor that tradition that my mother started, of sharing the recipes that are dearest to me. I do not believe, at all, that we should gate keep and hoard recipes – this is just my personal opinion. The joy in a recipe is the ability to share that recipe. So, I share freely because I truly believe that there is true beauty in passing the recipe torch. You see, my mother’s recipes are alive and well, on 4″ x 6″ index cards, because she shared them freely. So did her mother. And her mother before her. I have a deep appreciation and understanding of the tradition of sharing food and recipes.

Here’s the thing, though. I could not comprehend the techniques that my home-baking Mommy tried to teach me. Those techniques were steeped in generations of tradition, but, cognitively, they were fully lost on me. I had to teach myself how to bake from scratch in 2014, and, while I am a little sad that I can’t execute anything with my Mommy’s techniques, I know she’s proud of what I can do because she’s my Mommy.

That’s a long way of saying that you should execute recipes in the way that makes the most sense to you. Please, don’t ever dismiss the importance of tradition in your baking, but also, don’t be afraid to blaze a path that’s just a touch different. As long as your remain thoughtful and true to the cultural and historical intent of the recipe, the ancestors will be pleased.

Nobody Does it Alone. Ask for Help!

There are many things in life that we “practice”. Attorneys “practice” law. Yogis “practice” yoga. Doctors “practice” medicine. Parents “practice” patience. 😝

Guess what? Baking is as much a practice as any of those things. A baker gets better as they continue to practice their skill. Even now, as a professional baker, I see myself as a practitioner instead of a guru. There is always someone who knows more, and it is to those people (or textbooks) that I race when I’m stuck.

I encourage you to do the same. Nobody gains mastery as a baker without oodles of help. Whether it was from your grandmother standing behind you, teaching you how to roll out a perfect pie crust, or your mother showing you her special trick for stiff meringue peaks, or from a textbook (🙋🏾‍♀️), or from a baking bestie (also 🙋🏾‍♀️), we all need to know that someone has our backs as we endeavor to improve.

That’s true of baking and life, BB.

In baking, know that I’ve got you. When you’re stuck, or frustrated, or ready to panic, I want you to reach out to me at bakingbestie@beginwithbutter.com. When you are faced with kitchen heartache and you’re at your worst, know that 🎶 you’ve got a friend in me. 🎶 I’m here to listen, help you troubleshoot, and figure out whether this is a salvageable moment or a “start all over” moment. And I promise to always do it lovingly, with integrity, because I’ve been there.

You have baking mastery in you, BB. And I am honored that you trust me to help you get there.

Conclusion and Resources

Friend, I know that was a mouthful. It’s my hope that you found this information helpful and calming as you get ready for all of your holiday bakes.

Remember, Begin with Butter is more than a recipe website. There are tons of resources on this site to help you gain proficiency as a baker, and I’m always happy to share them! The resources are organized by techniques, equipment, and ingredient science, and each of those will help you tremendously on your baking journey. There’s great information that will help you not just during the holidays, but with every bake going forward.

I wish you the absolute best this holiday season (and beyond)! And don’t forget to tag me in your amazing bakes @beginwithbutter on Instagram. I’m always so proud to see your baking growth!

XOXO,

Shani

Check Out Some of These Amazing Cakes

Buttermilk Vanilla Bean Loaf Cake
About This Cake This is the kind of bake that turns heads …
Strawberry Shortcake in a Charlotte Pan
That whipped cream isn’t just a topping-it’s the luxurious bridge back to …
Simple Carrot Cake with Cream Cheese Frosting (Nut-Free!)
Carrot cake was always the Easter cake in my childhood home. No …
Brown Butter Kentucky Bourbon Cake with Salted Caramel
In this Post About this CakeBrown Butter Kentucky Bourbon Cake: The Key …
Classic Cream Cheese Pound Cake
Friends, pound cakes are deeply, deeply nostalgic for many of us. They …
Half and Half Cake
Y’all…this Half and Half Cake is the best kind of line jumper. …
Sweet Potato Sock it to Me Cake
Well, I am my mother’s child, and I have the strongest affinity …
The Best Cream Cheese Glaze
Hi BB! This year, for the Twelve Days of Pound Cake 2024, …
Bourbon Brown Butter Vanilla Pound Cake
Hi BB! Welcome to Day 12 of the Twelve Days of Pound …
Gingersnap Pound Cake
Hi BB! Welcome to Day 11 of the Twelve Days of Pound …
Sweet Potato Cranberry Pound Cake
This Sweet Potato Cranberry Pound Cake has willingly accepted the assignment, and …
Cherry Cheesecake Pound Cake
Let’s talk about it. The vanilla cake base of this Cherry Cheesecake …
S’Mores Pound Cake
When my baby girl asked me for a S’Mores Pound Cake, she …
Apple Cranberry Pound Cake
This special cake uses unsweetened applesauce instead of diced apples, because easy. …
Chocolate Stout Pound Cake
There isn’t a brownie recipe on this site – yet – but …
Pineapple Carrot Pound Cake
This cake features a beautifully plump, moist crumb, deep and warm complementary …
Pineapple Dulce de Leche Pound Cake
While I love, love, love my Decadent Caramel Pound Cake (and I …
Iconic Apple Pie Pound Cake
Of course, I had to make apple pie into a pound cake, …
Brown Butter Rum Raisin Pound Cake
Y'all. Listen. This year's Twelve Days of Pound Cake theme of "Sugar, …
Mexican Chocolate Pound Cake
Every once in a while at Begin with Butter, there's a cake …

The Best Cream Cheese Glaze

Hi BB! This year, for the Twelve Days of Pound Cake 2024, the theme was Sweet, Spice, and Everything Nice. Every single pound cake fit into one of those categories (some fit into two!), but there was a through line that was consistent with many of the cakes: my favorite cream cheese glaze. We used it in a bunch of the cakes (my Gingersnap Pound Cake, my Pineapple Carrot Pound Cake, and the Cherry Cheesecake Pound Cake), and I modified it to suit the needs of each cake.

But the cream cheese glaze base remained the same. So I wanted to share it with you today!

In this Post:

How to Make this Cream Cheese Glaze – a Video Tutorial

Cream cheese glaze is one of those things that can be frustratingly simple. Most of the time, the frustration lies in the fact that the glaze got thin because there was too much liquid. To prevent this from happening to you ever again, I created this video for you, where I show you, step by step, how to make this incredible glaze (and keep it delectably thick!)

The Recipe

Troubleshooting Cream Cheese Glaze

Why is my glaze so thin?

This happens when you add too much liquid (usually whole milk) to the glaze too quickly. There’s a point where this glaze will try and convince you to add more liquid. Ignore the urge! Keep stirring, and you’ll find that, instead of that tablespoon you thought you needed, you probably needed only another teaspoon (if that). But you really have to take your time and work the glaze to figure that out.

How long can I store this cream cheese glaze? Can I freeze it?

It’s not recommended to freeze cream cheese glaze, because the texture can change upon thawing. Although most will tell you that you can store it in the refrigerator for 2-3 weeks, The most I’ll store it in my refrigerator is ten days.

How can I modify this to make a spiced cream cheese glaze?

If making spiced cream cheese glaze, start with 1/8 of a teaspoon (and no more!) of your favorite spice. If you want to mix two spices, that’s fine, but I would not recommend any more than 1/4 of a teaspoon total of spice in this glaze.

I want to use this glaze for cinnamon rolls. How would I modify?

If using this glaze for cinnamon rolls, reduce the initial whole milk amount to one tablespoon (instead of 1 1/2 tablespoons). For cinnamon rolls, you should also use your hand mixer on lowest speed to complete the glaze, since it will take a lot more elbow grease to work that one tablespoon into a cohesive, thick glaze.

The hand mixer will create some bubbles in the final glaze, which is why we don’t want to use it for cake glaze. But since cinnamon roll glaze goes onto warm rolls, any bubbles will pop anyway. 😊

Conclusion: This is the Only Cream Cheese Glaze You Need

The tanginess of this glaze beautifully keeps sweet desserts and cinnamon rolls from becoming cloyingly sweet. And I love that. So much so, that I’ve made this cream cheese glaze my default for most pound cakes. The smooth, rich texture is something that you cannot get with a regular glaze, and the taste is something that can only be achieved with cream cheese.

Be forewarned! This glaze is going to become your absolute favorite. So much so that you’ll look for things to bake, just so you can justify using it.

When you make it, let me know! Tag me on Instagram @beginwithbutter or send an email with your beautiful creation to bakingbestie@beginwithbutter.com! And make sure to share this post with your personal baking besties, to help them get on the good foot with cream cheese glaze.

See you soon BB!

Bourbon Brown Butter Vanilla Pound Cake

Hi BB! Welcome to Day 12 of the Twelve Days of Pound Cake! This is the final day of our twelve day journey for this year, and today, I have my Bourbon Brown Butter Vanilla Pound Cake. Because every holiday table needs a vanilla pound cake, but we need not be bored to tears by it.

This particular vanilla pound cake is anything but boring. Any time you begin a cake with brown butter, you know it’s definitely not a snooze. But, when you take the additional step of adding a little bit of bourbon to the butter after browning, you intensify the vanilla flavor even more, and add subtle caramel notes to the cake that make it even more exceptional. 

The glaze on this cake is one for the books, BB. Why, you ask? Because it’s a bourbon blackberry cream cheese glaze, that’s why. Smooth, sweet, and a lil’ smoky, this one leaves you all tingly for all the right reasons. It’s one of those cakes that will both turn heads and make stomachs happy at any gathering where it’s served.

In this Post:

About this Cake

The flavor profile of this cake is singularly spectacular. Bourbon-infused brown butter adds deep, smoky caramel and vanilla notes to an already extraordinary vanilla cake. It’s the kind of twist that will make your family and friends declare immediately that this is their favorite vanilla cake. And, the best part is that they won’t even know why they’re saying it.

In this cake, to increase the bourbon/caramel/vanilla notes, we do two things: create vanilla-infused sugar, and allow the brown butter to cool and re-solidify so that we can cream it with that same vanilla sugar. The bourbon butter and vanilla sugar, when creamed together, create a blissful, airy combination that contributes to the uniquely beautiful texture of this cake. BBs, OMGoodness, this one technique creates a cake so outstanding, you would never know that it came from a home kitchen.

Be forewarned, though. This cake will make you the vanilla cake person among your family and friends forevermore.

Recipe-At-A-Glance

Prep Time: 40 minutes

  • 20 minutes for mixing
  • 55-65 minutes total baking time
  • 3-5 hours cooling time
  • Total Time: 5-7 hours
  • Yield: 18 servings

Key Temperatures:

  • Oven: True 325°

Storage:

  • Room temperature: 3-4 days in the refrigerator, in airtight container
  • Freezer: Up to 3 months (unglazed)

Skill Level:

  • Beginner

Ingredients in the Bourbon Brown Butter Vanilla Pound Cake

One of the primary goals of Begin with Butter is to demystify baking for all levels of home bakers, and a big part of that is understanding how our baking ingredients work. When you understand how ingredients work, you open a whole new world of possibilities in your baking.

Do you need deep knowledge about every ingredient? No! But even a little knowledge goes a long way in a home kitchen. 😃 Let’s dive in!

All-purpose flour is the foundation of your cake – it provides structure and creates the basic “skeleton.” When mixed with wet ingredients and baked, flour helps create the soft, pleasantly plump texture we love in pound cake.

Kosher salt isn’t just for savory foods – it actually makes desserts taste better by enhancing all the other flavors and controlling the sugar level. Don’t skip the salt, else you’ll be asking for a cake that can actually be unpleasantly sweet! This tiny amount of salt is a heavy lifter, and goes a long way towards ensuring balance.

Baking Soda: This cake contains sour cream, so I chose baking soda for the leavener. Baking soda needs acid to activate, and the acid in the sour cream helps this activation. (Want to learn more about baking soda and baking powder? Check out this article: Do I Need Baking Soda or Baking Powder?)

Brown Butter: That’s right, BB. This cake uses brown butter. It’s an additional step but it lends massive flavor. In this particular recipe, we actually need to infuse the brown butter with bourbon and then re-solidify the brown butter. This step ensures that it can work together with the sugars to cream. This process adds additional leavening to the cake. (You can find out even more about brown butter in this article: How to Make Brown Butter)

Bourbon brings warm, caramel and vanilla notes into your cake batter. While you might worry that the bourbon might booze up the cake batter, there’s no need to fret; while the cake bakes, the alcohol cooks off, so you’re just left with those yummy flavors mixing with the browned butter.

Granulated sugar does more than sweeten – it helps make your cake tender and moist. And, granulated sugar is the key player for the caramelization on the outside of your cake!

Eggs are the glue that holds everything together. They provide structure while also making the cake rich and tender. Make sure to use room temperature eggs; they mix much better than cold ones, meaning you’re less likely to get batter curdling or separation.

Vanilla bean brings an incredibly rich flavor to your cake – it’s packed with tons of tiny seeds that add those classic black specks and big vanilla flavor. If you’re using vanilla extract instead, you’ll still get that wonderful vanilla taste (though not quite as intense), and it’s much easier since you just measure and pour.

Full-Fat Sour Cream adds delicious flavor, and the high fat content in the sour cream provides tenderizing qualities that keep the proteins (from the flour and the egg whites) from becoming too tough.

These resources are super helpful to help you build consistency and confidence on your baking journey. Happy reading!

Techniques for the Best Cakes

One of the absolute best things about this Bourbon Brown Butter Vanilla Pound Cake is the addition of the bourbon brown brown butter. To help you achieve perfect results, both with the brown butter and the cake, I’ve included links to some key techniques below that will ensure that this cake turns out beautifully for you every time!

These resources cover so many fun techniques that will take your baking to the next level, and will allow your confidence to soar to new heights!

Important Tools

Need equipment? Not sure if you have everything that you need to make this amazing cake? No worries! I’ve got you covered there too!

BB, Begin with Butter has its own Amazon Storefront, where you can find all of the amazing equipment that I used in this Bourbon Brown Butter Vanilla Pound Cake! Want even more specific product recommendations? Check out the product links, below.

I do get paid a commission when you purchase, but these are the tools that I use all the time in my own kitchen.

If you have these tools already, great! Think of this as a checklist to help you build the confidence that you’ll need to execute this cake!

The Recipe

Frequently Asked Questions

How long does it take for the brown butter to re-solidify after adding bourbon? Should I refrigerate it? What temperature should the butter be when creaming it with the sugar after re-solidifying?

To make the bourbon-infused brown butter, allow the butter to cool and solidify until you can use a spoon to distribute the browned milk solids effectively. Once you can do that, you’ll be ready to add your bourbon and refrigerate the butter until it’s cooled to the center; if you want to bake in the morning, it’s great to do this step the day before!

Once the butter is fully cooled, you can take it out of your refrigerator about 45 minutes to an hour before you’re ready to start; the optimum internal temperature for creaming any butter is between 65°F and 70°F. The butter won’t be as firm as it would be if you were using regular butter (hence the reason why it doesn’t need to sit out for 2-3 hours), but you will still get a butter/sugar mixture that is: a) lighter in color, and; b) more voluminous and cloud-like than when you started.

Can I make this cake without alcohol? What can I substitute for the bourbon?

You can absolutely make this without alcohol! If you’re interested in making a rich vanilla cake instead of a bourbon butter cake, though, I’d actually recommend making the brown butter and adding it to my Very Vanilla Pound Cake!

How far in advance can I make this cake? Does it need to be refrigerated because of the cream cheese glaze?

If you’ve baked the cake, you can add the simple syrup, allow it to cool fully, then freeze for up to three months. Once it’s glazed, you can keep in the refrigerator for 3-5 days. I never, ever recommend freezing a glazed cake.

Can I use vanilla extract instead of vanilla bean? If so, what’s the conversion ratio?

You can absolutely use pure vanilla extract! If you choose vanilla extract, you’ll use one tablespoon, and you’ll add it after the eggs and mix thoroughly.

How do I know when the cake is done baking?

You’ll know that the cake is done when the internal temperature is 212°F (my Goldilocks temperature). Alternatively, you can use a toothpick or skewer. You’ll best know that the cake is done when the toothpick or skewer comes out clean. This is not my favorite method, though.

Can I freeze this cake? Should I freeze it with or without the glaze?

You can freeze this cake, unglazed, for up to three months! If you allow the cake to cool completely and then add simple syrup, then you’re giving it even more protection against freezer burn!

Conclusion: Vanilla Cake,  But Make it Fashion

This vanilla cake is guaranteed to have people talking…in the best way. Dressed in its blackberry bourbon cream cheese glaze, it’s a wonder to the eyes and the palette.

(Not a blackberry fan? Replace the blackberry preserves with raspberry preserves, or even use my Vanilla Glaze recipe for your topper!)

Friend, thank you for joining me for the Twelve Days of Pound Cake 2024: Sweet, Spice, and Everything Nice (working title). It’s been my honor to be the conductor on this train, and I hope you enjoy making one (or twelve!) of these cakes very soon. 

I can’t wait to hear your thoughts about this cake, BB! When you make it, don’t forget to tag me on Instagram @beginwithbutter so that I can share your beautiful creation!

Got questions after reading this article? No problem! Send an email to bakingbestie@beginwithbutter.com and let’s chat!

Fin.

Gingersnap Pound Cake

Hi BB! Welcome to Day 11 of the Twelve Days of Pound Cake! Today’s selection is especially “sweet” around this time of year.  It’s my Gingersnap Pound Cake and I love her so much. Y’all already know that I have a thing for making cookies into pound cakes (see Snickerdoodle Pound Cake, Chocolate Chip Cookie Pound Cake, and Biscoff Cake), and this event just wouldn’t be complete without a special holiday edition cookie cake.

And oh, what a holiday edition cookie cake this is! Gingersnap cookies are known for having a deliciously bold kick of their signature spice blend, in addition to some important supporting spice cast members. We use ginger and nutmeg (in the cake) and cinnamon (in the spiced cream cheese glaze) to fill those important roles for this cake, and the married spices lead to such a heavenly outcome. 

This delicious cake is leavened only by the creamed butter and sugar, combined with the crisp bubbles of the ginger beer! It’s finished with a spiced cream cheese glaze; the sweet tang of the cream cheese pairs perfectly with the warm spices and the crunchy gingersnap cookie garnish. So, we’re left with a warmly-spiced, pleasantly plump pound cake that is absolutely delectable on the palette in every way.

In this Post:

About this Gingersnap Pound Cake

The gingersnap cookie is the stuff of many core memories for me. I distinctly remember seeing my mother with a crinkly bag full of crispy spiced cookies, and hearing her regular admonishment before I ever tasted one: “don’t eat them all in one sitting.”

My mother knew me well. Because once I tasted the crunchy ginger-y and molasses-y goodness of that crunchy cookie, kissed by cinnamon and nutmeg, I was RUINED. Since then, I have absolutely loved the cookies and I still have serious self-control issues when I hear that crinkly bag.

This cake had to give me that completely satisfying taste before I would be willing to put it on my website. And, with ginger beer and ginger and nutmeg, this pleasantly plump pound cake hits every delicious gingersnap note. The delicious spiced cream cheese glaze is the pièce de résistance; the cinnamon in the spiced cream cheese glaze just made my eyes roll back in my head in the most delightful way.

It also caused me a little headrush, but it was worth it.

Ingredients in the Gingersnap Pound Cake

Ever wonder why your pound cake turned out denser than expected, or why that one time it was absolutely perfect? Check out this section where I show you the science behind the ingredients that make up this incredible cake.

All-purpose flour is the foundation of your cake – it provides structure and creates the basic “skeleton.” When mixed with wet ingredients and baked, flour helps create the soft, tender texture we love in cake.

Kosher salt isn’t just for savory foods – it actually makes sweet things taste better by enhancing all the other flavors and controlling the sugar level. Don’t skip the salt, else you’ll be asking for an overly sweet cake where the spices might run a lil’ rampant!

Ground ginger and ground nutmeg give your cake that classic spicy gingersnap flavor. These warm spices work together to create that cozy, familiar taste that makes people ask for seconds. And thirds. And to-go boxes.

Unsalted butter provides rich flavor and helps create a tender, melt-in-your-mouth texture. Using room temperature butter is key – it mixes much better with sugar and creates tiny air pockets that help your cake rise.

Neutral oil (like vegetable or avocado oil) helps keep your cake moist, even after a few days. While butter provides flavor, oil is your insurance policy against dry cake. 

Granulated and dark brown sugars do more than sweeten – they help make your cake tender and moist. Dark brown sugar adds a deeper, almost caramel-like flavor thanks to its molasses content. And, your sugars are the key player for the browning of your cake!

Eggs are the glue that holds everything together. They provide structure while also making the cake rich and tender. Make sure to use room temperature eggs; they mix much better than cold ones.

Pure Vanilla Extract adds more than just flavor! Vanilla actually enhances our perception of sweetness, meaning we can get maximum yum without having to add extra sugar. Make sure to use pure vanilla extract in your baking, as vanilla flavoring has additional ingredients that can impact the flavor of your cakes.

Ginger beer adds moisture and an extra punch of ginger flavor. The bubbles in ginger beer also help create a lighter texture in your cake.

Crushed gingersnap cookies add a delightful crunch and an extra boost of spicy flavor. They’re optional but add both visual appeal and that satisfying texture contrast that makes desserts extra special.

Techniques for the Best Cakes

One of the absolute best things about this Gingersnap Pound Cake is the contrast between the tender, moist cake and the crunchy cookie topping. To help you achieve perfect results, I’ve included links to some key techniques below that will ensure your cake turns out beautifully every time!

These resources cover so many fun techniques that will take your baking to the next level, and will allow your confidence to soar to new heights!

These resources are super helpful to help you build consistency and confidence on your baking journey. Happy reading!

But wait! There’s more! Grab your coffee or a glass of wine and get ready to check out my favorite equipment!

Important Tools

Guess what? Begin with Butter has its own Amazon Storefront, where you can find all of the amazing equipment that I used in this Gingersnap Pound Cake! Want even more specific product recommendations? Check out the product links, below.

I do get paid a commission when you purchase, but these are the tools that I use all the time in my own kitchen.

If you have these tools already, great! Think of this as a checklist to help you build the confidence that you’ll need to execute this cake!

The Recipe

Conclusion: This Sweetly Spiced Cake is Ready to be a Holiday Staple For Your Friends and Family!

Gingersnaps represent all that is good about humanity: they are sweet, warm, and they bring a smile to your face. And they’re cookies. So, win.

This cake is such a special treat, and it’s ready for center stage at all of your holiday gatherings. When you remove the top cover and that wonderfully spiced scent wafts through the air, be prepared for every conversation in your immediate vicinity to come to a grinding halt. 

I can’t wait to hear your thoughts about this cake, BB! When you make it, don’t forget to tag me on Instagram @beginwithbutter so that I can share your beautiful creation!

Got questions after reading this article? No problem! Send an email to bakingbestie@beginwithbutter.com and let’s chat!

See you tomorrow for Day 12 of the Twelve Days of Pound Cake 2024!

Sweet Potato Cranberry Pound Cake

This Sweet Potato Cranberry Pound Cake has willingly accepted the assignment, and comes ready for center stage: granulated sugar and brown sugar dance deliciously together to add absolutely incredible flavor, with deep molasses notes. The sweet/tart cranberries give wonderful lil’ *pops* of amazing contrasting flavor, and the sweet potatoes in the batter give the smooth, delightful texture that they are supposed to give, as well as enhancing the sweet notes from the sugar. The maple syrup in the batter does its own enhancing…of the maple notes in the sweet potatoes. And, to finish, there’s the most outstanding Maple Cranberry Cream Cheese Glaze that is even more decadent than it sounds.

If Thanksgiving was a symphony, BB, this cake is the emotional, fortissimo swell of music at the end of the show that brings everyone to their feet, moved to tears.

Let’s get right into this recipe.

In this Post:

The Recipe

Ingredients in this Sweet Potato Cranberry Pound Cake

When you understand the role that each ingredient plays in your cake, it’s like having a backstage pass to a magic show! When you know why each ingredient is there and what it’s doing, you’re not just following a recipe – you’re mastering the art and science of cake making. Let’s break down each ingredient in this Sweet Potato Cranberry Pound Cake so you can increase your pound cake knowledge for all of your future baking adventures.

All-Purpose Flour: The backbone of our pound cake, flour provides the essential structure that makes cake actually hold together as cake. In a pound cake, we want just the right amount of structure for that signature tight crumb, but not too much – that’s why we mix just until combined and use all-purpose flour rather than bread flour or cake flour!

Allspice & Cinnamon: These two spices aren’t just about flavor – they contain natural compounds that enhance our perception of sweetness, meaning we get incredible taste without as much sugar. They also create super cozy aromatic notes, which the cake seem even more satisfying.

Kosher Salt: Beyond just enhancing flavors, salt plays a crucial role in strengthening gluten structure and supporting the Maillard reaction, which creates those delicious browned, complex flavors in our pound cake. Salt also helps balance sweetness and acts on our taste buds to amplify all the other flavors in the cake, making every bite more vibrant and satisfying.

Baking Soda: This potent lil’ powerhouse reacts with the acidic components in our pound cake (those cranberries) to create carbon dioxide bubbles. Those bubbles get trapped in the batter as it bakes, helping our cake rise and creating a tender, light texture.

Butter: More than just delicious, butter is a multitasking marvel in pound cake baking. During creaming, butter traps air bubbles that expand during baking for lift, while its fat content coats flour proteins to limit gluten development, ensuring tenderness. As it melts in the oven, it also creates steam that helps the cake rise.

Granulated Sugar: Beyond sweetness, sugar helps create a more delicate texture in our pound cake. During creaming, sugar crystals create tiny air pockets in the butter that expand during baking, contributing to the cake’s rise.

Dark Brown Sugar: With its molasses content, dark brown sugar brings both moisture and acidity to our pound cake. The molasses also contains compounds that react with proteins during baking (called the Maillard reaction), creating deeper flavor and that beautiful golden-brown color.

Eggs: Eggs are the great emulsifiers of the baking world, helping oil and water-based ingredients play nicely together while providing structure through protein. The fat in the yolks adds richness, while the proteins in both yolks and whites firm up during baking to help the cake set.

Maple Extract/Bourbon & Vanilla: These flavor enhancers work differently than simple sweeteners – they contain aromatic compounds that stimulate both our taste buds and our sense of smell, creating a more complex and satisfying flavor experience. Vanilla particularly contains hundreds of flavor compounds that enhance other ingredients.

Sweet Potato Puree: Sweet potato adds natural sweetness and incredible moisture through its high water content, while its starches help create a tender crumb. The natural sugars in sweet potato also caramelize during baking, contributing to both flavor development and that beautiful color.

Maple Syrup: Real maple syrup isn’t just about sweetness – it contains natural compounds that create complex flavor notes. Its liquid form also contributes to the pound cake’s moisture content while its unique sugars help create that lovely browned crust during baking.

Fresh Cranberries: These tart berries do more than provide bursts of flavor – their acidity helps activate the baking soda, making them an active participant in the cake’s texture development. As they bake, they release moisture that creates lovely pockets of tartness throughout the pound cake.

Finishing Sugar: Optional but genius, finishing sugar is sprinkled on top about 10 minutes after glazing (this timing is key – it prevents the sugar from being absorbed into the glaze). These larger sugar crystals create a delightful crunch that contrasts beautifully with the smooth, tender cake and creamy glaze beneath, while also adding an appealing sparkle to your finished pound cake.

Techniques for the Best Cakes

One of the absolute best things about this Sweet Potato Cranberry Pound Cake is the texture contradiction between the moist cake and the pops of cranberry. However, there are some techniques that will help you execute this cake perfectly, and I have included some links for them here! 

These resources cover so many fun techniques that will take your baking to the next level, and will allow your confidence to soar to new heights!

These resources are super helpful to help you build consistency and confidence on your baking journey. Happy reading!

But wait! There’s more! Grab your coffee or a glass of wine and get ready to check out my favorite equipment!

Important Tools

Guess what? Begin with Butter has its own Amazon Storefront, where you can find all of the amazing equipment that I used in this Sweet Potato Cranberry Pound Cake! Want even more specific product recommendations? Check out the product links, below.

I do get paid a commission when you purchase, but these are the tools that I use all the time in my own kitchen.

If you have these tools already, great! Think of this as a checklist to help you build the confidence that you’ll need to execute this cake!

Conclusion: The Time to Make this One is NOW

Like, right now. This cake is new, exciting, and it’s ready to cause a positive stir this Thanksgiving. Featuring two of the major Thanksgiving players (sweet potatoes and cranberries), it will be the perfect segue between the savory and sweet portions of the meal. 

BB, I am so excited for you to try this one! Make sure you tag me on Instagram @beginwithbutter when you make it, so that I can give you all the props! If you have questions, please don’t hesitate! Reach out to me at bakingbestie@beginwithbutter.com and let’s have a chat! I want you to be serve a successful cake to the aunties this year. 😊

See you tomorrow for Day 11! XOXO