Whole Wheat Blueberry Oat Muffins

Hi BB! Welcome to Healthy-ish January at Begin with Butter! I’ve been looking forward to this month and can’t wait to share what I’ve developed just for you. First up: whole wheat blueberry oat muffins that will positively knock your January socks off. These muffins can be an important part of a healthy-ish meal; they’re full of fiber, they’re 100% whole wheat, and, by the way, they’re undeniably and unbelievably delicious. 

Listen, I refuse to post anything on my blog that doesn’t meet my standards. These muffins exceeded my expectations exponentially.

In this Post:

About These Whole Wheat Blueberry Oat Muffins

On cold winter mornings, there’s nothing like a warm, filling breakfast. But let’s face it. In January, while we want something filling, the options can often be…sub-optimal. Our palettes crave texture, and flavor, and satisfaction, and a lot of “healthy” options lack one (or more!) of those things that truly make us feel satisfied when we eat. 

I don’t know about you, but those three qualities are the things that make me enjoy what I’m eating. And, whether it’s pound cake or kale salad, I must enjoy it

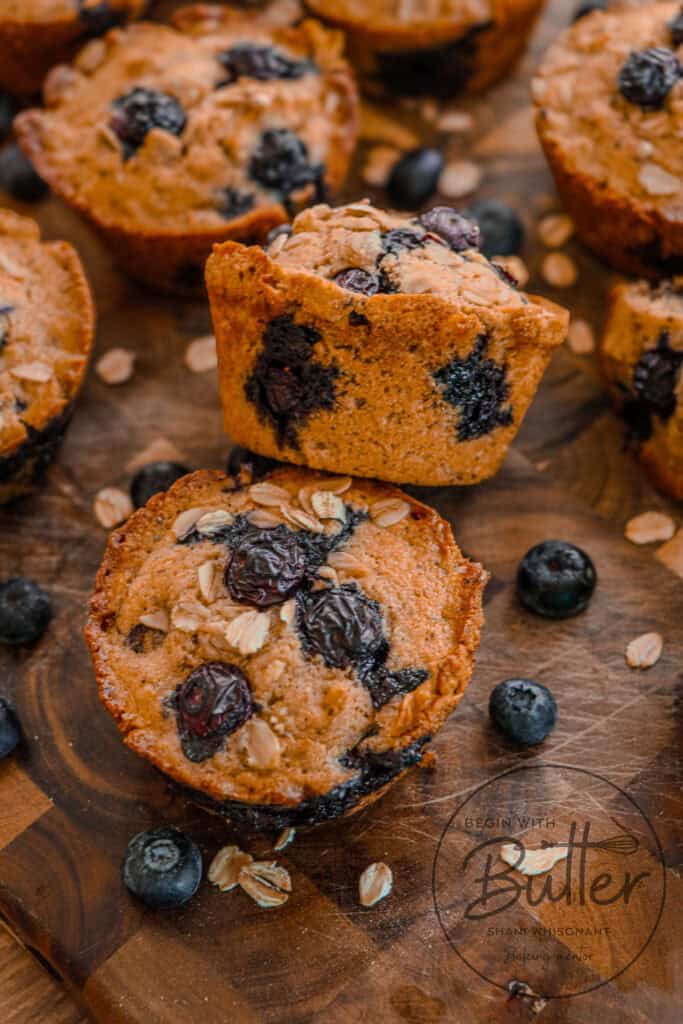
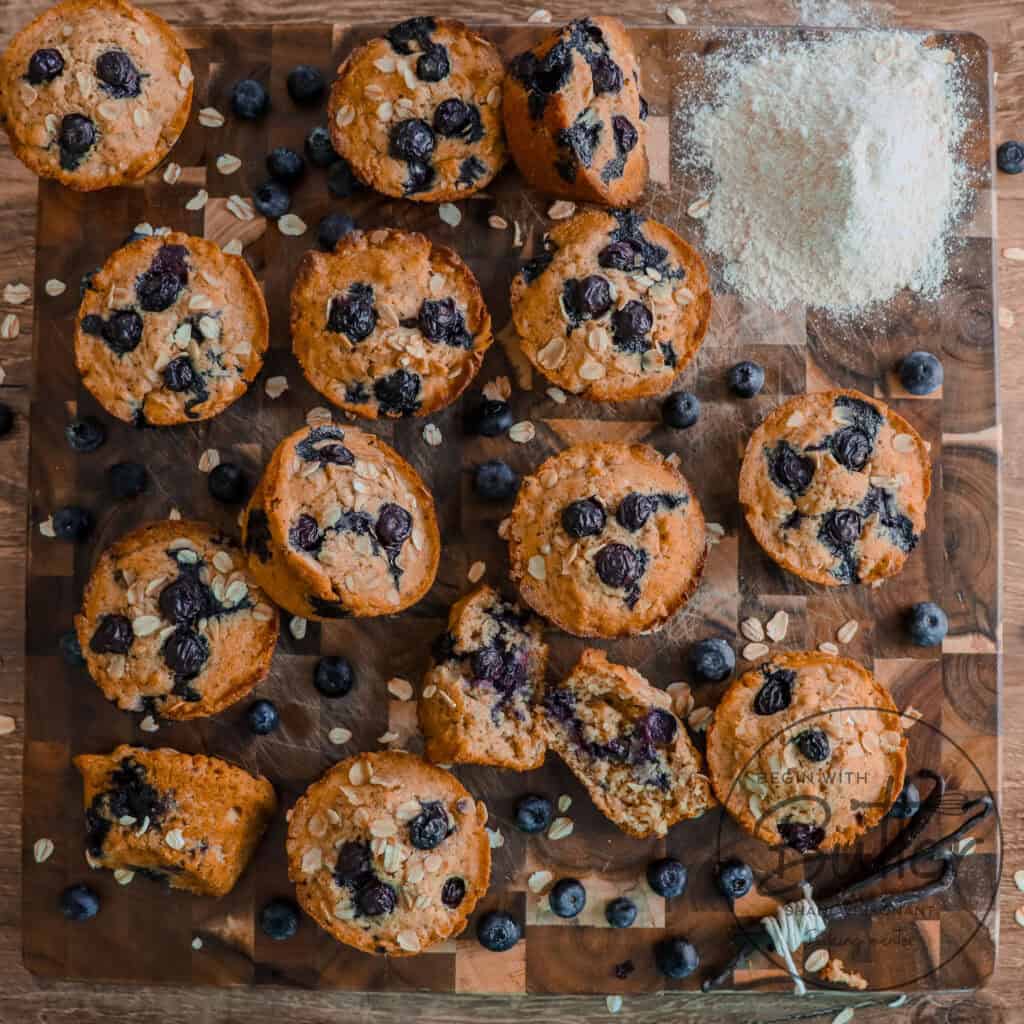
Friends, that’s exactly why these whole wheat blueberry oat muffins have become my winter morning salvation! These beauties completely redefine what whole grain baking can be. Made with 100% whole white wheat flour, they achieve that dreamy, light-as-air texture you’d expect from your favorite bakery, while still delivering the wholesome goodness your body craves. Each warm bite brings you delightful bursts of sweet-tart blueberries, perfectly complemented by hearty oats that add just the right amount of satisfying texture.

What makes these muffins truly special is how they prove that wholesome doesn’t mean sacrificing flavor. With just the right amount of sweetness and the most incredible aroma of warm grains and berries filling your kitchen, they’re that perfect balance of treat and nourishment we’re all searching for in January. They’ll keep you cozy and satisfied through your morning without weighing you down. And that, dearest BB, is the Golden Ticket to satisfaction at any time of the year.

Whole Wheat Blueberry Oat Muffins: Recipe At-A-Glance

Prep Time: 30 Minutes

  • 10 minutes for flax egg prep
  • 10 minutes for milk souring
  • 10 minutes for measuring and prepping remaining ingredients

Total Time: 45-50 Minutes

  • Allow muffins to cool for 5-7 minutes after baking, then enjoy immediately

Key Times and Temperatures

  • Bake Temperature: 375°F (13-18 minutes)
  • Internal Temperature: 205°F

Yield: 12-18 Standard-Sized Muffins

  • These can also be made into 19-24 mini muffins or 6-9 oversized muffins

Other Notes

  • This recipe is written with flax eggs, but you can use two room-temperature chicken eggs
  • Made with 100% whole wheat flour and old-fashioned oats
  • This recipe can be fully vegan if you choose; check recipe notes!
  • Best eaten warm
  • Freezer-friendly for up to 2 months
  • Skill Level: Beginner to Intermediate

Ingredients in these Whole Wheat Blueberry Oat Muffins

When you understand the science of ingredients, you’re on your way to unlimited creativity with your baking!  Let’s take a brief but fun trip to learn the scientific secrets behind each ingredient, so that you can not only make these muffins, but deepen your baking knowledge as a whole. 🧁

White Whole Wheat Flour: Made from hard white wheat berries, this flour gives us all the nutritional benefits of whole wheat with a lighter, less bitter taste than traditional red wheat flour. If you’re using hard red wheat flour instead, combine 113 grams (1 cup) wheat flour with 128 grams (1 cup) all-purpose flour for the perfect texture.

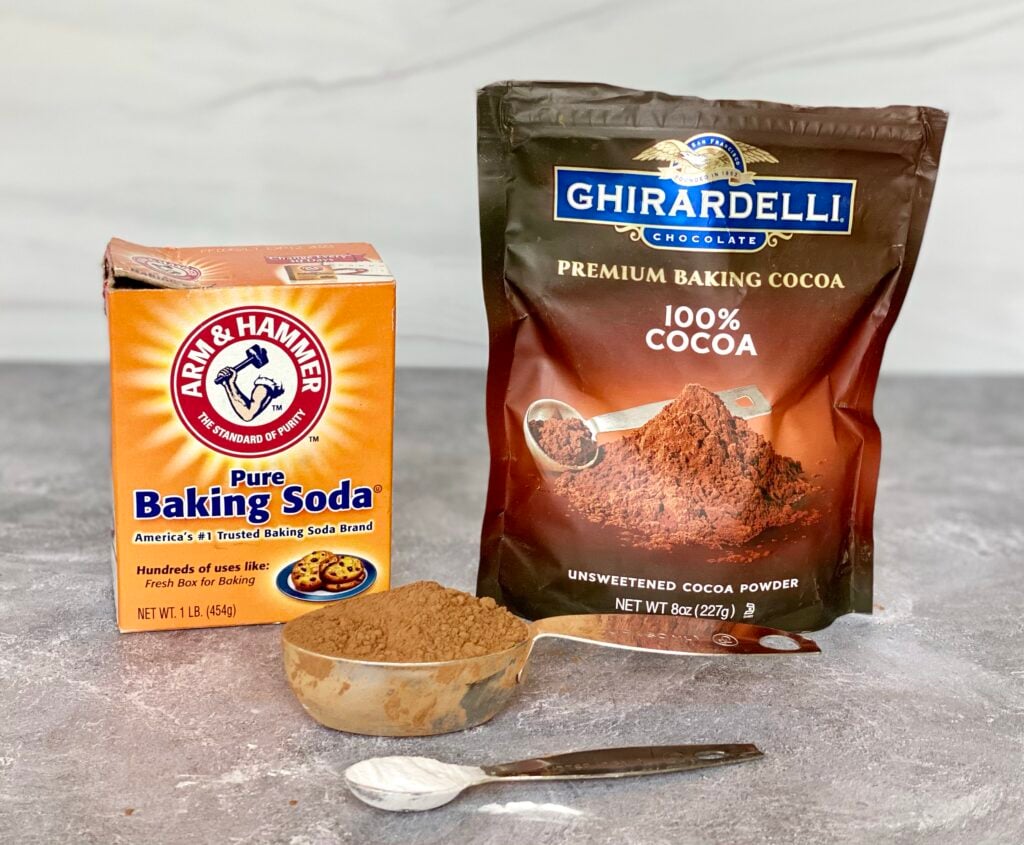
Leavening (Baking Soda & Baking Powder): Baking powder and baking soda work together not just to help our muffins rise beautifully, but also to promote that gorgeous golden-brown caramelization we love on top.

Kosher Salt: Beyond balancing sweetness, salt helps in developing gluten structure and enhancing all the flavors in our muffins. It’s a wonderful multi-tool, so make sure not to skip it!

Old-Fashioned Oats: Hearty oats aren’t just packed with fiber and protein – they team up with our whole wheat flour to create a satisfying breakfast that keeps you full all morning long.

Butter: At the beginning of the mixing, we mix melted butter with our sugar and stir until it’s lighter in color. If you’re using vanilla bean, you’ll want to add them to this mixture as well. Doing this pre-mix ensures a consistently-mixed muffin batter, without over-mixing.

Granulated Sugar: I gave this recipe a modest amount of sugar, while ensuring it’s just enough to help with browning and give a gentle sweetness. It’s all about balance!

Flax Meal + Water: When combined, these create our flax eggs, which are lower in cholesterol and higher in fiber than chicken eggs. Just remember to sift out those hulls before mixing – we want silky smooth flax eggs!

Chicken Eggs (Alternative): Not into flax eggs? No worries! Regular eggs work perfectly here too – just make sure they’re room temperature.

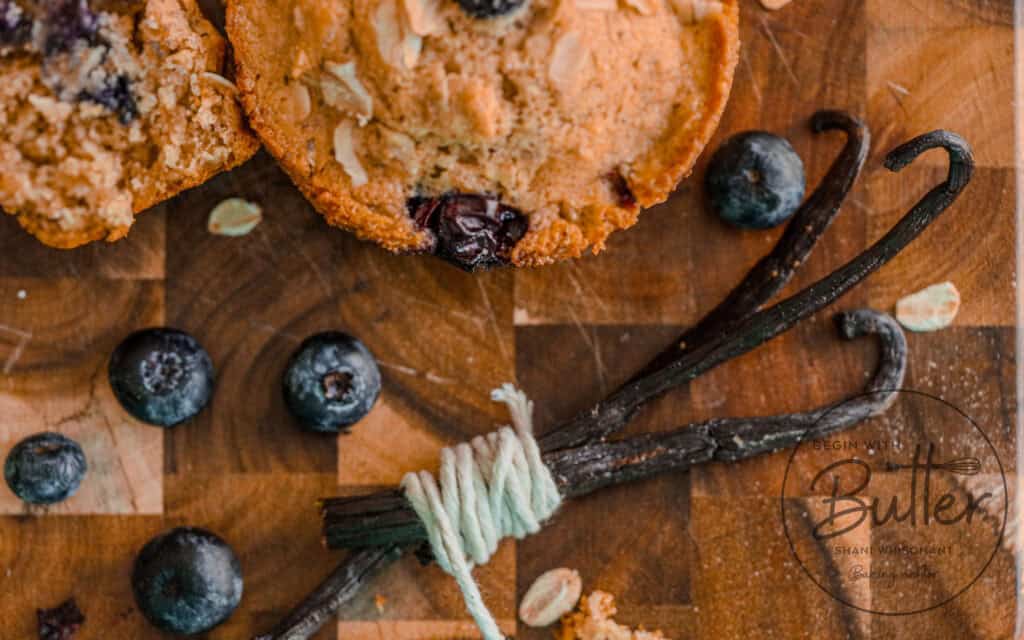
Vanilla: Whether you’re using extract or fresh vanilla bean, this ingredient enhances the natural sweetness of our blueberries and adds incredible depth of flavor. (If you’re wondering, I have a strong love for vanilla bean in this recipe!)

Milk: Whether you choose whole milk, 2%, or oat milk, they all bring different but equally delicious results to our muffins. Each option adds moisture and helps create that tender crumb we’re after.

Lemon Juice or Vinegar (apple cider or white vinegar): This ingredient works with any milk choice to create a DIY buttermilk, tenderizing our whole wheat flour and adding a subtle tang that makes these muffins extra special. I have a strong preference for lemon juice, but apple cider vinegar works too! You can use plain buttermilk, but there’s actually more acid in the milk/vinegar mixture than regular buttermilk, which leads to better tenderizing of the flour!

Blueberries: These little gems aren’t just bursts of natural sweetness – as they bake, they release moisture that helps create perfectly moist muffins.

Techniques for Whole Wheat Blueberry Oat Muffins

Muffins and quick breads are an incredibly quick way to make an extremely efficient, delicious breakfast treat that can freeze beautifully and be available for multiple days! But there are a couple of notes that will help you avoid common pitfalls of making quick breads and working with whole wheat. Check out the video, below, for all of the techniques that will help you achieve confidence and success!

After the video, if you’re still wanting to learn more techniques (I love you for that btw), take a gander at the following resources. They cover so many fun techniques that will take your baking to the next level, and will allow your confidence to soar to new heights!

These resources are super helpful as you’re building your baking skills. I hope you enjoy them!

Frequently Asked Questions

How do I keep these muffins from becoming dense?

Dense muffins mean over-mixed muffins. This happens when the flour has been mixed too much, causing too much gluten formation, and too much gluten formation means that the muffins will take on a bready texture. To avoid this, carefully fold the flour and the blueberries into the mixture.

Are these healthy? Or just “healthy-ish”?

These muffins are healthy-ish. While they use a healthier flour, oats, and flax eggs, they still use wheat flour, sugar, and butter. This isn’t a diet food, but it’s part of a balanced diet, and they’re designed to help you feel full longer than a traditional muffin would.

Got more questions? Feel free to send an email to bakingbestie@beginwithbutter.com and you’ll get a real answer from a real person! We’re here to help you improve your baking knowledge so that you can be a more confident baker with all of your future bakes!

The Recipe

Conclusion: Welcome to Healthy-ish Baking!

I’m really excited about these wonderful muffins, BB. They offer all of the qualities that make me feel so satisfied with my favorite breakfasts: they’re warm (which is important in January 🥶), they’re positively delicious, they’re texturally incredible, and they scent the kitchen with the most wonderful fragrance. 

These blueberry muffins will be on steady rotation, this January and well beyond. I hope you love them!

When you make them, don’t forget to tag me on Instagram @beginwithbutter! I can’t wait to see how you make them your own. ❤️

Similar Posts:

Hi! I’m Shani!

My name is Shani Whisonant, and I’m the Chief Butter Ambassador and owner at Begin with Butter and the Begin with Butter Home Baking Academy. I’m serious about your baking achievement. 😊 Whether you’re here for a recipe or you’re wanting to solve a baking conundrum, I’m here to help you!

Christmas Stunner: Apple Cinnamon Star Bread

0

BBs, I have tested and tested and tested and tested this Apple Cinnamon Star Bread. I tested it for such a long time that I almost missed its Christmas debut!

But alas, I could not miss the opportunity to share this absolutely incredible recipe with you, as well as give you the opportunity to make this stunner for Christmas morning. 

There are three fabulous ways to finish this Apple Cinnamon Star Bread: confectioner’s sugar (easy, traditional, and beautiful), melted apple jelly (also easy, and my personal favorite because of the incredible glaze it lends to the bread), or my cream cheese glaze, which makes it more like a cinnamon roll. ❤️

To ensure your success, I’m even including a video tutorial that will walk you through the entire process. Make sure you watch it before starting; consider it an important part of your mise en place.

Video Tutorial (Mise en Place)

Before you begin making this stunning Apple Cinnamon Star Bread, I strongly encourage you to watch this tutorial video from start to finish. While nine minutes might seem like a long time, it is a crucial part of your mise en place – just as important as measuring your ingredients or bringing your butter to room temperature. The video walks you through crucial techniques for making brioche and demonstrates the intricate (but totally doable!) shaping process that makes this bread so incredibly beautiful.

Seeing these techniques in action will help build your confidence, showing you exactly what your dough should look like at each stage and how to achieve those beautiful twisted layers. Even experienced bakers will benefit from watching the shaping portion, as it’s much easier to replicate this Apple Cinnamon Star Bread when you’ve seen it demonstrated. Trust me – these nine minutes will make all the difference in your baking success! Enjoy!

Now, let’s MAKE THIS RECIPE! Dearest BBs, this is one for the ages, and it is completely accessible to bakers of every level.

If you want to see shaping of this loaf done in real-time, check out this Christmas Eve Instagram Live!

Check out the Most Recent BwB Recipes!

Half and Half Cake

2

Y’all…this Half and Half Cake is the best kind of line jumper. And I am someone who cannot stand a line jumper. Like, when we go to amusement parks, I am always the person who will tap your shoulder and say “excuse me, there’s a little bit of a line back here.” 😂 (My kids love this by the way.)

Why is this cake a line jumper, you ask? Because she wasn’t supposed to be posted until next year. But y’all made such a kerfuffle on Instagram about this cake that I had to post it in time for your holiday tables.

(psst…want the tips for how to prep this ahead so that you can glaze and go on the big day? Check out this post: Storage Tips for Make-Ahead Desserts!)

This cake will finally help you resolve the spats that inevitably pop up when you ask whether people want vanilla cake or chocolate cake. You can give them both without sacrificing one or the other. One of the big gripes about marble cakes is that the chocolate cake often ends up underbaked, while the vanilla ends up dry. Well, both halves of this Half and Half Cake are perfectly moist (🙉), they each give big flavor, and, for the marble cake lovers among us who love both vanilla and chocolate, there’s even some marbling that happens where the two flavors meet for a lil’ razzle dazzle.

This just might be the perfect cake.

In this Post:

About this Half and Half Cake

This cake was absolutely borne of necessity. You see, I have a beautiful, vivacious, sweet, chocoholic-of-a daughter who cannot get enough chocolate. She was actually the inspiration for the Ultimate Chocolate Pound Cake, and she has fallen head over heels in love with my Mexican Chocolate Pound Cake…she also gave me very specific instructions for how she’d like to see the ratio of chocolate to vanilla in my S’Mores Pound Cake…heavy on the chocolate. 

My sweet, sweet, food-critic-of-a son literally detests chocolate. If it’s not vanilla or some derivation thereof, he’s not touching it. If there is a *puff* of chocolate in the air, his nose gets all crinkly and he acts like he might become faint from the disgust. And don’t let chocolate touch something he actually wants to eat, because…yeah no.

But give him anything NOT CHOCOLATE that’s heavy on the vanilla, and he is absolutely insane with delight. The Very Vanilla Pound Cake came from my hurt feelings after he told me that the fourth cake didn’t “have enough vanilla”. And this boy will tear up a Snickerdoodle anything (see Snickerdoodle Pound Cake and Snickerdoodle Cookies). So long as it’s not chocolate.

My poor husband doesn’t care. He’s such a good man.

Y’all see my dilemma. So I had to put this to bed once and for all, and make a cake that everyone could consume happily. Chocolate for the chocoholic. Vanilla for the vanilla virtuoso, and a marbled middle for the wonderful man in my life who’s made it all possible. A literal win-win-win. And the cake sacrifices NOTHING to make everyone exceptionally happy.

Half and Half Cake: Recipe at a Glance

Prep Time: 60-70 minutes

  • ~25 minutes for mise en place (getting all ingredients measured and ready, friends!)
  • 45 minutes for batter (it needs additional time because you’re going to split the batter in two to create separate chocolate and vanilla cake batters!)

🔥 Bake Time: 60-70 minutes at a true 325°F

🕒 Total Time: 5-7 hours

🕒 TL;DR, Cake Details Edition: A striking bundt cake cleanly divided into two distinct halves – pure vanilla and rich chocolate – with a naturally marbled effect only where the two batters meet, and crowned with my brand-new, Rich Vanilla Glaze

⭐ Why You’ll Love It: Each half maintains its distinct flavor integrity – pure vanilla for purists, deep chocolate for chocoholics, and a perfect marble middle for those who want both. No compromises in taste or texture…ever

📝 Tips for Success: 

  • Bring butter, eggs, AND buttermilk to room temperature for best results 
  • A kitchen scale is essential for precise measurements of flour, sugar, and butter to achieve perfect half-and-half results 
  • Natural cocoa powder (not Dutch-processed) works best with the baking soda 
  • Don’t substitute the buttermilk – it’s key for tenderness 

🔪 Special Equipment:

  • Kitchen scale (absolutely necessary for perfect results with this cake)
  • 12-15 cup bundt pan
  • Stand mixer or hand mixer

💭 Make Ahead: The cake can be wrapped well and frozen for up to 3 months. The vanilla simple syrup can be made up to a week ahead and stored in an airtight jar in the refrigerator. The vanilla glaze can be prepared 1-2 days in advance and stored in an airtight container in the refrigerator.

Ingredients in this Half and Half Cake

Let’s talk about the amazing science happening in your mixing bowl with this Half and Half Cake. Understanding your ingredients will help you tremendously on your baking journey, as you develop the confidence to start tinkering and playing with recipes. By learning the baking science behind the ingredients, you’ll be able to confidently personalize recipes, with an expectation that you’ll have great outcomes!

All-Purpose Flour is our cake’s foundation – it creates the building blocks that give your cake its beautiful structure. When we measure it by weight (yes, that kitchen scale is your best friend!), we’re ensuring every slice has that perfect, tender crumb. All-purpose flour, with a higher protein content than cake flour, is key for success in this recipe.

Baking Soda is the tiny but mighty chemist in your batter! (cue visual of Dr. Bunsen Honeydew from the Muppets. 😂) It teams up with the acid in our buttermilk and our natural (not Dutch Process) cocoa to create bubbles that help your cake rise into a fluffy dream.

Natural Cocoa Powder isn’t just any chocolate – it’s specifically chosen because it’s naturally acidic, which means it needs our friend baking soda to neutralize it and help create a proper rise. Trust me, this natural cocoa powder and baking soda friendship makes the most beautiful, dark chocolate magic happen in your cake!

Kosher Salt is the quiet hero that makes every other flavor sing louder and more beautifully, while helping to balance out the sweetness of our sugar. It’s working behind the scenes to make your vanilla more vanilla-y and your chocolate more chocolate-y!

Butter brings the richness we all love, especially when we take the time to cream it properly with sugar. And when browned? Oh friends, that’s when butter transforms into liquid gold with the most amazing toffee notes!

Oil is butter’s trusty sidekick in both of our batters, but for slightly different reasons! In the vanilla batter, it ensures a moist, tender crumb, and prevents the vanilla cake from drying out in the oven while the chocolate cake gets perfectly done. In the chocolate batter, the oil helps prevent the cocoa powder from making things too dry – that’s why chocolate cakes often include oil in their recipes.

Sugar isn’t just here for sweetness – it actually helps with texture and caramelization too! While it’s making things deliciously sweet, it’s also busy creating that melt-in-your-mouth tenderness we’re after, and the beautiful, deep, mouthwatering caramelization that we’re all craving from our pound cakes.

Eggs are our master binders, bringing the whole party together while adding richness and structure. Isn’t it amazing that nature packaged these contradictory elements – strong, structure-building egg whites and fatty, protein-tenderizing egg yolks – in one perfect shell without them canceling each other out? Remember to let them come to room temperature – they’ll thank you by blending in beautifully!

Pure Vanilla Extract is pure flavor gold, enhancing both sides of our cake (yes, even the chocolate half!). Give it time to work its magic – the flavor gets even better as the cake cools. 

Buttermilk is the tenderizer of all tenderizers! Its tangy personality not only helps create that velvet-like texture we’re after but also teams up with our baking soda for the perfect rise.

When you understand these principles, baking becomes much more fun; it’s always better when you can expect outcomes because you’re being creative but following the baking rules!

Techniques for the Half and Half Cake

This Half and Half Cake looks beautiful, but it truly relies on some special techniques to pull it off. 

Fear not, gentle reader! I’ve got you covered. Take a look at the resources below to gain the most kitchen confidence with this recipe.  These resources cover so many fun techniques that will take your baking to the next level!

These resources are super helpful to help you build consistency in your baking, which will make your confidence soar. Happy reading! And don’t forget to reach out to me with questions: bakingbestie@beginwithbutter.com

Need equipment? Not sure if you have everything that you need to make this amazing cake? No worries! I’ve got you covered there too!

Important Tools

If you’re wondering whether you have everything you need to make this Half and Half Cake, I’m here to help! Begin with Butter has an Amazon Storefront where you can find all of the essentials that I use day-to-day in my own baking kitchen. Because you don’t have to spend a fortune to make a cake. A few essentials is all you need!

If you’re interested in the tools that I use to make absolutely delicious and irresistible pound cakes, check out the My Essentials for Perfect Pound Cakes link in my Amazon Storefront!

I do get paid a commission when you purchase, but these are the tools that I use all the time in my own kitchen.

If you have these tools already, great! Think of this as a checklist to help you build the confidence that you’ll need to execute this cake!

Let’s get into this recipe, shall we? It’s an amazing one!

Frequently Asked Questions

What’s so important about creaming butter and sugar? Why is it such a big deal?

Creaming butter and sugar properly adds rise to your cake! The friction caused by agitating the sugar granules with the butter creates little air pockets that help with cake rise. This is especially important for pound cakes, where we use minuscule amounts of chemical leavening in the cakes.

What is “neutral oil”?

Neutral oil is any oil that does not lend flavor to your cakes. Some examples of neutral oils routinely found in home kitchens would be: vegetable oil, canola oil, grapeseed oil (absolutely great for baking, but it can be difficult to find) and avocado oil (my personal favorite). These oils do not have their own unique flavor profile, and they won’t impact the flavor of your cake.

You can absolutely use olive oil in this cake, but just know that you might have the slightest variation in flavor from what the recipe intends.

Why can’t I just use “regular” measurements, instead of metric measurements?

This cake, more than others, truly relies on baking precision to get the absolute best outcomes. Because metric units are the smallest units of measurement, I always use them in my baking. For the beautiful Half and Half outcome that we’re looking for in this cake, a digital kitchen scale and the use of metric measurement is imperative; there’s no way to ensure the perfect halves without it.

Can I halve this recipe to make it in a 6-cup bundt pan or a loaf pan?

Absolutely! Just make sure to use metric measurement and not measuring cups to scale the recipe.

Why are there bubbles in my glaze? UGH!

This Rich Vanilla Glaze uses heavy cream to give it a luxurious finish. When heavy cream is agitated too much, it believes that it’s intended to become whipped cream and it develops wonderful bubbles. In a glaze, those bubbles form and usually pop when the finished glaze is on your cake, causing a frustratingly hole-y glaze.

To remedy this, stir very gently when making this glaze. The less agitation you give the heavy cream, the better it will be.

How long can I keep this cake?

This cake will last up to five days, covered, on the countertop.

Can I freeze this cake?

You can absolutely freeze this cake before you do the final glaze layer! Freezing glaze is not recommended, as the glaze can become gummy and unpleasant when thawed. Check out this Instagram Live replay and this blog post for more information about how to freeze pound cakes!

This Half and Half Cake is the Great Mediator of Our Time

BB, this cake took several iterations to get just right. But it was all worth it, to see the absolute joy that crept over my children’s faces when they saw it finally come together. No more making their respective cases for why I should make one or the other; they could each have their favorites. And that, Friend, was well worth all of the butter and eggs that were sacrificed in the testing.

I call this delicious, unique cake “The Great Mediator” because it finally brought peace in the Whisonant Family Cake Wars. It is my hope that it does the same for any family that’s experiencing the same, and that it makes special occasions just a lil’ easier (but still outstanding and impressive!) for the bakers who have to arbitrate the chocolate/vanilla wars.

Got questions about the recipe? Reach out to me and let’s chat! You can reach me at bakingbestie@beginwithbutter.com, and I love your questions!

Did you make this cake? Make sure to tag me on Instagram @beginwithbutter so that I can share your success with the rest of our wonderful community!

Enjoy!

Check Out My Other Pound Cakes!

Storage Tips for Make-Ahead Desserts

Hi BB! Today, we have storage tips for make-ahead desserts, which dovetails perfectly with our Cozy, Curated Holiday Series! This post contains tips for storing your favorite breads, cakes, cookies, and pie dough so that you can make them ahead of serving them, but still have them taste completely fresh (because they are!)

This holiday season, we are keeping things as simple as we possibly can in the kitchen. To that end, I’ve created the Cozy, Curated Holiday Series here at Begin with Butter, which includes an Instagram Live series (with replays you can watch here, here, and here), blog posts (like this very one!), and help via email at bakingbestie@beginwithbutter.com

In this post, I’ll show you how to bolster your special occasion planning by taking advantage of one of your kitchen besties: your freezer. From this post, you’ll build your kitchen confidence about prepping ahead of time (yay!), storing your baked goods before your event, and preserving the freshness of those same baked goods after they’re done. Making something specific? Use the table of contents to go straight to it!  

In this Post:

How to Store Cakes

Pound Cakes

If you’re making pound cakes ahead of your holiday table, you’ll want to finish the pound cake through the bake. Allow it to cool fully on a cooling rack, then brush the fully cooled simple syrup onto the cooled cake. Wrap the cake with a layer of plastic wrap, followed by a layer of freezer paper, and two more layers of plastic wrap (I gave a demonstration of how to wrap pound cakes during this Ask me Anything session!), then freeze, avoiding direct contact with the sides and bottom of the freezer as much as possible. Pound cakes can remain in the freezer for up to three months with proper storage.

To thaw: Remove the pound cake from the freezer.  Immediately unwrap it and place on a cooling rack on your countertop for 4-5 hours to allow it to thaw at room temperature. Finish with your desired glaze, then place on your covered cake plate and serve! 

Note: I’m often asked whether I freeze cakes after glazing. I do not. Frozen glazes can take on an unpleasant, almost gummy texture. So, I wait to glaze until after the cake is thawed and ready to serve.

Storage: Proper pound cake storage relies on how much moisture exists in the cake and topping. For high-moisture cakes (like my Blueberry Buckle Pound Cake, my Sweet Potato Spice Cake, my Iconic Apple Pie Pound Cake, my Pumpkin Spice Pound Cake, or any cake with fruit and/or high moisture ingredients like sweet potatoes or pumpkin), I prefer to store the remaining cake in the refrigerator immediately (it can remain refrigerated for up to five days), though you can keep them on your countertop for the first 24 hours.

For lower-moisture cakes (think: Very Vanilla Pound Cake, Sour Cream Pound Cake, Crème Brûlée Pound Cake, or Mexican Chocolate Pound Cake), You can generally leave them on the counter for up to seven days.

For cakes that use a dairy-forward topping (like The Best Cream Cheese Glaze), you’ll want to also refrigerate them after one day. That would include cakes like my Bourbon Brown Butter Vanilla Pound Cake, my Ruby Red Velvet Pound Cake, my S’mores Pound Cake (with it’s incredible meringue topping), and my Gingersnap Pound Cake. These cakes can remain refrigerated for up to five days.

With proper storage, you can expect cakes to taste perfect on your holiday tables! Nobody will ever know that you didn’t spend all morning baking and decorating that cake! 

  • 1-2 weeks before serving: bake the cake; brush with simple syrup; wrap and freeze
  • 2-3 days before serving: make and refrigerate the topping
  • Day of serving: revive the topping (usually by just stirring with either a spoon or small whisk), decorate with the final topping and serve!

Layer Cakes

Layer cakes follow many of the same freezing rules as pound cakes (plastic wrap/freezer paper/2 x plastic wrap). You still want to allow the cakes to cool fully before wrapping them and freezing them. You can keep them frozen up to two months. With many layer cakes (like my Brown Butter Vanilla Cake with Chocolate Frosting), I don’t use a simple syrup. However, I do allow the layers to thaw fully, unwrapped, on cooling racks (for about 2-3 hours) before I build cake layers into the actual cake.

Storage: Once again, proper layer cake storage depends on whether there is fruit or fruit/vegetable purees between the cake layers, and whether or not there is a dairy-forward topping (like a cream cheese frosting). 

For cakes with fruit (strawberries, blueberries, peaches, etc.) baked into the sponge, you can keep the cake on the countertop for up to one day, though it’s best to refrigerate immediately. In the refrigerator, the built cake can last up to five days.

For cakes without high-moisture ingredients (fruit and purees) baked into the sponge (like the aforesaid Brown Butter Vanilla Cake with Chocolate Frosting), and without a cream cheese frosting, you can generally keep the cake on the countertop, covered, for 5-7 days.

For cakes with a traditional vanilla or chocolate buttercream (with just enough milk to help with texture, and without cream cheese), you can keep the cakes on the countertop, covered, for 5-7 days. If this cake has high-moisture ingredients in the sponge, however, you’ll need to refrigerate it.

For cakes with high-moisture ingredients (e.g. fruit) and/or cream cheese (like my Lemon Cake with Cream Cheese Frosting), you’ll want to refrigerate these for up to five days.

  • 1-2 weeks before serving: bake the cake; wrap and freeze
  • 1-3 days before serving: make and refrigerate the buttercream or topping (except for ganache, if using)
  • 1-2 days before serving: Build the layer cake, except for any final touches (like ganache)
  • Day of serving: make a quick ganache (if using), cut and serve!

How to Store Pie Dough

If there’s one thing that can make your holiday baking easier, it’s having pie crusts ready to go when you need them. The wonderful thing about pie dough is that it freezes beautifully, and with proper storage techniques, you’ll never be able to tell it wasn’t made the same day!

When it comes to freezing pie dough, you have a couple of options; you can freeze the pie dough discs or you can freeze rolled out pie dough. The most important thing is protecting those beautiful butter pieces that create your flaky layers (like the successful pies that you’re going to make with my Easy All-Butter Pie Crust).

Freezing Dough Discs

For bulk pie dough, proper storage starts right after making the dough. After bringing your dough together, and before you even think about rolling it out, allow it to rest in the refrigerator for at least two hours. This rest time lets the flour fully hydrate, it allows the butter to solidify gradually from room temperature, and allows the gluten to relax. Once your dough has rested, split it into individual servings (for example, my Easy All-Butter Pie Crust makes enough for a top and bottom deep dish pie crust, so you would split the dough in half) and shape it into discs about 1 ½ inches thick – this shape will thaw more evenly than a ball and makes it easier to roll out later. It will also lie more flat in the freezer, which makes the most of that precious freezer space!

Freezing Shaped Crusts

For storing shaped crusts, I’ve found that disposable aluminum pie pans are absolutely perfect; they’re a great size for standard (not deep dish) pie crusts. Remember that they hold about half the volume of a deep dish pie plate, so adjust your filling amounts accordingly so that you don’t end up with a messy oven. 😣

To prepare a rolled-out crust for freezing, make your pie dough and allow it to rest in the refrigerator for at least two hours (but up to overnight). Roll out the pie dough and then shape in the aluminum pan, as the recipe requires. Gently cover with crumpled parchment paper (the crumpling helps you gently press the parchment paper into the dough without damaging it), then gently wrap the entire pan in plastic wrap to eliminate as much air as possible. You can keep properly frozen, shaped crusts frozen for up to two months. If you’re one of the ambitious ones and you want to make a bunch of pie crusts, just remember to allow the pie crust on bottom to fully freeze before stacking others on top of it.

Freezing Par-Baked Crusts

For par-baked (or partially baked) crusts (essential for those Chocolate Pies and Lemon Meringue Pies of your dreams), you’ll want make the dough, then allow it to rest in the refrigerator for about two hours.  Roll out and place in an aluminum pie plate, then bake until the crust is just set but not browned (usually about 20 minutes with pie weights followed by 5-10 minutes without). Once it’s fully cooled completely, gently shape crumpled parchment paper over the pie crust, and then wrap the entire pan in plastic wrap. I freeze these par-baked shells for up to two weeks, though common thinking is that they can be frozen for up to a month.

Reviving Pie Dough From Frozen

To revive pie dough discs from frozen, you want to gradually thaw them for 18-24 hours in the refrigerator, and then you’ll want to place them on the countertop for 10-20 minutes before rolling them out. If they are very stiff, wait another 10 minutes and then try again.

For frozen pie shells (whether raw or par-baked), you can either bake them straightaway from the freezer, adding an 10-15 extra minutes of bake time, or you can place them on the countertop for 10-15 minutes before filling and baking. You’ll still need to add some extra time to the bake, but the time on the countertop will knock off a touch of that freezer chill. Either way, keep a close eye on the oven during the baking process, as the actual amount of additional time could vary greatly.

Preparing and Storing Pie Fillings

When it comes to pie fillings, different types need different treatment. For fruit fillings like the one in my Classic Peach Pie, cook and cool them completely before storing in the refrigerator for up to four days. 

Custard pie fillings, like the fillings in my Easy and Delicious Quiche or my Sweet Potato Pie, don’t freeze well, but they can be made 1-2 days ahead of baking and refrigerated in an airtight container (another reason to love deli cups!). For custards like lemon curd or pastry cream, always cover with plastic wrap directly on the surface to prevent a skin from forming.

Storing Finished Pies

For finished pies, storage depends entirely on the type. Fruit pies can stay at room temperature, loosely covered, for up to a day, but I urge you strongly to forego countertop storage and keep them in the refrigerator from day one. They can remain in the refrigerator for up to four days once they’re fully cooled. 

Custard pies (whether baked or no-bake) must always be refrigerated and will keep for three to four days. I always recommend bringing refrigerated fruit pies to room temperature before serving for the best flavor, while custard pies should be served chilled.

For standard pies:

  • Two weeks before serving: prepare and freeze pie dough, according to the chosen method, above
  • Two days before serving: move dough to refrigerator to thaw; make pie filling and store in an airtight container
  • Day before serving: fill pie and bake pie as directed; refrigerate overnight
  • Day of serving: remove from the refrigerator and enjoy!

For no-bake pies:

  • Two weeks before: make and freeze the pie crust
  • 1-2 days before: make the filling; store in refrigerator in air-tight storage.
  • One day before: make the pie as recipe directs; cool and refrigerate overnight
  • Day of: remove from the refrigerator and serve!

Friends, let me tell you one of my favorite make-ahead baking secrets: having cookie dough ready in your freezer means you’re always just minutes away from freshly baked cookies! This is especially wonderful during the busy holiday season, because December is the perfect time for cozy cookies on demand.

For most cookies, like my Chocolate Chip Cookies or Snickerdoodle Cookies, freezing your portioned dough is absolutely game-changing. After mixing your dough according to the recipe, allow the dough to rest in the refrigerator for 24 hours. This allows the flour to get fully hydrated, and also allows the butter to gently firm back up before the freezing process.

After the 24-hour rest, use your regular cookie scoop to portion the dough onto parchment-lined baking sheets. Pop these into the freezer until they’re solid (about two hours), then transfer them to a freezer container or bag. These little gems will keep perfectly for up to three months. To make them, you can bake them straight from frozen – just add an extra minute or two to your usual baking time. My personal favorite way is to allow the dough to defrost a bit, then bake. The butter, if frozen, will tend to create very puffy cookies.

Once your cookies are baked, proper storage is key to maintaining their perfect texture. Store cookies in airtight containers at room temperature for up to a week. If you need to store them longer, most cookies freeze beautifully for up to three months – just be sure to thaw them completely before serving.

  • Two weeks before serving: prepare dough, refrigerate overnight, portion and freeze
  • 1 day before serving: defrost cookie dough in refrigerator for 18-24 hours (optional) OR bake from frozen, adding 2-4 minutes per side.
  • Day of event: Enjoy!

How to Store Bread

There’s something truly magical about fresh bread during the holidays, and yes, you can absolutely make it ahead! The key is understanding how different types of bread need different care. Let me guide you through the process I’ve perfected over years of holiday baking.

Lean Breads

For lean breads like my Simple Sunday Artisan Loaf, the primary goal is maintaining that perfectly crispy crust while keeping the inside tender and fresh. Once they’re baked, you never want to refrigerate these breads – the refrigerator makes them get stale and dry even faster. Instead, store them at room temperature in paper bags for two to three days, or cover and freeze them for up to three months if you need to store them for a longer period of time.

It’s important to allow these breads to cool completely before wrapping and freezing – this prevents unwanted condensation (water) from getting trapped on the inside of your perfect wrapping. Once the bread is cool, wrap it carefully in plastic wrap, followed by freezer paper, then place the wrapped bread in a large freezer bag (or another two layers of plastic wrap, if it will not fit in a freezer bag). Store bread away from items that might crush it. When you’re ready to serve, thaw the bread at room temperature for about three hours, then pop into a 350°F oven for 5-15 minutes to warm it through and recreate a beautiful crust.

Enriched Breads

For enriched breads (think: cinnamon roll dough or my Perfect Sunday Dinner Rolls), the added butter, eggs, and sugar mean that storage has to take a different approach. These breads stay softer longer but need protection from drying out. When storing at room temperature, keep them in an airtight container for up to a day. For longer storage, it’s best to keep them in the freezer for up to two months. 

  • 2 weeks before: prepare and freeze bread
  • 1 day before: begin thawing process
  • Day of: finish thawing, warm if desired

Conclusion: You’ve Got this, BB.

Special occasions don’t have to be an occasion for stress and angst. With a little bit of planning, you, the maker, can have just as magical a time as all of your guests. 

This season, it’s my prayer that you enjoy the holidays with your family and friends, and that these prep tips help you feel just a little less stressed about it all.

We are here to help you succeed with your holiday baking planning! If you have questions about specific recipes, feel free to reach out to us at bakingbestie@beginwithbutter.com, and we will be happy to help you! 

Our Ask Me Anything holiday series is also a great way to learn actionable baking tips that will help you achieve meaningful improvements in your holiday planning and baking. I hope to see you on Instagram Live for a session or two!

Sweet Potato Sock it to Me Cake

Well, I am my mother’s child, and I have the strongest affinity for sock it to me anything. I also have an incredible affinity for any cake involving sweet potatoes. Several months ago, I wondered aloud what would happen if I “married” sweet potato cake and sock it to me cake, and this Sweet Potato Sock it to Me Cake is the exceptional result to that wondering.

In this Post:

About this Sweet Potato Sock it to Me Cake

I positively must tell you about the absolutely enchanting aroma that fills your kitchen when this Sweet Potato Sock it to Me Cake is in the oven. You know those perfect fall afternoons at grandma’s house, when the warmth from her oven wrapped around you like a cozy blanket? That’s exactly what this cake brings to life. First comes that beautiful butter-sweet scent that’s the hallmark of every beloved Southern pound cake. Then, almost miraculously, warm waves of cinnamon start weaving through your kitchen, followed by the most incredible caramel-maple notes that make time slow down just a little bit. It’s the kind of smell that draws everyone to the kitchen, that makes little ones peer through the oven window, and that brings back memories of fall baking with people you love. 🍁

And the flavor? My goodness! Each bite is like a warm hug in your tummy. The cake itself is everything a Southern pound cake should be – that pleasantly plump, deliciously moist, tender crumb that creates a reverant *hush* in the din of large Sunday dinners and family gatherings. Your first taste brings the natural sweetness of roasted sweet potatoes (the way grandma would have made them!), followed by gentle whispers of warm cinnamon. Then comes that beautiful moment when you discover how the sweet potatoes’ subtle maple notes blend with the real maple syrup we’ve added – it creates this heavenly caramel-like sweetness that feels like autumn sunshine. The cinnamon streusel? Those perfect little pockets of extra sweetness are like finding beautifully textured, treasured surprises in every slice. This isn’t just another fall cake, sweet friends – it’s the kind that makes you close your eyes, smile, and remember all the best parts of coming home. ✨

Sweet Potato Sock it to Me Cake: Recipe at a Glance

⏰ Prep Time: 60 minutes

  • 15 minutes for mise en place (getting all ingredients measured and ready, friends!)
  • 15 minutes for streusel
  • 30 minutes for batter

🔥 Bake Time: 70-80 minutes

🕒 Total Time: 5-7 hours

  • Time is an ingredient in this recipe, friends! Those delicious flavors need time to develop and settle.

👥 Servings: 18 beautiful slices

📏 Pan Size: 12 or 15-cup bundt pan

Difficulty Level: Beginner/Intermediate

Storage Tips:

  • Room Temperature: Up to 3 days in an airtight container
  • Refrigerated: Up to 5 days
  • Freezer: Unglazed cake can be wrapped well and frozen for up to 2 months (not recommended after glazing)

Key Features of this Sweet Potato Sock it to Me Cake:

  • Moist sweet potato cake
  • Cinnamon streusel swirl
  • Cinnamon cream cheese glaze
  • Made with real maple syrup

Special Equipment that will help you knock their “socks” off:

  • Stand or hand mixer
  • Digital kitchen scale (I can’t emphasize this enough, friends! For truly consistent results every single time, a digital scale and metric measurements are absolutely essential. This is why you’ll always see me list metric measurements first!)
  • Instant-read thermometer

Ingredients in the Sweet Potato Sock it to Me Cake

BBs! What time is it? It’s time to have some fun with baking science! ⏰ 🤩 Each ingredient in our Sweet Potato Sock it to Me Cake is carefully selected to be meaningful and delicious in the final result. Understanding what the ingredients do will help you become a more confident baker, and knowing the ‘why’ behind each component makes troubleshooting so much easier if something goes sideways!

All-purpose flour is the backbone of our cake, creating the structure that holds everything together. When flour mixes with liquid ingredients, the proteins in that flour form gluten networks that give the cake its signature tender crumb. I specifically chose all-purpose flour over cake flour for this recipe because it gives us that classic, pleasantly plump texture that makes Southern pound cakes so special – cake flour would give us a lighter, more delicate crumb that’s lovely for layer cakes but just isn’t what we’re after in a proper Southern pound cake, honey!

Baking soda is the important leavening in this cake, working with the natural acids in sweet potatoes and maple syrup to create tiny air bubbles that help our cake rise. Without it, we’d end up with a dense, flat cake (and literally nobody wants that!). (Want to learn more about leavening? Click here to learn about the difference between baking powder and baking soda, and why substituting one for the other is a very bad idea!)

Kosher salt plays a crucial role in our cake, enhancing the natural sweet potato flavor while balancing the sweetness from our sugar and maple syrup. It also helps our cake develop that beautifully golden crust we all love in a perfect pound cake.

Ground cinnamon brings warmth and complexity to our cake, working especially well with the sweet potatoes to create that cozy fall feeling we’re after.

Butter is doing triple duty here – it’s tenderizing the protein molecules in the flour of our cake, adding moisture, and creating tiny air pockets when we cream it with sugar (check out that real-world application of physics!). These air pockets are crucial for achieving that perfect pound cake texture we all love!

Granulated sugar isn’t just for sweetness – it’s actually a tenderizer that helps preventing too much gluten development (lots of gluten development is appropriate for bread, but not for lovely pound cakes). When we cream it with butter, it also helps create structure by incorporating air into our batter.

Eggs are the ultimate team players, bringing structure, richness, and moisture to our cake. The proteins in eggs coagulate during baking to help our cake set, while the fats in the yolks add that incredible richness we expect in a pound cake. Eggs are the perfect contradiction, all in one shell. ❤️ 🥚

Vanilla bean (or extract) might seem simple, but it’s actually working overtime to enhance all the other flavors in our cake. Think of vanilla as the conductor of our flavor orchestra, making sure everything plays together beautifully!

Sweet potatoes are the star of our show, bringing natural sweetness and incredible moisture to our cake. They add a gorgeous signature color, plus they have their own subtle maple notes that we’re about to make even more magical – talk about a multitasking ingredient!

Maple syrup isn’t just here for sweetness – it’s adding depth and complexity to our flavor profile while also helping to keep our cake beautifully moist. Real maple syrup amplifies those natural maple notes in our sweet potatoes and creates caramel-like flavors when baked, making our cake even more irresistible.

Techniques for the Best Sweet Potato Sock it to Me Cake

Sock it to Me Cake is such a wonderful addition to a home baker’s recipe book. But there are some fundamental baking techniques that make all the difference when you’re trying to make this one incredibly special.

Take a look at the resources, below. They cover so many fun techniques that will take your baking to the next level, and will allow your confidence to soar to new heights!

These resources are super helpful to help you build consistency and confidence on your baking journey. Happy reading!

Need equipment? Not sure if you have everything that you need to make this amazing cake? No worries! I’ve got you covered there too!

Important Tools

I’ve said it a thousand times, Friend: you don’t need a ton of expensive equipment to have a well-stocked baking kitchen. You just need some fundamental tools that will help you achieve (and keep) proficiency; tools that can withstand the test of time.

If you’re interested in the tools that I use to make absolutely delicious and irresistible pound cakes, check out the My Essentials for Perfect Pound Cakes link in my Amazon Storefront!

I do get paid a commission when you purchase, but these are the tools that I use all the time in my own kitchen.

If you have these tools already, great! Think of this as a checklist to help you build the confidence that you’ll need to execute this cake!

Frequently Asked Questions

What’s so important about creaming butter and sugar? Why is it such a big deal?

Creaming butter and sugar properly adds rise to your cake! The friction created by the butter and sugar create little air pockets that help your cake rise to its full potential. This is tremendously important in pound cakes in particular, as we use miniscule amounts of leavening for these cakes.

Can I use canned sweet potato puree instead of boiled sweet potatoes? 

You absolutely can. Just make sure that you’re using sweet potato puree instead of sweet potato pie filling.

Why do you boil these sweet potatoes instead of roast them?

The sweet potatoes in this cake serve as the liquid/moisture component. Roasting actually removes a not-insignificant amount of that moisture. So, I opted for boiling instead of roasting. 

Don’t fret! You will still get the full benefits of the complete sweet potato flavor profile!

How long can I keep this cake?

This cake can be stored in an airtight container on a countertop for up to three days, or it can be stored in the refrigerator for up to five days. 

Can I freeze this cake?

Yes! However, you don’t want to freeze the fully-glazed cake, as the ice crystals will change the glaze texture into something gummy and unpleasant. You can freeze this cake, without glaze, for up to three months.

What if I have more questions?

Send them to me (bakingbestie@beginwithbutter.com)! I’d love to answer them for you!

This Marrying Cake Marriage is Built to Last

I had an incredible time playing with this cake. From concept to execution, this one made me smile a thousand times. I hope it truly makes you smile as you prepare it for your special tables. 

Got questions about the recipe? Reach out to me and let’s chat! You can reach me at bakingbestie@beginwithbutter.com, and I love your questions!

Did you make this cake? Make sure to tag me on Instagram @beginwithbutter so that I can share your success with the rest of our wonderful community!

Enjoy!