
Friends, I have been having a BALL with pound cakes recently. So much so that I decided to do the Twelve Days of Pound Cakes Holiday Event. So much so that I’ve been baking and developing new pound cake recipes for that event for you.
Including the Ruby Red Velvet Pound Cake. She is gorgeous and she was going to be featured in that event.
Meet Ruby.

I posted Ruby on Instagram one day without a recipe (😮), and the email and DM campaign from the BwB community was swift and immediate. I was utterly shocked at how many of you needed this recipe for your Thanksgiving tables. So Ruby got pushed up in the rotation.
I want to make sure that you’re set up properly to make all of the pound cakes that are on the BwB site, so today’s post is about the prep. There are some tools that I rely on to make consistent, great-tasting pound cakes every time, and I wanted to share those tools in today’s post, so that you’re ready to rock and roll when it’s time to bake.
Ready? Me too!
**note: this post contains affiliate links for products that I use in my home kitchen.**
In this Post
- Bundt Pans
- Digital Food Scale
- Apron
- Sifter
- Rubber Spatula
- Stand Mixer
- Hand Mixer
- Mixing Bowl Set
- Oven Thermometer
- Instant Read Thermometer
- Cooling Racks
- Pastry Brush
- Parchment Paper
- Cake Carrier
You might already have most of these things, but I wanted the list to be comprehensive so that you could confidently go forward, knowing that you have all of the tools that you’ll need for these bundt cakes.
Bundt Pans
In order to get the characteristic shape of a bundt cake, you’ll need a bundt pan. Bundt pans will help you get the beautiful, show-stopping shape that you’re wanting to create. They also have higher sides than your typical cake pan, so you don’t have to worry about the cake batter spilling over the sides (within reason).
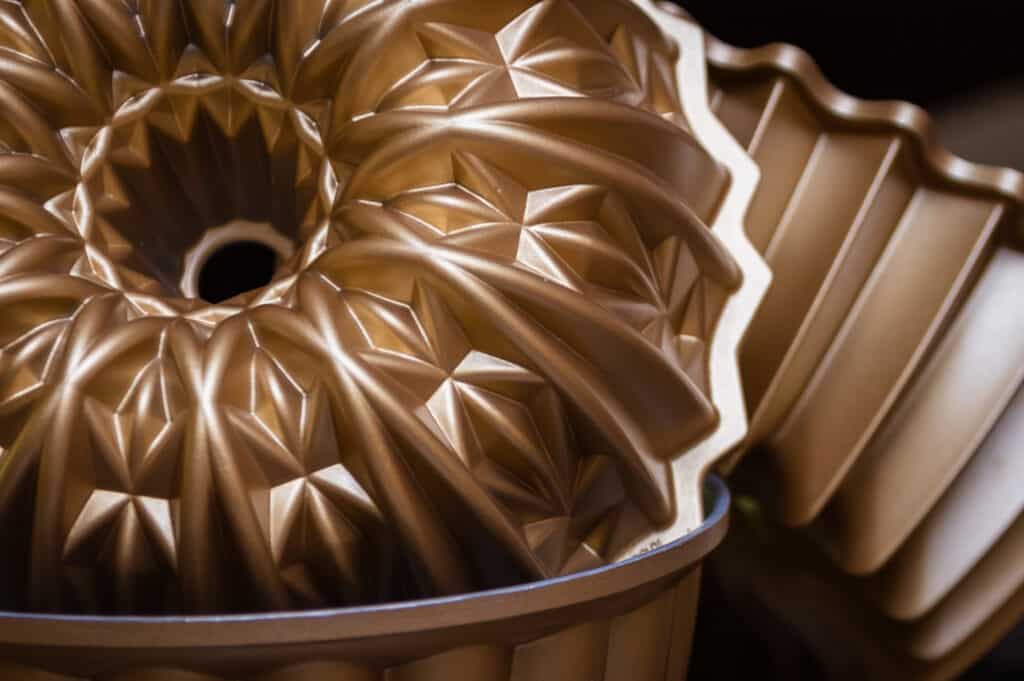
I wrote a little more about bundt pans in my post about the best pans for a home baker’s kitchen; you can find the section from that post right here. If you’re reading this and you want to know which bundt pans I’ll be using this holiday, here they are!
- Nordic Ware Elegant Party Bundt Pan
- Nordic Ware Brilliance Bundt Pan
- Nordic Ware Cut Crystal Cast Bundt Pan
- Nordic Ware Fleur de Lis Bundt Pan
Digital Food Scale
I will always always always recommend using a digital food scale and metric measurement when baking. Pound cakes are a game of inches and it’s a disaster waiting to happen if you are heavy handed with ingredients. A food scale helps to avoid the trauma of watching your cake overflow its bundt pan in slow motion.
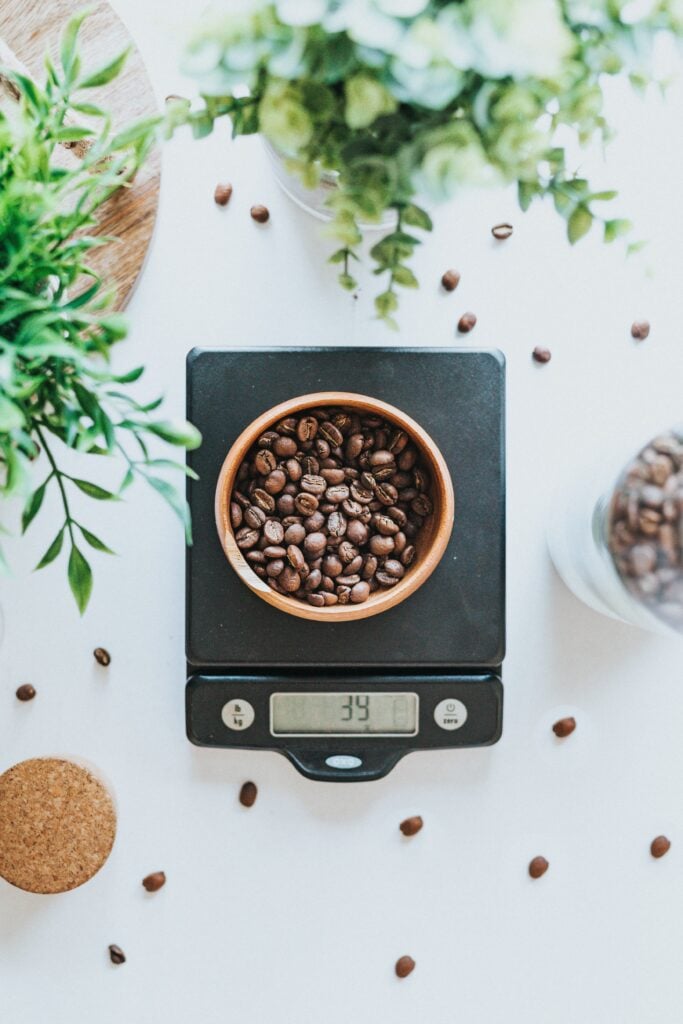
You can find my favorite food scales here and here.
Apron
Baking is a messy thing. There’s no real way to get around that. Sometimes there are unintended splashes and spills. And I, for one, would rather have those splashes and spills intercepted by a quality apron.
My favorites? My Hedley and Bennett Essential Apron is my clear favorite, but it was an investment. Williams Sonoma Classic Stripe Aprons are AMAZING aprons that are sturdy and beautiful, and affordable. I have them in light colors and they have NO STAINS. That fact is rather remarkable, considering the amount of food coloring and cocoa powder abuse I’ve subjected them to over the years.
Oh! And aprons keep your clothes from getting sloshed with dish water! Because there will always be dish water when you’re done baking.
Totally worth it though!
Sifter
Sifting is an incredibly key component to pound cakes; it ensures evenly distributed dry ingredients, gets clumps out of those ingredients, and removes impurities that might be in those ingredients.
For example, if you want to make the Ruby Red Velvet Pound Cake, you’ll need a sifter for the cocoa powder and flour mixture. A sifter will break up clumps of cocoa powder and ensure even distribution of that cocoa powder, flour, and other dry ingredients in your beautiful finished pound cake.
Because Ruby? She’s as beautiful as she is delicious. Inside and out. We don’t want lumps of cocoa powder ruining her smooth finish or her perfect internal texture.
Rubber Spatula
It’s important to have a stiff rubber spatula for bowl scraping and especially for the final turns of the completed batter.
My go-to spatula set for several years has been this set from Williams Sonoma. They are sturdy and can work through the stiffest cake and cookie batters. The small ones are great for scraping measuring cups and jars for that last…little…bit.
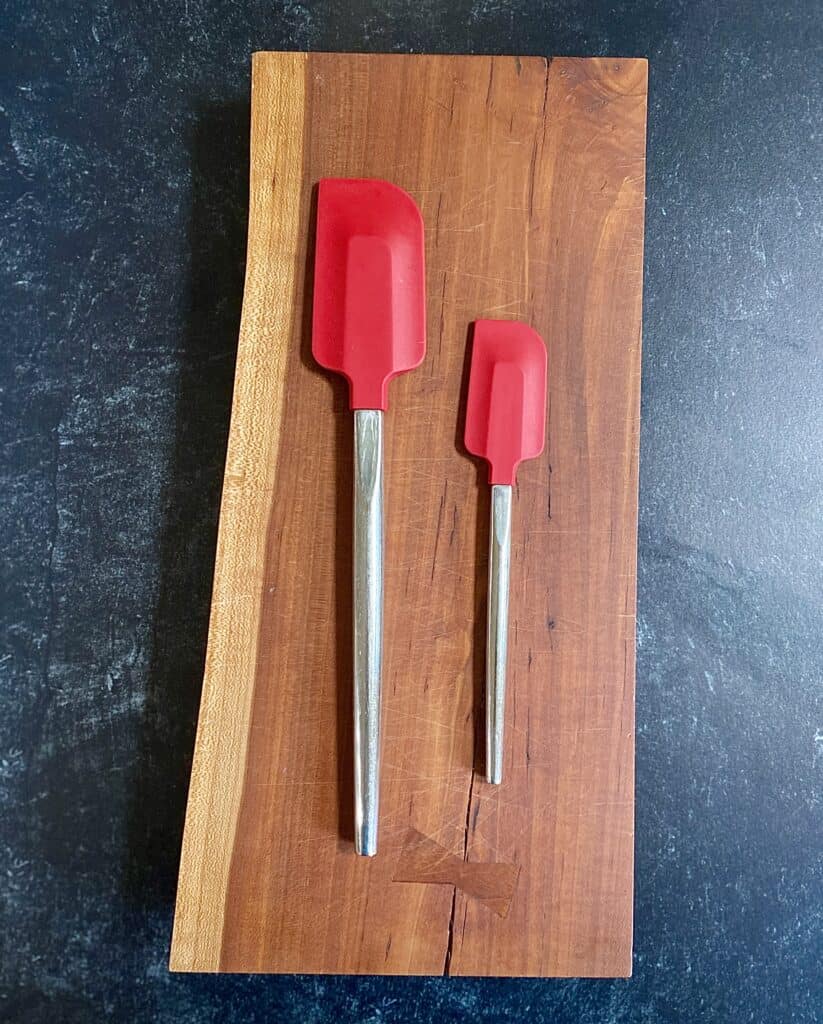
I’ve recently started using this set from OXO. I absolutely adore the OXO brand and use several of their products. These have become regulars in my baking rotation because they’re perfectly flexible while also being perfectly stiff, and they’ll work great for this cake.
Stand Mixer
I’ve said it before and I’ll say it forever: you do not need a stand mixer to bake amazing things. It’s not a necessity. And if you’ve read my recent post on this exact subject, you know that it’s possible to ruin a beautiful, brand new machine if you’re not yet kitchen-competent.
However, the stand mixer is the undisputed monarch when it comes to efficiency in mixing. This is especially true when it comes to efficiently and quickly creaming butter and sugar. Since this is the most crucial part of the mixing process for pound cake, having the most efficient tool for the job can be a huge bonus.
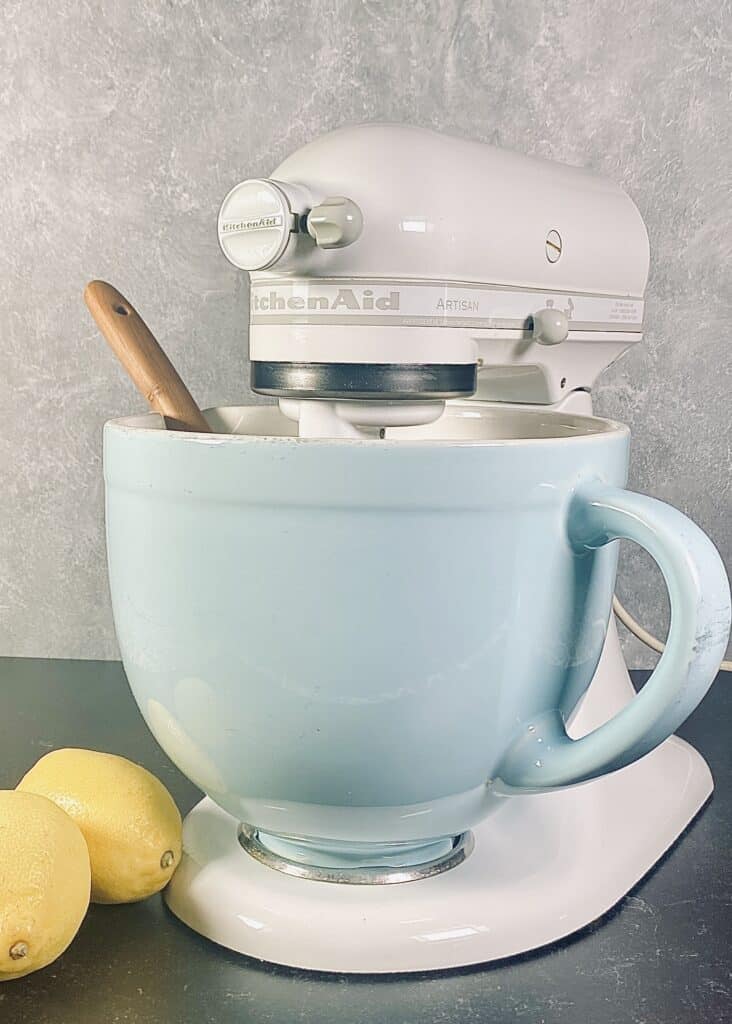
My kitchen workhorse is my KitchenAid Artisan Stand Mixer. I love this machine. It creams butter and sugar so beautifully. This step is crucial for getting that perfect pound cake density, and the planetary motion in my machine ensures that it’s done evenly, efficiently and quickly.
I love this machine so much so that I’m eyeballing a KitchenAid Professional. But that is still a little way away and it’s certainly not necessary to make any of the pound cakes on my list.
Hand Mixer
A great starter gadget for a new baker is a hand mixer. To be sure, it takes a few more minutes to get that perfectly creamed butter and sugar, but you will get there with enough patience and the result will be just the same. I use my hand mixer for smaller batches, and sometimes when I just feel like doing a lazy bake.
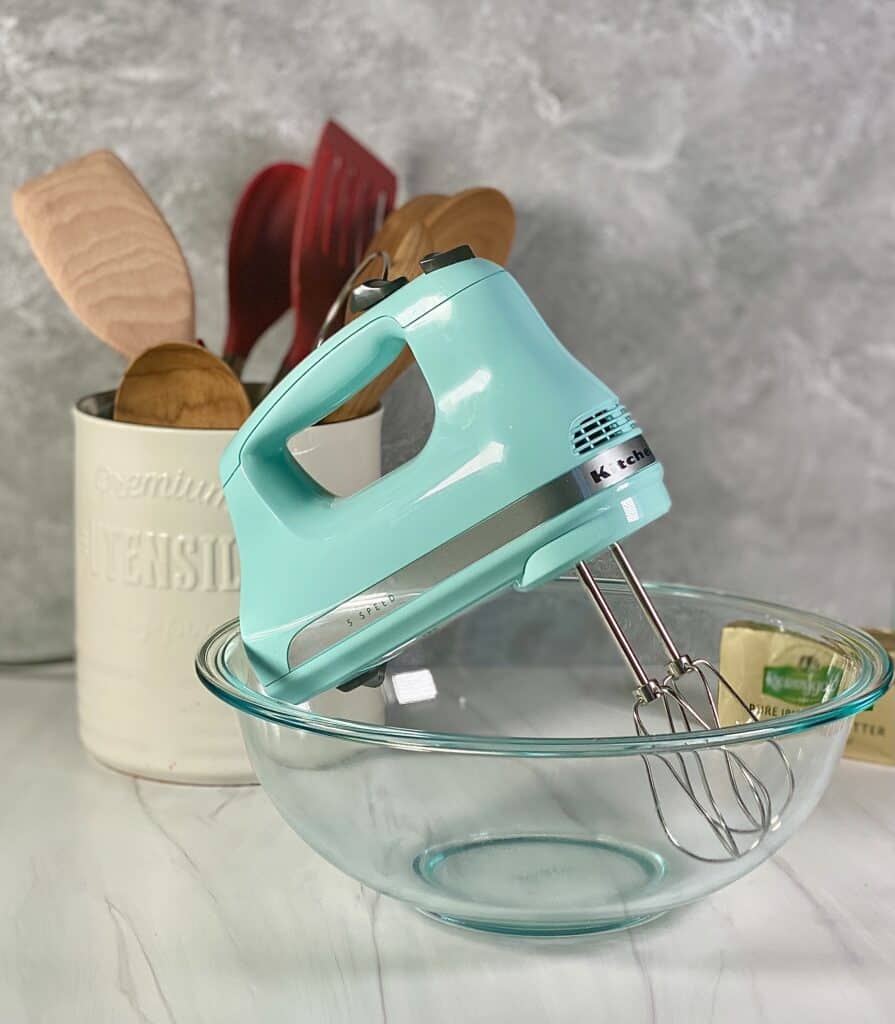
I love love love love my KitchenAid Ultra Power hand mixer. It is an amazing tool for just about every cake I will ever bake.
Mixing Bowl Set
These cakes require quite a bit of prep in their own right! Whether you have a stand mixer or hand mixer, a good mixing bowl set will be really helpful for properly preparing your mise en place. While I did do a whole post on the best bowls for a home baker’s kitchen, to get started, I recommend this set of stainless steel bowls.

They come in different sizes so you can use one for the batter, and smaller bowls to hold your individual ingredients. Because proper prep means being calm and collected in the kitchen. And having multiple bowls will help you prep multiple ingredients for the big bake.
Oven Thermometer
Inaccurate oven temperature is one of the main reasons that baked goods fail. It’s a completely avoidable fate, though.
Seriously. For eight dollars, you can gather a wealth of information about whether your oven runs hot or cold. Because it probably does one or the other.

You can find the one I use here.
Instant Read Thermometer
If you’ve ever read a cake recipe, you’ve probably noticed that they usually tell you that the cake is complete when a toothpick, inserted, comes out clean (or with a few crumbs). While this is a serviceable way to test the doneness of a cake, it’s not the most accurate.
Family. My cakes are involved. They are…a bit of a process. And I want to set you up for success by making sure that you have every tool in my arsenal.
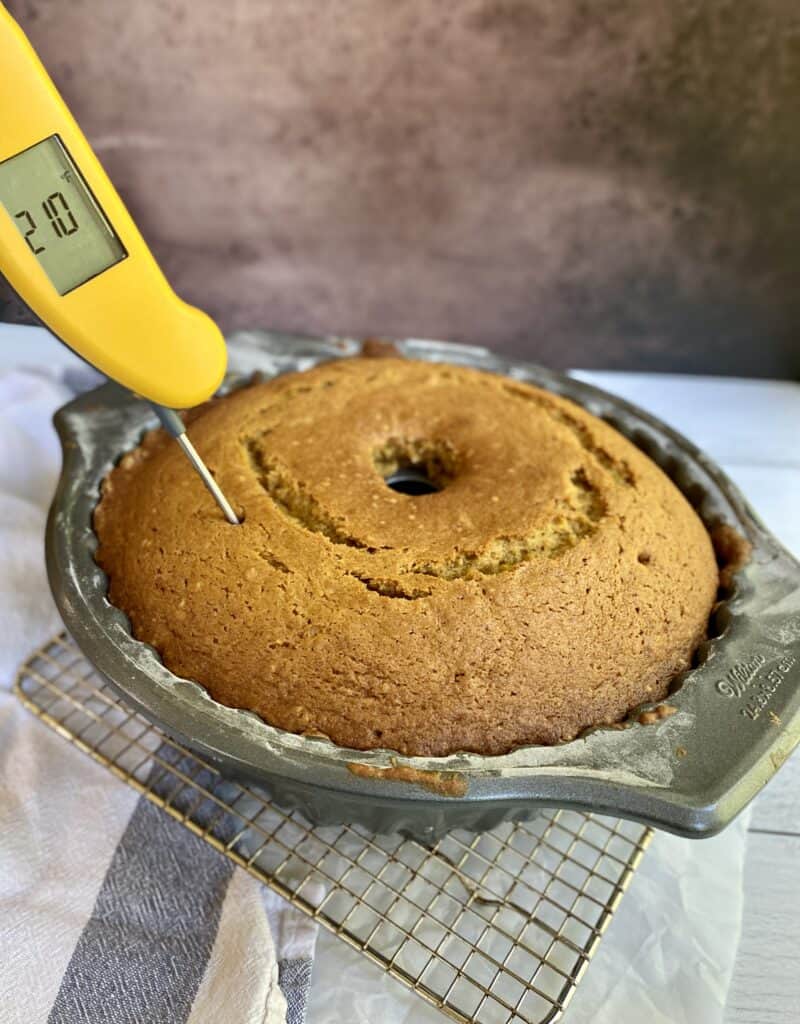
For my cakes, I check doneness with an instant read thermometer. Specifically, I use the Classic Super-Fast Instant Read Thermometer from ThermoWorks. With this tool, I can know with absolute certainty when my cake reaches the magic doneness range (210°F-215°F, though I aim for 212°F on the nose).
Cooling Racks
When your cake comes out of the oven, the general rule is to let it rest for ten minutes and then invert it on a cooling rack.
Like one of these!
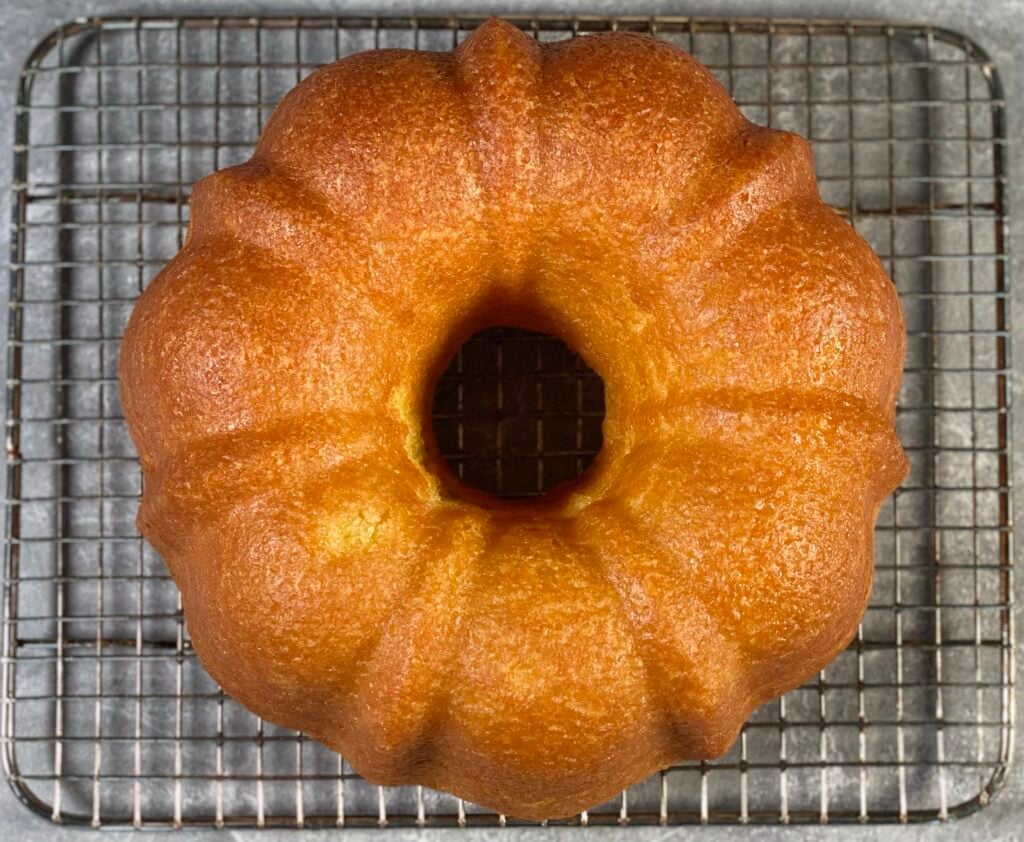
When cakes first come out of the oven, they’re still cooking a bit in the blazing hot pan. This is good! It allows the center of the cake to fully set.
It wouldn’t be good to leave the cake in the hot pan for longer than ten minutes after it leaves the oven. This could lead to over baking and dryness. At the ten-minute mark, the bundt pan is not as hot as it was when it first came out of the oven. But it’s still hot enough to overbake your cake.
So, out it goes onto a cooling rack! You can find my absolute favorite cooling rack for bundt cakes here.
Pastry Brush
All of my pound cakes (really, all of my cakes) have a step where you add simple syrup to the warm cake immediately after turning it out of the cake pan. This simple syrup helps to preserve moisture in the cake, and gives pound cakes a gorgeous sheen that makes the cake itself worthy of a special occasion, even without a final glaze.
Some people pour the simple syrup over the top of the cake, but I prefer to use a pastry brush for the task. Using a pastry brush ensures an even distribution of the simple syrup over the entire cake. Plus, for me, this is just a fun way to take a good 360° look at the cake I’ve worked so hard to make.
You can find the pastry brush that I recommend here. My off-brand pastry brushes are very old and I frankly couldn’t find them anywhere online, but I trust the OXO brand because they make so many quality items, so it is without hesitation that I recommend their pastry brushes to you.
Parchment Paper
Parchment paper is invaluable for pound cakes, both for the simple syrup phase and the final glaze.
Because, as I said before, baking is a messy business. If you put a piece of parchment paper underneath the cooling rack for the simple syrup and final glaze stages, you will have the utterly satisfying experience of crumpling the soiled paper and just…throwing it away.
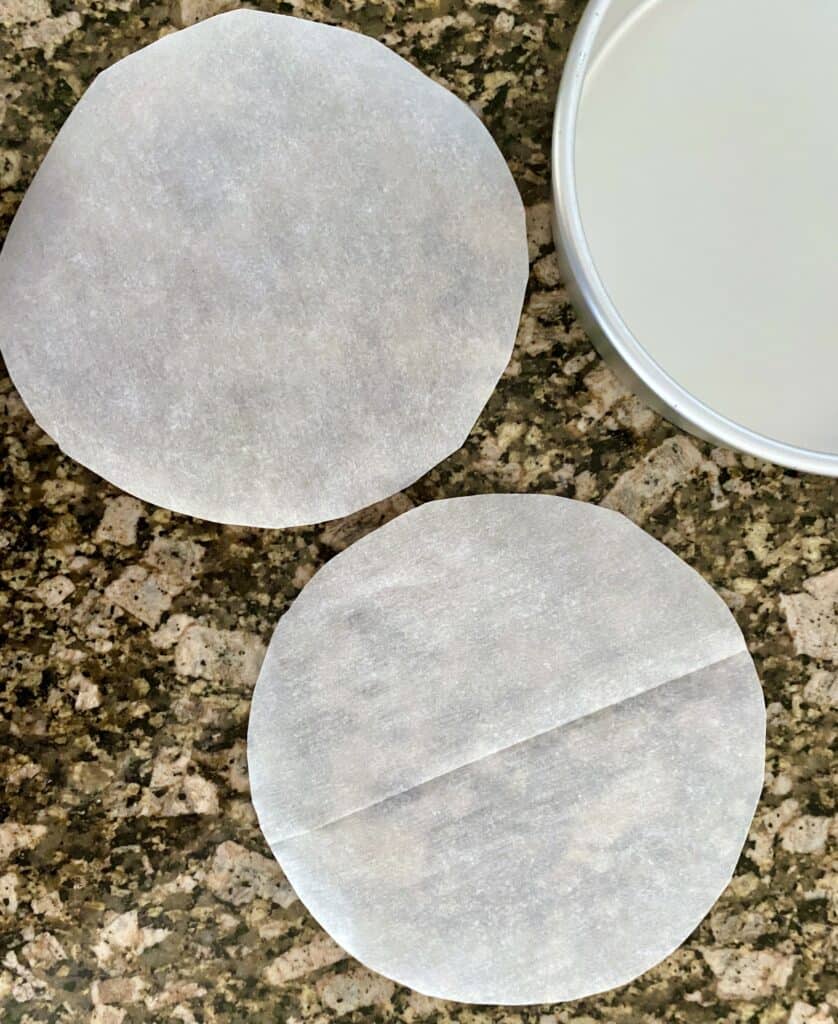
We love parchment.
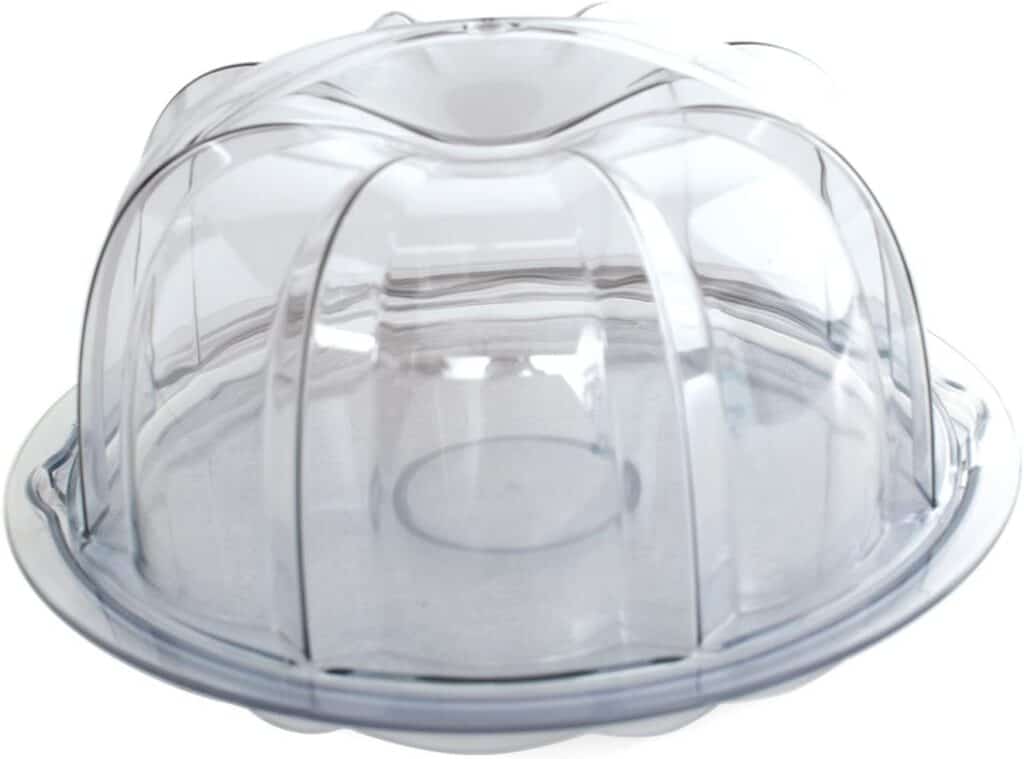
Cake Carrier
Baking a pound cake is a good five-hour process. At the end of that process, you’ll want a proper cake keeper to display and protect your hard work! Whether you’re traveling with your pound cake or you’re serving it at home, I recommend putting your cake on a cake round and using this Nordic Ware Bundt Cake Keeper. It’s sturdy enough to protect and secure your pound cake so that you can confidently and safely transport your cake to its final destination, and it’s also pretty enough to showcase your hard work without having to buy another cake stand.
Conclusion
I truly hope that this guide was helpful for you as you’re preparing to bake pound cakes for this holiday season (and beyond!). I literally cannot wait to see the perfection that you create! Whether you choose one of the Begin with Butter recipes or you use some BwB techniques on your favorite recipes, tag @beginwithbutter on Instagram so we can shout out YOUR success!
Happy baking!


