Pineapple Dulce de Leche Pound Cake

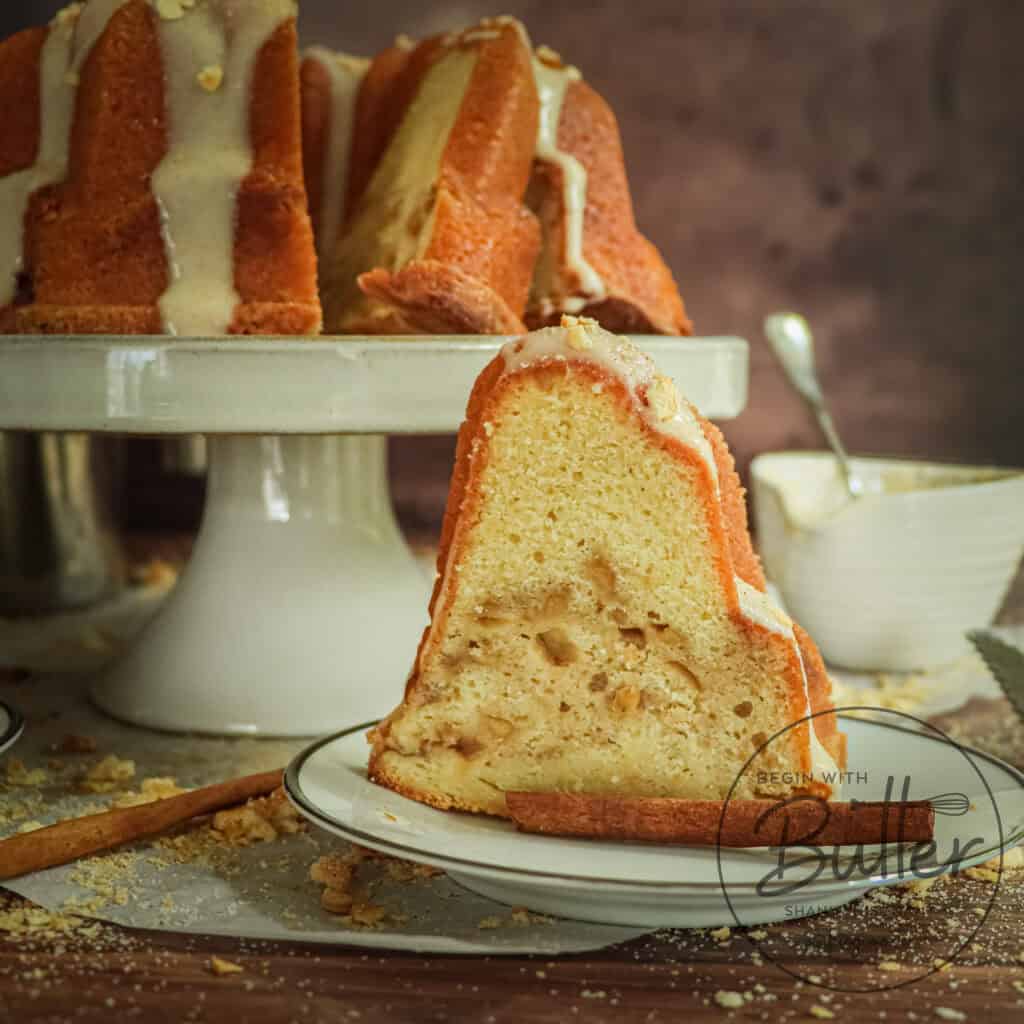
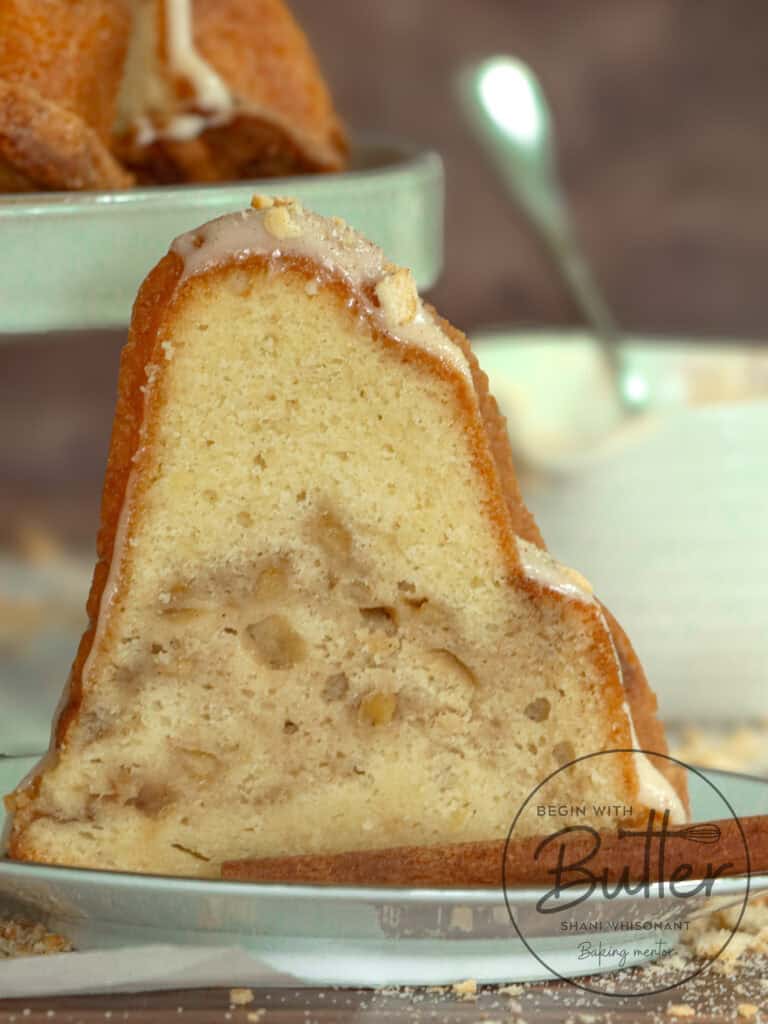
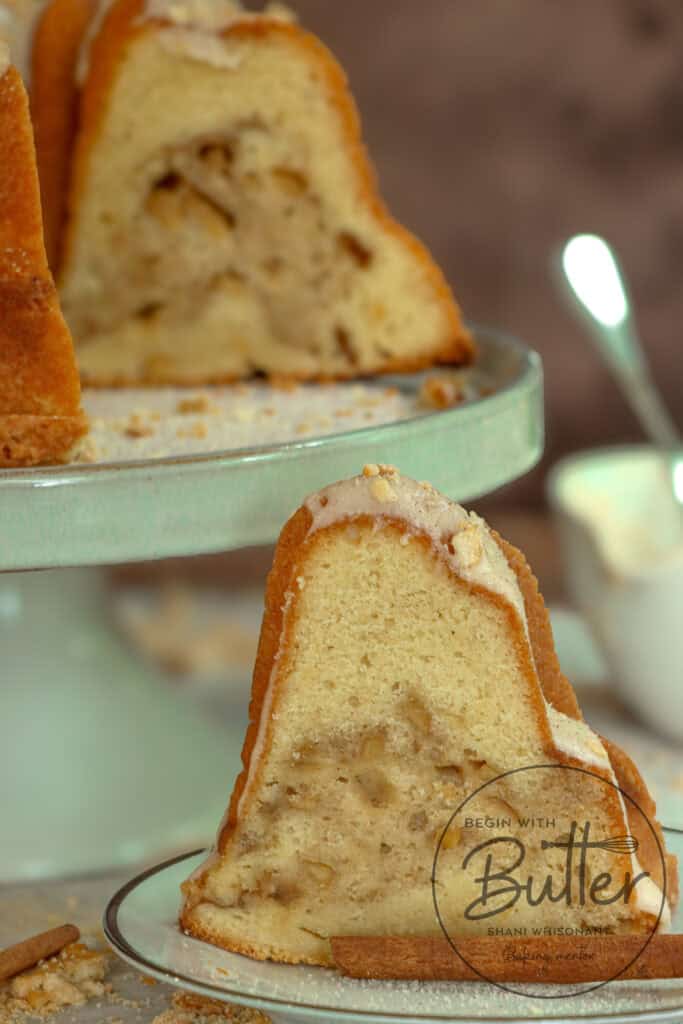
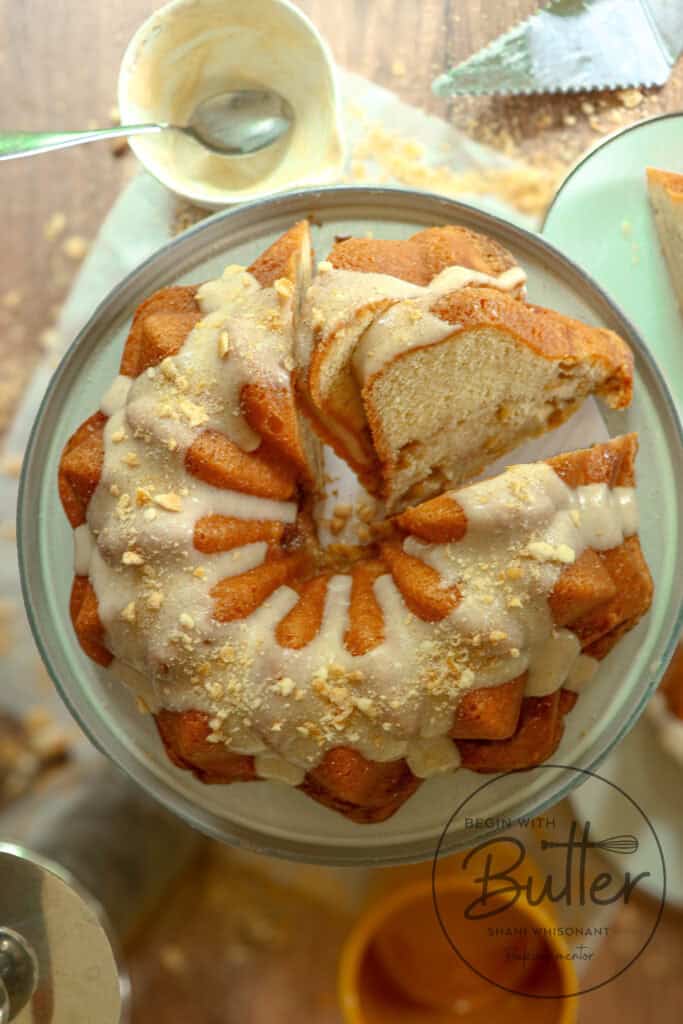
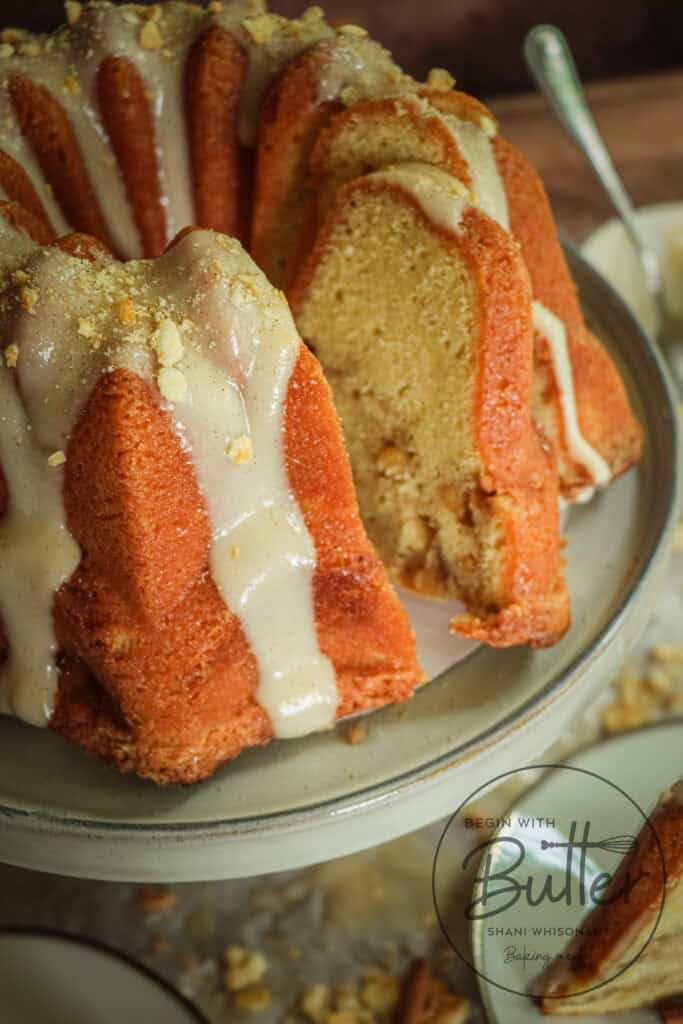
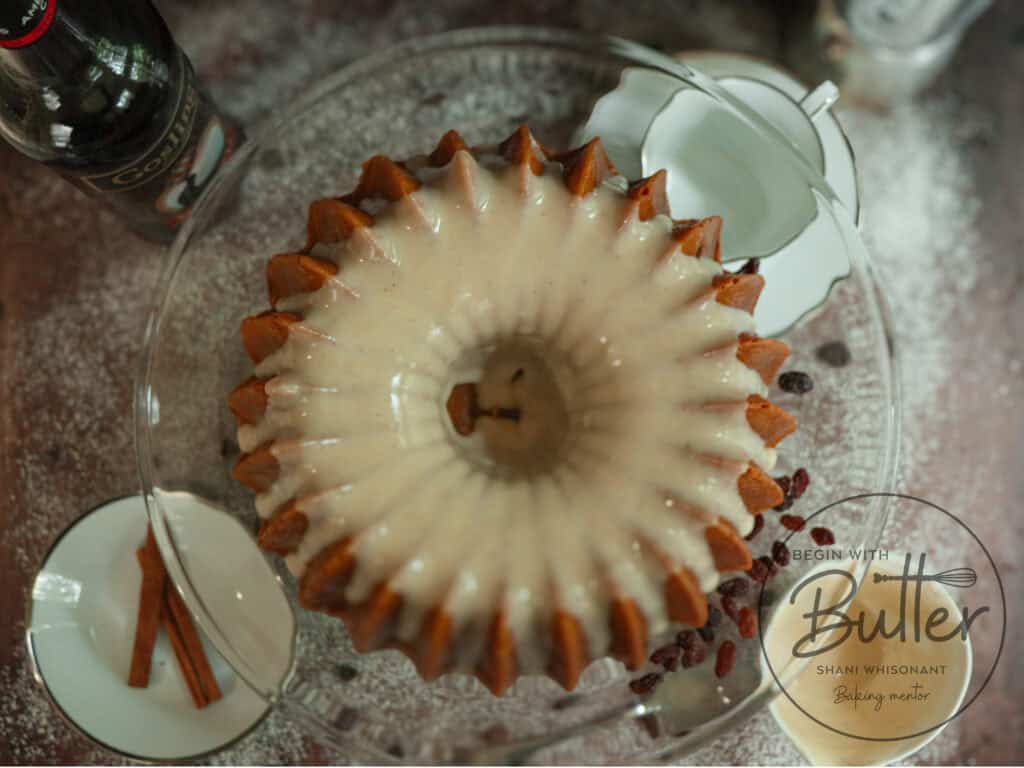
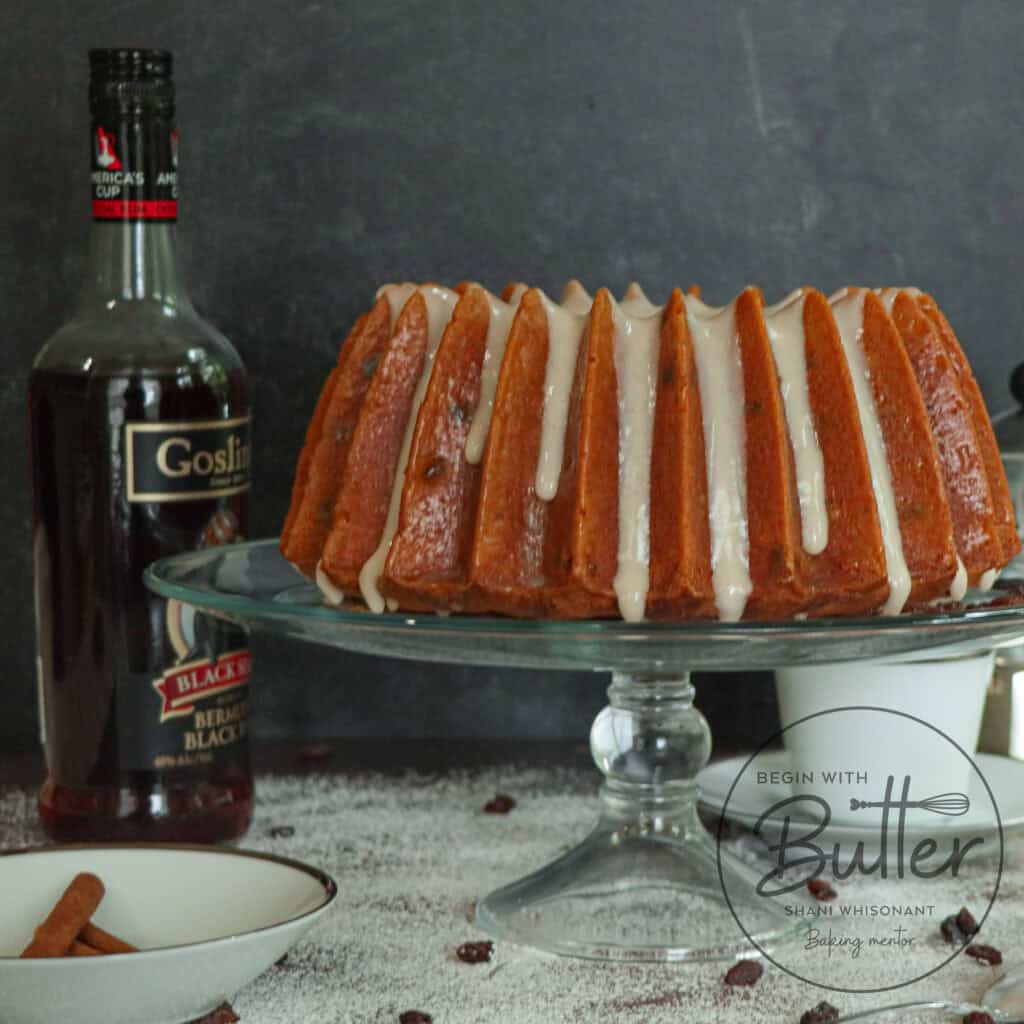
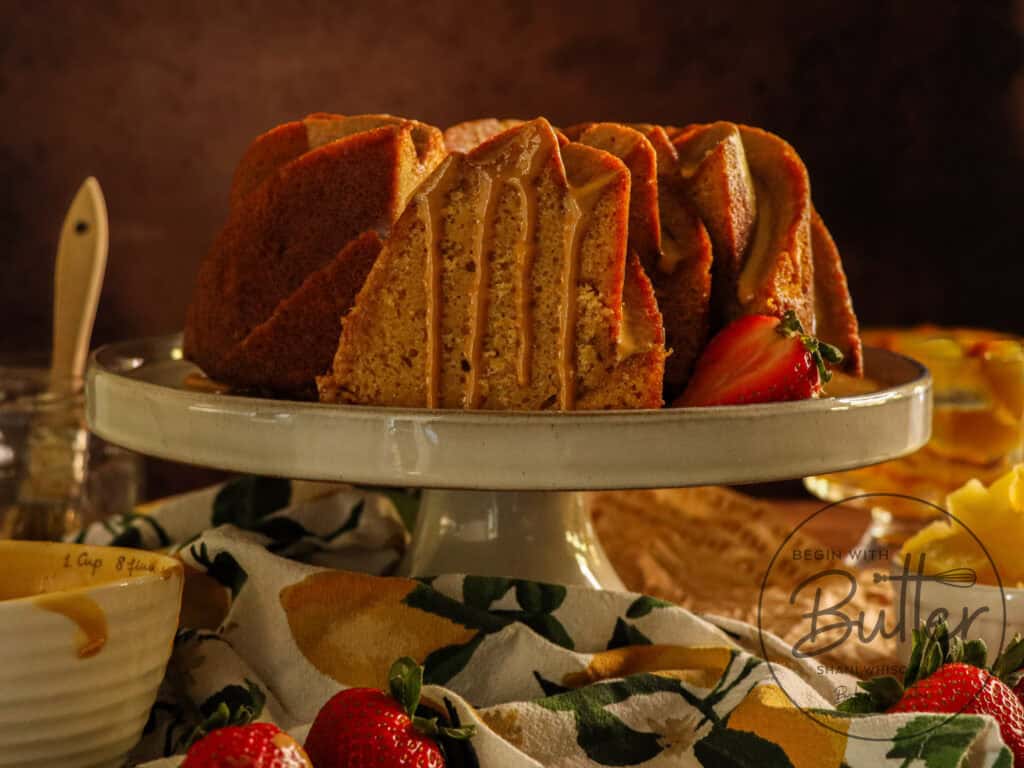
While I love, love, love my Decadent Caramel Pound Cake (and I hope you do too!), there’s a new kid on the block, and she is my Pineapple Dulce de Leche Pound Cake. This cake has complex layers of warm vanilla, sun-kissed pineapple, and luscious dulce de leche (caramel). The sweetness of the dulce de leche is balanced perfectly by the tangy pineapple, which itself gives incredible flavor to this cake, while also preventing it from becoming overly sweet. 

The pineapple also gives this cake a very special tropical feel, and a delicious texture to boot. The combination of the pineapple with the dulce de leche is a flavor that you cannot deny is one of the most amazing tropical treats ever.

In this Post:

The Recipe

Pineapple Dulce de Leche Cake Ingredients

Recipe tinkerers, unite! By reading this section, you’ll learn some of the important baking science in this recipe, which will help understand how to personalize this recipe to a degree. While I don’t recommend wholesale changes to an existing recipe, there are always fun touches that you can add to make it your own! Read on to learn more!

All-Purpose Flour: I love the pleasantly plump texture of a good pound cake, and this Pineapple Dulce de Leche Pound Cake is no different. That beautiful texture largely comes from a higher-protein all-purpose flour. I find that lower-protein cake flour doesn’t give the same rise and texture to pound cakes, so that is why I don’t use it in mine. My favorite all-purpose flours for pound cakes are King Arthur Baking’s All-Purpose Flour and Bob’s Red Mill’s All-Purpose Flour.

Baking Soda: This cake contains loads of pineapple, so I chose baking soda for the leavener. Baking soda needs acid to activate, and the acid in the pineapple is a boss for this activation.

Kosher Salt: Salt is very important in any dessert; it balances the sugar and keeps the dessert from becoming overly sweet. It doesn’t take a lot of salt to balance the sugar in a cake recipe, so measure this ingredient very carefully. If you’re using table salt or fine sea salt for this recipe, make sure to cut the amount in half. Whatever you do, don’t skip the salt in this particular recipe. Without it, all of the sugar (from the dulce de leche, the naturally occurring sugar in the pineapple, and the granulated sugar) will make this cake way. too. sweet.

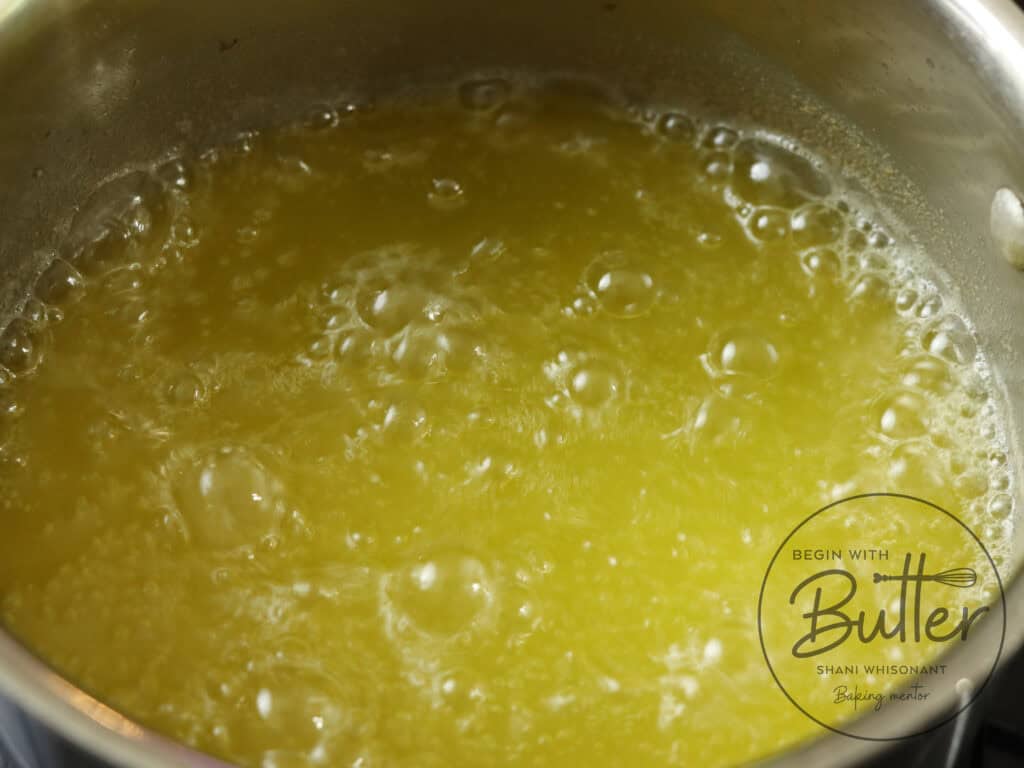
Unsalted Butter: As with most pound cakes, butter has a prominent role in this cake! It gives an unmistakably characteristic and buttery flavor, but that’s not all! In addition to that special flavor, the creaming process creates the absolutely necessary air pockets that help this cake to rise. Additionally, the fats in the butter are needed to tenderize the powerhouse protein molecules in your flour and egg whites. This ingredient does a lot of work here! Use good butter for this cake, and make sure that it’s room temperature before you begin. I set my butter out for at least two hours before baking time. If you don’t have two hours, 10-20 minutes in your waistband or pocket (or, as my mother would say, in your bra over your heart) will do just fine.

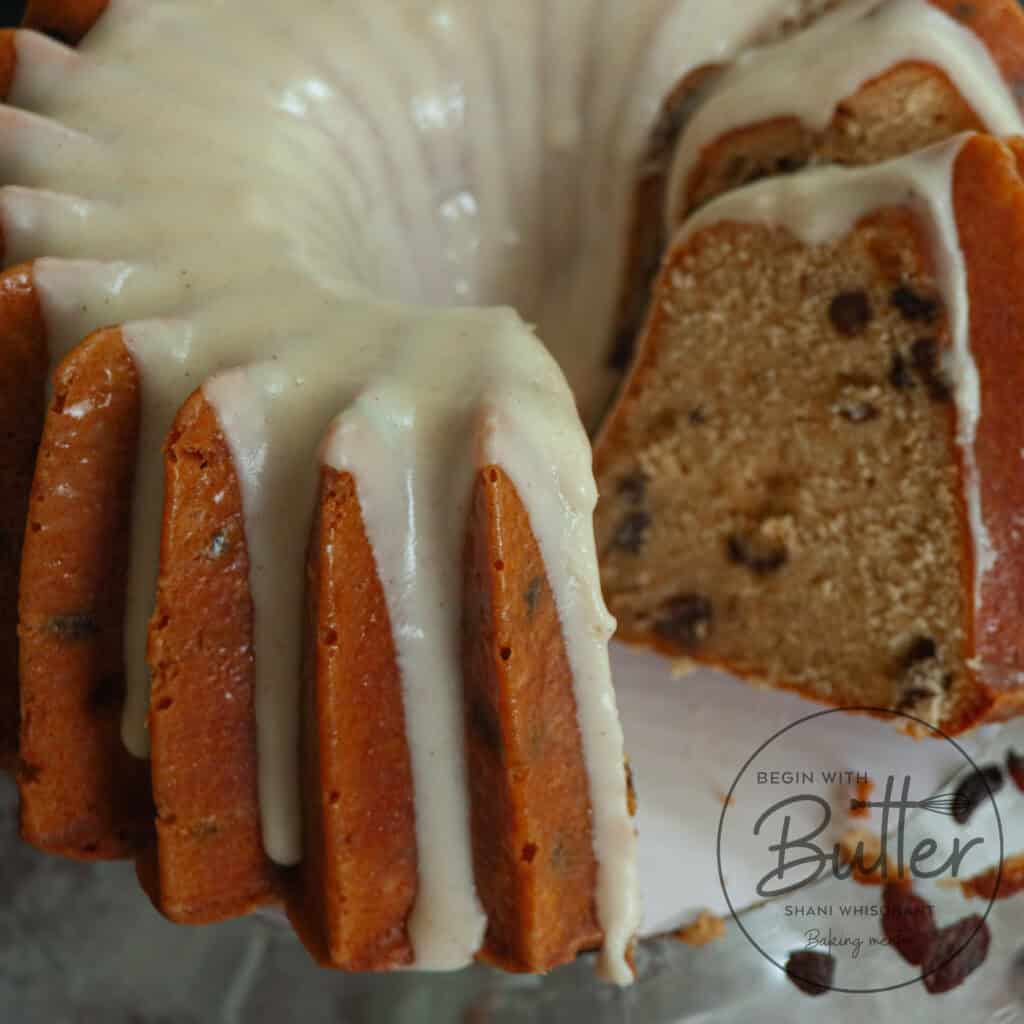
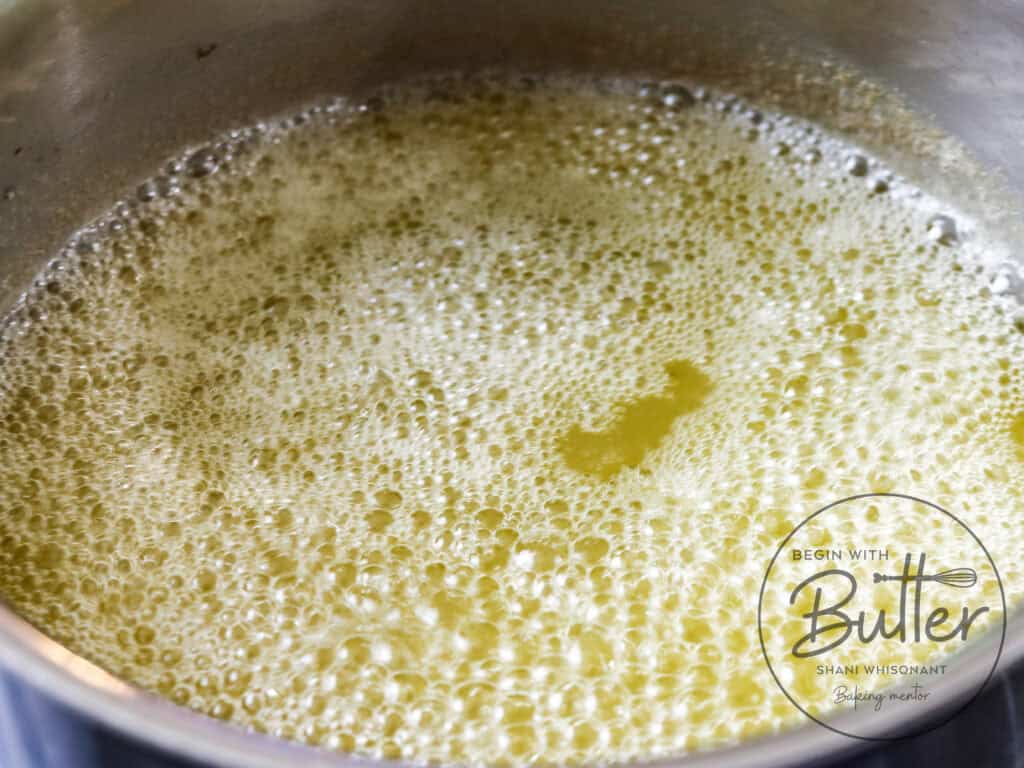
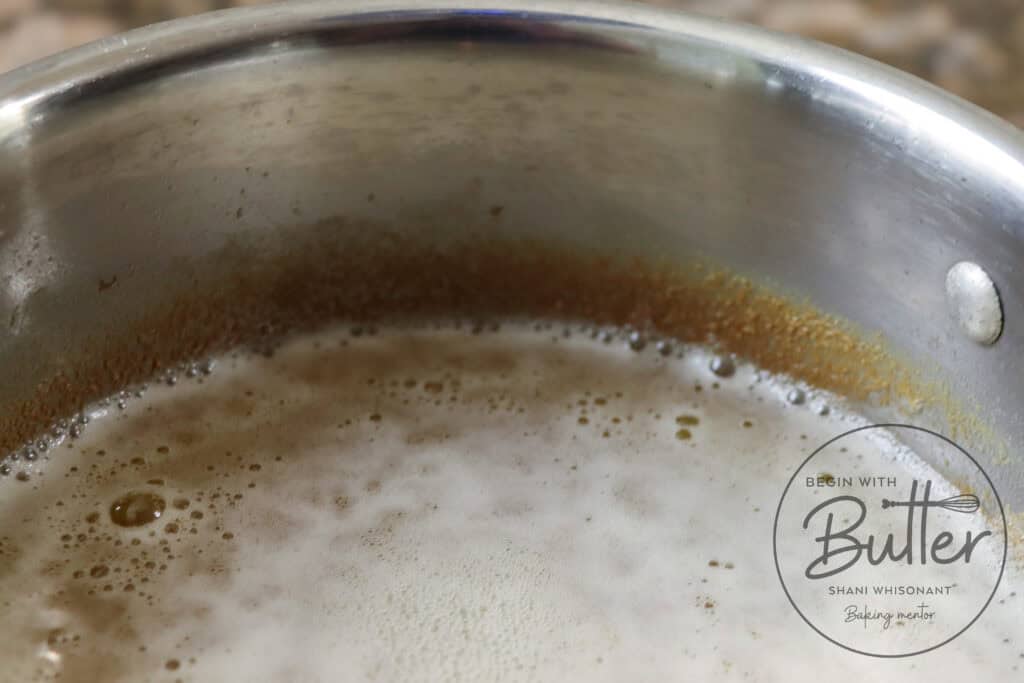
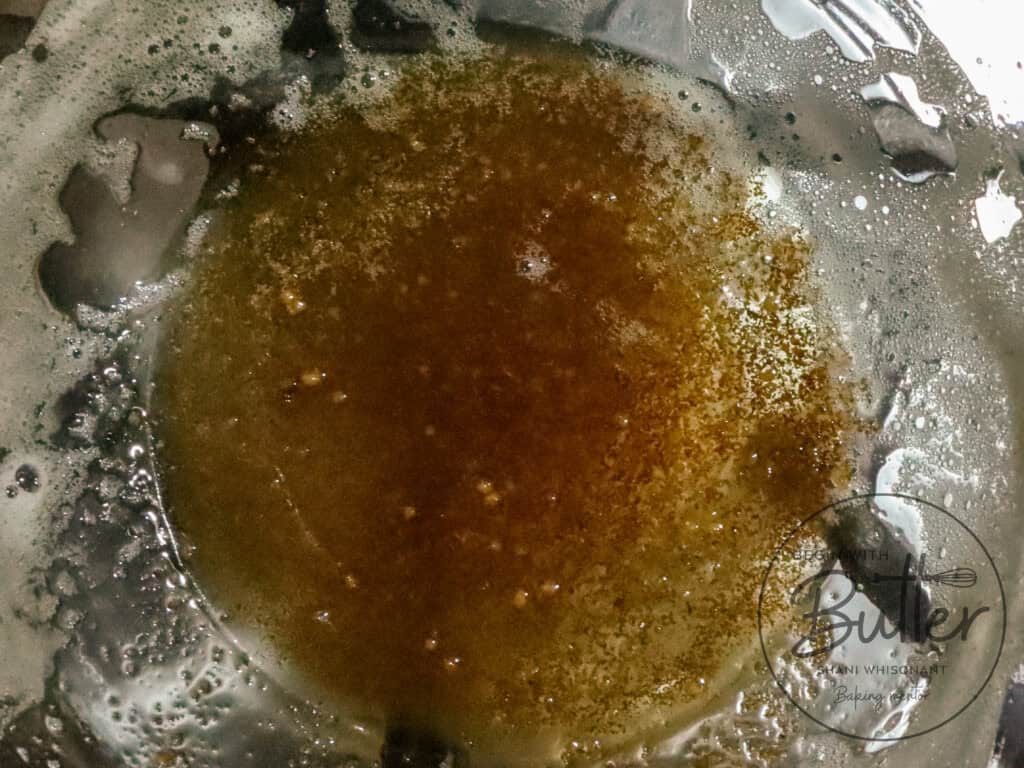
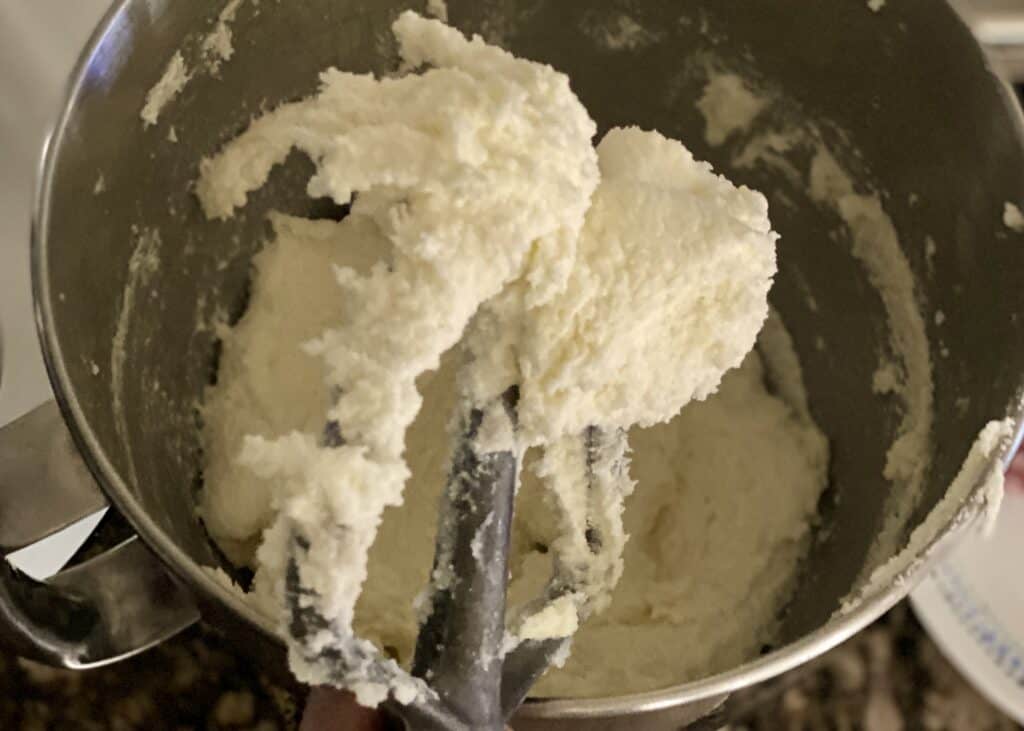
Dulce de Leche: When velvety dulce de leche meets creamy butter, they whip together into a toffee-colored cloud that’s ridiculously smooth and rich. When the vanilla-speckled sugar joins the party, the mixture transforms into a light, airy blend that holds onto those toasted caramel notes in every tiny bubble. This enhanced creaming process creates a uniquely tender crumb in the finished cake, with each bite delivering subtle hints of rich caramel that weave through every slice.

Granulated Sugar: The sugar in this recipe adds a nice sweetness to this cake, and it also helps with caramelization! That gorgeous crust on the outside of your cake is largely due to the granulated sugar in this recipe!

Eggs: The fatty yolks add flavor to this amazing cake, while the protein-rich egg whites assist with the texture and rise. Be sure to use large chicken eggs for the best results.

Vanilla Bean Pod: The mighty vanilla bean pod does so much in this cake. It truly plays above its weight and adds beautiful warmth and vanilla flavor. If you’re substituting vanilla extract, use a tablespoon. You won’t get the full vanilla flavor that I intended with this recipe, but it will still be over-the-top amazing.

Techniques for the Best Cakes

Who among us wants to learn how to consistently make the most amazing cakes? Well, lean in dear BB, because that’s what this section is about! Here at BwB, I love love love when you come and grab a recipe, but the real magic happens when you learn how to master a technique, and then you can use that technique in every pound cake you ever make

That’s why I’m giving you the following links! They cover so many fun techniques that will take your baking to the next level, and will allow your confidence to soar.

These resources are super helpful to help you build consistency and confidence on your baking journey. Happy reading!

But wait! There’s more! Grab your coffee or a glass of wine and get ready to check out my favorite equipment!

Important Tools

Guess what? Begin with Butter has its own Amazon Storefront, where you can find all of the amazing equipment that I used in this Pineapple Dulce de Leche Pound Cake! Want even more specific product recommendations? Check out the product links, below.

I do get paid a commission when you purchase, but these are the tools that I use all the time in my own kitchen.

If you have these tools already, great! Think of this as a checklist to help you build the confidence that you’ll need to execute this cake!

This delectable caramel cake belongs on your tables this season (and every season afterwards!). It’s simultaneously sweet and tangy, rich and vibrant, decadent and bright. These contrasting flavor profiles create an absolutely incredible cake experience. 

With this recipe, and the recommended tips and tools in this article, you can’t help but it this one out of the park. But I’m also here if you need help! Email me at bakingbestie@beginwithbutter.com with your baking questions and get help with the “sticky” points of this recipe. And, once you’ve made it, don’t forget to tag me on Instagram @beginwithbutter! I love to share your successes!

See you tomorrow for Day 5 of the Twelve Days of Pound Cake!

More from the Twelve Days of Pound Cake 2024

Iconic Apple Pie Pound Cake

Of course, I had to make apple pie into a pound cake, so today I have for you, my Iconic Apple Pie Pound Cake. This cake is such a warm hug to your insides. It’s a port in the storm. A celebration cake. A love offering to family and friends. It’s something to be savored at a family gathering. Or something to be devoured at a kids’ sports banquet. 

This cake features a vanilla base, with a cooked apple pie filling that is positively delicious. It is aromatic, has incredible spice, and the two textures (of the soft cake and the luscious apple pie filling) play together perfectly, creating a happy feeling on your tongue and in your tummy. Let’s get to the recipe! And don’t forget to read on after the recipe for all of my helpful execution tips!

In this Post:

The Recipe

Apple Pie Pound Cake Ingredients

To fully understand why this cake is so spectacular, a fun lil’ baking science TED Talk will help you in a big way. So, let’s dive into some cake ingredients, shall we? This section will help you tremendously if you want to tinker with this recipe, or if you just want to learn how all of the ingredients play together in the proverbial sandbox (or mixing bowl)!

All-Purpose Flour: I love the pleasantly plump texture of a good pound cake, and this Apple Pie Pound Cake is no different. That beautiful texture largely comes from a higher-protein all-purpose flour. I find that lower-protein cake flour doesn’t give the same rise and texture to pound cakes, so that is why I don’t use it in mine. My favorite all-purpose flours for pound cakes are King Arthur Baking’s All-Purpose Flour and Bob’s Red Mill’s All-Purpose Flour.

Baking Soda: This Apple Pie Pound Cake contains sour cream, which has active cultures added to give it its signature tangy flavor and texture. These active cultures transform the milk into a beautifully acidic component, so baking soda is the proper leavening for this particular cake.

Kosher Salt: Salt is very important in any dessert; it balances the sugar and keeps the dessert from becoming overly sweet. It doesn’t take a lot of salt to balance the sugar in a cake recipe, so measure this ingredient very carefully. If you’re using table salt or fine sea salt for this recipe, make sure to cut the amount in half.

Unsalted Butter: Coming in at 345 grams (or 1 ½ pounds!), butter has a starring role in this cake! It gives an unmistakably characteristic and buttery flavor, but that’s not all! In addition to that special flavor, the creaming process creates the absolutely necessary air pockets that help this cake to rise. Additionally, the fats in the butter are needed to tenderize the powerhouse protein molecules in your flour and egg whites. This ingredient does a lot of work here! Use good butter for this cake, and make sure that it’s room temperature before you begin. I set my butter out for at least two hours before baking time. If you don’t have two hours, 10-20 minutes in your waistband or pocket (or, as my mother would say, in your bra over your heart) will do just fine.

Granulated Sugar: The sugar in this recipe adds a nice sweetness to this cake, and it also helps with caramelization! That gorgeous crust on the outside of your cake is largely due to the granulated sugar in this recipe!

Eggs: The fatty yolks add flavor to this amazing cake, while the protein-rich egg whites assist with the texture and rise. Be sure to use large chicken eggs for the best results.

Vanilla Extract: Vanilla gives this cake a beautiful, warm flavor. I opted for a whole vanilla bean in this particular cake because it plays so nicely with the apple pie filling. However, if you don’t have a vanilla bean, don’t fret! You can absolutely use a tablespoon of pure vanilla extract. 

Sour Cream: I loved the final texture that sour cream lent to this cake. In a pinch, you can also use 250 g (1 c) of buttermilk. Subbing buttermilk will give you all of the tang that sour cream will; however, you’ll be sacrificing on the additional tendering properties of the sour cream, as buttermilk contains substantially less fat. (On that note, make sure to use full-fat sour cream for this recipe. 😊)

Techniques for the Best Cakes

Who among us has looked at a recipe and been completely intimidated right off the bat? 🙋🏾‍♀️

I have. Many, many times. It’s why I created Begin with Butter in the first place. To be the lil’ corner of the internet where you could find all of the resources that you need to help you become a more consistent and confident baker! So, to help you with this particular recipe, I have some resources on the site I’d like to share. Take a look at one (or all) of them and watch how your baking confidence soars!

These resources are super helpful to help you build consistency and confidence on your baking journey. Happy reading!

But wait! There’s more! Grab your coffee or a glass of wine and get ready to check out my favorite equipment!

Important Tools

Guess what? Begin with Butter has its own Amazon Storefront, where you can find all of the amazing equipment that I used in this Apple Pie Pound Cake! Want even more specific product recommendations? Check out the product links, below.

I do get paid a commission when you purchase, but these are the tools that I use all the time in my own kitchen.

If you have these tools already, great! Think of this as a checklist to help you build the confidence that you’ll need to execute this cake!

Conclusion – This Sweet Pound Cake is the Girl Next Door

BB, this indulgent Apple Pie Pound Cake brings together the best of two beloved desserts – a perfectly moist, vanilla pound cake and the warm, spiced filling of a classic apple pie. The contrast is pure magic: light, tender cake embracing pockets of luscious, saucy apples, all crowned with a silky and luxe cinnamon cream cheese glaze. Whether you’re hosting a fall gathering, looking for a show-stopping dessert for the holidays, or simply craving something special for your weekend baking project, this cake delivers pure comfort in every bite.

Once you make this special cake, I’d love to see your creation! Share your Apple Pie Pound Cake photos with me on Instagram by tagging @beginwithbutter – your success stories inspire all of the BBs in the Begin with Butter community. And if you have any questions along the way, don’t hesitate to reach out to bakingbestie@beginwithbutter.com. I’m here to help you achieve pound cake perfection!

See you tomorrow for Day 4 of the Twelve Days of Pound Cake 2024: Sweet, Spice and Everything Nice! ❤️

Brown Butter Rum Raisin Pound Cake

Y’all. Listen. This year’s Twelve Days of Pound Cake theme of “Sugar, Spice, and Everything Nice” exists because of this cake right here. It’s my Brown Butter Rum Raisin Pound Cake, and it is absolutely the most perfect over-the-top rum cake for every holiday season forevermore.

This is a photo of a Brown Butter Rum Raisin Pound Cake.

This cake, BBs, uses spiced rum to soak the raisins, giving them a deliciously decadent texture and flavor in the final cake. In the cake itself, we have the all-star trio of cinnamon, allspice, and nutmeg, which lend warmth and depth to both the raisins and the sponge. Of course it uses rum, but this cake uses spiced rum, which further enhances the spices in the cake.

Oh! And about the cake…with a brown butter base, the flavor of this cake is so rich, complex and yummy that this pound cake is as perfectly pleasantly plump as they come.

Listen, this recipe uses a lot of ingredients, and I never, ever want you to waste ingredients on a failed baking project. So, to make help you feel more confident with this fun baking project, make sure that you take a look at the resources in this post after the recipe! They’re designed to increase your consistency and confidence with this stunning centerpiece! ❤️

In this Post

The Recipe

Brown Butter Rum Raisin Pound Cake Ingredients

All-Purpose Flour: I often get questions about why I choose all-purpose flour for pound cakes. All-purpose flour contains a higher protein content than cake flour, which leads to the classic, “pleasantly plump” pound cake that we all know and love.

Baking Soda: This cake contains sour cream, so I chose baking soda for the leavener. Baking soda needs acid to activate, and the acid in the sour cream (and, to a lesser extent, the acid in the raisins!) helps this activation.

Kosher Salt: Every dessert needs salt, in order to avoid becoming overly sweet. The tiny bit of salt creates a huge amount of balance in this pound cake, and helps even out what could be competing spice flavors. If you’re using table salt, cut the amount in half for the best results!

Ground Cinnamon: Cinnamon adds a woodsy, deep flavor to this cake. A little goes a very long way!

Ground Allspice: Allspice is so aptly named; its flavor profile has elements of cinnamon, pepper, nutmeg, and cloves, which enhances the “spice” in this spice cake. This cake has big, big flavor, and the allspice is one of the reasons for that.

Nutmeg: Nutmeg gives a warm and slightly spicy element to this cake. So yeah. YUM.

Brown Butter: That’s right, BB. This cake uses brown butter. It’s a additional step but it lends massive flavor. In this particular recipe, we actually need to re-solidify the brown butter so that it can work together with the sugars to cream. This process adds additional leavening to the cake.

Vegetable Oil: You can use any vegetable oil for this cake; my personal favorite for baking is avocado oil, with its very neutral flavor profile. The oil in this recipe is a humectant, which means that keeps the cake moist (🙉) for longer, so even though it probably won’t last very long, at least you have a little insurance that it can last for a few days longer than it otherwise would!

Granulated Sugar: Granulated sugar makes recipes sweet, to be sure, but the sugar in your recipes does a whole lot more! Combined with the butter, it helps create volume and lift for this cake, preventing it from becoming dense. Sugar also leads to caramelization, so that beautiful browning on your cake comes from this special ingredient!

Dark Brown Sugar: In addition to all of the wonderful characteristics of granulated sugar, dark brown sugar has the delicious element of molasses that adds to the deep, rich flavor of this cake.

Eggs: The protein-filled egg white helps with cake rise, and the fatty yolk gives you delicious flavor. The egg is truly a multi-tool in a shell!

Pure Vanilla Extract: The vanilla in this cake provides the perfect adds an additional warmth that is perfectly welcome in this showstopper of a cake. 

This is a photo of a Brown Butter Rum Raisin Pound Cake.

Full-Fat Sour Cream: Full-fat sour cream adds delicious flavor, and the high fat content in the sour cream provides tenderizing qualities that keep the proteins (from the flour and the egg whites) from becoming too tough.

Raisins, Soaked in Spice Rum: The raisins in this cake get soaked in spiced rum. This creates deliciously plump surprised in every bite of this amazing cake.

Now that you know what the ingredients do in this cake, let’s take a look at some technique tips that will help you execute this cake absolutely perfectly!

Techniques for the Best Cakes

Listen, this cake has a lot of ingredients and a lot of steps. I wouldn’t post it, though, unless I knew it would be accessible for bakers at every level.

(That’s you, BB. You’re “baker”.)

But I get it. Sometimes, we look at ingredient lists and think “nope”. And we miss out on some of the best recipes because of it. So I’ve curated a list of technique posts from the BwB site to help you have fantastic, unexpectedly amazing results with this recipe every time you make it!

These resources are super helpful to help you build consistency and confidence on your baking journey. Happy reading!

But wait! There’s more! Grab your coffee or a glass of wine and get ready to check out my favorite equipment!

Important Tools

Guess what? Begin with Butter has its own Amazon Storefront, where you can find all of the amazing equipment that I used in this Brown Butter Rum Raisin Pound Cake! Want even more specific product recommendations? Check out the product links, below.

I do get paid a commission when you purchase, but these are the tools that I use all the time in my own kitchen.

If you have these tools already, great! Think of this as a checklist to help you build the confidence that you’ll need to execute this cake!

Conclusion – You’ve Got This

BB, this rum-soaked bundt cake might look intimidating at first glance. But, I promise you that you – yes, you! – can create this showstopper in your own kitchen. The secret ingredient isn’t fancy equipment or professional training – it’s time. By treating time as an essential ingredient (whether it’s the patience needed to brown your butter properly, letting those raisins luxuriate in their rum bath, or allowing each egg to fully incorporate), you’re setting yourself up for success.

Before diving in, take a few extra minutes to read through not just the recipe steps, but all the additional tips and notes provided. Understanding why to brush the cake multiple times with rum reduction, or how to achieve the perfect glaze consistency, will give you the confidence to tackle each step.

Remember: great baking isn’t about rushing to the finish line – it’s about enjoying the journey and respecting the process. When you do, the result is this incredibly moist, perfectly spiced Brown Butter Rum Pound Cake cake that’s worthy of any celebration. Happy baking BB! I’m cheering for you! Don’t forget to tag me in your finished product photos on Instagram (@beginwithbutter) so that I can celebrate you!

(Still got questions? Reach out to me at bakingbestie@beginwithbutter.com and I’m happy to help!)

Mexican Chocolate Pound Cake

Every once in a while at Begin with Butter, there’s a cake that comes out that is made for the coveted center spot of the dessert table. This Mexican Chocolate Pound Cake is one of the most incredible chocolate cakes that I’ve ever tasted and deserves a RESERVED parking spot at every holiday and party gathering. This cake is dense yet impossibly tender, with that characteristic pound cake richness, it’s warmed by cinnamon and kissed with just enough cayenne to give it a deep, smoky heat that is not at all unwelcome in this cake. Every bite starts with deep chocolate notes and ends with a gentle, warm spice that lingers (in the best possible way).

This year’s theme for the Twelve Days of Pound Cake is “Sweet, Spice, and Everything Nice.” And BBs, this Mexican Chocolate Pound Cake surprised even me with its impossibly rich, warmly spiced flavor. The combination of rich chocolate, warm cinnamon, and that subtle cayenne kick turned out to be exactly the show-stopping cake I was hoping for (and based on the empty plates at my taste-testing sessions, I’d say mission accomplished).”

Let’s get onto the recipe, shall we? And, bonus, after the recipe there are so many resources available after the recipe that will help you be even more successful, so stay tuned!

In this Post:

The Recipe

Mexican Chocolate Pound Cake Ingredients

Even more than understanding what works in a recipe, it’s my hope to show you why the recipe works. A huge part of that comes from an understanding of the ingredients that I use in each recipe. 😊 For that reason, for every cake I create, I give you the science behind the ingredients!

Read on to find out the science behind this amazing cake. (And psst…recipe tinkerers, reading about the science can help you successfully personalize this cake!) 😊

All-Purpose Flour: A pound cake has to have a pleasantly plump texture. In my experience (and with my cakes), that beautiful texture comes from all-purpose flour. That particular flour is absolutely perfect to give me the rich, delicious texture that this cake demands.

Natural Cocoa Powder: Natural cocoa powder is the right call for this cake. It contains naturally-occurring acid, so, combined with the sour cream and baking soda, you’ve got a “recipe” (pun intended) for perfect cake rise.

Baking Soda: Natural cocoa powder and sour cream are acidic elements. Because of that, baking soda was the proper leavening to add to this cake.

Kosher Salt: Salt is very important in any dessert; it balances the sugar and keeps the dessert from becoming cloyingly sweet. If using table salt for this recipe, cut the amount in half. And yes, it is even important to control the sweetness level in a cake that features cinnamon and cayenne!

Cinnamon: Mexican chocolate is so-named because of the spice and/or chile combinations. While there are many, many versions of “Mexican Chocolate”, one constant in all of the recipes I’ve seen is cinnamon. The warm, woodsy, deep flavor of cinnamon is so welcome in this cake, and it’s one of the things that makes it so special.

Cayenne Pepper: Cayenne pepper gives this cake a wonderful spice level, to be sure. But the purpose of the cayenne is more to deepen the chocolate flavor even more. Will you taste a spiciness in this cake? Yes. But will you also notice a depth of flavor that you’ve never experienced in chocolate cake before? Also, yes.

Unsalted Butter: This cake has huge flavor, and butter plays a delicious part in that. Additionally, properly creaming butter and sugar creates air pockets that assist with cake rise.

Full-Fat Cream Cheese: The full-fat cream cheese adds additional delicious fat to this recipe, while also giving the cake an even more rich mouth feel. 

Granulated Sugar: Granulated sugar gives our cake the sweetness that it needs, but did you know that granulated sugar is also responsible for caramelization too? As the sugar caramelizes, it develops a golden-brown color and a nutty, toasted flavor that perfectly complements the spice and chocolate notes in the finished cake.

Eggs: The protein in the egg whites helps to adds structure to the cake, while the fatty yolk adds delicious flavor. This recipe calls for six eggs, which helps create a strong structure while also adding to a rich texture. Eggs truly are incredible if you think about it. Two opposing forces (protein builder and fat bomb, whose job is to neutralize protein) in the same shell? It’s fascinating if you think about it.

Vanilla Bean or Pure Vanilla Extract: The vanilla in this cake provides the perfect adds an additional warmth that is perfectly welcome in this showstopper of a cake. 

Full-Fat Sour Cream: Sour cream has a much higher fat content than buttermilk, and I wanted to use sour cream to reach the texture that I envisioned for this cake. It worked beautifully, as sour cream further tenderizes the proteins in the flour and egg whites, and creates a dreamy texture that only happens when these ingredients play together.

Coffee: That’s right. Coffee! Coffee is famous for deepening chocolate notes even further. This cake is something truly special to taste, because this recipe, as written, does everything possible to create the richest, most beautiful chocolate cake experience. I hope you positively fall in love!

Now that you’ve got the science, let’s get to some other fun…all of my tips and resources to help you become positively proficient with this cake!

Techniques for the Best Cakes

Sometimes, baking can be a tricky business. We often don’t know the why or the how…we just know the recipe and someone’s rationale for why should follow them.

Fear not, BB! Today, I’m giving you the links for some of the technique articles on the Begin with Butter site, and the Begin with Butter Home Baking Academy. These will help you tremendously when you get into the kitchen to make this cake!

These resources are super helpful to help you build consistency and confidence on your baking journey. Happy reading!

Important Tools

Guess what? Begin with Butter has its own Amazon Storefront, where you can find all of the amazing equipment that I used in this Mexican Chocolate Pound Cake! Want even more specific product recommendations? Check out the product links, below.

I do get paid a commission when you purchase, but these are the tools that I use all the time in my own kitchen.

If you have these tools already, great! Think of this as a checklist to help you build the confidence that you’ll need to execute this recipe!

This Mexican Chocolate Pound Cake isn’t just another dessert – it’s a rich, deep chocolate holiday showstopper that’ll have everyone asking for more and more slices at your gathering! And while its flavors might sound sophisticated, please don’t be intimiated. ❤️ With the tips and techniques shared above, you’ll be surprised at how smoothly this cake comes together. Have questions along the way? I’m always here to help! Drop me a line at bakingbestie@beginwithbutter.com – nothing makes me happier than helping fellow bakers create their own moments of butter-and-sugar magic.

When you make this recipe, don’t forget to tag @beginwithbutter on Instagram so that I can share your wonderful success! See you next time!

How to Make Brown Butter

When you run a site called Begin with Butter, you get a lot of questions about what type of butter you prefer. Indeed, you write whole posts about butter, where you wax poetic about cultured butter, sweet cream butter, and even vegan butter. But what if I told you, dear BBs, that there is a kind of butter that has such an intensely rich, deep, and complex flavor. That that flavor profile elevates any baked good that it touches. That the process for making this magical ingredient was simple, involving only a pot, a wooden spoon and some patience. This ingredient is brown butter, and it is as versatile and perfect as any ingredient. Ever.

About Brown Butter

Brown butter is what happens when you slowly heat butter past its melting point. The butter actually separates into milk solids (which are the things that brown at the bottom of the pot) and liquefied fats. The solids sink to the bottom of your pan, coming into better contact with the heat, and they…toast. It’s truly a beautiful thing to see, but it’s a delicious and important ingredient to use, as it imparts a more complex, richer butter flavor into everything it touches!

Why do you want to use brown butter? Well, brown butter adds a deep, irreplaceable flavor to anything it touches. It’s nutty and caramel-y and rich. And that only comes with this special ingredient. While using it can be a touch tricky at times, it is always worth the effort.

How to Brown Butter: A Photo Tutorial

The process of browning butter is actually quite simple. You just need to remember to go slowly and stir once the butter has melted.

First, you’ll place the amount of butter that you need in a small saucepan or stainless steel skillet. It’s best to use a pan with a light-colored bottom; stainless steel is perfect for this task. Use the best butter that you can source for this adventure! (Note: many sources recommend that you don’t use more than two sticks/1 cup/227 grams of butter at a time. However, I’ve successfully used up to 3 sticks/1.5 cups/341 grams of butter for this task.)

Place the butter in the pan on a stovetop over medium heat. Leave it alone for a few minutes while it melts. You don’t have to stir at this point; you’d only be stirring solid butter anyway. 😂

Once the butter melts completely, you’ll need to start stirring. You do want to stir regularly, but you don’t have to stir constantly. The reason for stirring is this: the milk solids that are part of the butter will separate from the water and fat in the butter and those milk solids will go to the bottom of the pot and stay there (and burn!) if they’re not stirred on a regular basis. If that happens, the milk solids will burn before the rest of the butter gets to be a gorgeous amber color.

As it cooks (and you’re stirring), the brown butter will change color; it will go from light yellow (melted) to golden, to an amber hue with the butter solids at the bottom. During this process, you’ll also notice that the top of the butter gets very bubbly!

The bubbles can actually make it difficult to see what’s going on underneath. Pro tip: I look at the milk solids on the side of my pot, because those will loosely inform me when the milk solids underneath are done!

You’ll know you’re done with this step when you smell a positively gorgeous nutty, caramel-y scent in your kitchen. Once you’re done, remove the brown butter from your heat immediately to a heat resistant container. Mason jars work perfectly for this task, as they’re meant to withstand high temperatures.

And that’s it! You’ve made brown butter!

How to Use Brown Butter

Once you allow the brown butter to cool to room temperature, you can use it in a number of preparations. If your recipe calls for cooled brown butter that hasn’t re-solidified, you’re ready to go! If, however, there’s a recipe where you need to have brown butter re-solidified so that you can cream the butter with granulated sugar, then you’ll need to refrigerate the brown butter so that it can re-solidify fully. Trying to cream liquid brown butter with sugar will not lead to the same result.

In order to re-solidify brown butter, allow the brown butter to cool to room temperature, then place it in the refrigerator until it’s fully solidified. Once it’s solidified, you’ll remove it from the refrigerator about an hour before baking, or when you take out the rest of your cold ingredients. 😊

Congratulations! You’ve made brown butter! Now you can use it in literally everything, because it is truly the most amazing butter ever.

Enjoy BBs!