
Hi BB! Today, we have storage tips for make-ahead desserts, which dovetails perfectly with our Cozy, Curated Holiday Series! This post contains tips for storing your favorite breads, cakes, cookies, and pie dough so that you can make them ahead of serving them, but still have them taste completely fresh (because they are!)


This holiday season, we are keeping things as simple as we possibly can in the kitchen. To that end, I’ve created the Cozy, Curated Holiday Series here at Begin with Butter, which includes an Instagram Live series (with replays you can watch here, here, and here), blog posts (like this very one!), and help via email at bakingbestie@beginwithbutter.com.
In this post, I’ll show you how to bolster your special occasion planning by taking advantage of one of your kitchen besties: your freezer. From this post, you’ll build your kitchen confidence about prepping ahead of time (yay!), storing your baked goods before your event, and preserving the freshness of those same baked goods after they’re done. Making something specific? Use the table of contents to go straight to it!
In this Post:
How to Store Cakes
Pound Cakes
If you’re making pound cakes ahead of your holiday table, you’ll want to finish the pound cake through the bake. Allow it to cool fully on a cooling rack, then brush the fully cooled simple syrup onto the cooled cake. Wrap the cake with a layer of plastic wrap, followed by a layer of freezer paper, and two more layers of plastic wrap (I gave a demonstration of how to wrap pound cakes during this Ask me Anything session!), then freeze, avoiding direct contact with the sides and bottom of the freezer as much as possible. Pound cakes can remain in the freezer for up to three months with proper storage.

To thaw: Remove the pound cake from the freezer. Immediately unwrap it and place on a cooling rack on your countertop for 4-5 hours to allow it to thaw at room temperature. Finish with your desired glaze, then place on your covered cake plate and serve!
Note: I’m often asked whether I freeze cakes after glazing. I do not. Frozen glazes can take on an unpleasant, almost gummy texture. So, I wait to glaze until after the cake is thawed and ready to serve.
Storage: Proper pound cake storage relies on how much moisture exists in the cake and topping. For high-moisture cakes (like my Blueberry Buckle Pound Cake, my Sweet Potato Spice Cake, my Iconic Apple Pie Pound Cake, my Pumpkin Spice Pound Cake, or any cake with fruit and/or high moisture ingredients like sweet potatoes or pumpkin), I prefer to store the remaining cake in the refrigerator immediately (it can remain refrigerated for up to five days), though you can keep them on your countertop for the first 24 hours.
For lower-moisture cakes (think: Very Vanilla Pound Cake, Sour Cream Pound Cake, Crème Brûlée Pound Cake, or Mexican Chocolate Pound Cake), You can generally leave them on the counter for up to seven days.
For cakes that use a dairy-forward topping (like The Best Cream Cheese Glaze), you’ll want to also refrigerate them after one day. That would include cakes like my Bourbon Brown Butter Vanilla Pound Cake, my Ruby Red Velvet Pound Cake, my S’mores Pound Cake (with it’s incredible meringue topping), and my Gingersnap Pound Cake. These cakes can remain refrigerated for up to five days.
With proper storage, you can expect cakes to taste perfect on your holiday tables! Nobody will ever know that you didn’t spend all morning baking and decorating that cake!
Recommended Schedule for the Make-Ahead Process:
- 1-2 weeks before serving: bake the cake; brush with simple syrup; wrap and freeze
- 2-3 days before serving: make and refrigerate the topping
- Day of serving: revive the topping (usually by just stirring with either a spoon or small whisk), decorate with the final topping and serve!
Layer Cakes
Layer cakes follow many of the same freezing rules as pound cakes (plastic wrap/freezer paper/2 x plastic wrap). You still want to allow the cakes to cool fully before wrapping them and freezing them. You can keep them frozen up to two months. With many layer cakes (like my Brown Butter Vanilla Cake with Chocolate Frosting), I don’t use a simple syrup. However, I do allow the layers to thaw fully, unwrapped, on cooling racks (for about 2-3 hours) before I build cake layers into the actual cake.
Storage: Once again, proper layer cake storage depends on whether there is fruit or fruit/vegetable purees between the cake layers, and whether or not there is a dairy-forward topping (like a cream cheese frosting).

For cakes with fruit (strawberries, blueberries, peaches, etc.) baked into the sponge, you can keep the cake on the countertop for up to one day, though it’s best to refrigerate immediately. In the refrigerator, the built cake can last up to five days.
For cakes without high-moisture ingredients (fruit and purees) baked into the sponge (like the aforesaid Brown Butter Vanilla Cake with Chocolate Frosting), and without a cream cheese frosting, you can generally keep the cake on the countertop, covered, for 5-7 days.
For cakes with a traditional vanilla or chocolate buttercream (with just enough milk to help with texture, and without cream cheese), you can keep the cakes on the countertop, covered, for 5-7 days. If this cake has high-moisture ingredients in the sponge, however, you’ll need to refrigerate it.
For cakes with high-moisture ingredients (e.g. fruit) and/or cream cheese (like my Lemon Cake with Cream Cheese Frosting), you’ll want to refrigerate these for up to five days.
Recommended Schedule for the Make-Ahead Process:
- 1-2 weeks before serving: bake the cake; wrap and freeze
- 1-3 days before serving: make and refrigerate the buttercream or topping (except for ganache, if using)
- 1-2 days before serving: Build the layer cake, except for any final touches (like ganache)
- Day of serving: make a quick ganache (if using), cut and serve!
How to Store Pie Dough
If there’s one thing that can make your holiday baking easier, it’s having pie crusts ready to go when you need them. The wonderful thing about pie dough is that it freezes beautifully, and with proper storage techniques, you’ll never be able to tell it wasn’t made the same day!
When it comes to freezing pie dough, you have a couple of options; you can freeze the pie dough discs or you can freeze rolled out pie dough. The most important thing is protecting those beautiful butter pieces that create your flaky layers (like the successful pies that you’re going to make with my Easy All-Butter Pie Crust).
Freezing Dough Discs
For bulk pie dough, proper storage starts right after making the dough. After bringing your dough together, and before you even think about rolling it out, allow it to rest in the refrigerator for at least two hours. This rest time lets the flour fully hydrate, it allows the butter to solidify gradually from room temperature, and allows the gluten to relax. Once your dough has rested, split it into individual servings (for example, my Easy All-Butter Pie Crust makes enough for a top and bottom deep dish pie crust, so you would split the dough in half) and shape it into discs about 1 ½ inches thick – this shape will thaw more evenly than a ball and makes it easier to roll out later. It will also lie more flat in the freezer, which makes the most of that precious freezer space!

Freezing Shaped Crusts
For storing shaped crusts, I’ve found that disposable aluminum pie pans are absolutely perfect; they’re a great size for standard (not deep dish) pie crusts. Remember that they hold about half the volume of a deep dish pie plate, so adjust your filling amounts accordingly so that you don’t end up with a messy oven. 😣
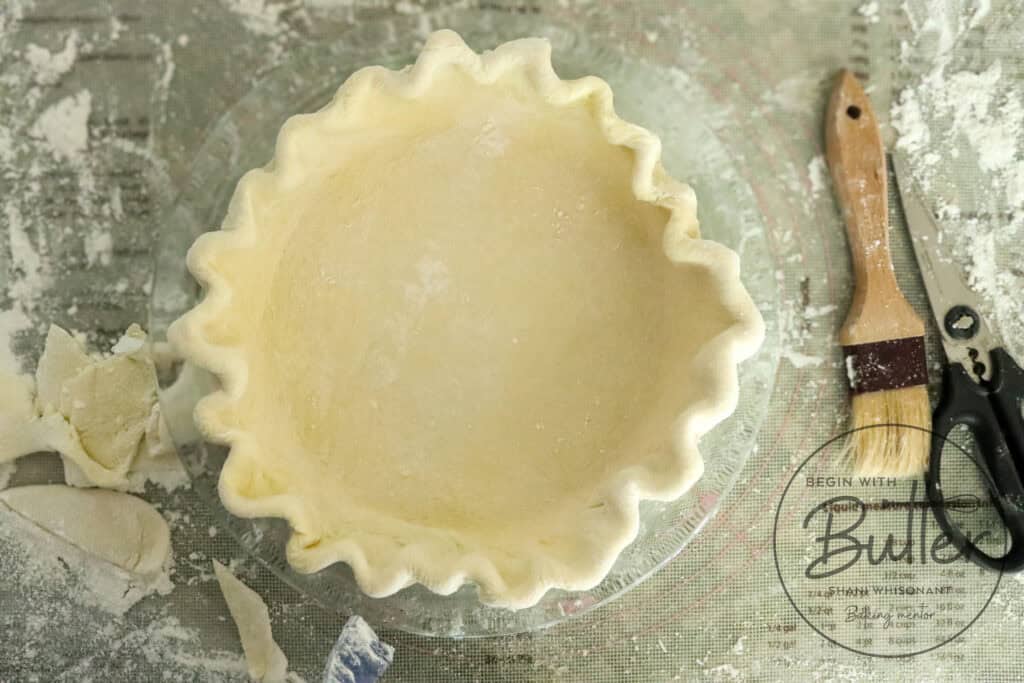
To prepare a rolled-out crust for freezing, make your pie dough and allow it to rest in the refrigerator for at least two hours (but up to overnight). Roll out the pie dough and then shape in the aluminum pan, as the recipe requires. Gently cover with crumpled parchment paper (the crumpling helps you gently press the parchment paper into the dough without damaging it), then gently wrap the entire pan in plastic wrap to eliminate as much air as possible. You can keep properly frozen, shaped crusts frozen for up to two months. If you’re one of the ambitious ones and you want to make a bunch of pie crusts, just remember to allow the pie crust on bottom to fully freeze before stacking others on top of it.
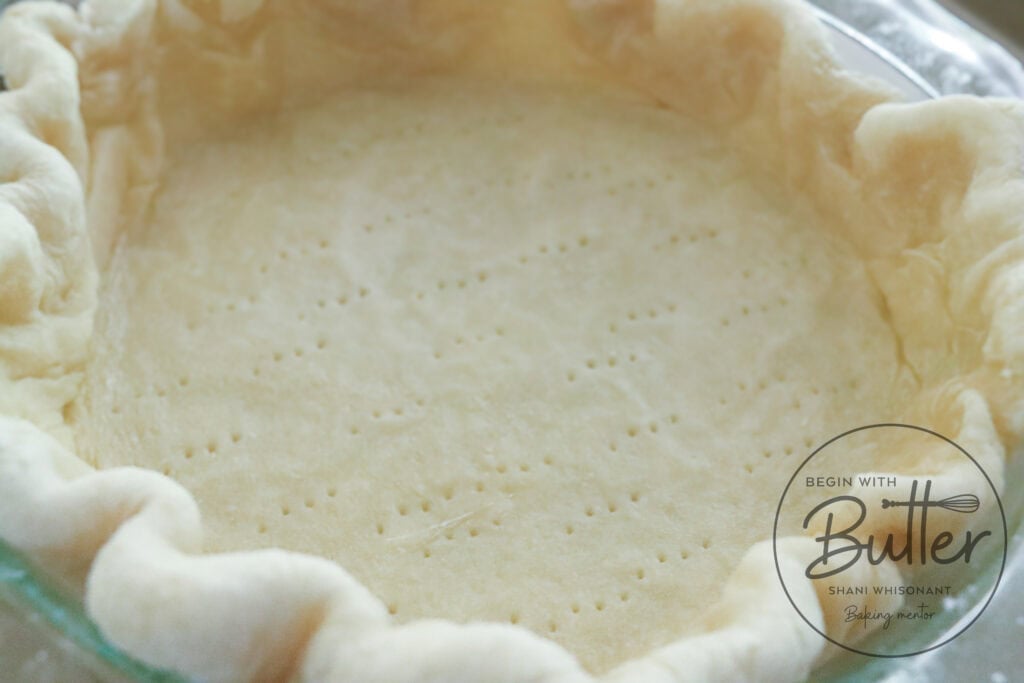
Freezing Par-Baked Crusts
For par-baked (or partially baked) crusts (essential for those Chocolate Pies and Lemon Meringue Pies of your dreams), you’ll want make the dough, then allow it to rest in the refrigerator for about two hours. Roll out and place in an aluminum pie plate, then bake until the crust is just set but not browned (usually about 20 minutes with pie weights followed by 5-10 minutes without). Once it’s fully cooled completely, gently shape crumpled parchment paper over the pie crust, and then wrap the entire pan in plastic wrap. I freeze these par-baked shells for up to two weeks, though common thinking is that they can be frozen for up to a month.
Reviving Pie Dough From Frozen
To revive pie dough discs from frozen, you want to gradually thaw them for 18-24 hours in the refrigerator, and then you’ll want to place them on the countertop for 10-20 minutes before rolling them out. If they are very stiff, wait another 10 minutes and then try again.
For frozen pie shells (whether raw or par-baked), you can either bake them straightaway from the freezer, adding an 10-15 extra minutes of bake time, or you can place them on the countertop for 10-15 minutes before filling and baking. You’ll still need to add some extra time to the bake, but the time on the countertop will knock off a touch of that freezer chill. Either way, keep a close eye on the oven during the baking process, as the actual amount of additional time could vary greatly.
Preparing and Storing Pie Fillings
When it comes to pie fillings, different types need different treatment. For fruit fillings like the one in my Classic Peach Pie, cook and cool them completely before storing in the refrigerator for up to four days.
Custard pie fillings, like the fillings in my Easy and Delicious Quiche or my Sweet Potato Pie, don’t freeze well, but they can be made 1-2 days ahead of baking and refrigerated in an airtight container (another reason to love deli cups!). For custards like lemon curd or pastry cream, always cover with plastic wrap directly on the surface to prevent a skin from forming.
Storing Finished Pies
For finished pies, storage depends entirely on the type. Fruit pies can stay at room temperature, loosely covered, for up to a day, but I urge you strongly to forego countertop storage and keep them in the refrigerator from day one. They can remain in the refrigerator for up to four days once they’re fully cooled.
Custard pies (whether baked or no-bake) must always be refrigerated and will keep for three to four days. I always recommend bringing refrigerated fruit pies to room temperature before serving for the best flavor, while custard pies should be served chilled.


Recommended Schedule for the Make-Ahead Process:
For standard pies:
- Two weeks before serving: prepare and freeze pie dough, according to the chosen method, above
- Two days before serving: move dough to refrigerator to thaw; make pie filling and store in an airtight container
- Day before serving: fill pie and bake pie as directed; refrigerate overnight
- Day of serving: remove from the refrigerator and enjoy!
For no-bake pies:
- Two weeks before: make and freeze the pie crust
- 1-2 days before: make the filling; store in refrigerator in air-tight storage.
- One day before: make the pie as recipe directs; cool and refrigerate overnight
- Day of: remove from the refrigerator and serve!
How to Store Cookie Dough
Friends, let me tell you one of my favorite make-ahead baking secrets: having cookie dough ready in your freezer means you’re always just minutes away from freshly baked cookies! This is especially wonderful during the busy holiday season, because December is the perfect time for cozy cookies on demand.
For most cookies, like my Chocolate Chip Cookies or Snickerdoodle Cookies, freezing your portioned dough is absolutely game-changing. After mixing your dough according to the recipe, allow the dough to rest in the refrigerator for 24 hours. This allows the flour to get fully hydrated, and also allows the butter to gently firm back up before the freezing process.
After the 24-hour rest, use your regular cookie scoop to portion the dough onto parchment-lined baking sheets. Pop these into the freezer until they’re solid (about two hours), then transfer them to a freezer container or bag. These little gems will keep perfectly for up to three months. To make them, you can bake them straight from frozen – just add an extra minute or two to your usual baking time. My personal favorite way is to allow the dough to defrost a bit, then bake. The butter, if frozen, will tend to create very puffy cookies.


Once your cookies are baked, proper storage is key to maintaining their perfect texture. Store cookies in airtight containers at room temperature for up to a week. If you need to store them longer, most cookies freeze beautifully for up to three months – just be sure to thaw them completely before serving.
Recommended Schedule for the Make-Ahead Process:
- Two weeks before serving: prepare dough, refrigerate overnight, portion and freeze
- 1 day before serving: defrost cookie dough in refrigerator for 18-24 hours (optional) OR bake from frozen, adding 2-4 minutes per side.
- Day of event: Enjoy!
How to Store Bread
There’s something truly magical about fresh bread during the holidays, and yes, you can absolutely make it ahead! The key is understanding how different types of bread need different care. Let me guide you through the process I’ve perfected over years of holiday baking.
Lean Breads
For lean breads like my Simple Sunday Artisan Loaf, the primary goal is maintaining that perfectly crispy crust while keeping the inside tender and fresh. Once they’re baked, you never want to refrigerate these breads – the refrigerator makes them get stale and dry even faster. Instead, store them at room temperature in paper bags for two to three days, or cover and freeze them for up to three months if you need to store them for a longer period of time.
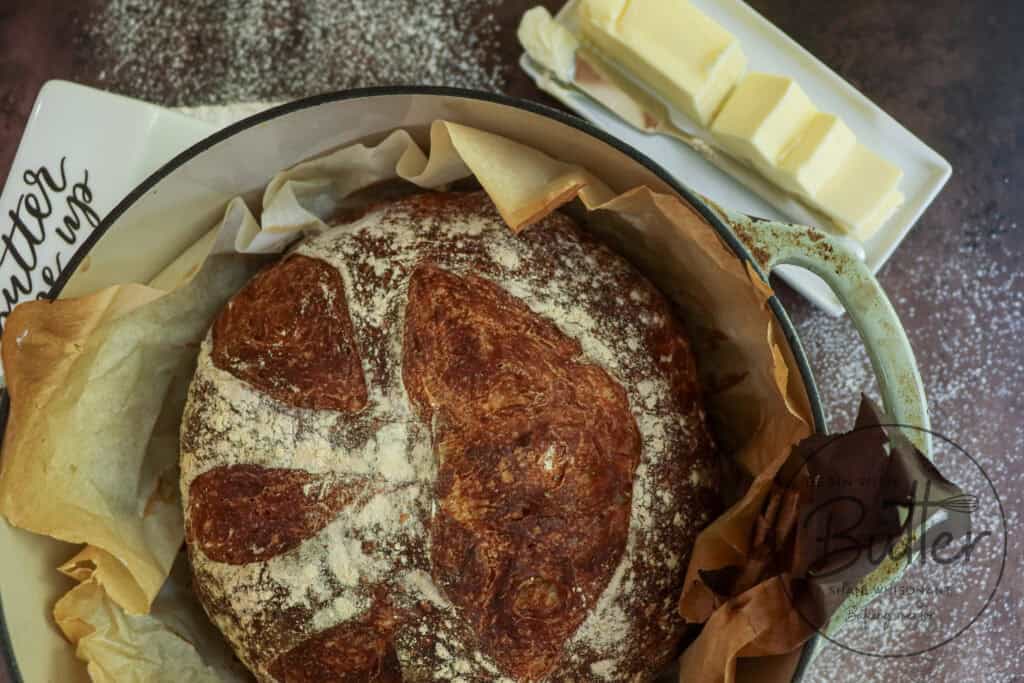
It’s important to allow these breads to cool completely before wrapping and freezing – this prevents unwanted condensation (water) from getting trapped on the inside of your perfect wrapping. Once the bread is cool, wrap it carefully in plastic wrap, followed by freezer paper, then place the wrapped bread in a large freezer bag (or another two layers of plastic wrap, if it will not fit in a freezer bag). Store bread away from items that might crush it. When you’re ready to serve, thaw the bread at room temperature for about three hours, then pop into a 350°F oven for 5-15 minutes to warm it through and recreate a beautiful crust.
Enriched Breads
For enriched breads (think: cinnamon roll dough or my Perfect Sunday Dinner Rolls), the added butter, eggs, and sugar mean that storage has to take a different approach. These breads stay softer longer but need protection from drying out. When storing at room temperature, keep them in an airtight container for up to a day. For longer storage, it’s best to keep them in the freezer for up to two months.
Recommended Schedule for the Make-Ahead Process:
- 2 weeks before: prepare and freeze bread
- 1 day before: begin thawing process
- Day of: finish thawing, warm if desired
Conclusion: You’ve Got this, BB.
Special occasions don’t have to be an occasion for stress and angst. With a little bit of planning, you, the maker, can have just as magical a time as all of your guests.
This season, it’s my prayer that you enjoy the holidays with your family and friends, and that these prep tips help you feel just a little less stressed about it all.
We are here to help you succeed with your holiday baking planning! If you have questions about specific recipes, feel free to reach out to us at bakingbestie@beginwithbutter.com, and we will be happy to help you!
Our Ask Me Anything holiday series is also a great way to learn actionable baking tips that will help you achieve meaningful improvements in your holiday planning and baking. I hope to see you on Instagram Live for a session or two!