This post contains affiliate links. While I receive a small commission if you purchase from these links, they are products that I use and trust in my own kitchen.
There are a few tasks in the kitchen that make even experienced bakers a lil’ nervous. That’s because they are a true test of baker’s feel. And baker’s feel is the mark of a true baker. And BBs, an all-butter pie crust is one of those nerve-wracking things.
I’ve heard all of the objections, Friends:
“Pie crust is too difficult to make from scratch.” FALSE. It takes literally five minutes to make. The hardest part is waiting while it refrigerates.
“It’s impossible to get all-butter pie crust to be as flaky as a shortening pie crust.” FALSITY FALSE FALSE FALSE FALSE! With good technique, this all-butter pie crust can be as flaky as any other.
“My pie crust is always underbaked.” A Pyrex pie plate and good technique will help you avoid this. Because the payoff is so worth it.
“I don’t have all day to work on pie.” This one is actually kinda valid. 😂 If you don’t have enough time to make a good pie, then you should definitely leave this dessert for another day. #TimeIsAnIngredient.
All-butter pie dough is in your reach. I’m going to ensure it today. ♥️

About this All-Butter Pie Crust
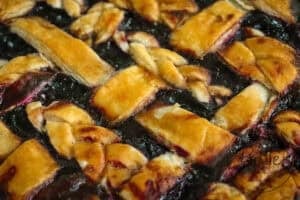
This all-butter pie dough is a classic all-butter dough that can be used for many different types of pie. Whether you make Classic Peach Pie, Cherry Pie, or even hand pies, this dough caramelizes beautifully, is incredibly flaky, and tastes incredible. While the ingredients are consistent with (literally) thousands of other pie dough recipes, it is the instructions and the ratios of this particular recipe that make it so wonderful.
All-Butter Pie Crust Ingredients
All-Purpose Flour: Okay BBs, here’s the thing. The type of flour that you use for this pie crust depends entirely on your comfort level with making pie. While I recommend all-purpose flour because of the higher protein content (leading to a lessened likelihood that the pie crust will fall apart in your hands when you’re working with it), I actually use White Lily All-Purpose Flour for my pie crust. It leads to positively crust shattering results. White Lily All-Purpose has a lower protein content (9%) than Gold Medal All-Purpose (10.5%), King Arthur All-Purpose (11.7%), and Bob’s Red Mill All-Purpose (10-12%) flours. So, White Lily flour, combined with the laminating technique that I use, leads to incredible pie crust results.
Fine Sea Salt: A small touch of fine sea salt in the crust gives this pie crust delicious flavor.
Granulated Sugar (optional, I use it for sweet pies): A couple of tablespoons of granulated sugar give this pie crust a nice sweetness, and also helps with caramelization. The granulated sugar in the pie filling enhances the sweetness of a sweet filling. If you’re making a savory pie (like a chicken pot pie or leftover roast beef hand pies), then you can omit the sugar.
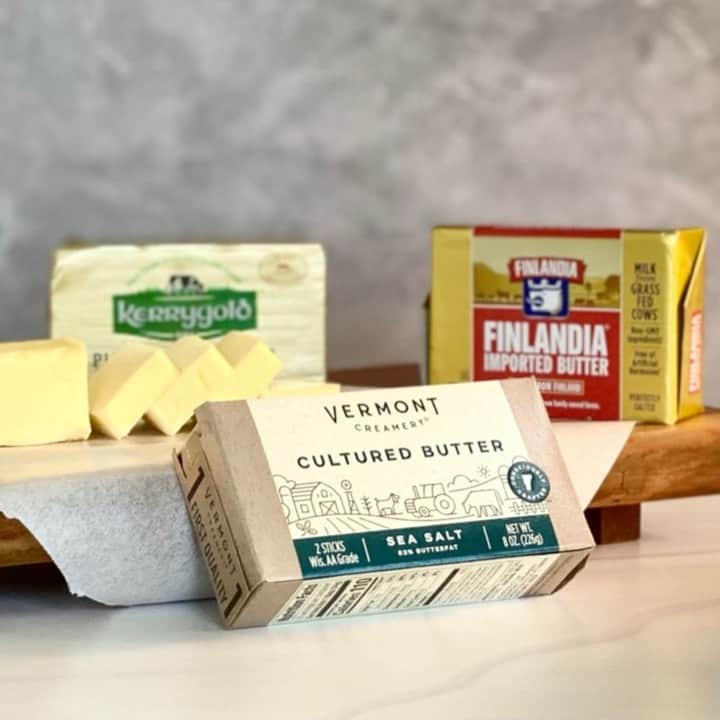
Cold Butter: This pie crust uses the grandaddy of all pie crust fats: BUTTER. Butter, in my humble opinion, gives pie crust the absolute best taste. The laminating process (which we’ll talk about a little further down) helps ensure that this crust shatters all over your clothes like the best croissant. You’re welcome. 😊
Water: This ingredient is the bane of the existence of many a pie maker. Too little and you get a positively dry pie crust. Too much and you get a pie crust that never reaches its flaky potential. Oh, and every pie crust has a magic amount of water that only it knows before you start. There are so many variables that impact how much water a specific pie crust needs, and BB, you can only figure this out with practice.
Now that you know what goes into your dough, let’s get into the whys and hows of perfect pie dough. And how to transform that perfect pie dough into perfect pie crust.
How to Make All-Butter Pie Dough: A Step-by-Step Tutorial
Before You Start Making Your Dough
Tools: Make sure your stainless steel bowl, your pastry cutter (also called a pastry blender), and your fork are ice cold. I mean it! Put these tools in the freezer about 30 minutes before you’re ready to begin. That cold will buy you valuable time when you’re making your pie dough.
Ingredients: Place your cold butter, cut into tablespoon-sized chunks, into the freezer right next to your cold tools. Like those tools, you also want your butter to be ice cold for at least 30 minutes. Some people like to grate frozen butter into their pie dough, but I prefer this method.
Water: You need two containers for water. One large container that holds ice water, and a smaller, empty container into which you’ll pour the water amount for your recipe. Put a pin in this for now. Just go on and fill that big container with ice water and let’s go on to our next steps. 😊
So, now that your tools, butter, and water prepped to go, let’s move on to the make:
Step 1: measure your flour with a digital kitchen scale.
This technique gets a whole step devoted to it because it is that important. You see, pie is crazy fickle about its water/flour ratio. We want to have as much control as possible in this circumstance, so making sure that we begin with an accurately-measured flour amount is key. As humans, we have a tendency to put too much flour in a bowl when we use a measuring cup. That, friends, is enough to ensure that your pie crust doesn’t succeed. So, a digital kitchen scale is key to getting set up for success.

Step 2: place flour, salt, and sugar (for sweet pie preparations) into the stainless steel mixing bowl.
That’s right, it’s time to take the stainless steel mixing bowl and the fork out of the fridge. Leave the pastry cutter for a couple more minutes; we will get to it, I promise! Use that fork to mix your dry ingredients thoroughly. There’s no tell-tale way to know when this mixture is ready to go, so I just give it about twenty turns in my bowl and call it a day. Hasn’t failed me yet.

Step 3: place the tablespoons of butter into the flour/sugar/salt mixture.
Put that pastry cutter down. 😂 Before you even look towards that freezer to retrieve your pastry cutter, you need to coat the tablespoons of butter with the flour mixture. Because while the butter is going to get stuck in the pastry cutter (and that can’t be avoided), we want to minimize sticking. Having the flour coat the butter helps us achieve that.
So, for this step, we need to place the tablespoons of butter into the flour/sugar/salt mixture that is in your stainless steel bowl. And use that fork to toss the butter in the flour for a few seconds.
So, start here:
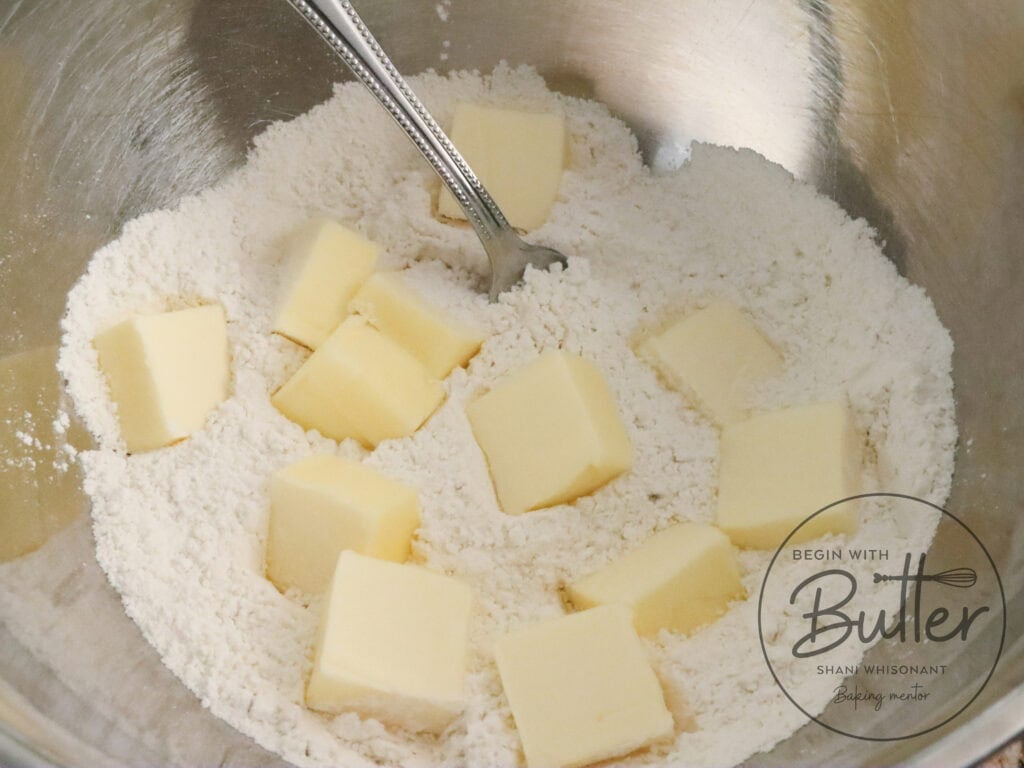
And coat:
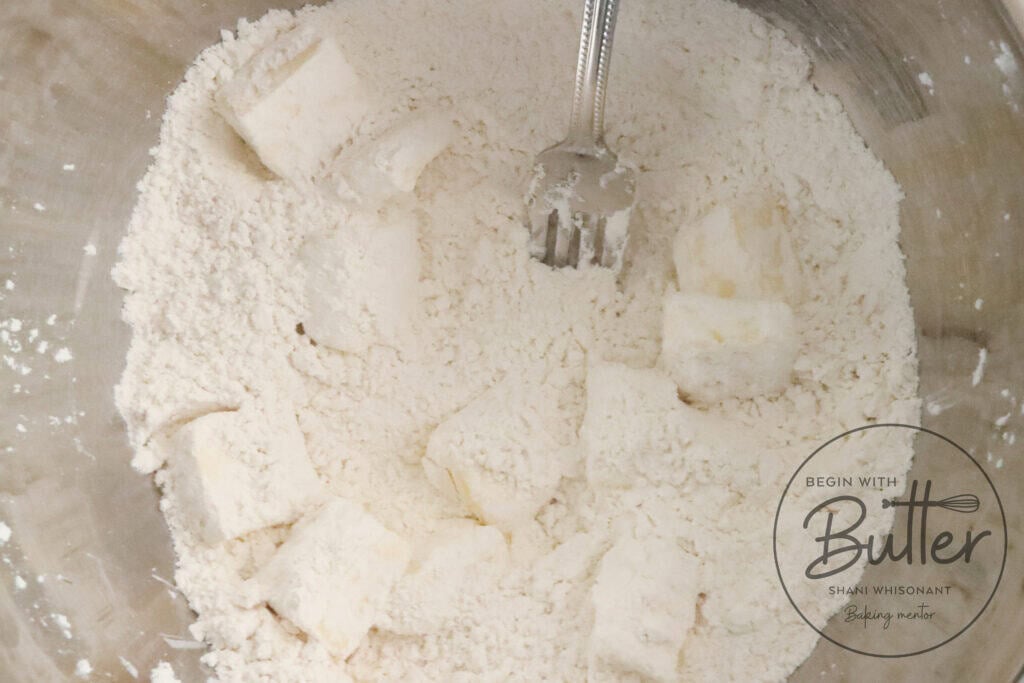
before you move to the next step.
Step 4: use the pastry cutter to break the butter into uneven pieces.
That’s right. Uneven. Pieces. You want some pieces to be the size of pecans (or “pi-kahns” as my family says) and others to be the size of green peas. (If you hate green peas, this is the point where you make the retching noise, so go on ahead and get that out of the way 😂). We are not aiming for evenly-sized pieces. And we don’t want tiny, dirt-sized pieces either. We want some larger pieces because, as that butter melts in the oven, it creates steam. And, in pie crust, steam means layer upon layer of pie crust goodness. But you cannot get a proper crust if the butter has been completely obliterated into tiny pieces.
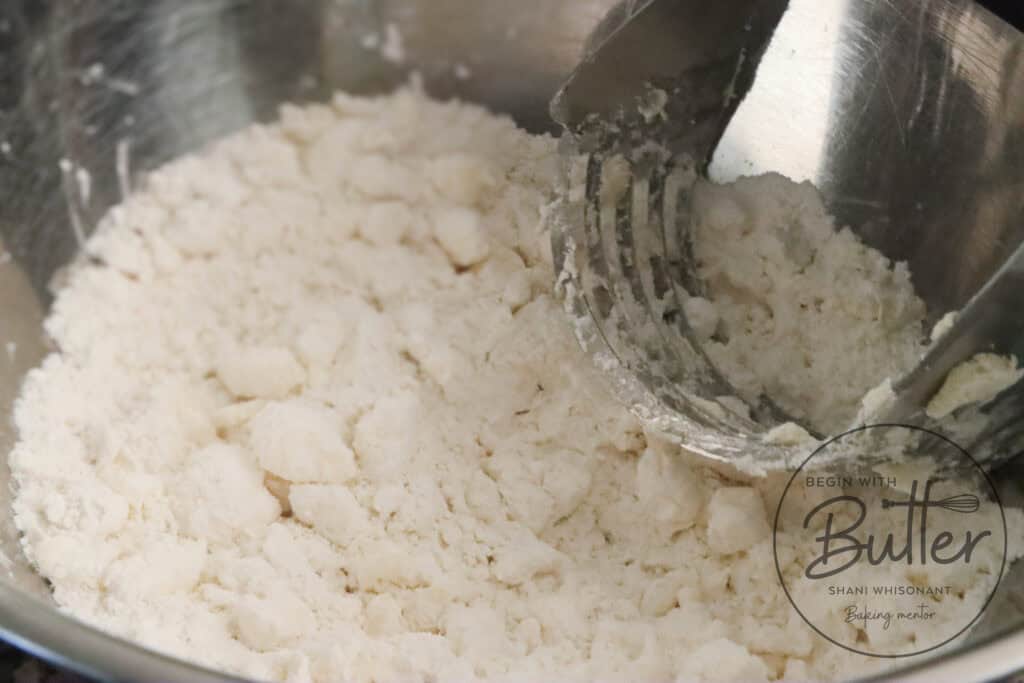
Remember what I said before: some of the butter will get caught in your pastry cutter. This is where that fork comes in handy yet again. I just use my fork to free the butter from the pastry cutter and continue on my pastry cutting way.
This whole step takes about 45-60 seconds.
Step 5: toss everything with a fork to create a fairly even layer of flour/salt/sugar/butter in your bowl.
This part is important, because water is next and we don’t want one part of the flour/butter mixture taking on a disproportionate amount of water and getting soaked. So, either use your fork to even things out as much as possible, or give your bowl a shimmy shake. Either way, the result will be the same. Just don’t shimmy shake too hard or you’ll have flour all over your kitchen.
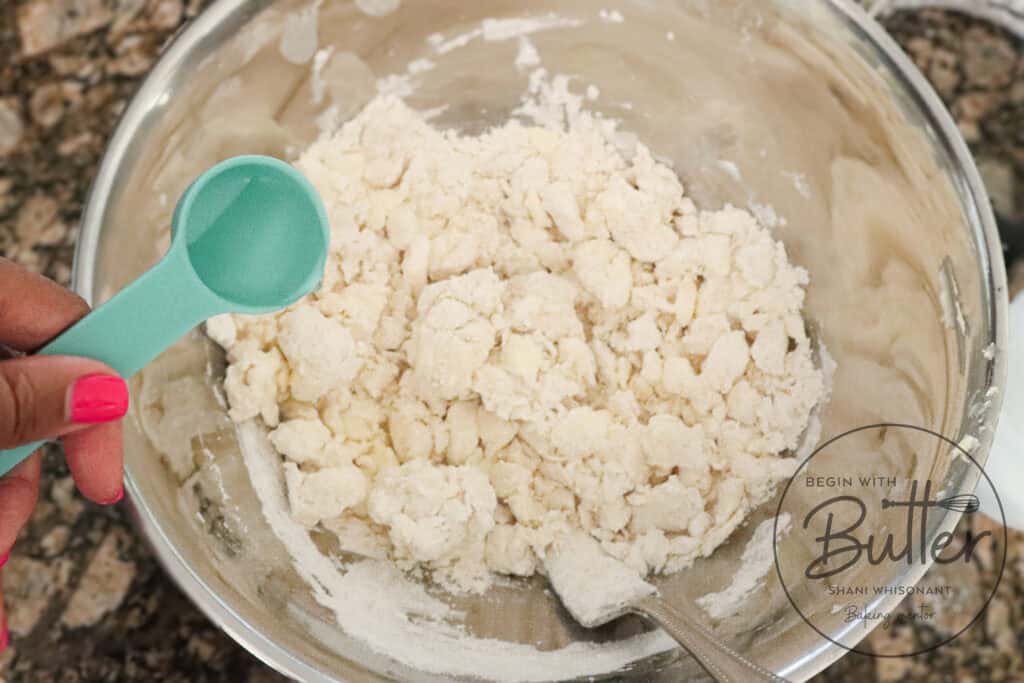
Maybe start with the fork…
Step 6: pour 125 grams (1/2 c) of water from your large water container into your small water container.
Notice I said water. Do everything in your power to eliminate the ice from the equation. Also, I strongly urge you to once again measure your water with your digital kitchen scale. Remember, water is the ingredient that usually causes the most problems with pie dough, so accurate measurement here is critical.
If you do accidentally pour some ice in the second container, you can just use a spoon to get it out. But it’s important to remove it!
Step 7: pour the water over the flour/butter mixture evenly, making sure not to concentrate too much water on one spot.
Take the water and pour in a circular motion over the flour, taking care not to moisten (🙉) one spot too much.
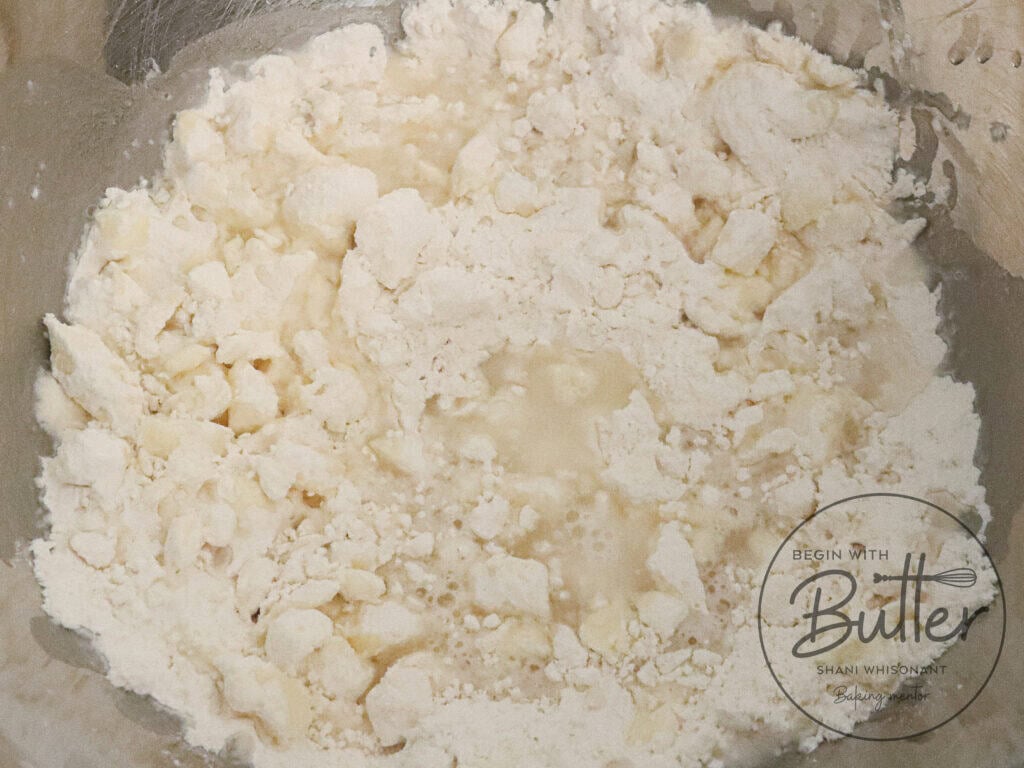
Remember: do. not. dump. Do the chef-y thing where you pour with a flourish. That’s actually a perfect move here.
Use your fork to gently stir the moistened (🙉) mixture, trying to expose as much of the flour to the water as possible. The goal is not to create a batter-like mixture. The other goal is not to mix too much, because that will cause too much gluten development (and too much gluten development causes chewy, dense crust). The goal of a perfectly mixed pie dough is to make it look like this:
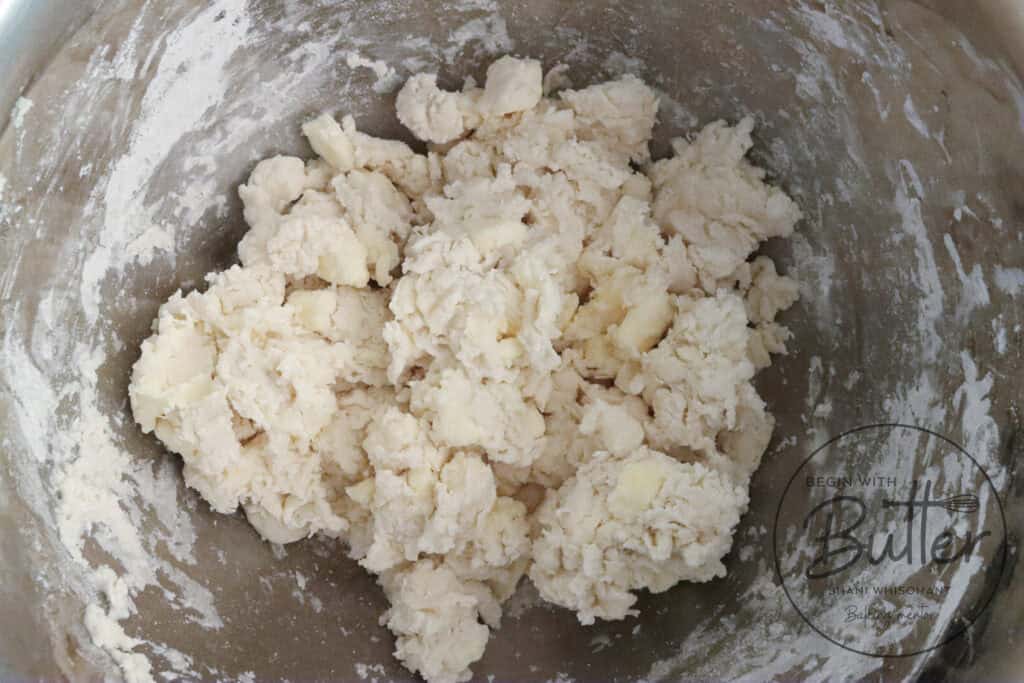
When you’ve reached this stage, you’ll notice that the dough looks crazy shaggy, it feels ever-so-slightly tacky to the touch, and the dough will stick together when you gently press a bit of it in between your fingers. This is the point where you stop adding liquid and split it into two halves. Like this!
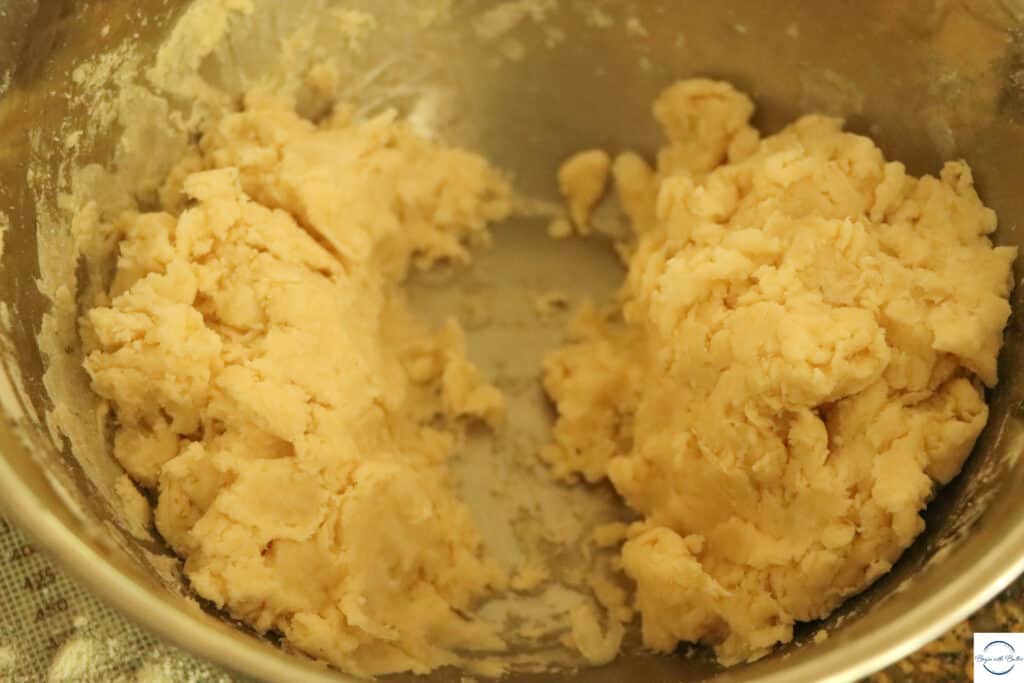
Note: the halves won’t be exactly equal and that is okay! You’ll use the visibly larger half for the bottom crust in a double crust preparation. If you’re doing a single crust pie, you don’t need to split the dough.
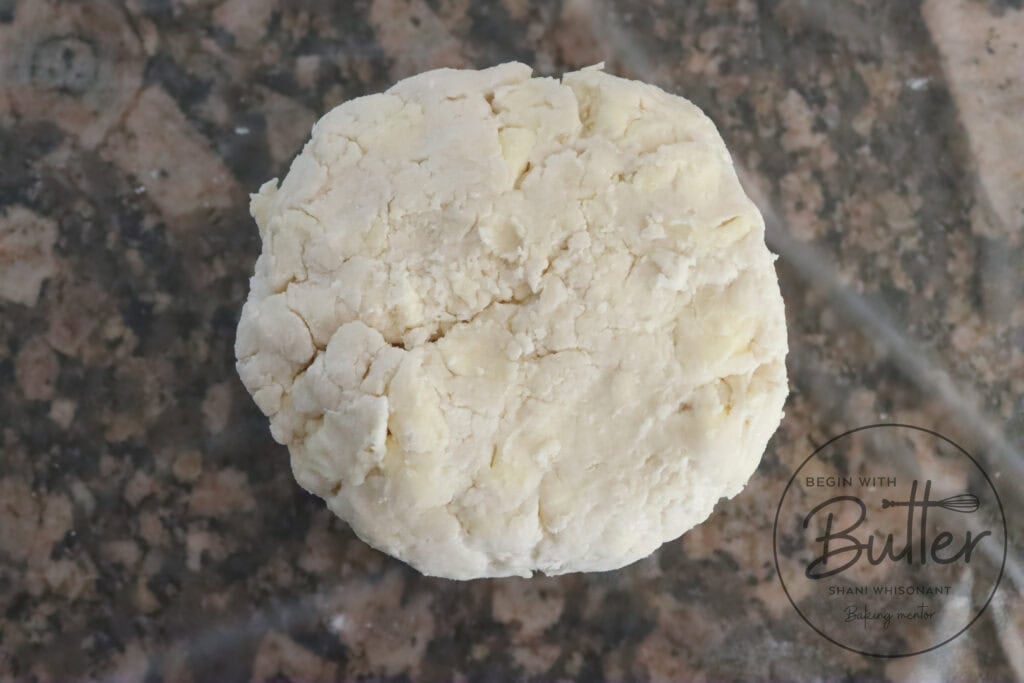
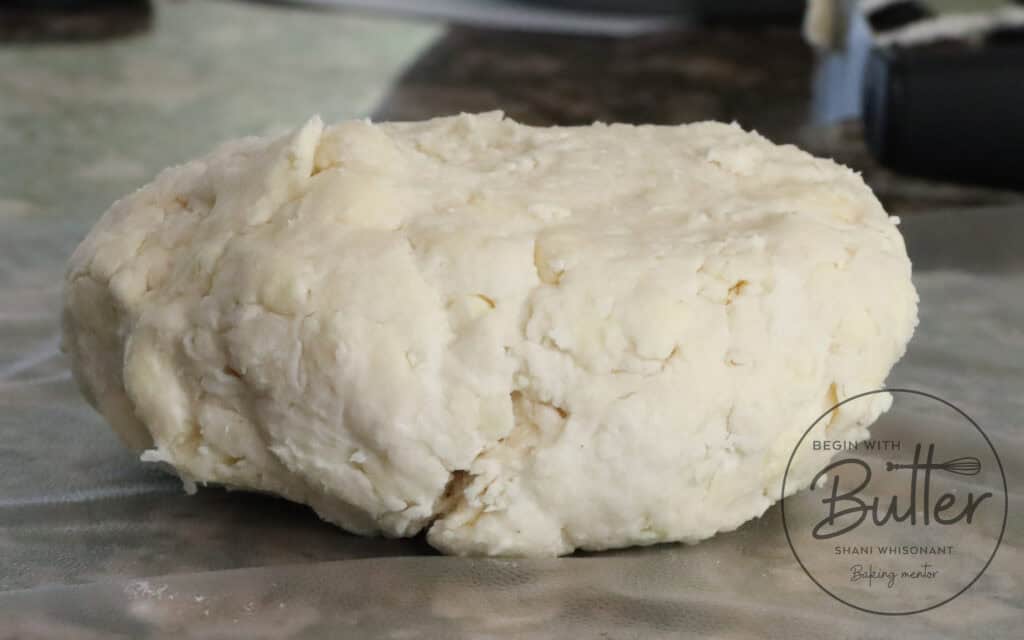
Step 8: form each half into a thick disc and place in plastic wrap.
Use your hands to form each half of your dough into a thick disc.
Wrap each disc tightly in plastic wrap and place into a refrigerator for at least two hours. Don’t skip this step, thinking you’ll save time. The butter needs time to firm back up in the refrigerator before you roll it out. Skipping this step = melted butter and unimpressive, flat pie crust that is decidedly not flaky.
Step 9: put your rolling pin in the freezer and prep your rolling area for maximum chill.
While your dough does its thing in the refrigerator, you should place your rolling pin in the freezer so that it’s nice and cold when it’s time to roll out your dough. Remember, every time you work with cold tools, you give the butter more time to stay in its solid state, even while you’re rolling it. This is good!
There are two kinds of rolling pins that I recommend: this traditional, classic one that is the one that I use most in my kitchen, and this metal one that I use sometimes for pie dough, but mostly for other laminated pastry doughs. They both work like an absolute charm!
As a new pie maker, this next tip is essential: fill a gallon-sized zip top bag with 1/3 ice and 2/3 cold tap water. Seal the bag tightly, then put the first bag into another gallon-sized zip top bag (to help prevent leaks). Place this bag directly on the rolling surface and…leave it there for the last 20-30 minutes that the pie discs are in the fridge (or longer for extra credit). This gives your countertop a great chill and allows you additional time to work with dough and still end up with the flakiest pie crust.
I say this one is for new pie makers, but I also use this tip a whole lot.
Step 10: place a pastry mat on your counter and cover the pastry mat and your rolling pin generously with flour.
Seriously. Generously.
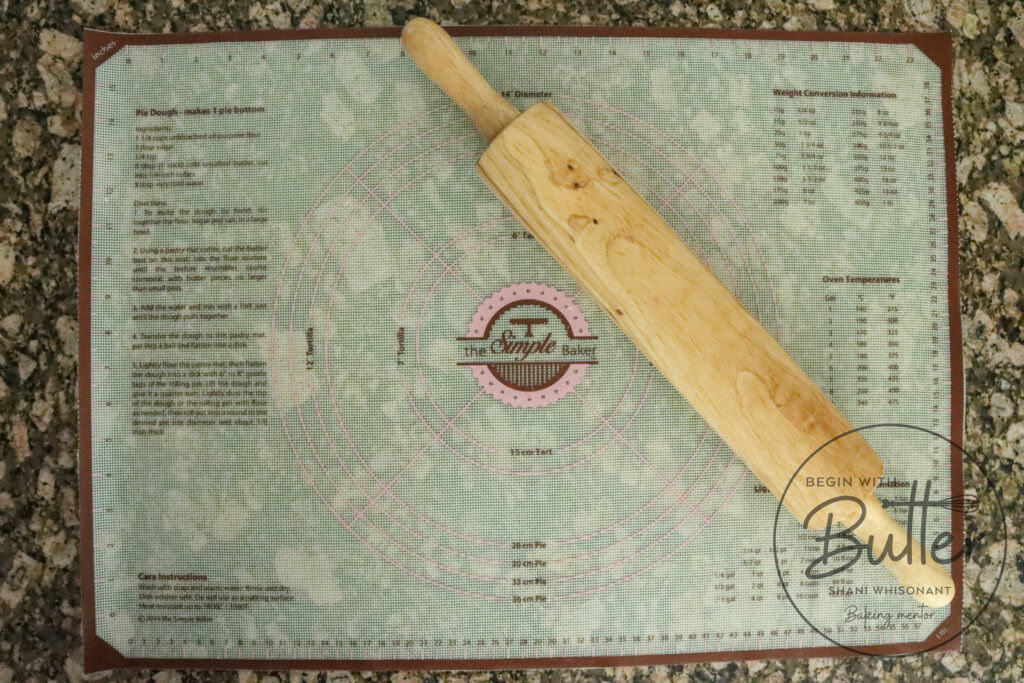
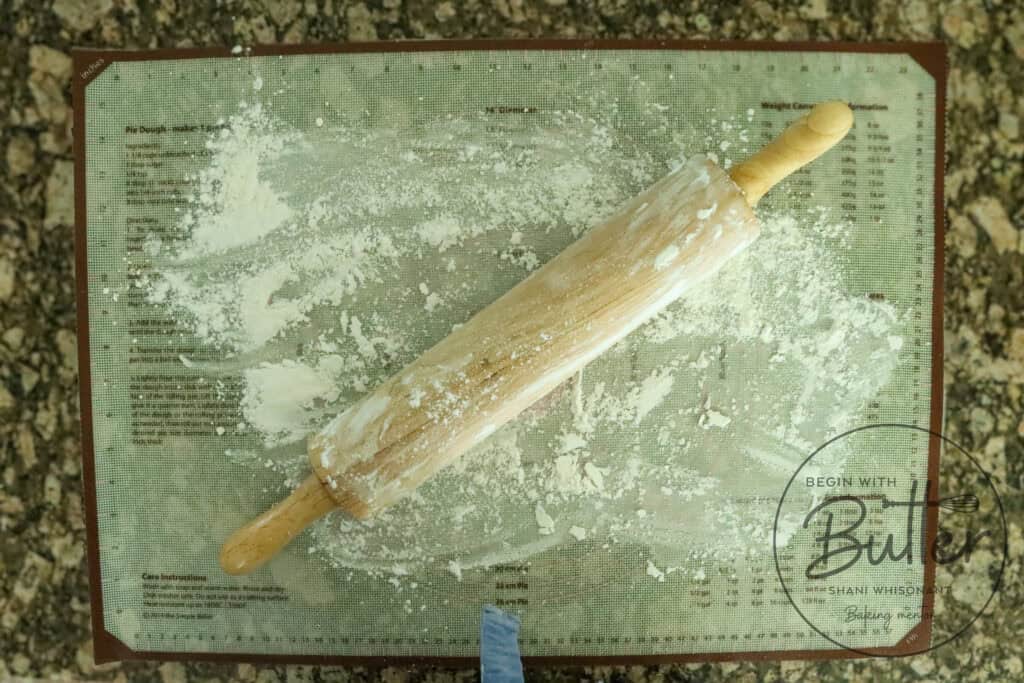
Step 11: place one dough disc onto the floured pastry mat…and cover the dough disc generously with flour.

Step 12: roll out the dough to about 14″. I say about 14″ inches because this first roll out will be rough.
The dough could be a little larger or a little shorter. The telltale sign that it’s rolled out properly is when it starts to retract (shrink) a bit with each roll.
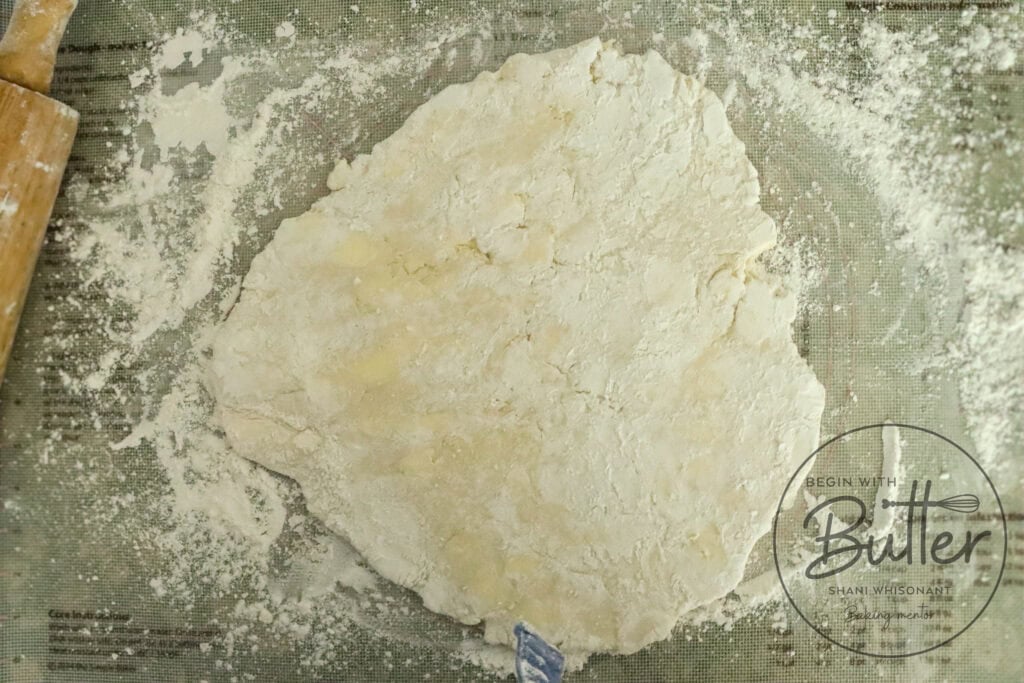
If this was my current dough, I’d be very happy with it at this point. 😍
Listen, I said it would be a rough circle. 😂 You’ll also notice that, on this first roll out, the dough still looks pretty piecemeal. It’s not fully cohesive, and that’s exactly how I want it. During this first roll out, you’ll also notice that the butter starts to look stretchy. Again, this is a wonderful sign.
During the first roll out (and, really, for the entire procedure), you’ll want to add generous amounts of flour to the top and bottom of your dough on a constant basis, to avoid your rolling pin and pastry mat sticking to your dough. I turn my dough over as needed to make sure that each side gets an even flour-ing during the rolling out process.
Step 13: fold the dough in half, then fold each side into the middle (the “letter fold”). This is the magic of lamination.
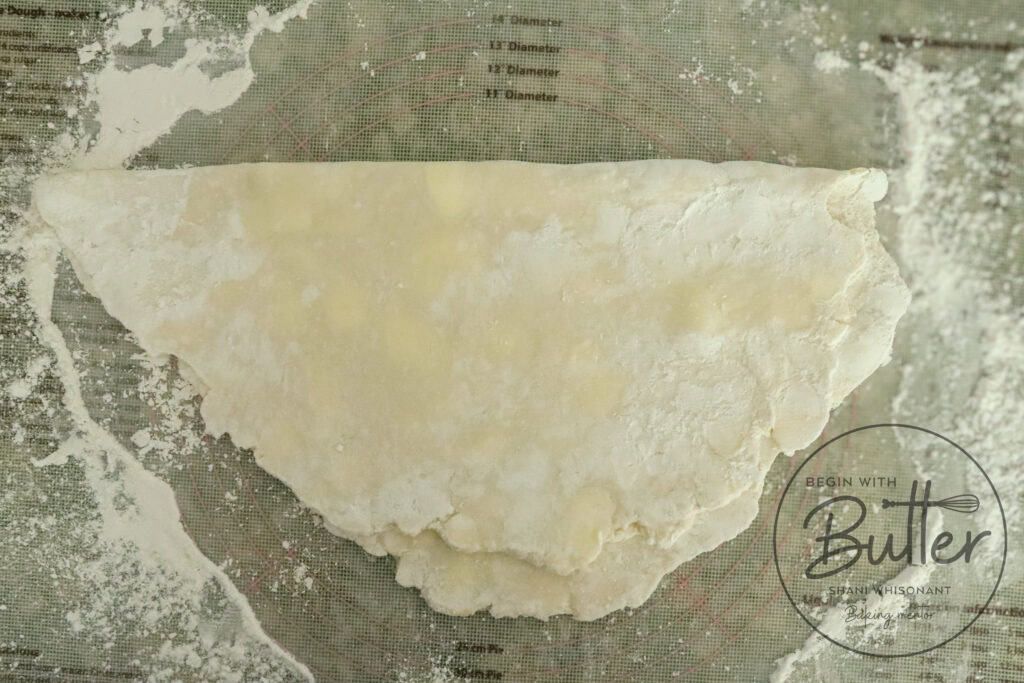
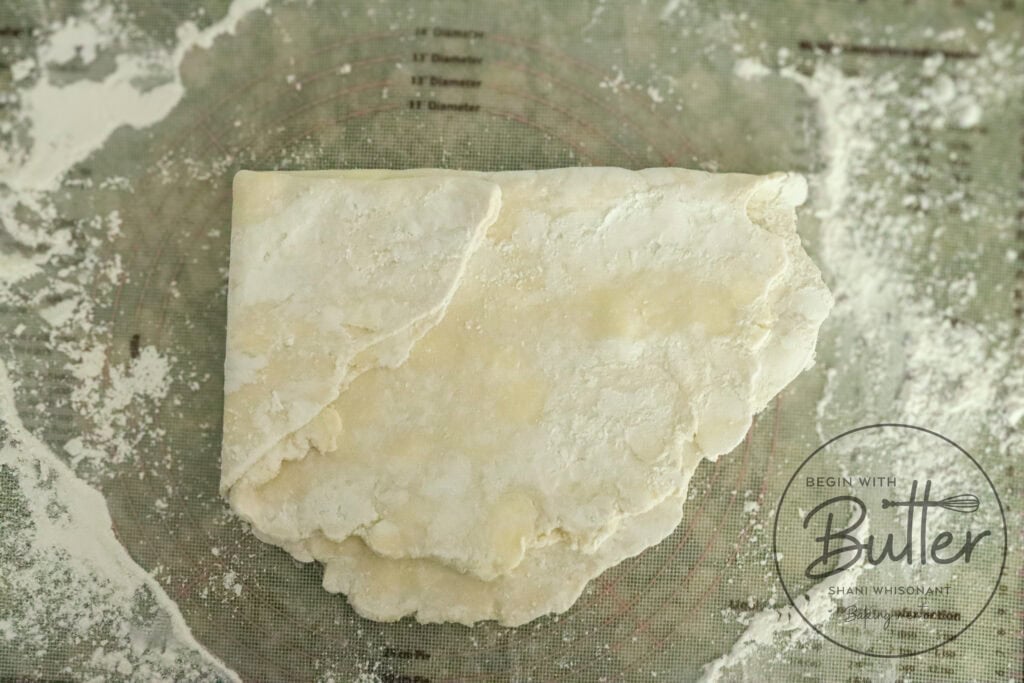
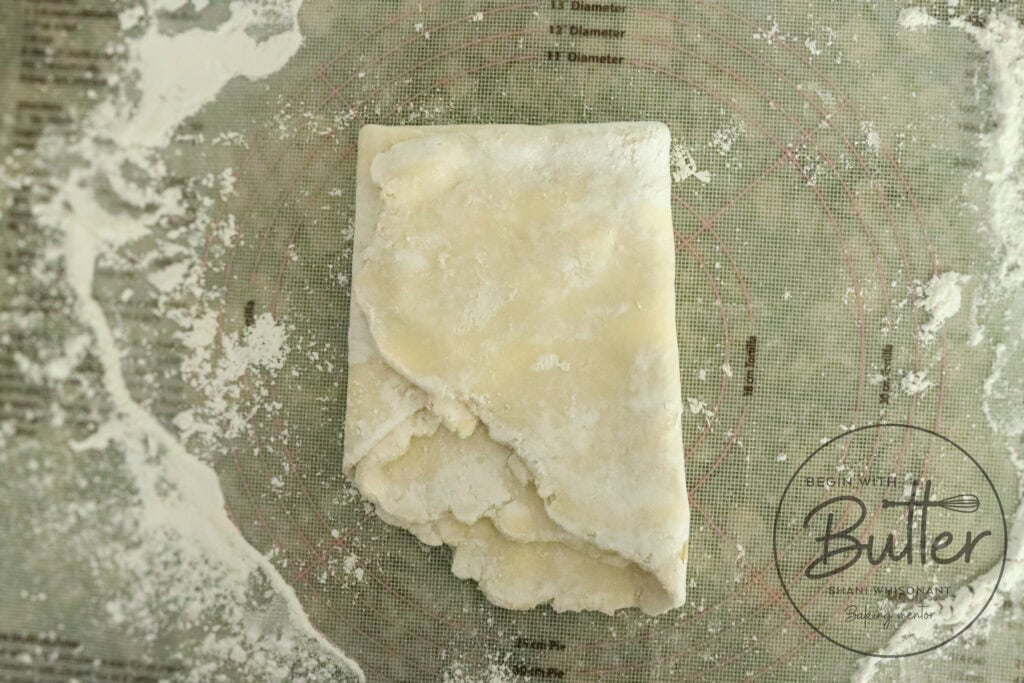
This is how we manually create flaky layers in our pie dough. First, you’ll fold the dough in half. Then, take the left side of your dough and fold it to the center. Finally, fold the right side of your dough and fold it into the center as well.
Then, you’ll roll out the dough the same way that you did the first time. Except this time, your dough will start to look and feel more cohesive. You’ll notice with each rolling out process that that piecemeal quality goes away.
The procedure to roll out the dough this second time is exactly the same as it was the first time. Roll out to about 14″, fold in half and do a letter fold, then roll out for a third time.
Now it’s clear why we want a cold rolling pin and countertop. Because this part takes a few minutes, and warm tools and hands will cause the butter to melt.
On the third roll out, you’ll notice that the dough looks and feels…perfect.
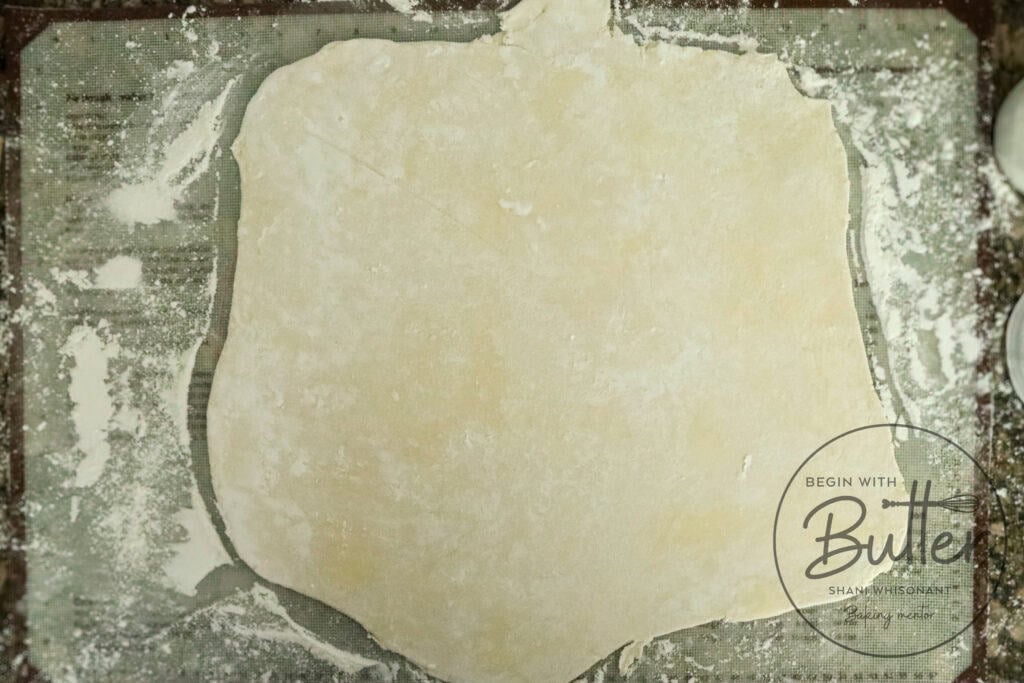

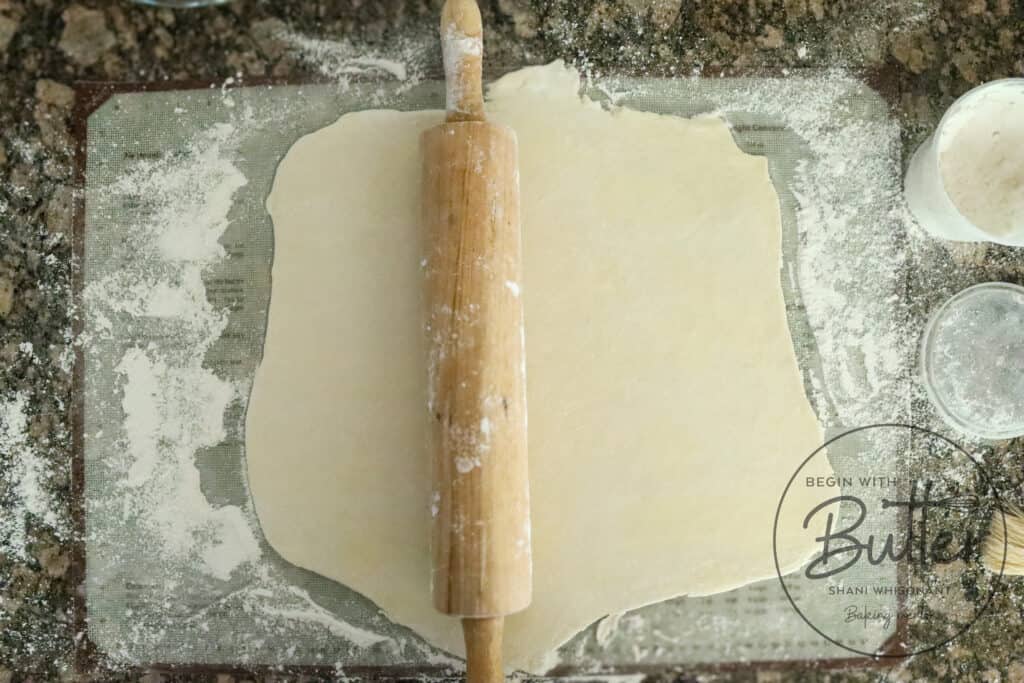
It’s at this point that you’re ready to brush the excess flour off of your pie crust with a pastry brush and get ready to put it into your pie plate.
(It’s worthwhile to click on the photos to see the beautifully smooth texture of the finished pie dough! This is, in fact, the same pie dough from those first crazy rough looking pictures!)
It’s hard to believe that our piecemeal pie dough became this…but it does!
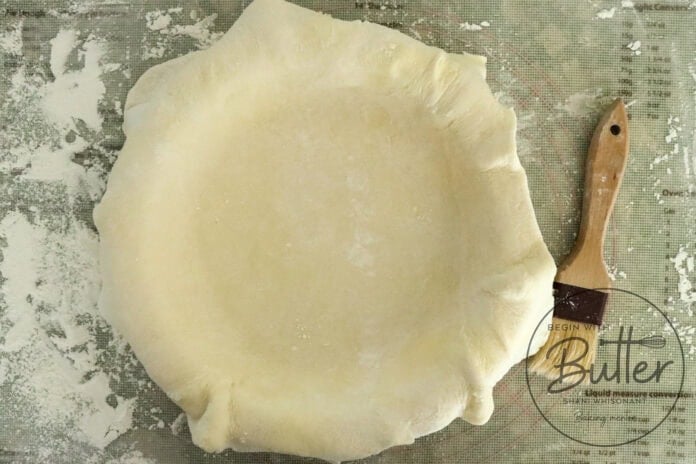
Step 14: fold the pie dough over the rolling pin and gently “roll” it into the pie plate.
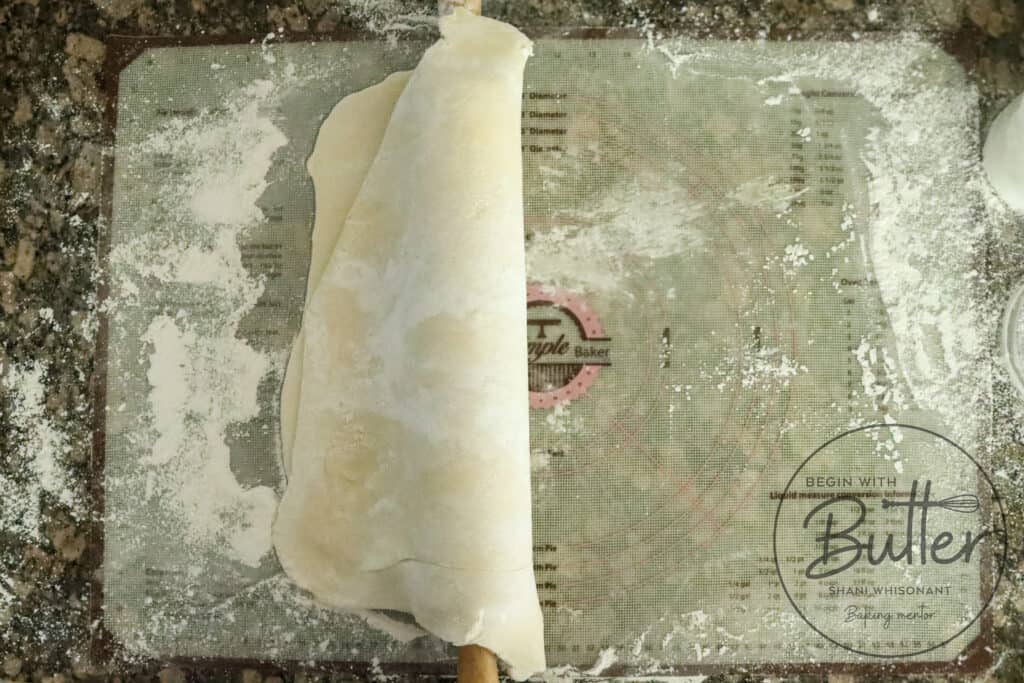
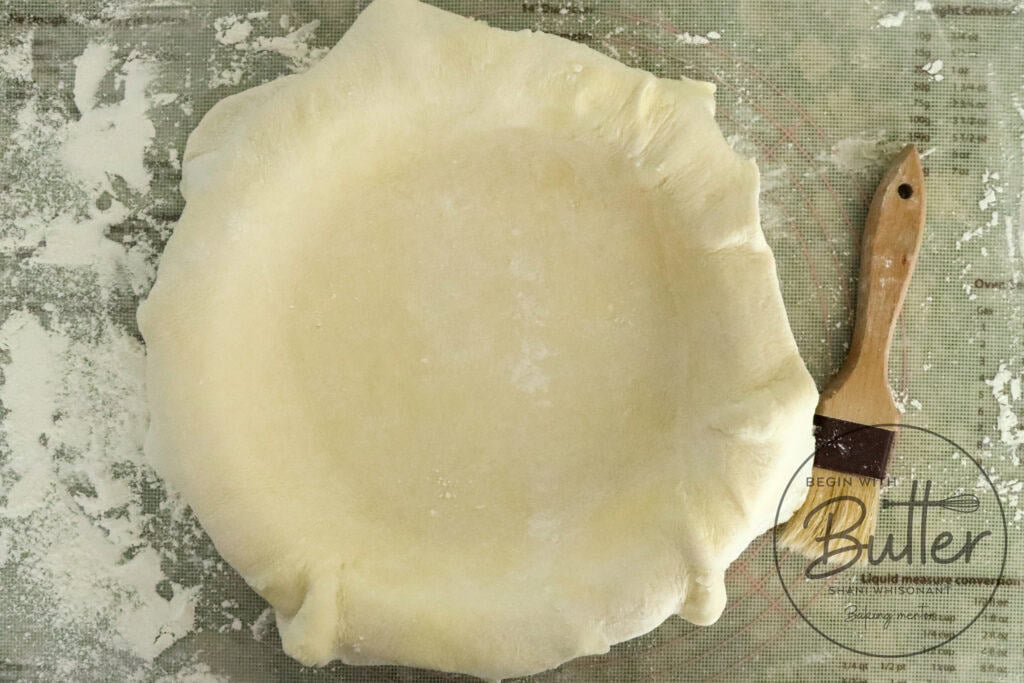
When you first place the dough over the pie plate, it won’t go into the deep corners of the pie plate. This is absolutely normal. However, you want to avoid stretching the pie dough with your fingers, as you could tear holes in the dough. Instead, lift the overhanging dough on the sides of the pie plate and gently place it down into the corners. Use your fingers to gently press the dough into place.
Use the “lift and gently press” method to make sure that your pie dough connects with the corners of your pie plate. This will help minimize shrinking when the pie crust bakes.
Step 15: quickly, but carefully, fold and press the outer edge of the pie dough together, then place the pie plate in the refrigerator to allow the butter to solidify once again.
The dough that you’ve just made needs to go back into the refrigerator so that the butter can start to re-solidify. Because, despite your best efforts, rolling and working pie dough will soften and start to melt your butter. This is not a failing! It’s just physics!
The next step needs to be done quickly so that the butter doesn’t melt in your hands. Before refrigerating, use clean kitchen shears to trim the pie dough to about 2″ of excess dough all the way around. Use your fingers to just tuck the excess dough underneath. You’re not looking to finish the dough at this point. You’re just looking to press the sides of the dough together, so that the dough will solidify in the correct shape.

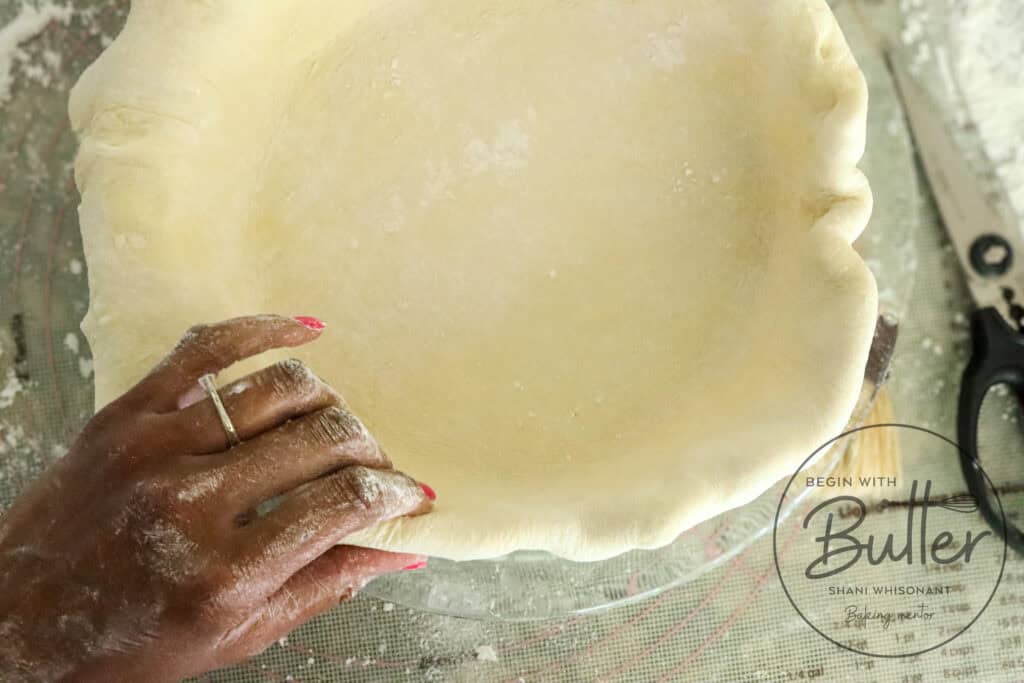
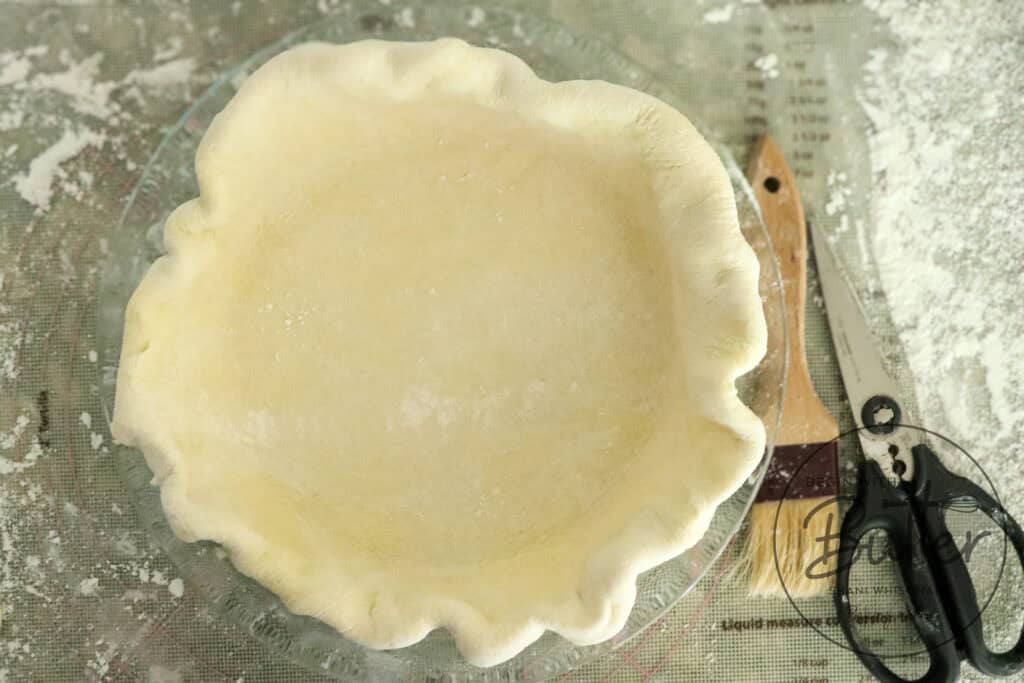
I can’t stress enough…don’t finish the edge at this point! You want to do the final shaping after the butter has had a good opportunity to solidify in the refrigerator again.
Step 16: do it again! (if you’re making a double crust pie)
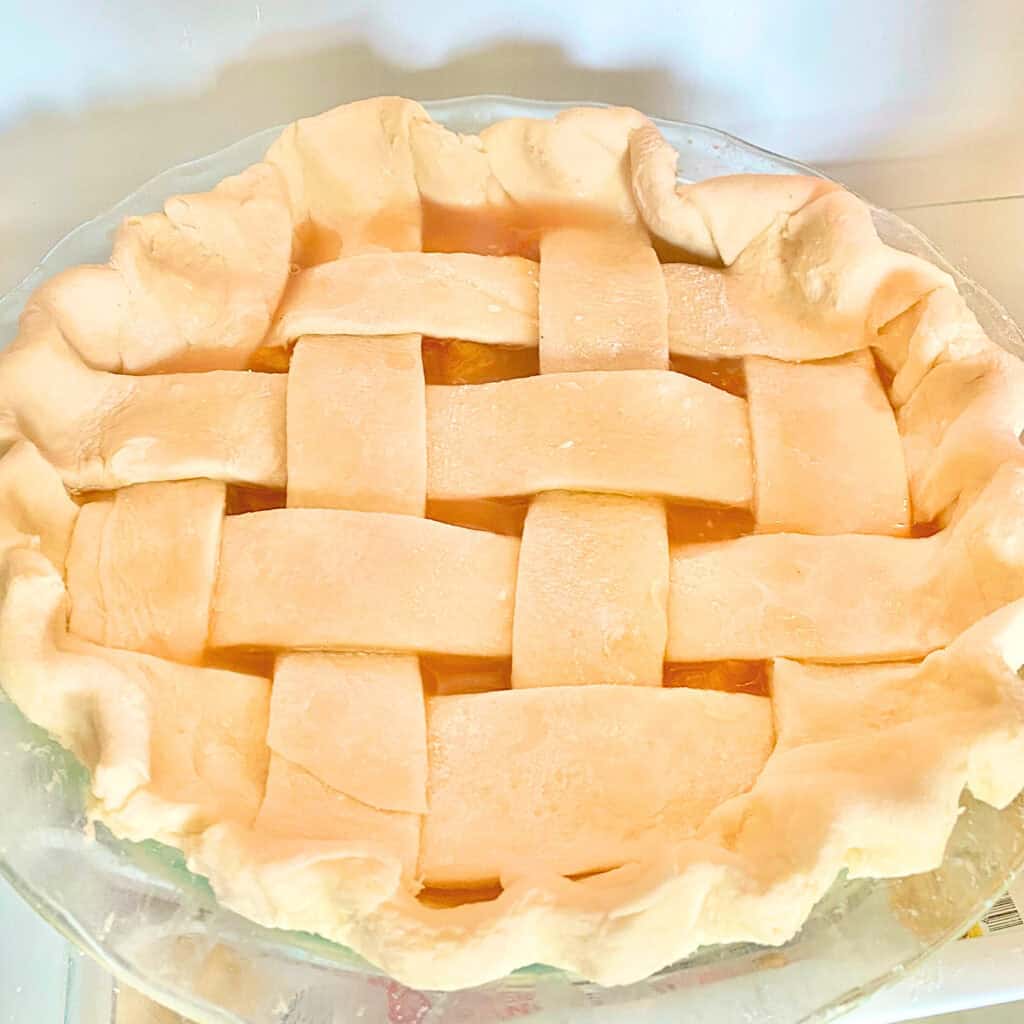
While the first half of the pie dough relaxes in its pie plate home, you’ll repeat steps 9-15 with the second dough disc, if your pie recipe calls for a top crust (or if you’re making two separate single crust recipes). Once the second pie dough is fully laminated, you’ll place your filling into the bottom of the pie plate, and then top the filling with a cut-up tablespoon of butter. Finally, top your pie with the second dough and finish the edges as desired.
If you’re new to pie baking, then a fork finish is perfect for this job. ❤️
Once you’ve built the pie, put the completed pie back into the refrigerator for 1-2 hours, while your oven preheats. The longer you can stand to keep your pie in the refrigerator at this point, the less shrinkage you’ll get from the pie crust when you bake. I typically leave my built pies in the fridge for two hours, and preheat my oven to a true 375°F for the second hour of that time.
As a bonus, I’ve included my favorite all-butter pie crust recipe with this post just for you!
When you’re ready to practice this easy homemade pie crust recipe, you can check out these pie recipes on the BwB site:
The hand pie recipes utilize another amazing pie crust (coconut oil pie crust), but those recipes also work perfectly with this amazing crust! This pie dough works perfectly with savory pies, so quiches and pot pies: watch out!
Frequently Asked Questions About All-Butter Pie Dough
What does the lamination process do?
When you fold and roll pie dough, you are creating more buttery layers in your crust. When the butter heats in the oven, it releases steam, which is the process that creates flaky pie crust!
What do I do if my dough starts melting when I’m working with it?
Your refrigerator is the real MVP during the pie making process, BB. If, at any point, the butter starts to get too melted when you’re working with it, place the dough in the refrigerator for at least 30 minutes before trying again. Also, place your tools in the freezer so that everything will be nice and cold when you’re ready to go again.
How long does my pie dough need to remain in the fridge before baking? And what does that do?
When you’re making a double crust pie, the built pie needs to be placed in the refrigerator for 1-2 hours. I prefer two hours, but one will be sufficient. The additional chill time gives the butter an opportunity to solidify again. We want solid (not melted!) butter in our pie dough because the butter is hugely responsible for creating flaky layers in our finished pie crust.
How do I adjust these instructions for a single crust pie?
When you’re making a single crust pie, you’ll need to refrigerate the pie dough once it’s rolled into the pie plate; this will be the start of the 1-2 hour refrigeration time. You’ll need to preheat your oven for about an hour before baking this pie dough, so you will either: 1) par bake initially, then place your custard filling and complete the bake (think: quiche); 2) fully bake initially, then refrigerate until fully cooled and add your no-bake filling (think: chocolate cream pie); or 3) place your cooled fruit filling into the refrigerated pie crust, add your optional crumble topping, and bake (think: apple crumble). More on this when this post gets updated!
I hope this visual tutorial helps you feel more confident as you begin your pie crust journey! Know this: the more you practice, the easier this will get (and the better your pie crusts will be!). As always, if you have questions, you can email me at bakingbestie@beginwithbutter.com!
Go forth and bake BB! And may all of your pie crusts be flaky.
See you next time!
Print
Easy All-Butter Pie Crust
This all-butter pie crust is so flaky and delicious, you won’t believe it can be this simple. It’s a perfect addition to any sweet or savory pie!
- Total Time: 6-8 hours
- Yield: 14 servings 1x
Ingredients
- 352 g (2.75 c) All-Purpose Flour (I really, really, really love White Lily for this pie crust)
- 1/4 tsp fine sea salt
- 2 tbsp granulated sugar
- 227 g (1 c) unsalted butter, cold, cut into tablespoon-sized pieces
125 g (1/2 c) water, plus more if needed
Instructions
- Add the 352 g all-purpose flour, fine sea salt, and granulated sugar to a large mixing bowl. Stir with a fork to combine.
- Add the butter to the flour mixture. Stir gently to cover the butter with the flour. Then use a pastry cutter to break the butter into smaller pieces. The butter pieces should be between the size of a pea and the size of a walnut. The pieces will not be uniform and this is ideal!
- Pour the 125 g of water evenly over the flour/butter mixture and stir very gently to combine with a fork. The mixture should be shaggy but combined. If necessary, add water a tablespoon at a time until you get the correct consistency. You should not need more than about 3 additional tablespoons!
- Split the pie dough into two equal-ish parts in your mixing bowl. Shape each half into the size of a fat disc and cover each disc with plastic wrap. Place in a refrigerator for at least two hours before rolling out.
- While the dough is in the refrigerator, place your rolling pin in the freezer. To cool your surface, fill a gallon-sized zip top bag with 1/3 ice and 2/3 water and seal shut. Place on the countertop for 30 minutes to an hour to cool the rolling surface underneath your pastry mat.
- After the two hour refrigeration, flour a generous amount of flour on a pastry mat. Place one of the thick discs atop the well-floured pastry mat. Flour the top of the dough disc and also your rolling pin. Test to see if the dough is ready by gently tapping your rolling pin on top of the disc; if the rolling pin makes small indentations, you’re ready to roll. Gently roll to about 14″, or until the dough begin to retract (shrink) (this will be about 1/4” thickness). If the dough breaks when rolling, allow the dough to sit for 2-3 minutes and then try again. Dough often breaks when the butter is still too cold from the refrigerator.
- Once you’ve reached about 14″, fold the dough in half, then do a letter fold (see photos above). Continue rolling, adding flour as necessary and turning over the pie dough occasionally; don’t worry about over-flouring at this point.
- After letter folding the dough, roll the dough again to 1/4” thickness. Repeat this step one more time, for a total of three times.
- Brush excess flour from the top of the pie dough. Use your rolling pin to place the dough into a 9” or 10” pie plate (see photo tutorial above for how to do this). Place the pie plate in the refrigerator while you roll out the second half of the dough.
- For a double crust pie: Roll out the second half of the pie dough, using the same technique as above.
- Add the filling to the pie plate.
- Using a pastry brush, brush the rim of the bottom dough with a small amount of water. Add the top crust and press gently to seal. Trim the pie crust to 2” outside of the pie plate, and fold over the crust to seal. If desired, crimp or flute the crust.
- Place the completed pie in the refrigerator while you warm your oven to a true 375°F, and place an oven rack on the bottom third of the oven. Allow your oven a significant amount of time to reach the proper temperature. I allow my oven at least an hour to come to temperature.
- Bake according to the recipe directions. I prefer a steady-state bake at 375°F for this pie crust.
Notes
- This Easy All-Butter Pie Crust is perfect for my Classic Peach Pie, my Peach Hand Pies, or my Apple Hand Pies!
- Prep Time: 1 hour (active)
- Refrigeration Time: 3-4 hours
- Cook Time: ~1 hour
- Category: dessert

