Yes. Ricotta. Ricotta cheese contributes a tender, moist texture and a subtle tanginess to the cake, balancing the sweetness of the sugar and the brightness of the lemon. Additionally, the creamy ricotta helps to create a rich, velvety crumb for this Lemon Blueberry Ricotta Cake and a delicate, airy structure, making the cake feel both decadent and refined.
If you’ve never had a ricotta cake before, think of this as your exquisite entree to a life well-lived.
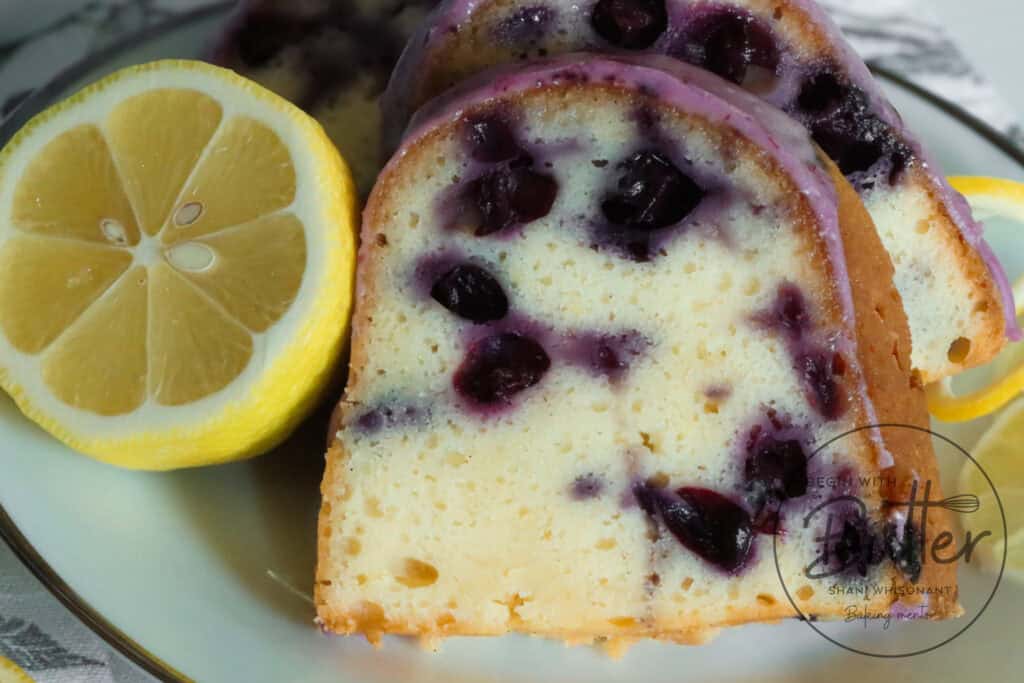
About this Lemon Blueberry Ricotta Cake
This is a pound cake like none other. There is an absolutely perfect amount of lemon and bursting blueberries in the cake, warmed up by a beautifully balanced vanilla simple syrup and a jaw-droppingly gorgeous sweet/tart blueberry glaze. If you’re ready to upgrade your favorite lemon desserts, and if you’re willing to open your mind to the possibility of ricotta cheese in a cake, then you’re ready to make one of the most incredible desserts that you’ve ever had.
Lemon Blueberry Ricotta Cake Ingredients
Lemon Juice: The cake calls for 63 grams (1/4 c) of freshly squeezed lemon juice, in addition to the sour cream. The lemon juice technique means that you never, ever have to use lemon extract in this cake. Please don’t use the lemon juice in a bottle. It contains preservatives that may end up in the final product of your cake.
Lemon Zest: You’ll use the lemon zest to make lemon vanilla sugar for your cake. The technique of rubbing the lemon zest into the sugar releases the oils from the zest, which gives a big boost of lemon flavor. This is another reason why you can leave that lemon extract in your cupboard.
Granulated Sugar: Granulated sugar creates a sweet balance for the tartness of the lemon in this cake. However, did you know that granulated sugar is also responsible for caramelization? That beautiful crust on the outside of your pound cake? It is largely because of the sugar in your recipe!
All-Purpose Flour: I’ve said it before and I’ll say it again: I love the pleasantly plump texture of a good pound cake. In my experience (and with my cakes), that beautiful texture comes from all-purpose flour. That particular flour is absolutely perfect for this cake.
Baking Soda: Lemons and blueberry are acidic ingredients. Because of that, baking soda was the proper leavening for this pound cake.
Kosher Salt: Salt is very important in any dessert; it balances the sugar and keeps the dessert from becoming cloyingly sweet. If using table salt for this recipe, cut the amount in half. In this dessert, the sugar/lemon/blueberry/salt balance works beautifully!
Unsalted Butter: This particular cake has an amazing balance of sweet and tart, and it really needs salt to balance the whole thing. That being said, it’s important to really control the amount of salt in this recipe, so I’m recommending unsalted butter for this recipe. Also, butter helps this cake become lighter! Specifically, the process of creaming butter and sugar creates air pockets that assist with cake rise.
Ricotta Cheese: Ricotta cheese is like a superhero for your cake, using its moist and tangy powers to save the day by tenderizing the crumb and keeping it from getting too dense. The acidity in ricotta also triggers a chemical reaction that makes the cake brown to perfection, giving it that gorgeous golden crust. Ricotta cheese adds a rich, creamy flavor and a tender, moist texture to the cake, balancing its sweetness and creating a velvety crumb that’s simply irresistible.
Eggs: The protein in the eggs adds structure to the cake, while the fatty yolk adds delicious flavor. This recipe calls for four eggs, which might seem like a lot. Trust me, it’s perfection.
Vanilla Bean or Vanilla Extract: You can use either; this is a matter of personal preference. If you’d prefer to have the fruit flavors come through more boldly, use the vanilla extract.
Sour Cream: Sour cream and lemon juice are like the ultimate BFFs in this recipe – when mixed together, they create a beautiful balance of acidity and creaminess that makes the cake’s blueberry and lemon flavors pop. The acidity in the lemon juice awakens the sour cream’s tangy side, causing a delightful reaction that tenderizes the cake’s crumb and adds a burst of citrusy freshness.
Beginners Start Here
If you’re new to baking, or if you want to learn how to do some of the more tricky baking techniques, here are a couple of super helpful articles from the BwB site that will help you get set up for success with this Lemon Blueberry Ricotta Cake.
These resources are super helpful to help you build consistency and confidence on your baking journey, they’ll also help you with amazing classics like my Lemon Pound Cake and my Very Vanilla Pound Cake. Happy Reading!
Important Tools Used in this Lemon Blueberry Ricotta Cake
I am immensely happy to announce that Begin with Butter has its own Amazon Storefront, where you can find all of the amazing equipment that I used in this special cake! Want even more specific links? Check out the links, below.
I do get paid a commission when you purchase, but these are the tools that I use all the time in my own kitchen.
If you have these tools already, great! Think of this as a checklist to help you build the confidence that you’ll need to execute this recipe!
This Lemon Blueberry Ricotta Cake is, quite simply, exquisite. She is an elevated take on a classic bake, and one that I hope will become a part of your regular baking rotation.
You need only a few ingredients to pull off this amazing pie, but there is one ingredient that you need much more of anything else to be successful: time. Because while it is true that this pie is made with simple ingredients, and proper technique will make this pie seem simple, if you want to make it look extremely difficult, all you need to do is short yourself on time.
My students are rolling their eyes right now. They hear me say this almost every class. But it is especially true with this one: time is an ingredient.
Because the pie crust comes together in less than five minutes. But then you have to allow it to chill in the fridge for several hours. And the cooking of the peach filling takes only another five minutes, but you have to wash, pit, and slice 6 cups (or, to be more accurate, 942 grams 😊) of peaches (though frozen work just fine too!). And then, once the filling is done cooking, you have to chill it in the refrigerator until it’s completely cooled.
Pie built and ready to bake? NOPE. That built pie needs to sit in the fridge for another 45-60 minutes while your oven preheats. And then, and only then, is it time to bake your pie for the better part of another hour.
So, yes. Think of time as an ingredient and be prepared to set aside the better part of a day to make this one. Call all those friends and family members you’ve been meaning to catch up while doing this bake. Better yet, invite them over to spend some time with you in the kitchen; it’s a perfect time to catch up on old stories and hear new ones. ❤️ And you will be richly rewarded if you just…give this one time.
Ingredients in this Peach Pie
All-Purpose Flour: Okay BBs, here’s the thing. The type of flour that you use for this pie crust depends entirely on your comfort level with making pie. While I recommend all-purpose flour because of the higher protein content (leading to a lessened likelihood that the pie crust will fall apart in your hands when you’re working with it), I actually use White Lily All-Purpose Flour for my pie crust. It leads to positively crust shattering results. White Lily All-Purpose has a lower protein content (9%) than Gold Medal All-Purpose (10.5%), King Arthur All-Purpose (11.7%), and Bob’s Red Mill All-Purpose (10-12%) flours. So, White Lily flour, combined with the laminating technique that I use, leads to incredible pie crust results.
Fine Sea Salt: A small touch of fine sea salt in the crust gives this pie crust delicious flavor.
Granulated Sugar: A couple of tablespoons of granulated sugar give this pie crust a nice sweetness, and also helps with caramelization. The granulated sugar in the pie filling enhances the sweetness of the peaches. If your peaches are super sweet, you can cut the granulated sugar in the filling by 50 grams (1/4 cup) in the filling.
Butter: This pie crust uses the grandaddy of all pie crust fats: BUTTER. Butter, in my humble opinion, gives pie crust the absolute best taste. The laminating process (which we’ll talk about a little further down) helps ensure that this crust shatters all over your clothes like the best croissant. You’re welcome. 😊
Water: This ingredient is the bane of the existence of many a pie maker. Too little and you get a positively dry pie crust. Too much and you get a pie crust that never reaches its flaky potential. Oh, and every pie crust has a magic amount of water that only it knows before you start. There are so many variables that impact how much water a specific pie crust needs, and BB, you can only figure this out with practice.
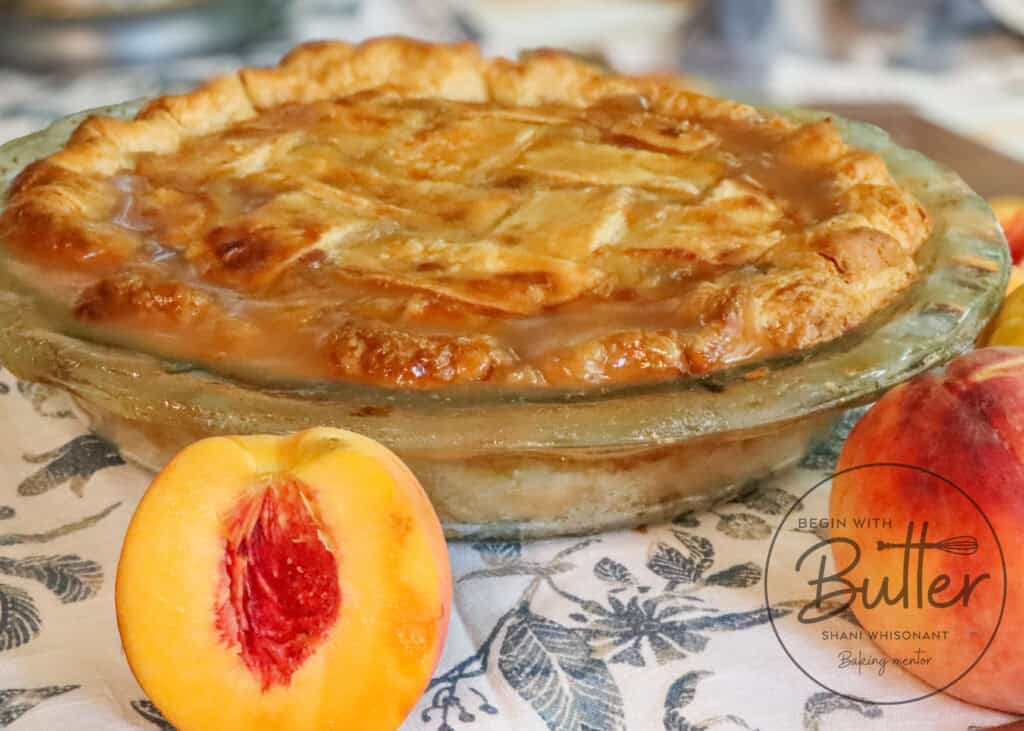
Peaches, Peaches, and More Peaches: This peach pie features 942 grams (6 cups) of sliced peaches. If you’re making this pie at the peak of peach season in your area, I highly recommend using fresh ripe peaches because they are just…🤌🏾. However, if you’re not at peach peak, you can absolutely use frozen peach slices. The additional water from the frozen peaches will reduce during the cooking process, so you don’t have to worry about adding additional liquid to your peach pie.
Brown Sugar: Brown sugar is less processed than granulated sugar, leaving a delicious bit of molasses-y taste in the filling that is simply divine. That molasses complements the peaches and adds a beautiful depth to this dish.
Triple Sec: The orange notes in the Triple Sec bring the peach flavor shining through. It’s an optional ingredient though, but it’s a good one.
Lemon Juice: The sweetness of the peach filling needs a bit of acid to provide balance. The lemon juice does this beautifully!
All-Purpose Flour (for the pie filling): The flour in the pie filling acts as a thickener. Fruit pies are notorious for being runny without some kind of thickener, so this is very important!
Kosher Salt: The kosher salt in the pie filling is vitally important to control the sweetness from the natural sugars in the peaches, as well as the granulated and brown sugars. Without salt, the filling will be overpoweringly sweet. The tiny bit of kosher salt will help you avoid that!
Ground Ginger: Ground ginger provides a warm little zingy flavor to the peach filling. It’s a simple touch that makes a big difference!
Beginners Start Here
Pie is something that can strike fear in the heart of the most experienced bakers. That is because pie really forces us to hone in and develop our baker’s feel: that intangible sense that lets you know when you have enough water, when your laminated dough is ready to put into your pie plate, when your pie filling has reached the proper consistency…I could go on.
Fear not, Dear BB! In this section, I’m going to walk you through the techniques that I use in this pie, to give you a FAQ tutorial to make this amazing pie (and all of the pies in your future). Remember, the absolute best peach pie will come with practice, practice, practice. So that leads to the first tip:
Tip #1: Don’t expect to master pie crust the first time.
We hear it everywhere: “Mindset is key”. Nowhere in the baking world is that more true than when working with pastry. Because pastry is as much about feel as it is about skill. And the learning process can be incredibly frustrating. But it’s incredibly rewarding when it “clicks”, so the best advice I can give you? Indulge your curiosity, take your time, and go into your first pie crust attempts with a beginner’s mind.
Tip #2: Chill your tools.
One of the best ways to ensure great pie crust is to keep all of your crust ingredients very cold. But, did you know that if you keep your tools cold, you actually increase your chances of great, flaky crust?
When preparing to make pie crust, I recommend chilling your (stainless steel) mixing bowl, your pastry cutter, your rolling pin, and even the little fork that you’ll use to stir ingredients together. This initial chilling helps make sure that your butter doesn’t melt as you work with it, and that’s vitally important to helping you achieve the flaky crust of your dreams.
And if the butter starts to melt, don’t panic, refer back to Tip #1, and get it into a refrigerator as quickly as possible.
Tip #3: Make sure that your filling is completely cooled before using
This peach pie uses a cooked filling, and you need to make sure that that cooked filling is fully cooled before using. Placing hot filling on top of cold dough is a way to make the butter in your dough melt prematurely, and once again, when the butter in your dough melts too quickly, you will lose the beautiful flaky layers that you’re trying to create.
Tip #4: Your refrigerator is as important as your oven!
I get it. When we think of “baking” we think of using our oven to heat things to a certain temperature. And while that is correct, it is also correct that another appliance is equally important for this peach pie: your refrigerator.
First, you’ll need to refrigerate/freeze your ingredients and tools to help everything stay nice and cold. Some recipes even call for the use of frozen butter, and while this recipe does not require that, I have much respect for those who do use it.
Second, you’ll need to halve the completed pie dough, create thick discs with each half, cover them in plastic wrap, and, you guessed it, refrigerate those discs for at least two hours before using.
Third, you’ll need to make and refrigerate your peach filling. Like chill it to the center. When you stir your peach filling, it should be uniformly cool throughout. So, once again, the refrigerator is the MVP.
Fourth, as you build the pie, you’ll need to use your refrigerator to keep the bottom crust in place while you roll out the top crust.
And finally, you’ll need your refrigerator to hold the completed pie while your oven does a long preheat. You don’t want to skip this final refrigeration, since this helps keep your pie from shrinking!
So yes. Give the refrigerator a participation trophy because it is an extremely important participant in the all-butter pie crust world. 😊
Tip #5: Slow and steady baking wins the race!
There are two schools of thought when it comes to baking pie: either start at a high temperature and reduce to a lower temperature, or bake at a steady temperature for the entire baking time.
I have a strong preference for the latter. In my experience, starting at a higher temperature (425°F) and then reducing to a lower temperature (375°F) leads to overbaked, dry external crusts and inconsistently baked crust underneath. A steady-state bake brings this peach pie to its best deliciousness, with consistent crust all around.
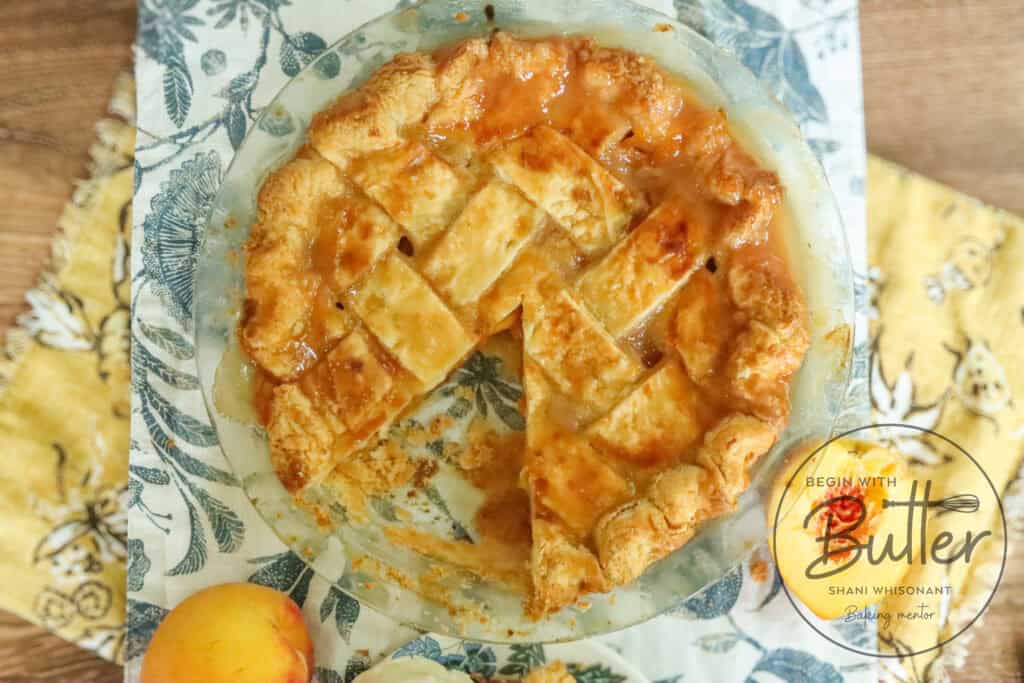
Tip #6: The pie needs to cool completely.
This one is difficult, BB. You see, that all-purpose flour in your filling needs time after the baking process to finish its work. While the pie is cooling, the filling is completing its gelling process. If you are a patient baker and wait until the pie is completely cooled (~2 hours after it’s finished baking), you’ll be able to cut it into beautiful, picture-perfect slices with filling that remains intact.
It’s worth it!
Let’s get on to the fun part…making peach pie!
How to Make Classic Peach Pie
Start with the Filling
Start your peach pie by making your filling. Making your filling first allows for an optimal chill time before you have to use the filling for your pie dough.
Start by pitting between 7-9 medium peaches (I love yellow peaches for this pie) and slicing them into thin-ish slices (about 1/4″ each, but don’t get overly concerned about exact measurements here). (Note: to pit a peach, use a sharp knife and carefully cut around the peach lengthwise, following the line on the peach. Once you’ve cut all the way around, twist to separate the halves and remove the pit. You’re then ready to slice!)
Add your peaches, granulated sugar, brown sugar, triple sec (if using), lemon juice, flour, salt, and ground ginger to a large pot. Stir them all together to combine before turning on the heat.
Turn the heat onto medium high, stirring frequently to prevent burning. Once the mixture begins to bubble, reduce the heat to medium. Continue stirring frequently until the mixture has reduced by about 1/3rd and has thickened. The peaches should be al dente at this point and not mushy. Remember, they will bake for another 45-60 minutes in the pie!
Once the pie filling is done, remove it to a non-reactive, heat-proof bowl. If you’re using a glass bowl, please make sure it’s made of tempered glass. Place in a refrigerator to cool until it’s time to use.
Easy peasy!
Make the Dough
To make your pie dough, you’ll need to start with very cold tools. Your stainless steel bowl, pastry cutter, and fork should all come straight from the freezer when you’re ready to use them.
Start by adding the 352 g (2.75 cups) of all-purpose flour, fine sea salt, and granulated sugar to your large mixing bowl. Stir with your super-cold fork to combine the dry ingredients.
Next, you’ll add the cold butter to the flour mixture, and stir gently to cover the butter with the flour. Once your butter is coated with flour, use a pastry cutter to break the butter into smaller pieces. The butter pieces should be between the size of a pea and the size of a walnut. The pieces will not be uniform and this is ideal!
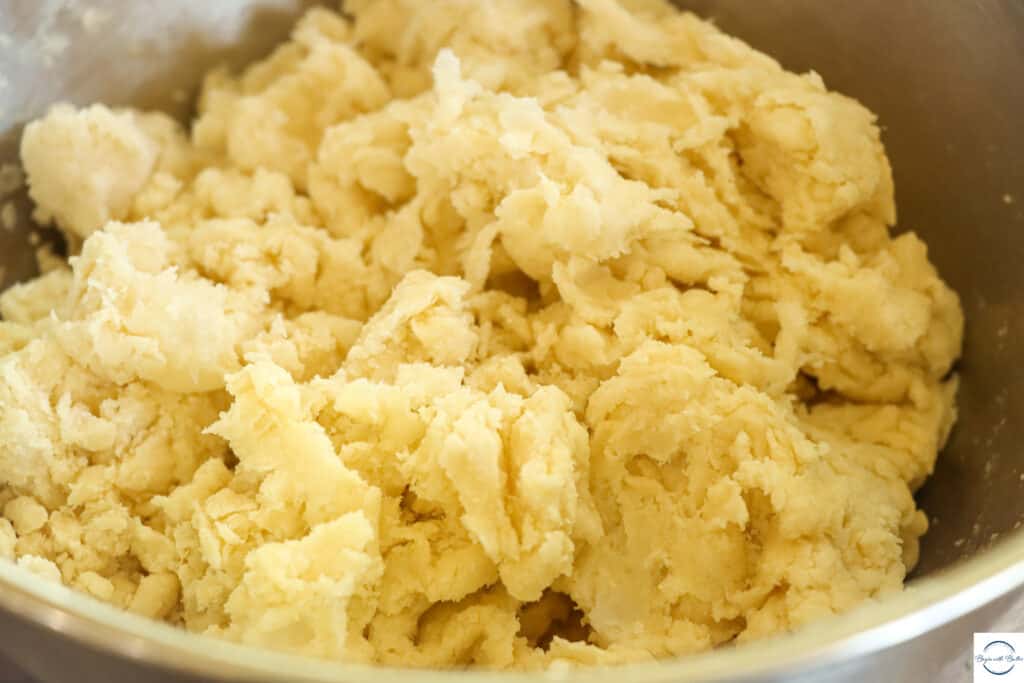
Once you’re done breaking up your butter, pour the 125 g (1/2 cup) of water evenly over the entire flour/butter mixture, making sure not to put too much water in one place, the stir very gently to combine with your handy fork. The mixture should be shaggy but combined; remember, this is not cake batter, so it shouldn’t be runny. If necessary, add water a tablespoon at a time until you get the correct consistency. You shouldn’t need more than about 3 additional tablespoons!
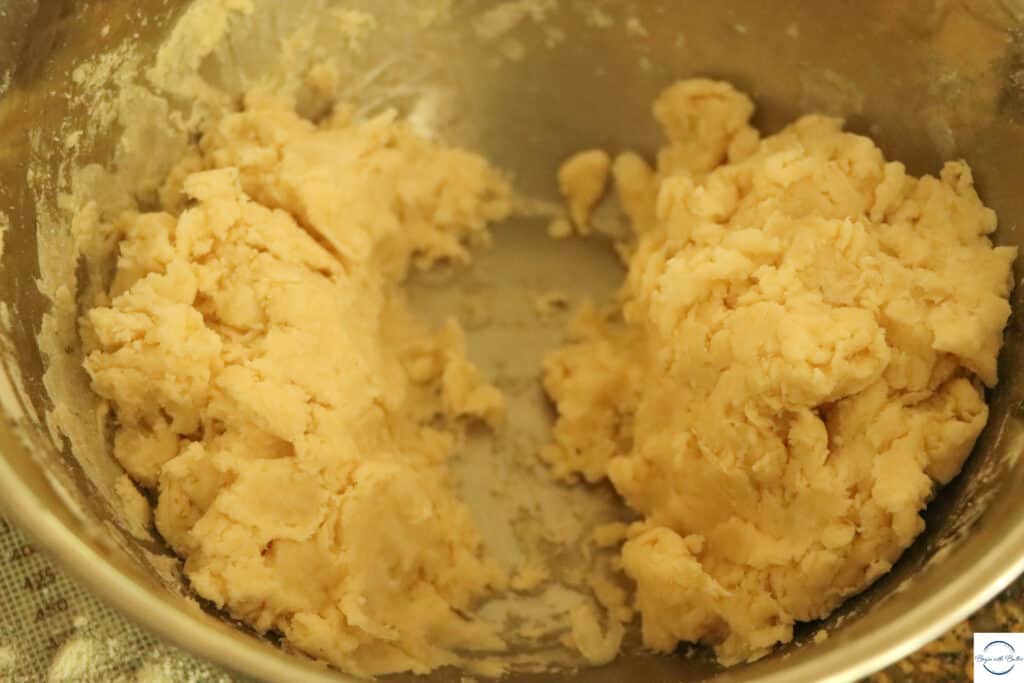
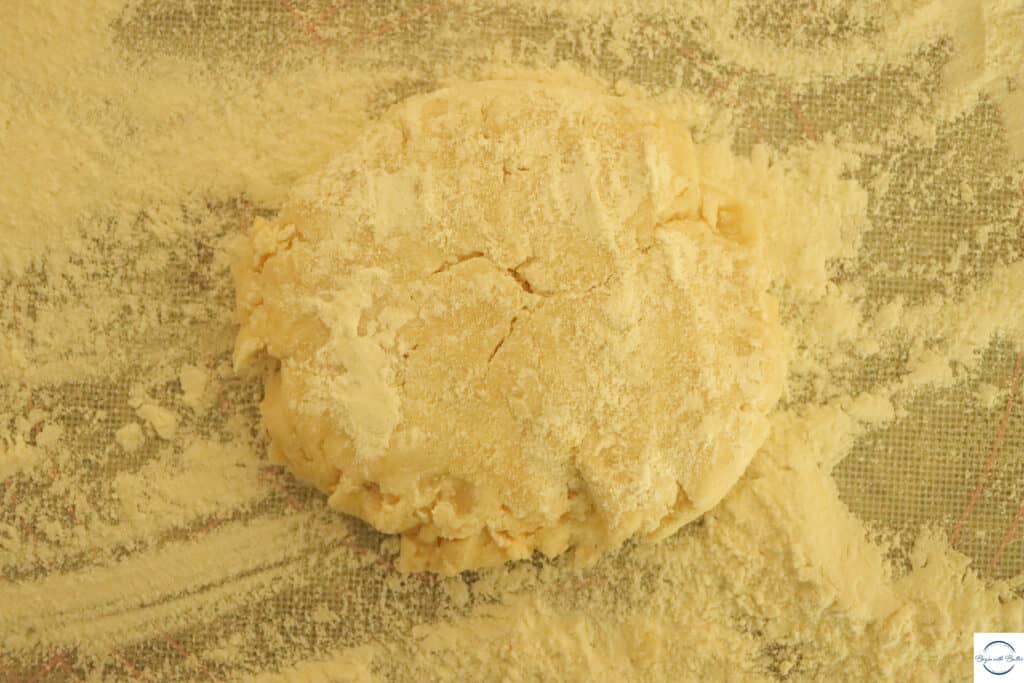
Split the pie dough into two equal-ish parts in your mixing bowl. Shape each half into a fat disc and cover each disc with plastic wrap. Place in a refrigerator for at least two hours before rolling out.
Build the Pie
When you’re ready to “roll” (😂 sorry, couldn’t be helped), place a pastry mat on top of a countertop. If you want bonus points, you can even fill a plastic bag with water and ice on the countertop for 20 minutes before rolling out your dough. On super hot days, this is very helpful!
Generously dust your pastry mat with flour and cover your rolling pin with flour, then get ready to laminate your dough! To laminate, start by taking one of the pie dough discs out of the refrigerator. Test to see if the dough is in the sweet spot for rolling by gently tapping the plastic-wrapped dough with the rolling pin. If the rolling pin makes small indentations in the dough, then you’re ready!
Place a generous amount of flour on the top and bottom of your dough disc, and make sure that your rolling pin is also generously floured. Don’t worry about the flour; it will work itself out…I promise!
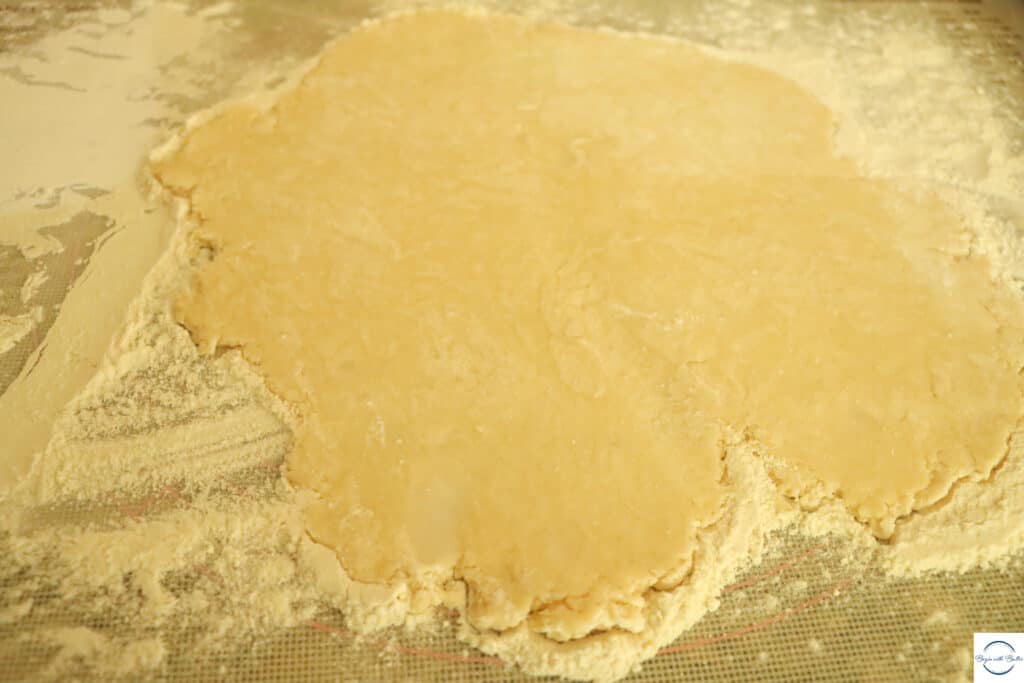
Roll the dough out to about 1/4″ thickness, like this:
Then, fold the dough over twice until it’s the shape of a rough square. Roll out the dough again to the same thickness. Repeat the folding and rolling cycle one more time, making sure to dust with flour as needed. It will seem like a lot of flour (and it is!), but I promise the finished product will be fine.
Want to learn all of the techniques that you’ll need to execute this Classic Peach Pie? Join my Classic Peach Pie Class at the BwB Home Baking Academy!
Once you’ve laminated twice and rolled to 1/4″ thickness, brush the excess flour with a pastry brush. Use your rolling pin to carefully place the dough over the pie dish. The dough should overhang the edges of the pie dish, so you can place some plastic wrap beneath the pie dish to keep the overhang off of the refrigerator shelf.
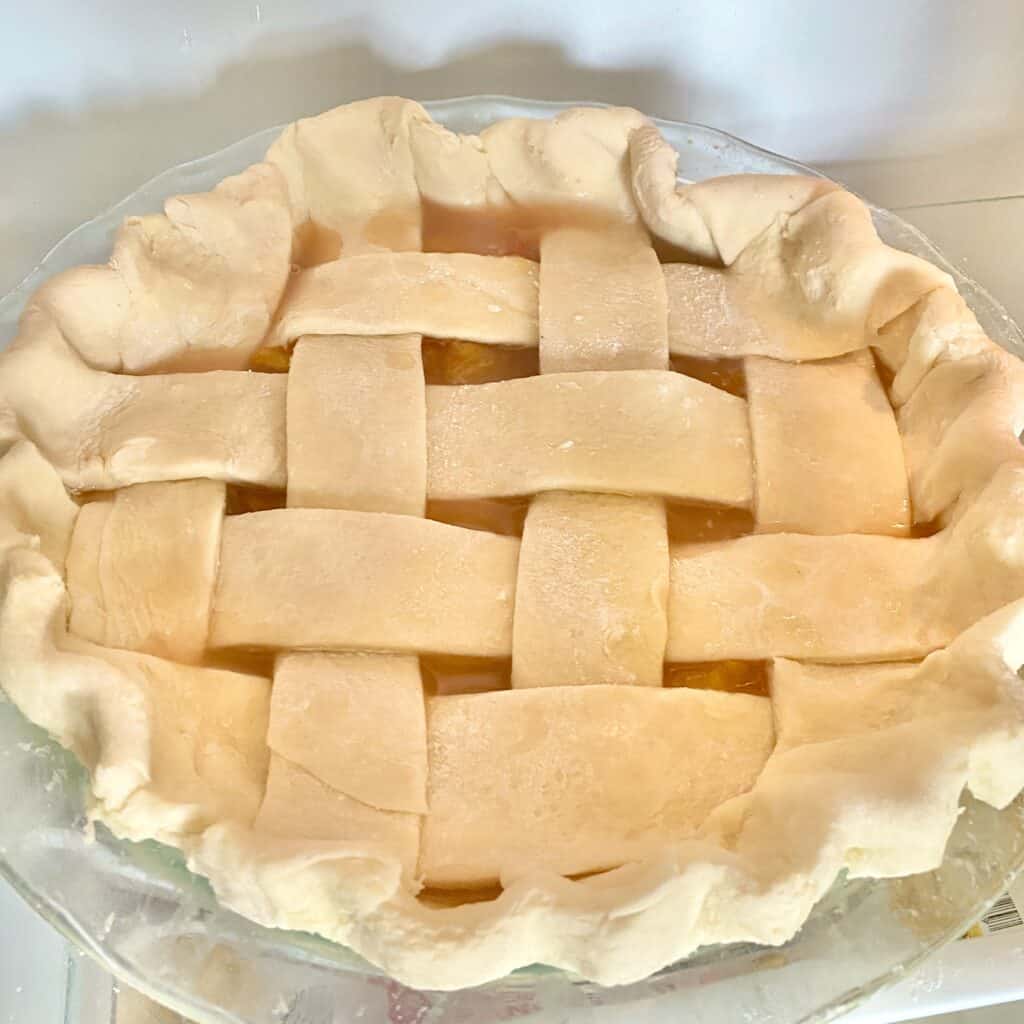
While the bottom dough and the pie dish are getting acquainted in the pie dish, take the time to roll out the second half of the pie dough. Remove the pie dish and the filling from the refrigerator and place the completely cooled filling into the pie. Then, use your pastry brush to gently brush a tiny amount of water around the edges of the bottom crust, and place the rolled-out top crust on top of the pie. Using kitchen shears, cut the overhang to about 1.5″ all around the pie dish. Then, fold over the edge of the pie crust to seal. You can finish by crimping or fluting the pie all the way around!
Place the pie that you’ve built…into the refrigerator and turn on your oven to 375°F. To ensure that it’s a true 375°, use an oven thermometer to help you determine where to set your oven. Allow your oven a good 45-60 minute preheat to ensure that it gets to the actual baking temperature.
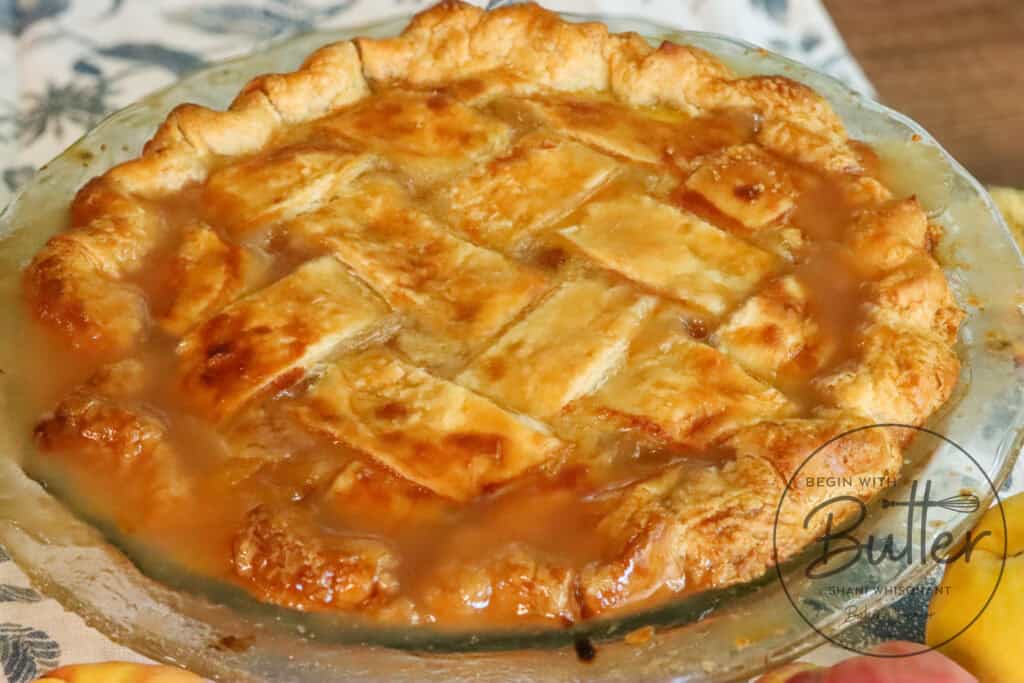
Cut 4-6 vents in the top of your pie crust and brush with egg wash (I use the whole egg). Place in the oven for 45-55 minutes, or until the top is golden brown. Keep an eye on the top crust; if it’s browning too quickly you can cover the whole top of the pie with aluminum foil to prevent it from burning!
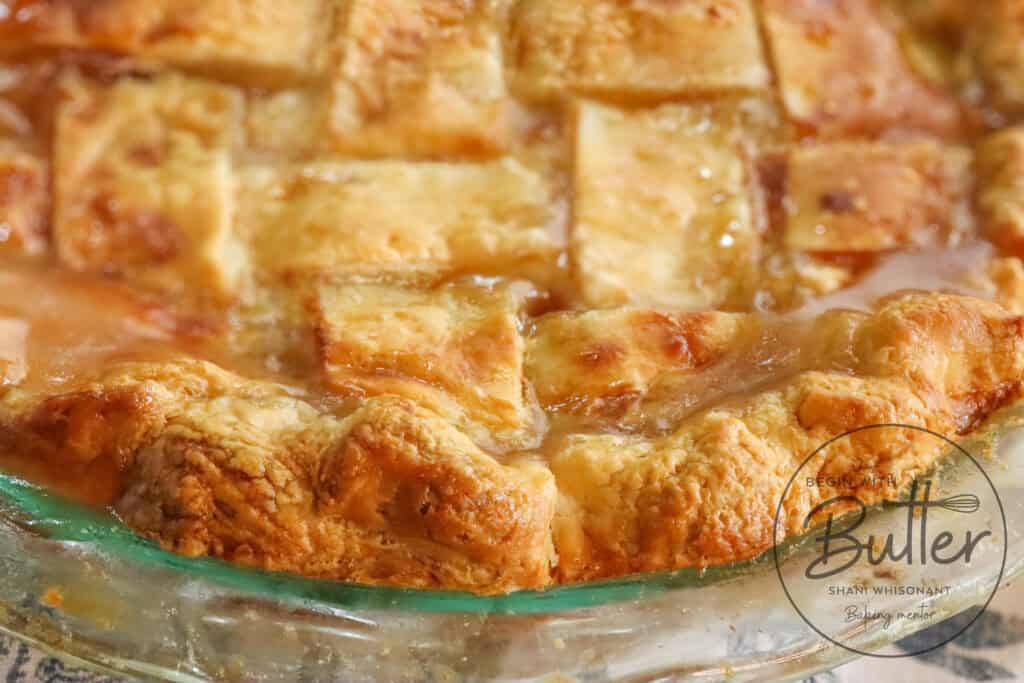
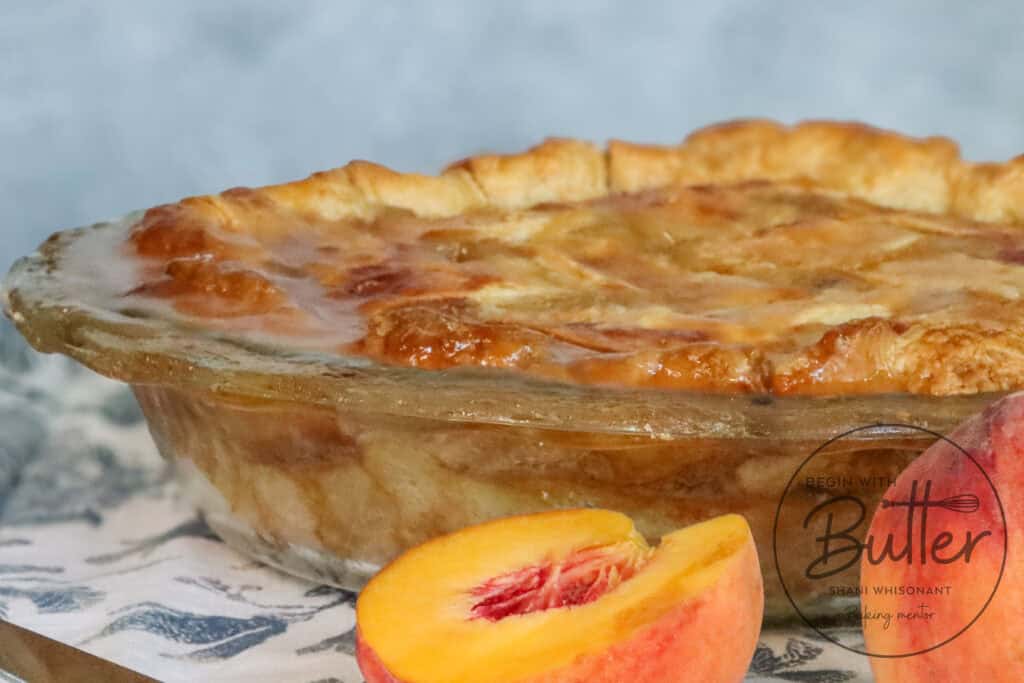
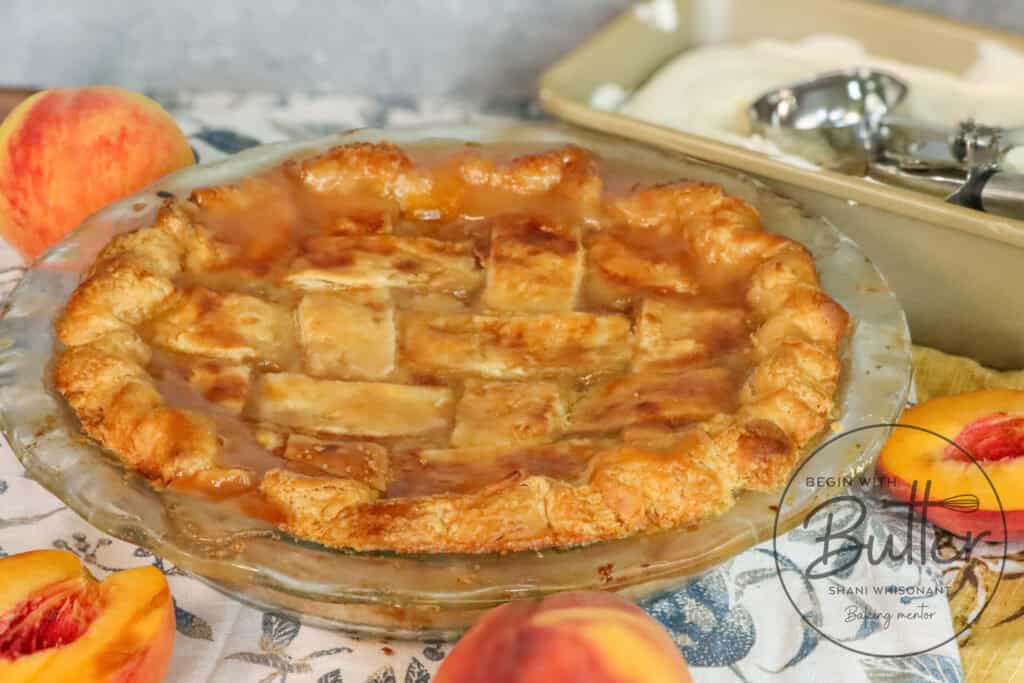
And when it’s done? Oh, when it is done! It will positively sing to you:
If you’d like, you can remove the pie from the oven at the 25-minute mark and sprinkle with turbinado or sparkling sugar. But this isn’t a necessary step. It just makes the pie extra pretty!
As you can see, “pretty” isn’t a problem for this beauty:
Important Tools Used in this Classic Peach Pie
I am so happy to announce that Begin with Butter has its own Amazon Storefront, where you can find all of the amazing equipment that I used in this special pie! Want even more specific links? Check out the recommendations, below.
I do get paid a commission when you purchase, but these are the tools that I use all the time in my own kitchen.
If you have these tools already, great! Think of this as a checklist to help you build the confidence that you’ll need to execute this recipe!
I am exceptionally proud of this pie, and I can’t wait to hear your stories about it! May you have many great successes serving this Classic Peach Pie, and may you and your loved ones enjoy this pie for years to come!
Don’t forget to tag me on Instagram @beginwithbutter so that I can shout out your success!
My mother, Ms. Gloria, was known for making some *ahem* showy desserts. She was not a competitive woman by any means, but she just loved the jaw-dropping reactions from the crowd every time she removed a lid from one of her decorative cake plates. I loved those moments – seeing people’s faces positively light up from the sudden sensory delight that was the dessert she’d unveiled. This Lemon Cake, with its luscious cream cheese frosting, Friends, is an homage to the woman who raised me, and who to this day is my greatest inspiration.
Besides being a visual masterpiece, this Lemon Cake just tastes absolutely amazing. Real, balanced lemon flavor is featured in every level of this cake, rendering it perfect for lemon lovers. For those who simply love dessert, this cake is so beautiful and delicious that it will make them reconsider everything they think they know about lemon.
Speaking of levels, this cake has lemon in the sponge, a glorious lemon curd, and a lemon cream cheese frosting. Yes, it’s a lot of lemon, but it’s also balanced by vanilla bean and the tang from the cultures in the cream cheese.
The lemon cream cheese frosting featured in this cake has to be tried to be believed. It’s impossible to believe that such a frosting could come out of a home baker’s kitchen. But with the easy instructions that I give you in this recipe, it absolutely can. You, BB, can be the one of your peers who has perfected cream cheese frosting that is perfectly smooth, dotted with beautiful vanilla bean, and pipe-able at the same time. A lemon cream cheese frosting that absolutely melts on your tongue when you eat it.
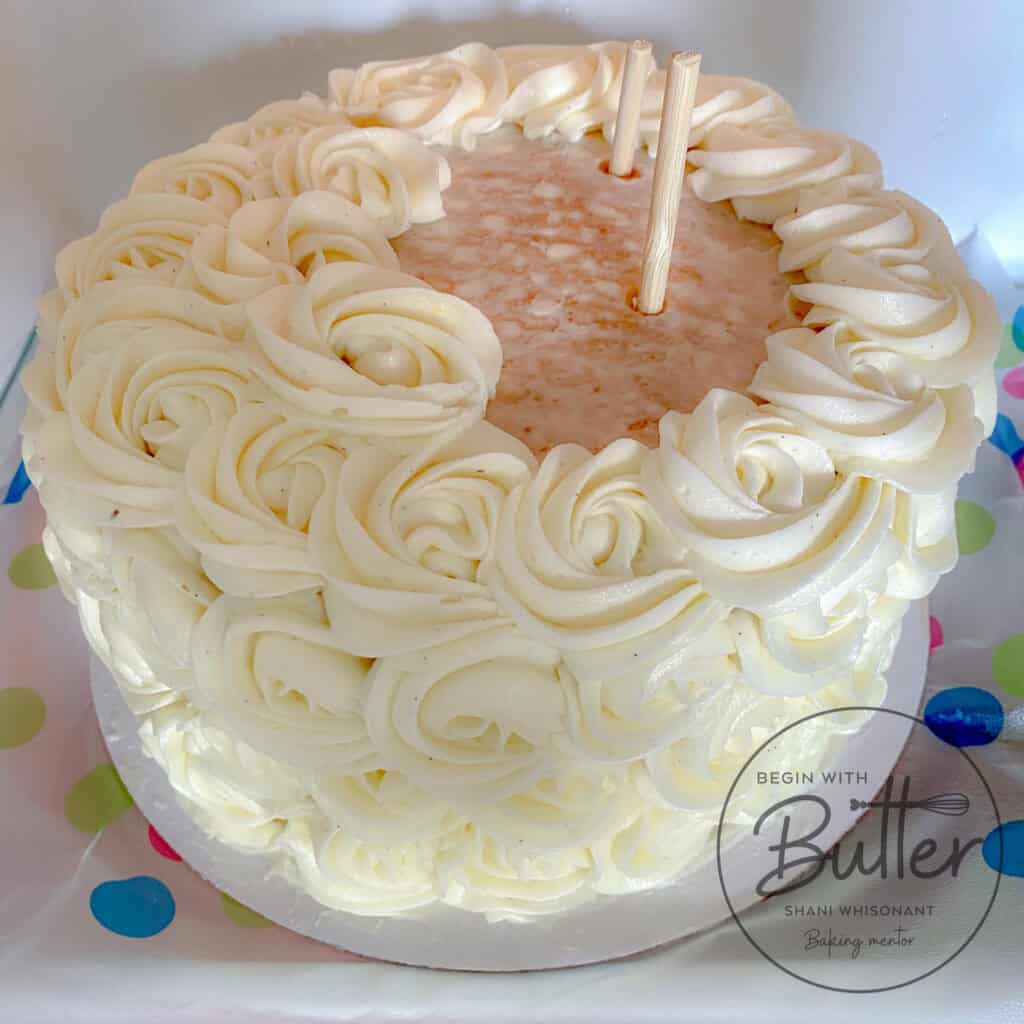
Oh, and about the Lemon Cream Cheese Frosting…if you want to pipe rosettes onto the cake like I did, make sure you have the positively obscene amounts of frosting ingredients that I have in the recipe. You’ll need them.
How do I know?
This is how I know. 😩 😂
Lemon Cake Ingredients
Cake Flour: The flour in a cake recipe impacts the final texture of a cake in a big way. Flour is the primary ingredient that is responsible for the amount of structure and chew in your cakes, cookies, and breads. The higher the protein content in a particular type of flour, the more structure and chew in the final product. For this cake, I wanted a very soft, moist crumb, so I use cake flour here. My caveat: my fave “cake flour” is actually White Lily’s All-Purpose Flour, which has a lower protein content than most cake flours!
Baking Soda: This Lemon Cake contains sour cream, which is naturally acidic, so baking soda is the proper leavening here.
Kosher Salt: Salt is very important in any dessert; it balances the sugar and keeps the dessert from becoming overly sweet. Salt is very important in this particular cake recipe, as it helps to balance both the sugar and the lemon in this recipe.
Cornstarch: This cake has an almost ethereal crumb. That is because the cake flour has a lower protein than typical all-purpose flour, yes, but it is also because we added another ingredient whose only job was to tenderize the crumb even more. A big thank-you to cornstarch for understanding this important assignment.
Unsalted Butter: As usual, butter has a starring role in this cake! It gives wonderful special flavor, and also the creaming process creates the absolutely necessary air pockets that help this cake to rise. Additionally, the fats in the butter are needed to tenderize the powerhouse protein molecules in your cake flour and egg whites, giving it a marvelously moist, light crumb. This ingredient does a lot of work! Make sure that your butter is room temperature before you begin. I set my butter out for at least 1.5-two hours before baking time. Also, buy a LOT of butter for this recipe. 😂 Like, a lot A LOT.
Neutral Vegetable Oil: Vegetable oil adds additional moisture to this cake, and it also helps the cake stay moist longer. One tablespoon is more than enough to make sure that this beautifully moist cake stays that way. I love avocado oil for baking, but any vegetable oil will do.
Granulated Sugar: The sugar in this recipe adds a nice sweetness to this cake, and it also helps with caramelization (browning). Additionally, granulated sugar helps to balance the tartness from the lemon juice and lemon zest in this cake!
Lemon Zest: You’ll use the lemon zest and the vanilla beans to make lemon vanilla sugar for your cake. The technique of rubbing the lemon zest into the sugar releases the oils from the zest even better, which gives a big boost of lemon flavor.
Whole Vanilla Bean: This cake uses the beans from an entire vanilla bean pod. The amped-up vanilla flavor is necessary to help balance the sweetness from all of the sugar and the tartness of the lemon so I strongly recommend using this ingredient for this cake. If you don’t have access to a whole vanilla bean, you can sub a tablespoon of pure vanilla extract.
Eggs: The protein in the eggs adds structure to the cake, while the fatty yolk adds delicious flavor, and also tenderizes the proteins in the egg whites and the cake flour. It’s a true multi-tasker and I couldn’t love it more. ❤️
Sour Cream: I loved the final texture that sour cream lent to this cake. In a pinch, you can also use 250 g (1 c) of buttermilk. Subbing buttermilk will give you all of the tang that sour cream will; however, you’ll be sacrificing on the additional tendering properties of the sour cream, as buttermilk contains substantially less fat. (On that note, make sure to use full-fat sour cream for this recipe. 😊)
Lemon Juice: The cake calls for 63 grams (1/4 c) of freshly squeezed lemon juice, on top of the sour cream. The lemon juice and lemon zest combo means that you will never need to use lemon extract in this cake. Please don’t use the lemon juice in a bottle. It has additional preservatives that can impact the taste of the final product.
Beginners Start Here
If you’re new to baking, or if you want to learn how to do some of the more tricky baking techniques, here are a couple of super helpful articles from the BwB site that will help you get set up for success with this unbelievable Lemon Cake.
These resources are super helpful to help you build consistency and confidence on your baking journey, and specifically with this special cake. Happy Reading!
Important Tools Used in this Lemon Cake
I am so happy to announce that Begin with Butter has its own Amazon Storefront, where you can find all of the amazing equipment that I used in this special cake! Want even more specific links? Check out the recommendations, below.
I do get paid a commission when you purchase, but these are the tools that I use all the time in my own kitchen.
If you have these tools already, great! Think of this as a checklist to help you build the confidence that you’ll need to execute this recipe!
I do love a beautiful cake, BB. I hope you enjoy making this cake, and that it becomes a favorite in your household like it has in mine. And don’t forget to tag me on Instagram @beginwithbutter so that I can shout out your success!
Luckily, my business mentor assigned me one hour a day of “staring out the window” time, and on that day, the vision for “Toffee Crunch Cake” came screaming into my psyche. (It also came to me to do it charcuterie-style, but feel free to ignore this part of my vision. 😝)
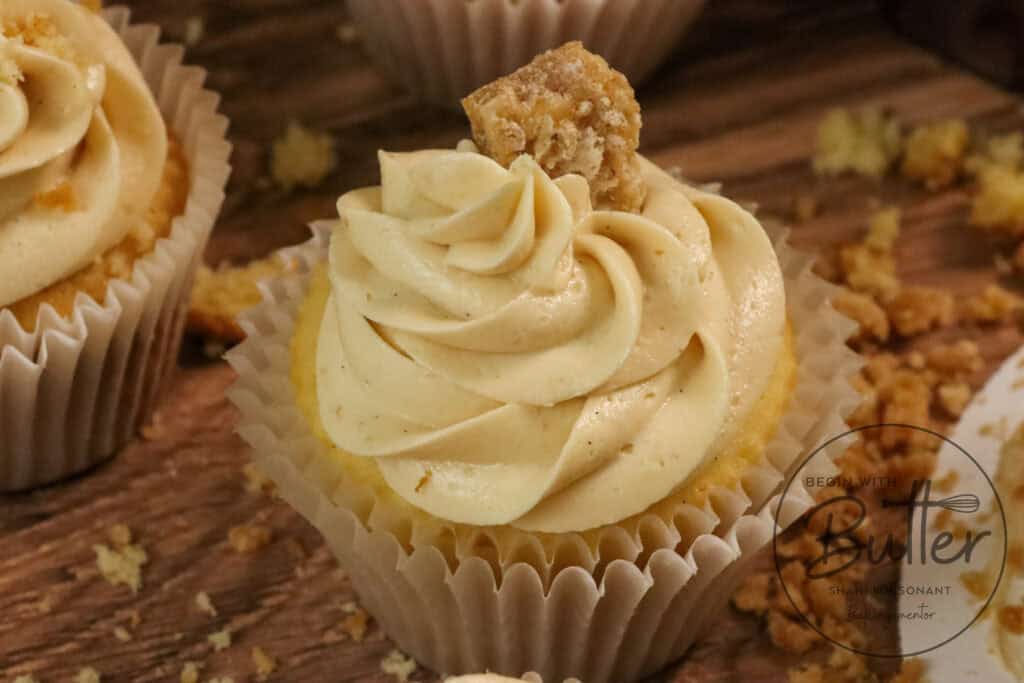
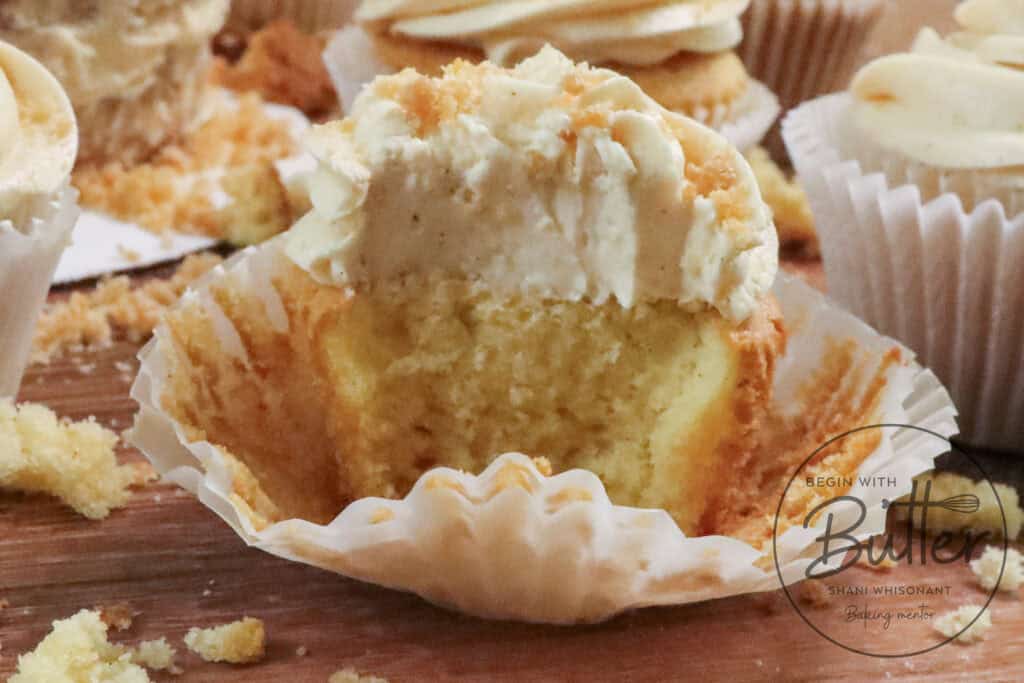
For those of you who love warm, rich, balanced flavors, and easy desserts with a beautiful depth of flavor and contrasting textures, this one is perfect for you. It’s different. It’s gorgeous. And now it’s yours. ❤️
(And, for those of us who are allergic to nuts, you can find nut-free toffee at ToffeeCreationsCA! It’s the very toffee featured in the photography here!)
Toffee comes in many, many different flavors. One thing that is consistent among all of the toffee that I’ve consumed in my life (and that amount has been…substantial) is that there’s a warmth in the flavor profile that is unique to toffee.
It’s the brown sugar, Y’all. Brown sugar has a ratio of delicious molasses in it, and that molasses permeates everything that that brown sugar touches. It gives everything made with brown sugar a beautifully rich taste that is almost untraceable in origin.
Unless you know a lil’ something about toffee, that is. 😉
That je ne sais quois – that intangible – is what I had to emulate in this Toffee Crunch Cake. This cake had to enhance that intangible quality, not hide it.
And I’m proud to say that this cake nails it. 😊
Toffee Crunch Cake Ingredients:
Cake Flour: Cake flour enthusiasts, unite! It’s cake flour’s time to shine on the Begin with Butter site. The lower protein content of cake flour results in a divinely moist, tender crumb that cake flour is known to give. My favorite cake flour? White Lily All-Purpose Flour. And no, that’s not a typo; White Lily is my current fave to use for cake flour! (You can read more about White Lily’s use as cake flour in this article)
Baking Soda:This Toffee Crunch Cake contains sour cream, which is naturally acidic, so baking soda is the proper leavening here.
Kosher Salt: Salt is very important in any dessert; it balances the sugar and keeps the dessert from becoming overly sweet. Salt is crucially important in this particular cake recipe, as there is sugar at every step that must be carefully balanced. Without the salt, that sugar becomes overpowering, so make sure to use the correct amount of salt in this particular recipe! That being said, if you’re using table salt or fine sea salt for this recipe, make sure to cut the amount in half.
Unsalted Butter: As usual, butter has a starring role in this cake! It gives wonderful special flavor, and also the creaming process creates the absolutely necessary air pockets that help this cake to rise. Additionally, the fats in the butter are needed to tenderize the powerhouse protein molecules in your cake flour and egg whites, giving it that marvelously moist, sweet crumb. This ingredient does a lot of work! Make sure that your butter is room temperature before you begin. I set my butter out for at least 1.5-two hours before baking time. If you don’t have two hours, 10-20 minutes in your waistband or pocket (or, as my mother would say, in your bra over your heart) will do just fine.
Neutral Vegetable Oil: Vegetable oil adds additional moisture to this cake, and it also helps the cake stay moist longer. One tablespoon is more than enough to make sure that this beautifully moist cake stays that way. I love avocado oil for baking, but any vegetable oil will do.
Granulated Sugar: The sugar in this recipe adds a nice sweetness to this cake, and it also helps with caramelization! We’re not looking so much for deeply caramelized edges to our cake (quite the opposite, in fact), but there will be some. The granulated sugar is largely responsible for this result!
Eggs: The protein in the eggs adds structure to the cake, while the fatty yolk adds delicious flavor, and also tenderizes the proteins in the egg whites and the cake flour. It’s a true multi-tasker and I couldn’t love it more.
Whole Vanilla Bean: This cake uses the seeds from an entire vanilla bean pod. The amped-up vanilla flavor is necessary to help balance the sweetness from all of the sugar, so I strongly recommend using this ingredient for this cake. If you don’t have access to a whole vanilla bean, you can sub a tablespoon of pure vanilla extract.
Sour Cream: I loved the final texture that sour cream lent to this cake. In a pinch, you can also use 250 g (1 c) of buttermilk. Subbing buttermilk will give you all of the tang that sour cream will; however, you’ll be sacrificing on the tendering properties of the sour cream, as buttermilk contains substantially less fat.
Beginners Start Here
If you’re new to baking, or if you want to learn how to do some of the more tricky baking techniques, here are a couple of super helpful articles from the BwB site that will help you get set up for success with this Toffee Crunch Cake.
These resources are super helpful to help you build consistency and confidence on your baking journey, and specifically with this special cake!. Happy Reading!
Important Tools Used in this Toffee Crunch Cake
I am so happy to announce that Begin with Butter has its own Amazon Storefront, where you can find all of the amazing equipment that I used in this special cake! Want even more specific links? Check out the recommendations, below.
I do get paid a commission when you purchase, but these are the tools that I use all the time in my own kitchen.
If you have these tools already, great! Think of this as a checklist to help you build the confidence that you’ll need to execute this recipe!
In 5″ cake pans (with accompanying cupcakes), this cake takes anywhere from 18-22 minutes. For 9″ cakes, this cake takes about 28-34 minutes.
Why vanilla bean instead of vanilla extract?
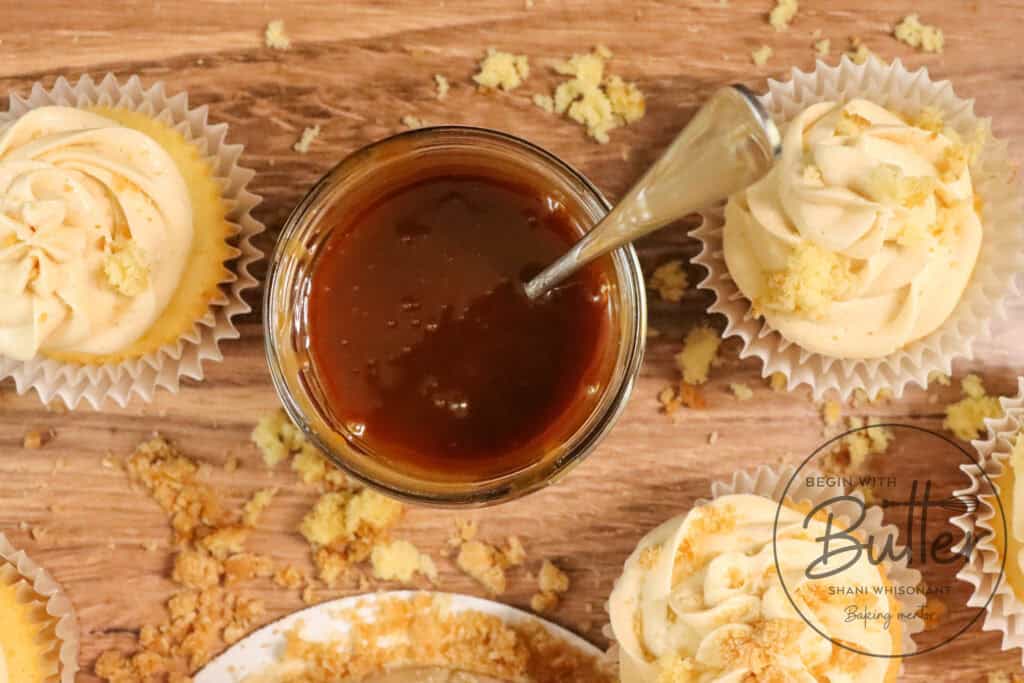
Vanilla flavor that comes directly from the bean itself is much more concentrated with that gorgeous vanilla flavor. It also does a wonderful job of countering the sugar in the recipe. Between granulated sugar in the cake batter and salted caramel sauce, confectioner’s sugar in the frosting, and toffee on top, this cake needs these balancing ingredients to keep it from becoming overly sweet.
Why did you pick cream cheese frosting instead of American Buttercream?
I’m a girl who doesn’t like things too sweet. With all of the sugar already in this cake, I thought it was necessary to have as many elements to help balance that sweetness as possible. I made cream cheese frosting for this one and never looked back because it was perfect!
Why did you do a charcuterie presentation?
I firmly believe that a cake’s presentation should be jaw-droppingly gorgeous. One thing I love about traditional charcuterie is that there is so much for the eye to see, and I wanted to create that here. Instead of having one cake, I thought “why not create an entire dessert display? With different presentations of the same dessert?” And here we are.
This Toffee Crunch Cake is ready for every single event this summer, fall, and beyond! It’s so easy to make, and whether it’s for a special occasion or a Tuesday (which is also a special occasion), you won’t regret taking the time to make this amazing cake
Enjoy! And don’t forget to tag me on Instagram @beginwithbutter so that I can shout out your success!
I hope you love this preview! And I hope you love this cake!
What makes this Biscoff Cookies and Cream Ice Cream so different? The Lotus Biscoff Sandwich Cookies and the rich swirls of chocolate ganache that’s positively out of this world, swirled with an almost-excessively decadent vanilla ice cream base.
It’s Cookies and Cream like you’ve never experienced it before. And it’s so easy that you’ll think I’m lying to you.
One thing I love is a play on textures. If a dessert is completely smooth, I love to add a little something crunchy to give it some textural razzle dazzle. The resulting contrasting textures on the tongue add so much interest to the finished dessert, and that adds a great level of sophistication to any dish.
It’s why I’ve always loved cookies and cream ice cream with all my heart. You’re eating that oh-so-smooth ice cream, then you get a pop 💥 of buttery, crunchy cookie? I mean come on…Whether they’re chocolate chip cookies or Oreo cookies, there’s just no losing with a good cookie/ice cream combo.
And when that cookie/ice cream combo involves spiced Biscoff cookies, you have won the lottery.
Biscoff Cookies and Cream Ice Cream Ingredients
Heavy Cream: Heavy cream adds a rich, creamy texture and provides the necessary fat content to help hold air bubbles, creating a smooth and scoopable consistency in no-churn ice cream. The high fat content in heavy cream also helps to slow down the freezing process, allowing for a more even crystallization and a creamier final product.
The heavy cream is also found in the chocolate ganache, and helps create a ganache that is creamy and swirly texture throughout the ice cream, providing a beautiful contrast to the crunchy cookies.
Vanilla Bean or Vanilla Extract: Vanilla bean or vanilla extract complements the warm, spicy, and nutty flavors of Biscoff cookies in no-churn ice cream, adding a creamy and sweet contrast to the cookie’s deep flavor. The subtle flavor of vanilla also enhances the overall flavor profile of the Biscoff, creating a balanced and decadent dessert that combines the best of both flavors.
Fine Sea Salt: Fine sea salt enhances the flavors of the Biscoff cookies and balances the sweetness of the cream and sugar in the no-churn ice cream, adding a touch of sophistication and depth to the dessert. The salt also helps to bring out the caramel and nutty notes in the Biscoff, creating a more complex and interesting flavor profile.
Sweetened Condensed Milk: Sweetened condensed milk adds a rich, sweet, and creamy element to Biscoff no-churn ice cream, providing a smooth and velvety texture that complements the crunchy cookies. The sweetened condensed milk also helps to balance out the spiced and nutty flavors of the Biscoff, creating a sweet and indulgent dessert that’s perfect for hot summer days.
Biscoff Sandwich Cookies: Biscoff cookies add a sweet and spicy flavor to the ice cream, with their distinctive taste and aroma infusing the creamy base with notes of caramel, cinnamon, and nutmeg. The cookies are also dispersed throughout the ice cream in chunks, providing a delightful textural contrast to the smooth cream, with their crunchy wafers and creamy filling adding a playful touch to the dessert.
Semi-Sweet or Milk Chocolate: You’ll want to use high-quality semi-sweet or milk chocolate in this recipe. The chocolate adds a deep, rich, and velvety chocolate flavor to the chocolate ganache that complements the sweetness of the cream and the spiced cookies, creating a decadent and indulgent treat.
Beginners Start Here
If you’re new to dessert making, or if you want to build your confidence immediately, here are a couple of super helpful articles from the BwB site that will help you get all the way ready for this Biscoff Cookies and Cream Ice Cream.
So happy to announce that Begin with Butter has its own Amazon Storefront, where you can find all of the amazing equipment that I used in this special ice cream! By clicking the link, you can go directly to all of my favorite equipment for this summertime treat.
I do get paid a commission when you purchase, but these are the tools that I use all the time in my own kitchen.
If you have these tools already, great! Think of this as a checklist to help you build the confidence that you’ll need to execute this recipe!
Frequently Asked Questions about Biscoff Cookies and Cream Ice Cream
What is “no-churn ice cream”?
No-churn ice cream is a type of ice cream that is made without using an ice cream maker, instead relying on the homemade whipped cream and sweetened condensed milk to freeze and set the mixture.
Why do you pair Biscoff sandwich cookies with chocolate ganache?
The combination of chocolate ganache and Biscoff sandwich cookies creates a rich, velvety, and sweetly spiced flavor experience with notes of caramel, butterscotch, and deep chocolate. Basically, why wouldn’t I pair these two things? 😊
Which Biscoff Cookies should I use for this recipe?
Since the original cookies and cream ice cream included vanilla ice cream and Oreo sandwich cookies, I wanted to stay true to the intent of the original and use the vanilla-flavored Biscoff Sandwich Cookies. To add that special chocolate element, I added a delicious ganache, so you’re getting the best of both worlds: Biscoff and chocolate! (And bonus, you learn how to make incredible ganache that’s multi-purpose!)
Can I use plain Biscoff Cookies for this recipe?
Absolutely! The difference will be that you won’t get the wonderful texture from the vanilla filling. I LOVE that texture and taste with the vanilla ice cream and the Biscoff cookies, but if you can’t find the sandwich cookies, you can make an incredible ice cream with the plain Biscoff cookies!
This Biscoff Cookies and Cream Ice Cream is the perfect dessert to combat this July heat (or, actually, it’s perfect for any time of the year!). I hope that you all love it as much as my family and I do!