The weather in Maryland has been all over the place lately. Up and down and everywhere in between.
Seriously?!
But one thing has remained constant over the past couple of weeks.
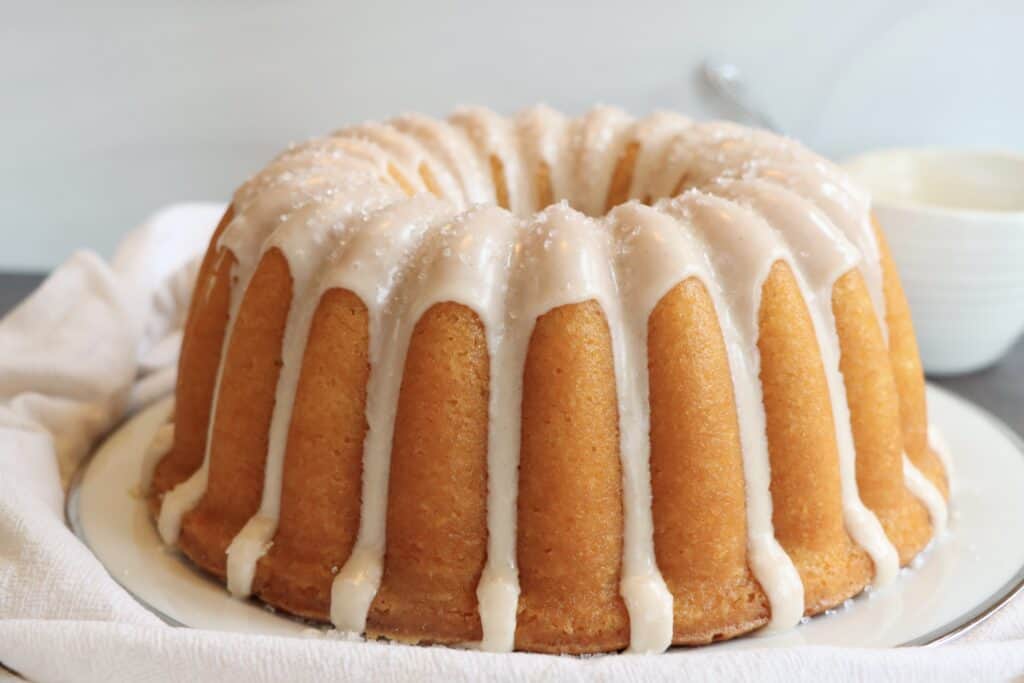
I’ve made this Lemon Blueberry Loaf Cake 9,847 times, to make it just perfect for you.
It has been a ray of sunshine during this unpredictable winter. Winter is peak season for citrus, so this cake takes full advantage of the wonderfully tart lemon, and balances it with plump, sweet blueberries.
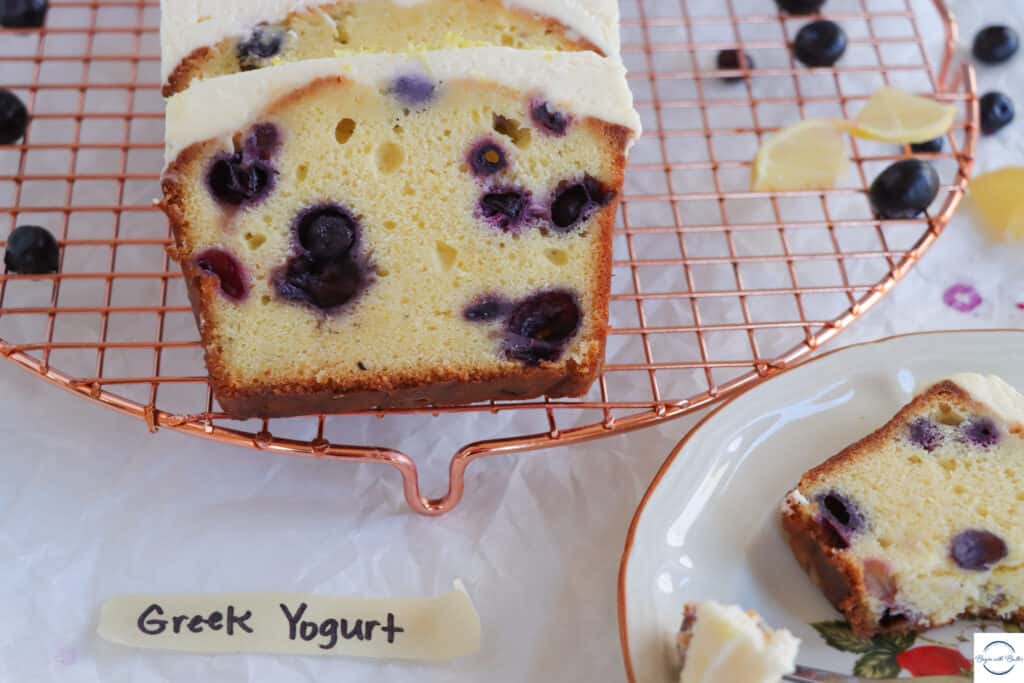
This cake is bright and balanced in color and flavor, and the blueberries look beautiful in the cut cake. Finished with an optional lemon mascarpone whipped cream, this Lemon Blueberry Loaf Cake is perfect for a reception cake for company, brunch with friends, or a Sunday afternoon snack cake.
About this Lemon Blueberry Loaf Cake
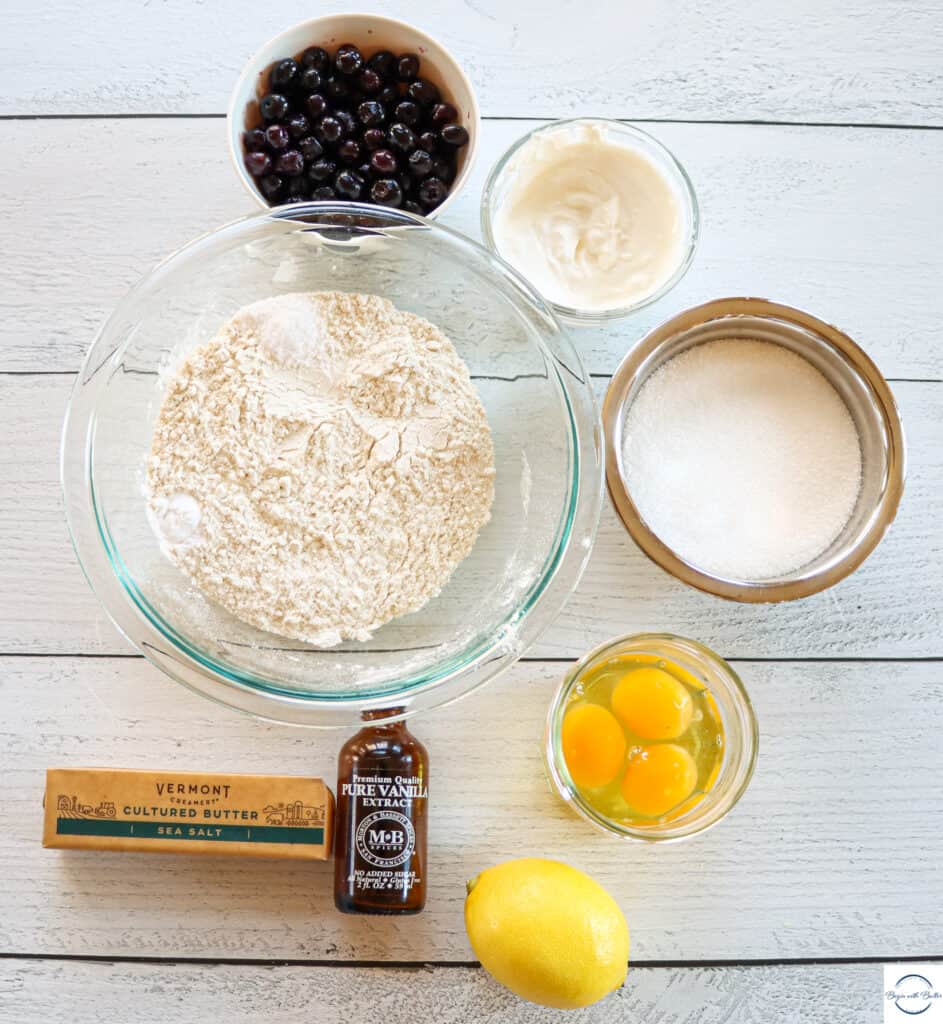
This Lemon Blueberry Loaf Cake works perfectly with either fresh or frozen blueberries; you’ll want to check your state’s harvest schedule to see when local blueberries are in season in your area.
If they’re not in season where you live (and, for those of us in Maryland, blueberries won’t be in season until the end of June ????), this recipe shines with the best frozen blueberries you can find.
If you’re using frozen blueberries, you can thaw them gently under warm water to remove the exterior ice, and then spread them in a single row on a double layer of paper towels while you make the rest of your batter. By the time you’re ready to coat them with flour, they’ll be ready to go!
I recently wrote about four common types of liquids that I use for cakes. Friends, I tried three of the four for this cake and two of them produced exceptional, but different results. So, for this Lemon Blueberry Loaf Cake, you can use either Greek yogurt or sour cream.
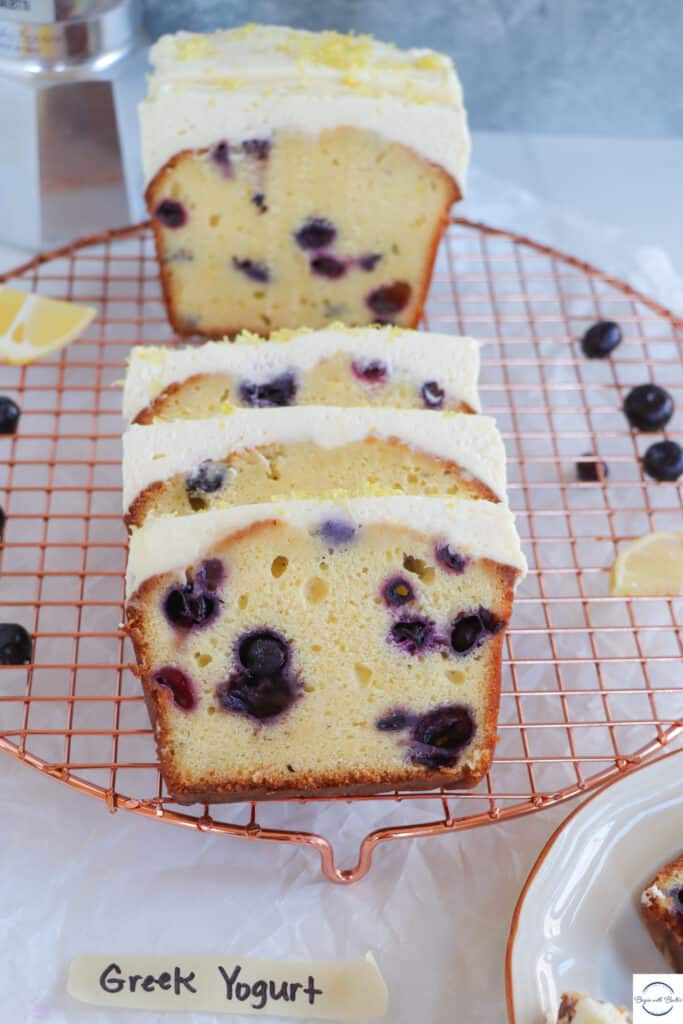
Greek Yogurt Cake
If you want a cake that has a very balanced texture and a WHOLE LOT OF lemon and blueberry flavor, Greek yogurt is the right choice.
If you use Greek yogurt, you can expect a more toothsome, less buttery-flavored cake with an amazing, balanced crumb; the blueberries had a more prominent flavor in this cake than in the sour cream cake. Don’t get me wrong; the cake was extremely rich but also very balanced. The blueberry distribution is absolutely ideal in this cake, making it gorgeous when cut.
Speaking of blueberries…the Greek yogurt brings out every sweet burst of blueberry flavor in this cake, and it also somewhat enhanced the tartness from the lemons. From a taste and texture standpoint, I thought this would be perfect for a breakfast or snack cake. It was exceptional.
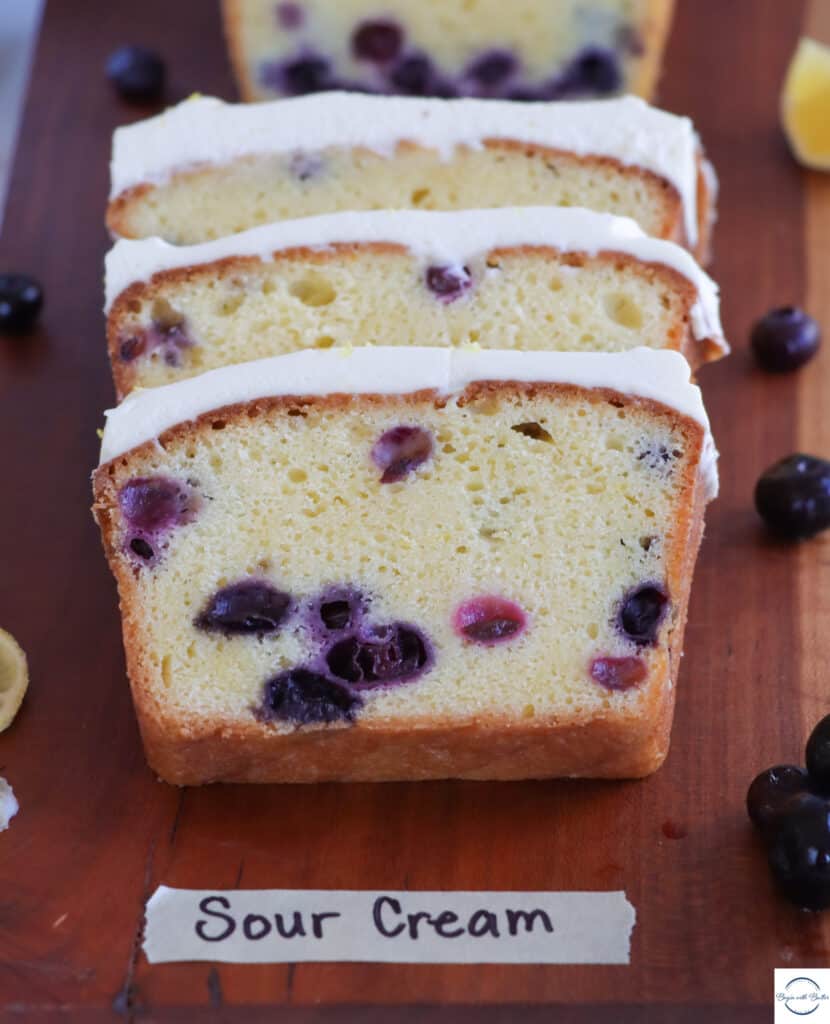
Sour Cream Cake
If you’re going for extreme decadence, sour cream is the way to go; the sour cream cake just melts in your mouth from all of that extra butter fat, and the sweet blueberries add a wonderful pop of sweetness. The sour cream also mellowed the tartness of the lemon and the sweetness of the blueberries; it created a very well-balanced, buttery cake that just made my eyes roll back in my head.
I put a note in my Bits and Bobs book to try this sour cream version in a full layer cake, because I think this version could work really well as a showcase dessert. #comingsoon
Beginners Start Here
If you’re new to baking, or if your stand mixer is covered in dust, here are a couple of articles from the BwB site that will help you get off to a great start with this recipe!
These resources are never mandatory reading, but they are super useful to help you understand the techniques that you’ll need to successfully execute this Lemon Blueberry Loaf Cake. Happy Reading!
Also, in this batter, there’s an important folding technique. You don’t want to break the blueberries in the batter and turn the whole thing blue! For a visual example on how to fold the blueberries into the batter, take a peek at this quick video at the :35 mark!
Below, you’ll find some tools that I used for this Lemon Blueberry Loaf Cake. They’re what I use in my kitchen for just about everything that I bake. **I get paid a small commission if you purchase directly from some of these links, but they are truly amazing products that you’ll find in my kitchen.**
If you have them already, great! Think of this as a checklist to help you build the confidence that you’ll need to execute this recipe!
I hope you love this Lemon Blueberry Loaf Cake as much as I do. It’s making regular rounds at my house right now and every cake is consistently delicious.
Hello Friends! Today is the perfect day to nerd out about ingredients! I had so much FUN writing this blog post and I hope you love it.
When I’m developing a cake recipe, I have oodles of liquid options to choose from. I’ve used just about every one of them during my Mad Scientist baking sprees.
There are, however, four liquids that I use more than others: those four are whole milk, buttermilk, sour cream and Greek yogurt.
This information is incredibly useful for those of you who want to substitute one type of liquid for another in a cake recipe, or for those of you who want to develop your own recipes.
I wanted to share these four with you today, to explain what you can expect from each type of liquid. I also wanted to share why I choose each of them during a recipe development process.
First: What Does Liquid Do In A Cake Recipe?
The type of liquid that you use in a recipe is a really important choice. The liquid that you choose will impact the moisture, protein, fat and acidity levels of your cake. Ultimately, these things will affect the taste of your cake!
Moisture
The moisture level of a liquid refers to the percentage of water in that liquid. This is important because the moisture (water) content of your baking liquid impacts the mouthfeel (texture) of your cakes. A higher moisture content typically means a richer, more satisfying mouthfeel and a lower moisture content typically means a more crumbly, drier texture.
Friends. This does not mean to take it upon yourselves to add more liquid than a recipe calls for. Too much moisture in any baked good means mush.
What this does mean is that different liquids have different moisture percentages, so using a liquid that has a higher moisture percentage per cup will generally mean a more moist end result.
I still hate the word moist (????) but it’s unfortunately the best option here.
Protein Level
The protein level in your liquid can impact the texture of your finished product. Similarly to flour, high-protein liquid contributes to the structure of your cake; more protein = more structure = tougher and more chewy cakes.
Achieving the perfect texture in a cake is a delicate balancing act. Too much protein, not properly balanced against tenderizing agents (like active cultures) will mean tough cake. Not enough protein and you once again arrive at mush, because there is not enough strength to support the other ingredients.
Fat Content
Different liquids also have varying fat contents. And, just like eggs, a higher fat content liquid will add a more luscious texture and rich taste to your baked goods.
This is the reason why recipe writers (myself included) will go to great lengths to remind you to use full-fat liquids in your baked goods.
Acidity Level
Every ingredient in your cakes is either acidic, basic (alkaline), or neutral. Liquids can be any of the above, and this is important because the acidity of your liquid will determine which leavening is appropriate for your cake. Several of my most commonly-used baking liquids are “cultured”, which means that they contain live bacteria and are therefore acidic.
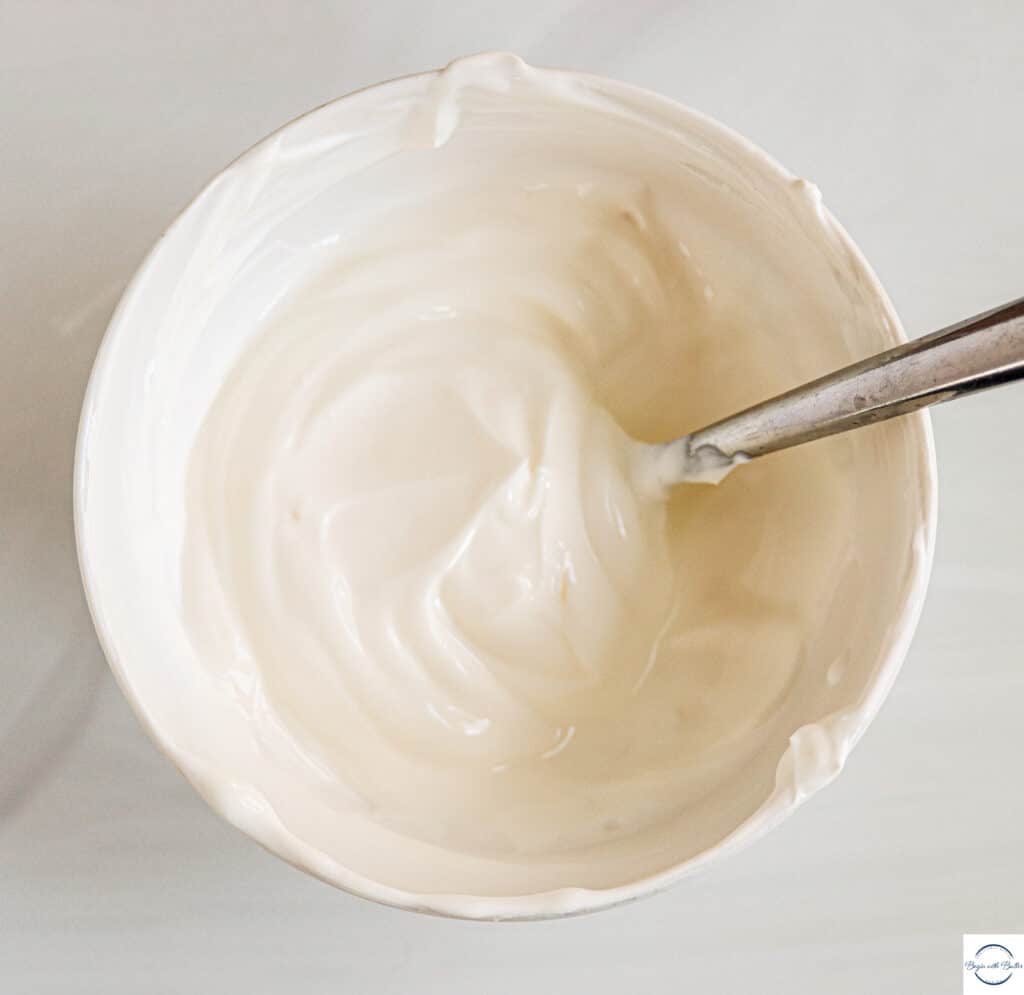
Pictured: Greek yogurt.
I tackled the important differences between baking powder and baking soda in this compelling, must-read article, but for the sake of this article, liquids that are acidic require baking soda, and liquids that are neutral require baking powder.
Taste
Different liquids will also impact the taste of your baked goods. For cultured liquids (buttermilk, sour cream and Greek yogurt), you can expect varying degrees of tangy flavor in the finished product. With whole milk, you can expect a neutral taste.
How Do I Choose Which Liquid to Use?
A common question that I’m asked all the time is how I choose which liquid I’m going to use in a specific recipe?
My answer is going to be deeply unsatisfying, but I will share: I imagine the mouthfeel and taste that I want to end up with in a specific cake and I work backwards. That’s right! Good old reverse engineering and testing, with a chaser of baking science for the win!
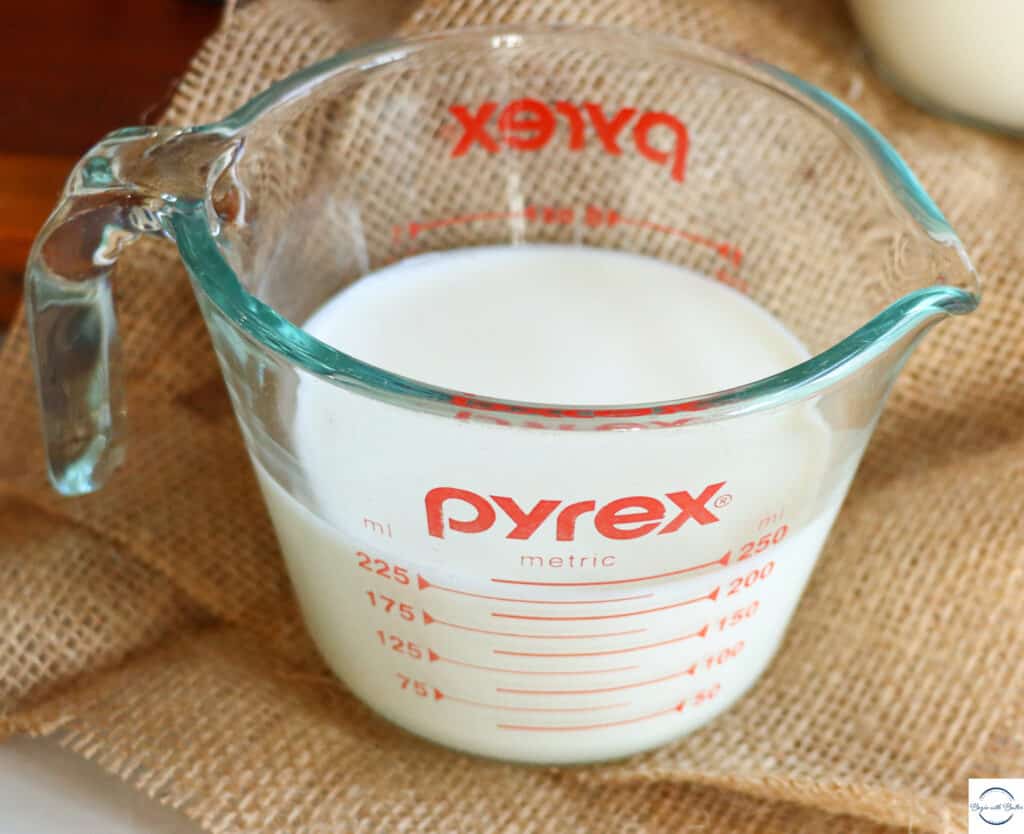
Whole Milk
Whole milk is a great liquid to use in cakes when you want a more delicate flavor. Coming in at 3.25% milk fat, whole milk is great for adding wonderful texture to your cakes without adding a tangy punch of flavor. Whole milk allows other, more subtle flavors to shine, while cultured liquids might compete with those flavors.
One cup of whole milk contains about 8 grams of protein and has a moisture content of about 87% water. This means that whole milk will contribute to a delicate, pleasantly moist and well-structured crumb on your cake. Think light (but well-defined), melt-in-your-mouth crumbs and that’s what you can expect!
If you’re using whole milk in a recipe, you’ll want to use baking powder. Whole milk is a barely-acidic ingredient (it has a typical pH around 6.7, so it is extremely close to being neutral), and it is not acidic enough to activate baking soda. The proper leavening, then, is baking powder!
How I Use Whole Milk: Whole milk is an amazing liquid for vanilla cake recipes, or for chocolate cake recipes that use Dutch process cocoa powder (like my Ultimate Chocolate Cake recipe!).
Buttermilk
Buttermilk is milk with added cultures. These cultures create a wonderfully creamy, acidic, thick milk that is absolute perfection for baked goods. Buttermilk weighs in at somewhere between .5 and 1.5% milk fat, which is slightly less than the aforementioned whole milk. Using buttermilk instead of whole milk means that your baked goods will be ever-so-slightly less rich. This is not usually noticeable, however, and it can be easily overcome with other recipe tweaks.
Buttermilk’s trademark characteristic is a slightly tangy flavor that it imparts on cakes. The active cultures in the buttermilk add a tangy flavor that you cannot find in whole milk.
The added cultures make buttermilk an acid, which means that you should use buttermilk in recipes that call for baking soda. Baking soda is a base, which means that it needs the added acid from buttermilk in order to make a cake rise.
Also of note: buttermilk has a protein content of 8 grams (equivalent to whole milk) and a water content of 90%. This means that, from a texture standpoint, you can still expect a well-defined gluten structure with a moist crumb.
How I Use Buttermilk: I use buttermilk as a default in pound cakes. It helps me achieve the perfect pound cake crumb; the walk-around-with-a-piece-of-cake-in-a-napkin-and-not-drop-a-crumb crumb. ????
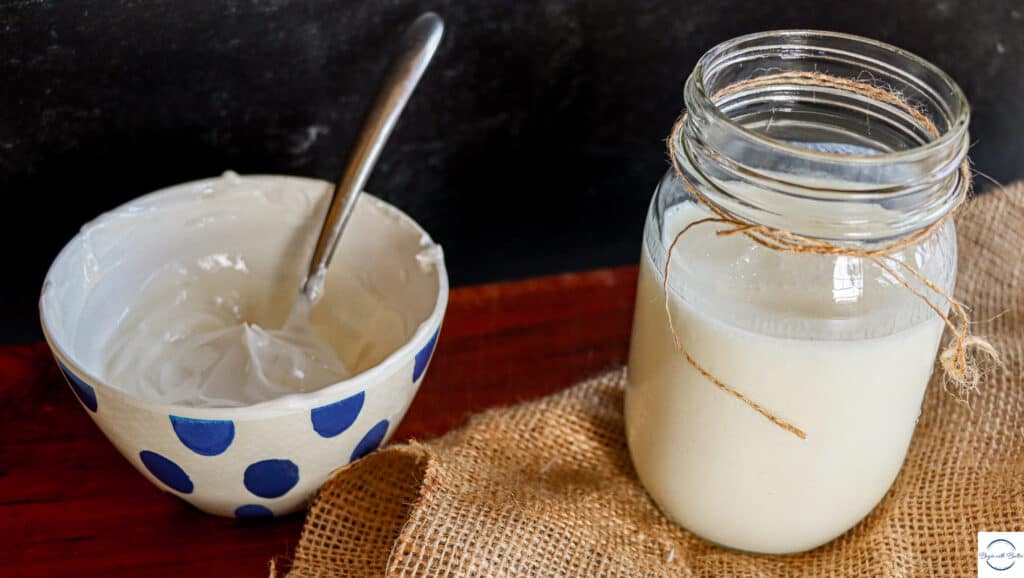
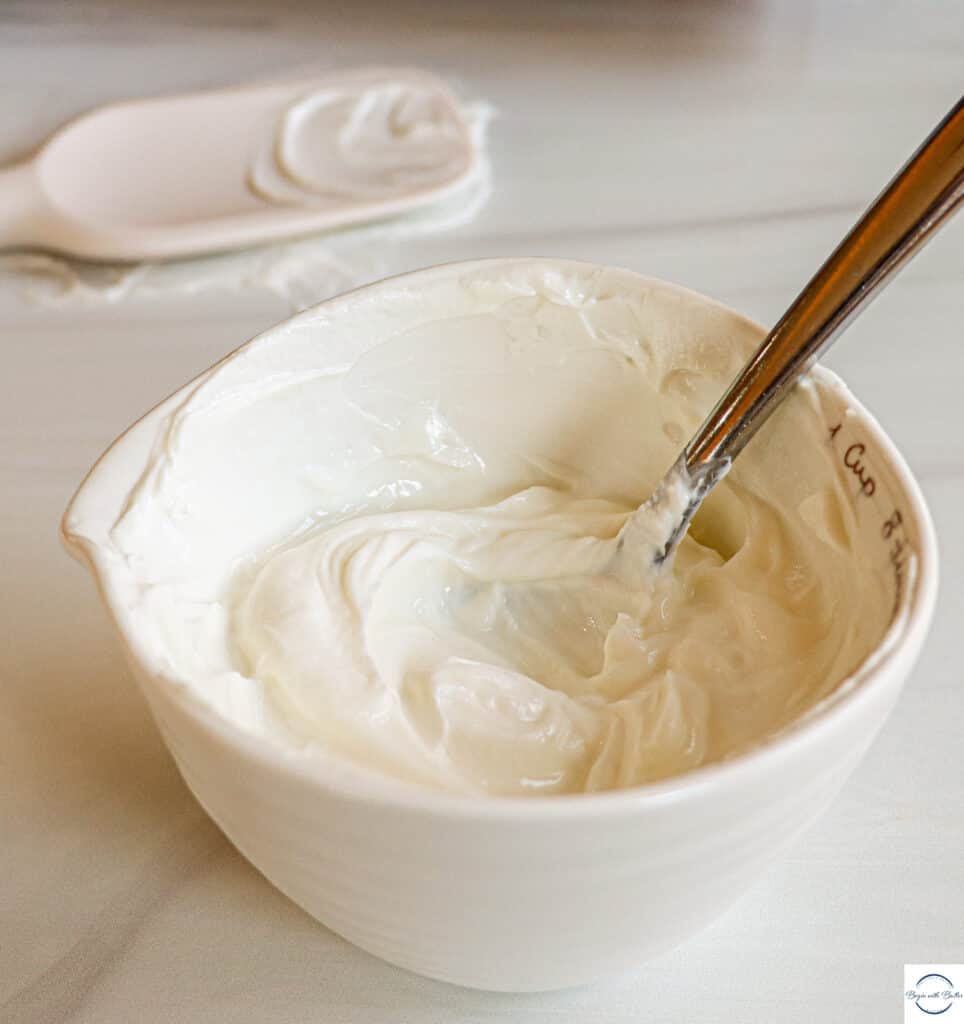
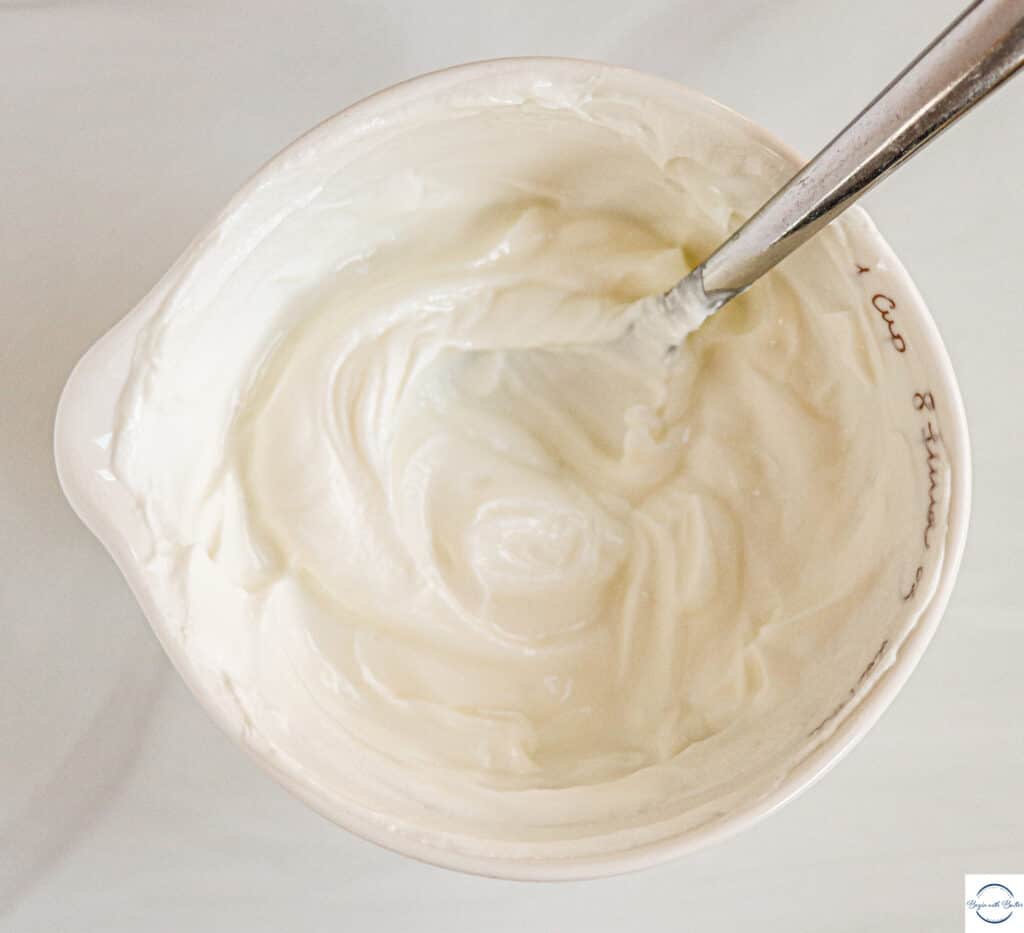
Sour Cream
Sour cream is similar to buttermilk, in that it is cultured, but sour cream is cultured cream and has a significantly higher fat content. While buttermilk is somewhere between .5% and 1.5% milk fat, sour cream clocks in at around 20% milk fat!
Pictured: sour cream.
The cultures in sour cream mean that it will again have a tangy taste to it. The tanginess isn’t enough to overpower the other flavors in your cake; to me, sour cream enhances the flavors of other ingredients and makes them really pop.
With sour cream, it’s all about the mouth feel. With a low protein content (4.8 grams per cup) and a lower water content (73%), sour cream creates a rich, dense and more loosely defined crumb. This, combined with all of that additional fat, creates a super rich texture that just melts in your mouth.
My Snickerdoodle Pound Cake is a perfect example of a cake that has a potent flavor profile (the cinnamon and sugar is extremely prominent). Those flavors are boosted by the acidic sour cream, and the high fat content gives it the most luscious texture. It’s truly an experience.
How I Use Sour Cream: I use 100% sour cream in pound cakes when I need to achieve that very rich, very dense texture and I have strong flavors to showcase. If I want a light-but-still-rich crumb, but still want to take advantage of the high fat content of sour cream, I will mix sour cream with whole milk, usually in a 75/25 ratio.
Sour cream is also a great idea for cakes that have heavy add-ins, like fruit or chocolate chips. Those things tend to sink to the bottom of cakes unless they’re coated in flour, but they’ll stay more buoyed in a more dense batter with sour cream.
Greek Yogurt
And then there was Greek yogurt. Greek yogurt is cultured milk, triple strained to remove as much water as possible and achieve that famous texture.
The full-fat Greek yogurt that I use is 5% milk fat, which gives it the second-highest milk fat content of the bunch (because nothing can compete with sour cream). It also comes it at 9 grams of protein per cup, and it is 88% water. The culturing process makes this another acidic liquid for baking. On paper, it is the most balanced baking liquid.
The high milk fat content means that you can once again expect a very luscious crumb. The high protein content means that you can expect a very well-defined crumb. The 88% water content means that the finished product will be moist, and the cultures mean that this is again a proper candidate for baking soda that will impart a slight tangy taste on your finished product.
How I use Greek yogurt: Greek yogurt is absolutely perfect for muffins and breakfast loaf cakes. It has a unique scientific profile that’s great for high-rise, moist and medium-crumb cakes. It’s also another great liquid to use if you’re adding fruit, nuts, or chocolate chips to a cake batter, since it again creates a more dense batter that won’t allow those things to slip to the bottom.
Other Liquids I Use
While these are the most common liquids that I use, sometimes I play with other ingredients. When I’m feeling really fancy, I’ll add either crème fraîche or ricotta cheese to my cakes. They are an experience, to be sure, and they are worth every expensive penny.
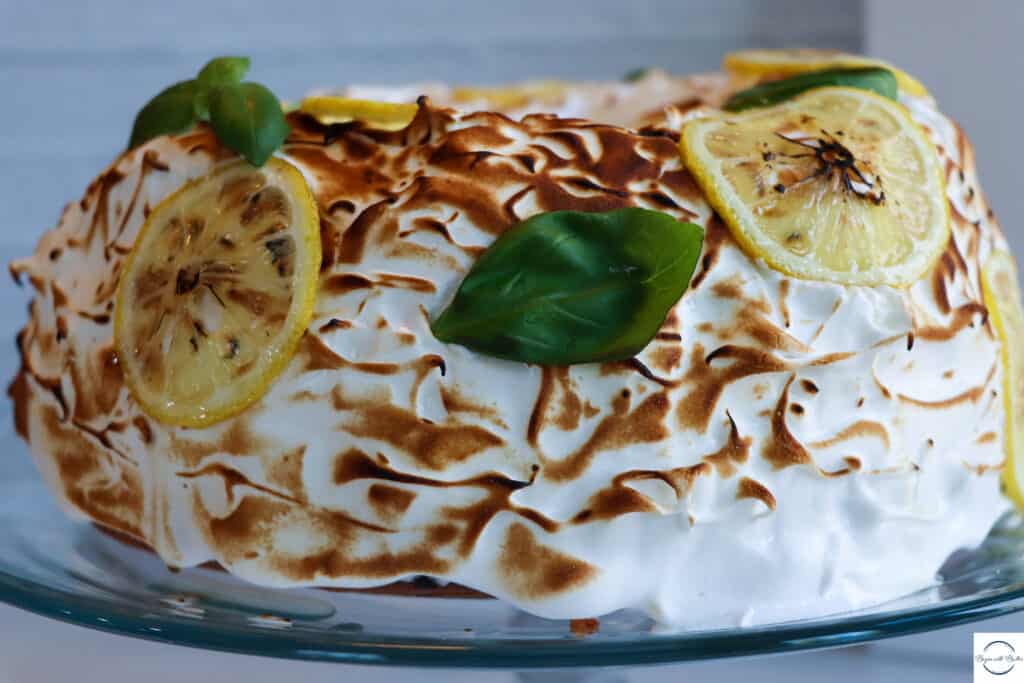
My amazing Lemon Meringue Pound Cake is an example of a ricotta-based cake that I LOVE to make. With ricotta in the batter, lemon curd swirled throughout, and a topping of scratch meringue on top, it’s…an experience.
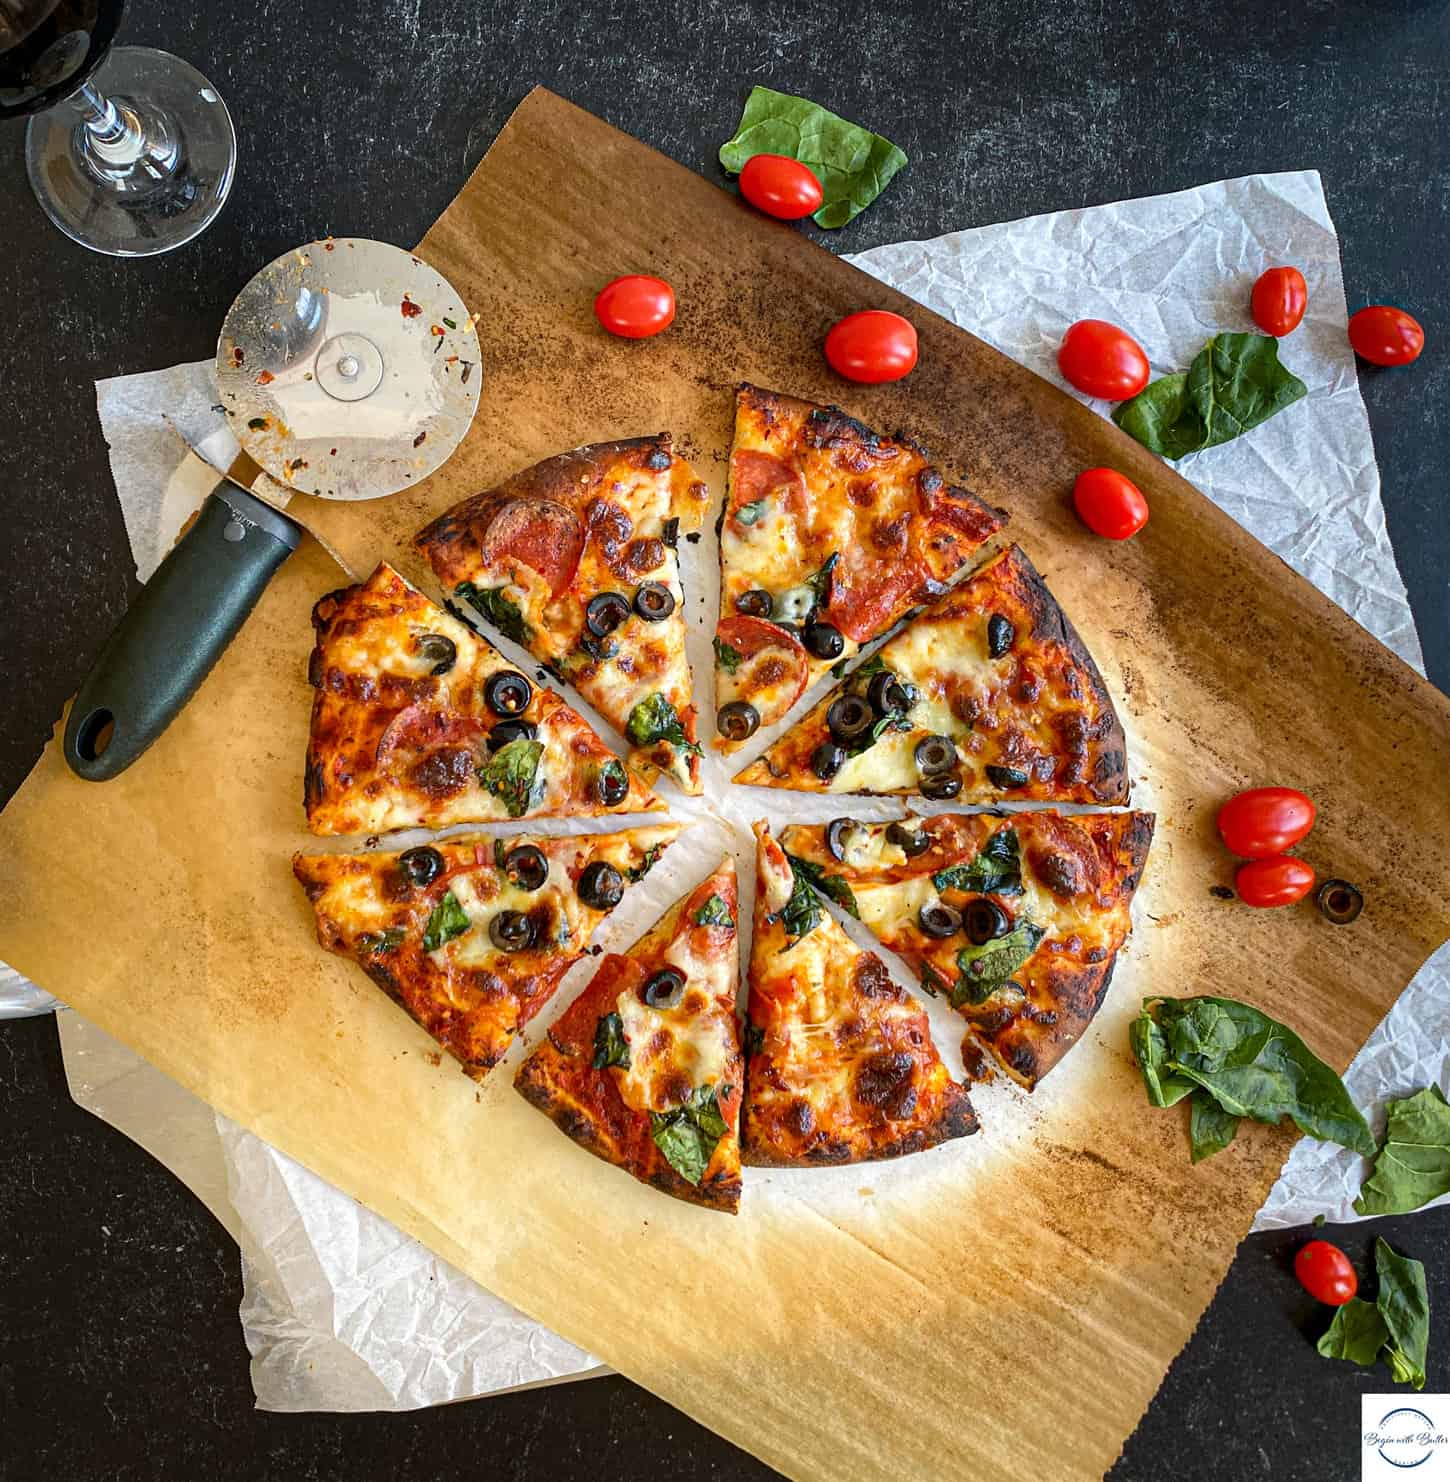
I recently published The Anytime Pizza Dough, which is a Friday staple in my home. It comes together quickly, has two rises, has incredible chew, and tastes like you spent two days making it.
Seriously. That dough must be experienced to be believed.
What I didn’t tell you, Family, was that there’s a very special and extremely easy pizza sauce that I often pair with that dough. The combination is serious dynamite and it is a big part of the reason why I never, ever use my phone to dial for anybody else’s pizza around here.
(If you can access a good mozzarella di bufala, you’ll want to add that too. Otherwise, a good part-skim, low moisture mozzarella works extremely well!)
I mean…
My goodness.
This highly customizable pizza sauce has exactly five easy ingredients and it is exactly what your next homemade pizza needs. It is so versatile, that I’ve been known to use it as pasta sauce when I needed a very quick win.
How to Make this Sauce
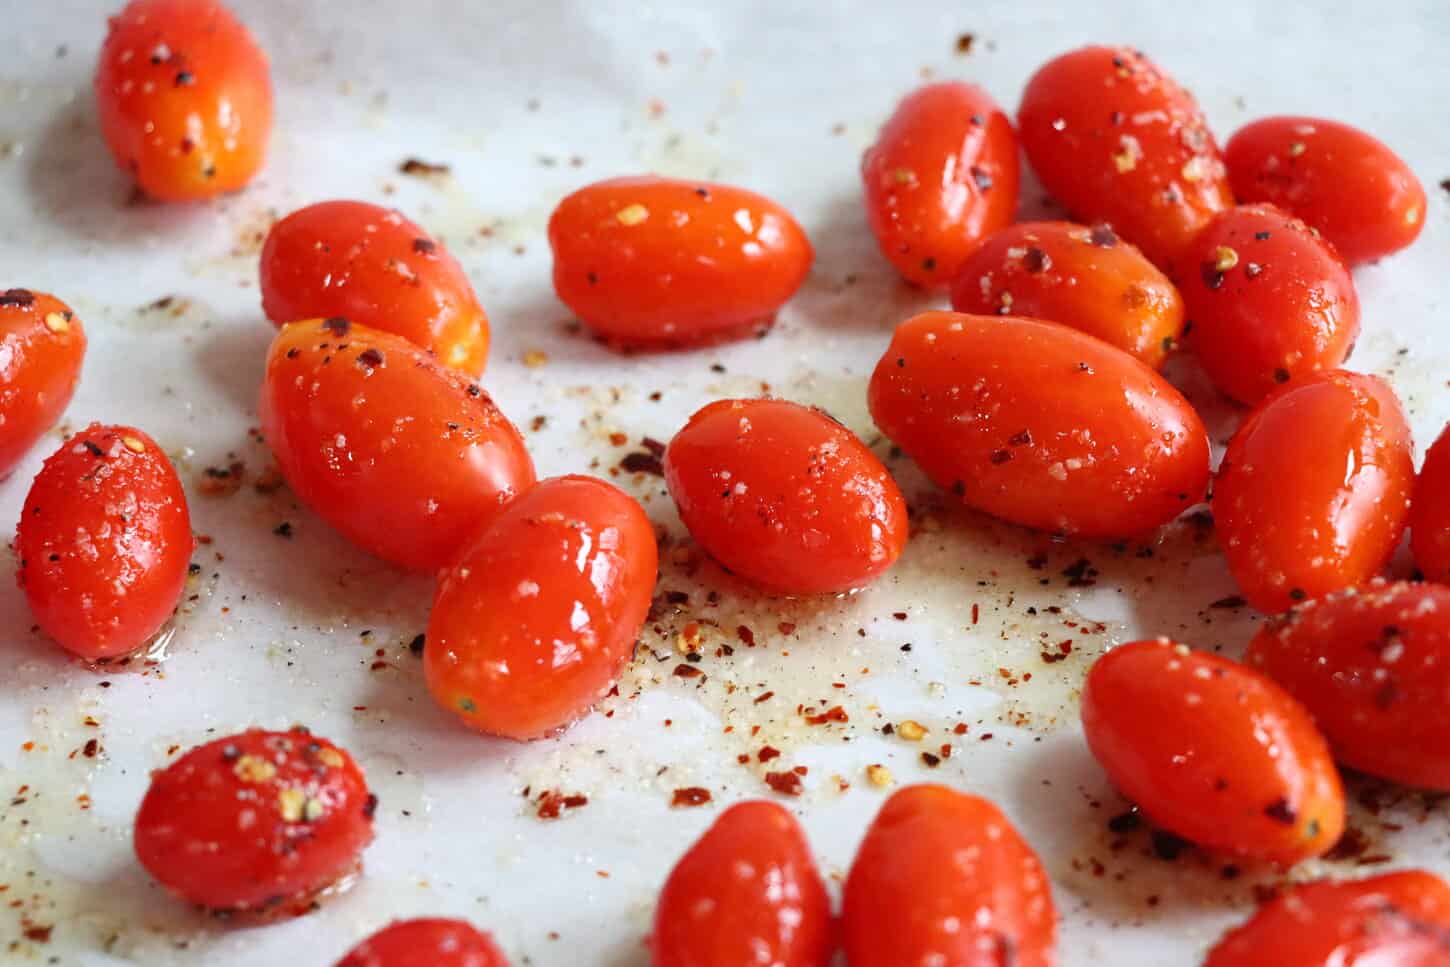
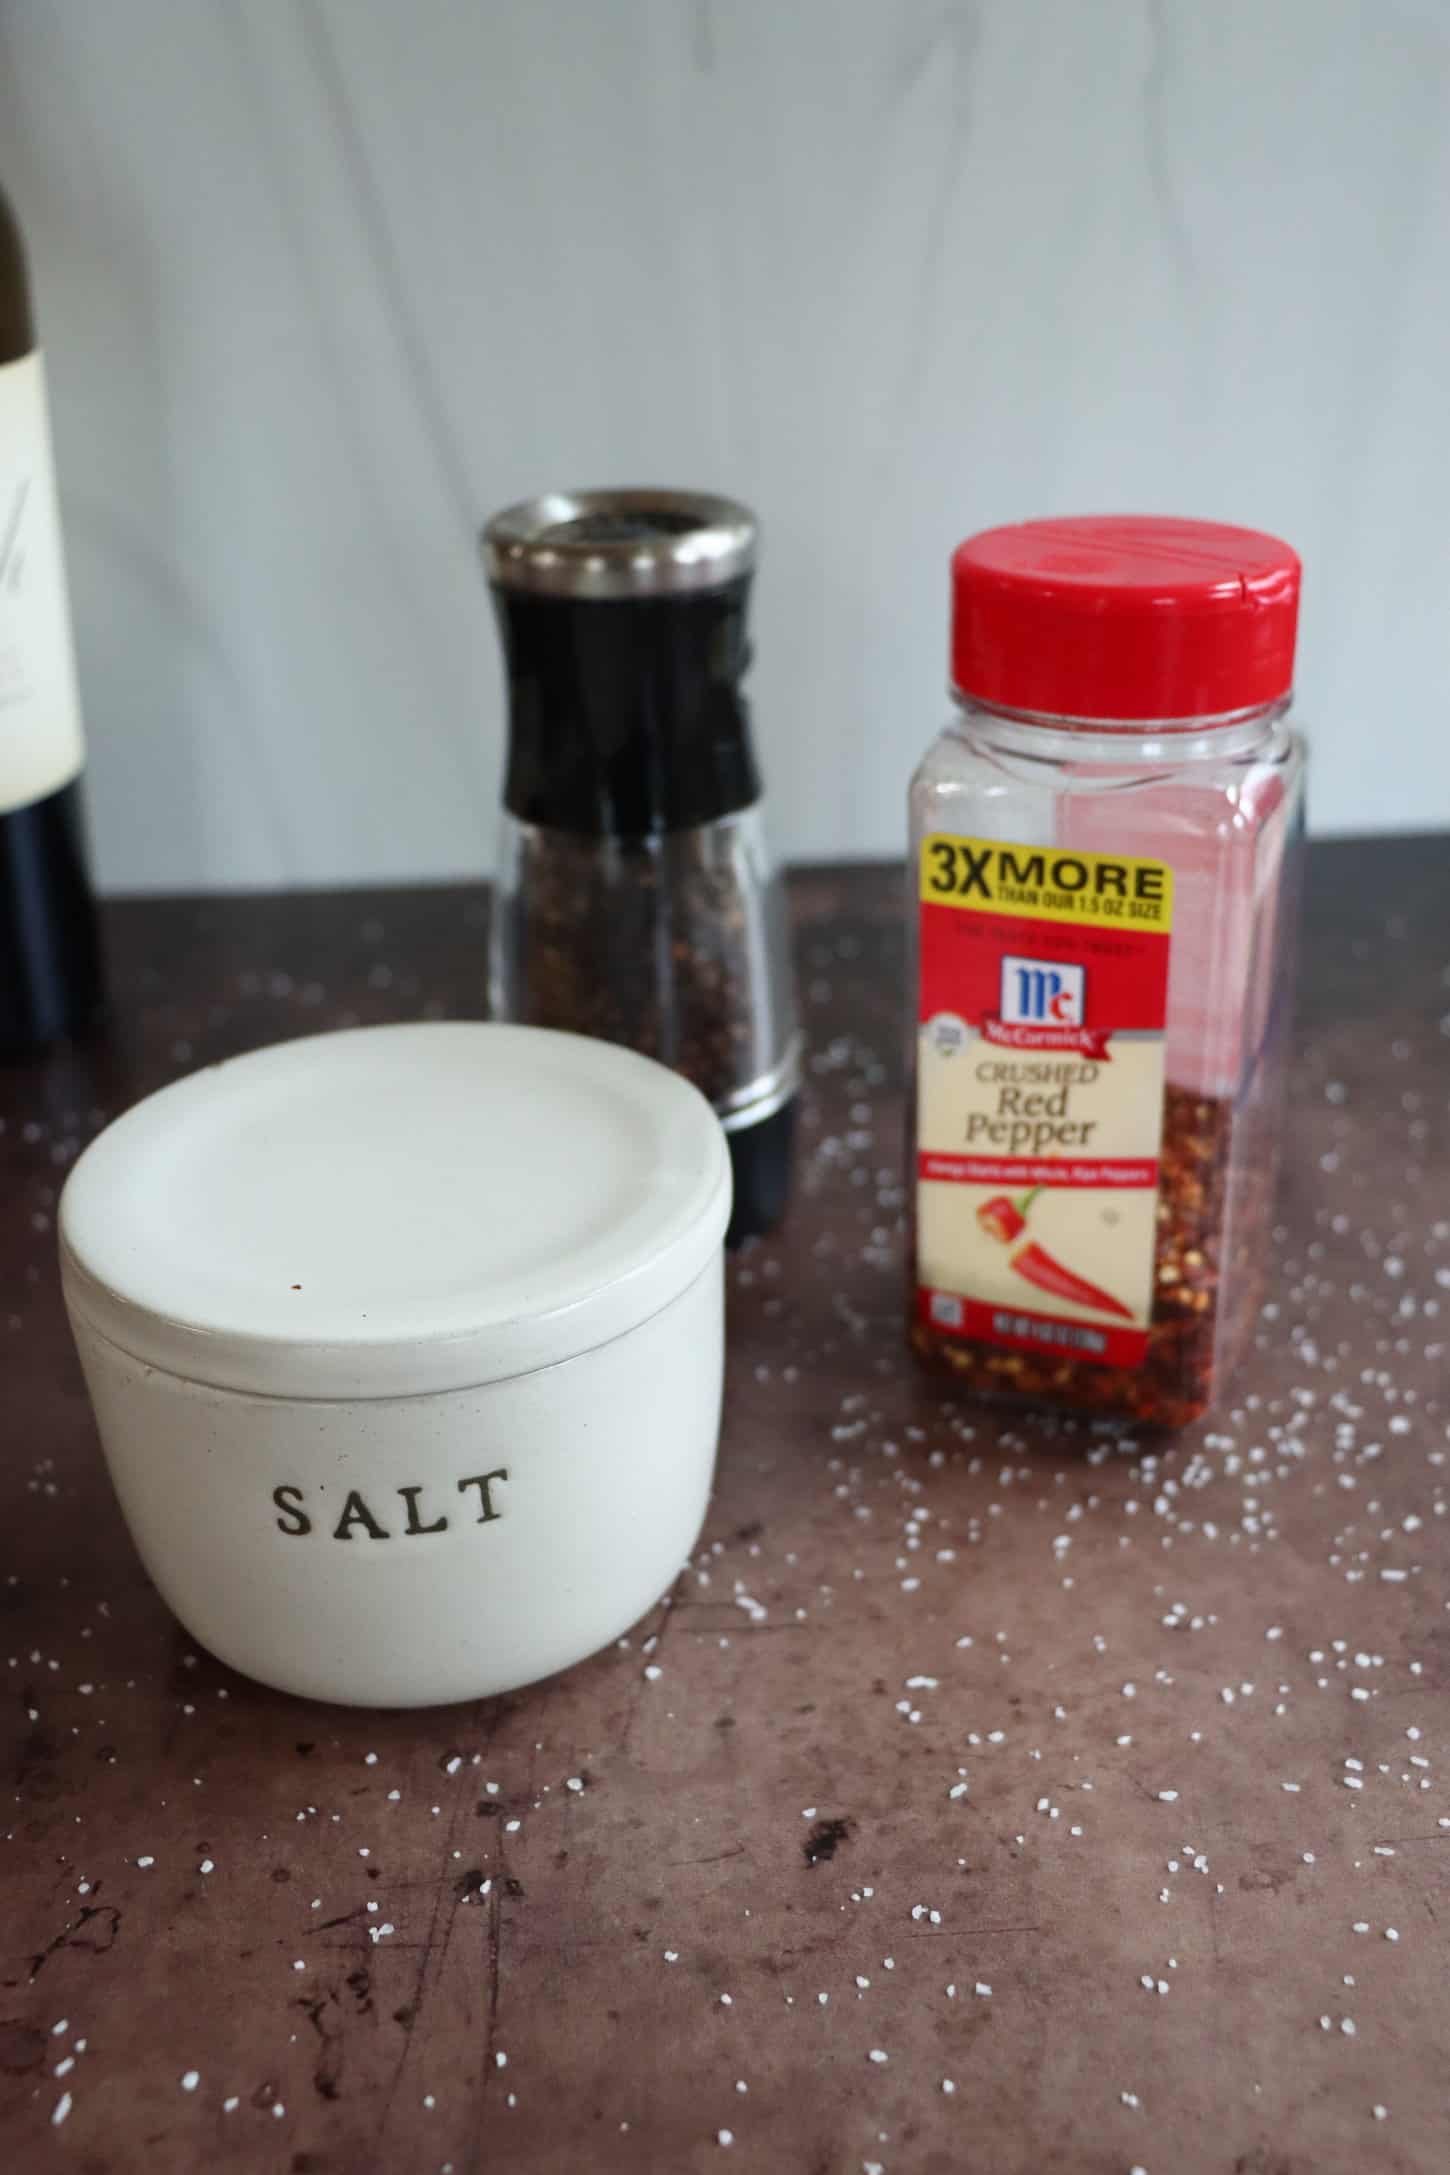
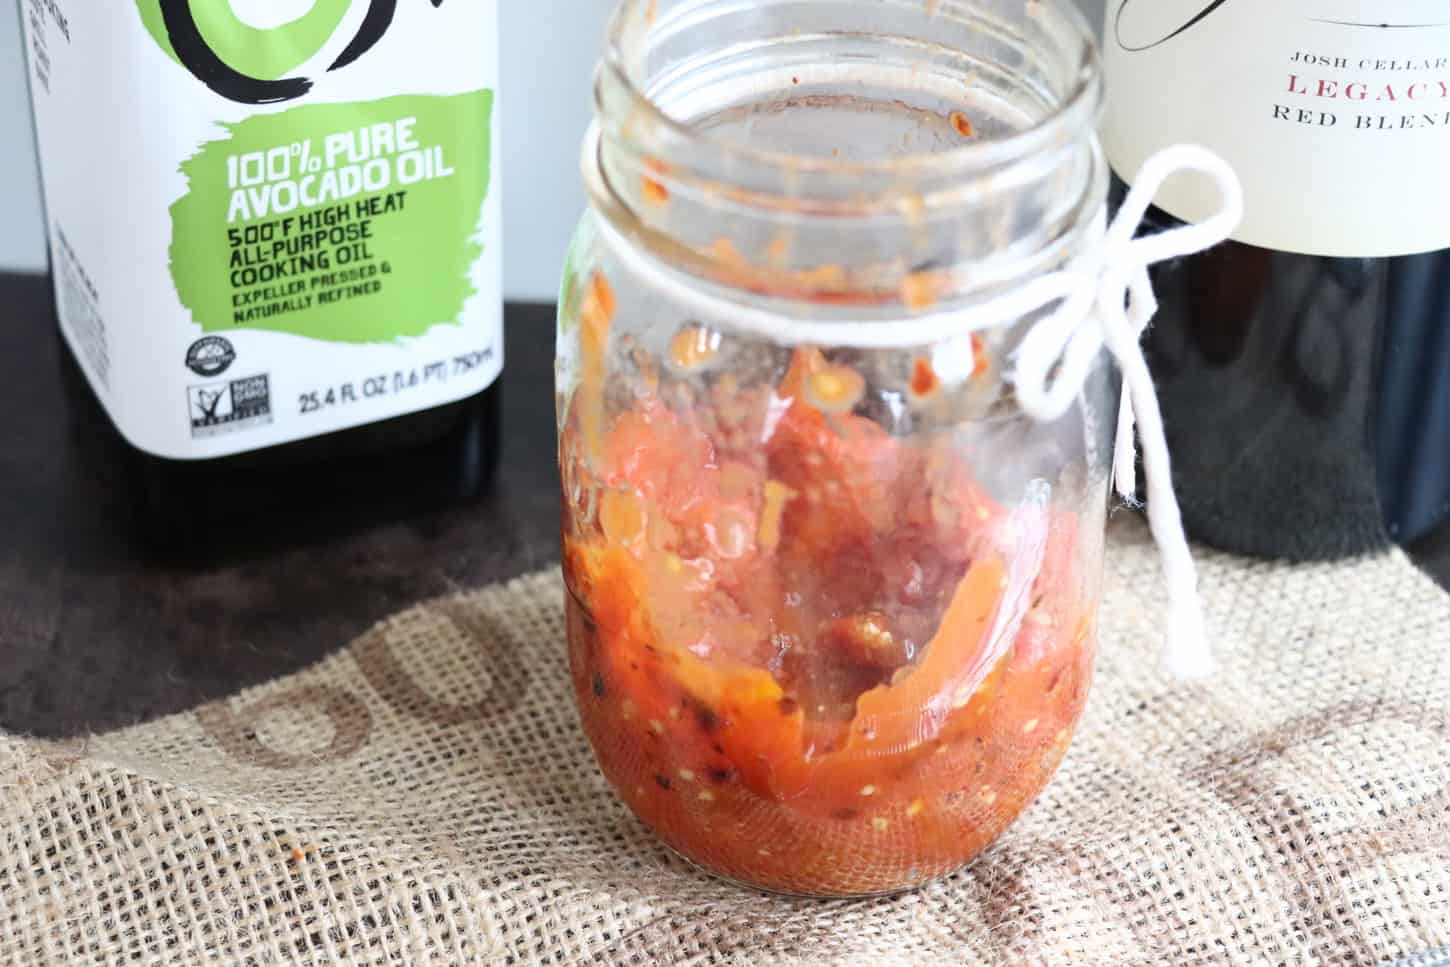
This pizza sauce comes together with only five ingredients. You’ll want to source the best grape or cherry tomatoes that you can find, since the tomato flavor is the star here:
Tomatoes, salt, pepper, and crushed red pepper. Not pictured: avocado oil.
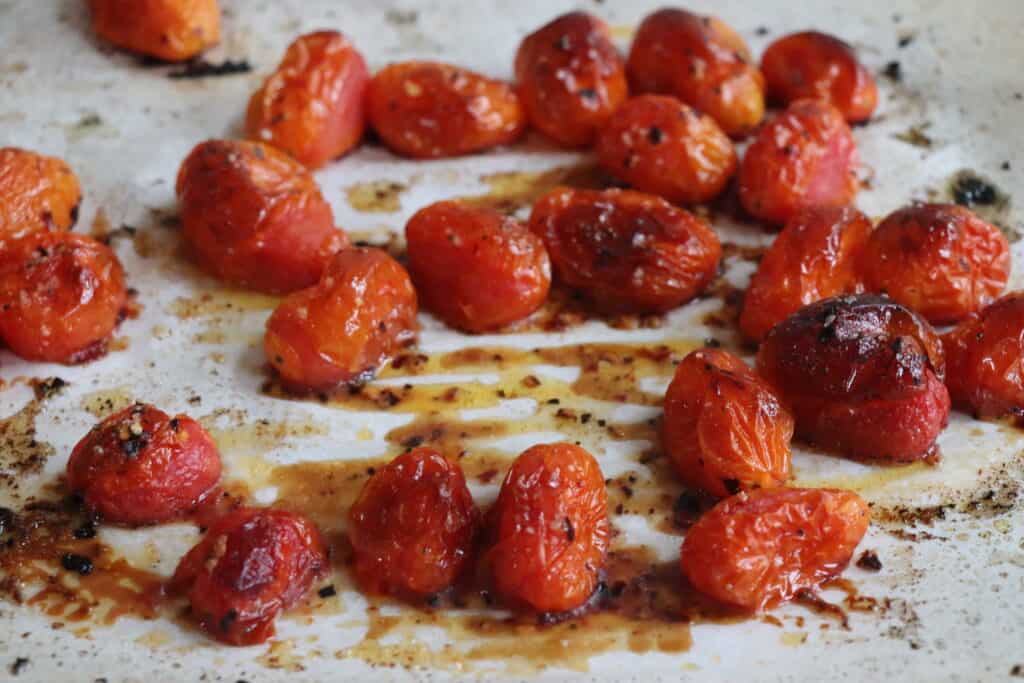
To make the sauce, place parchment paper on a rimmed baking sheet. Pour the oil over the tomatoes, then sprinkle the salt, pepper, and crushed red pepper over the whole thing. Use a silicone or rubber spoon to stir the whole thing together, then pop it into a 425°F oven for anywhere from 11-16 minutes.
Sound up! You’ll want to listen to this. ????
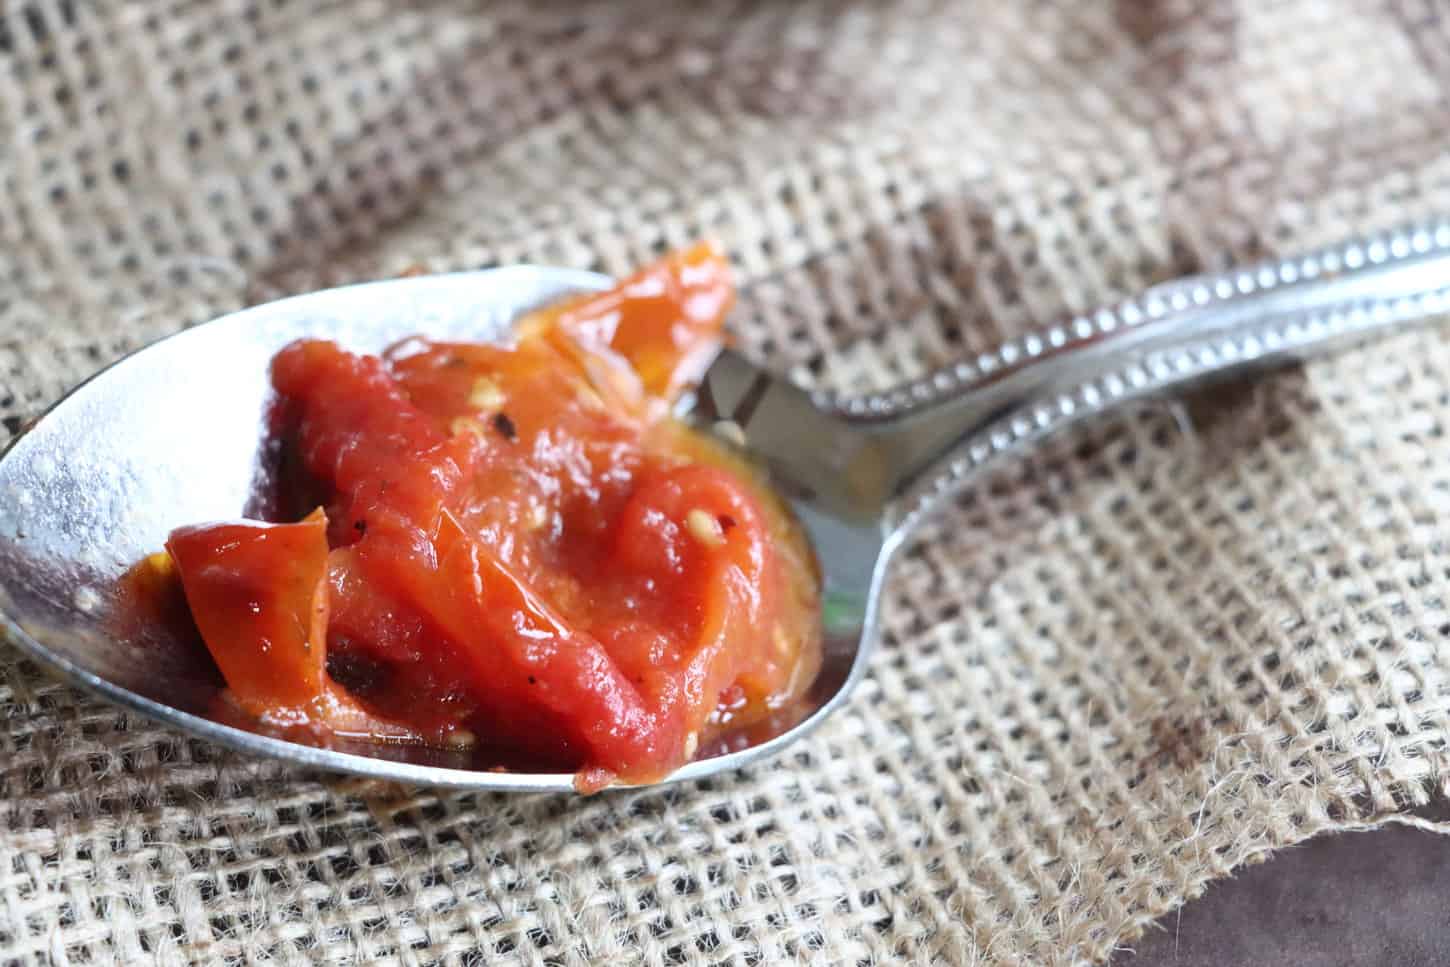
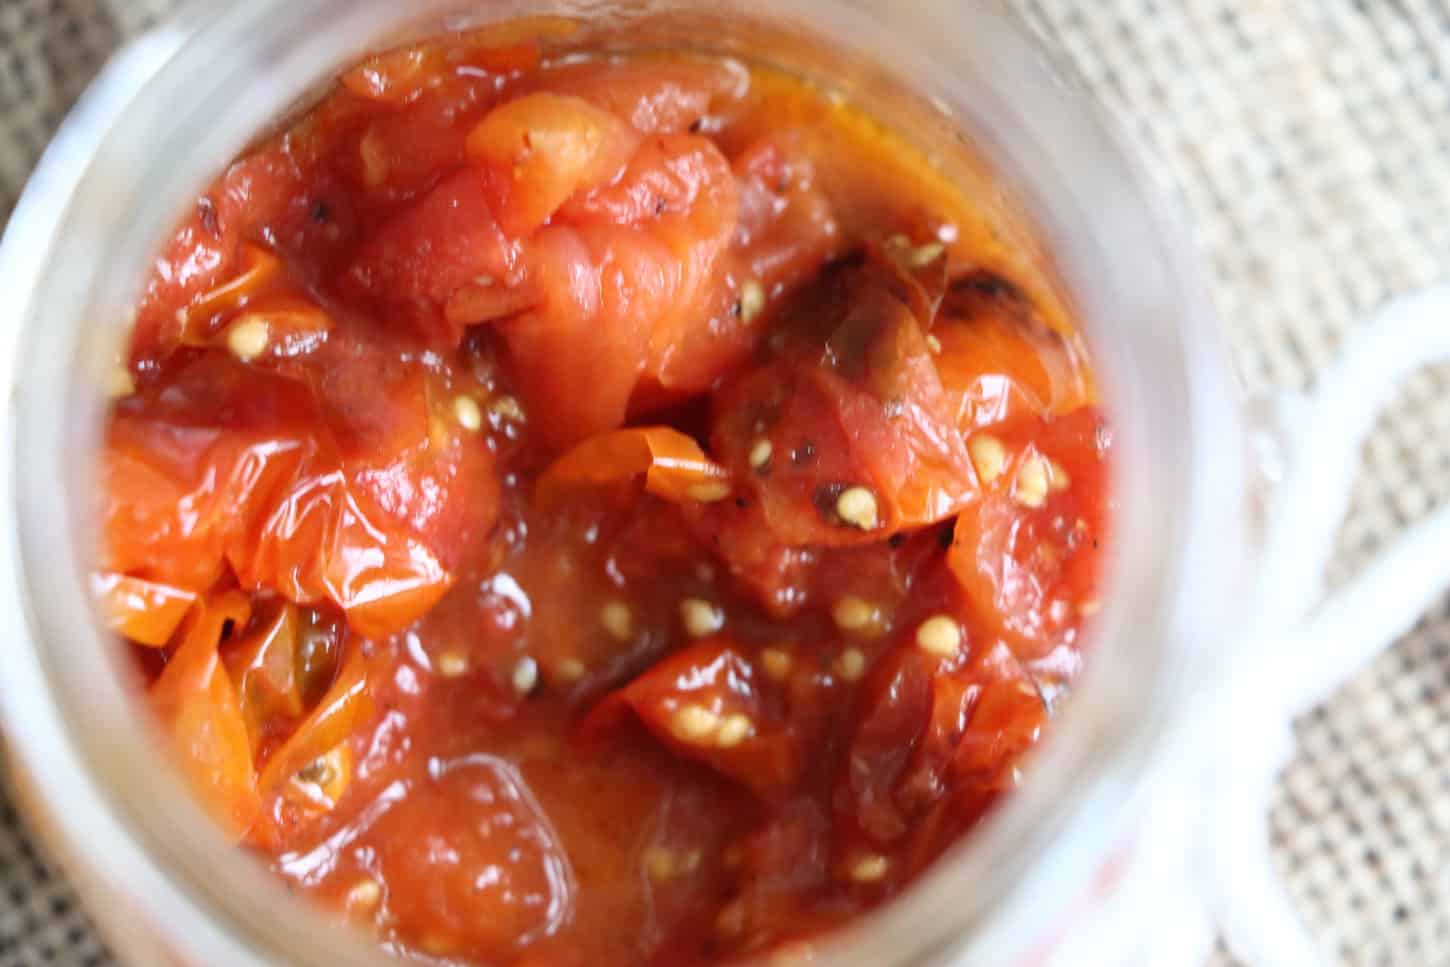
Once the tomatoes reach your desired level of caramelization (I prefer mine really caramelized), remove them from the oven and allow them to rest for about ten minutes. That rest time allows the tomatoes to reach perfectly jammy goodness and texture for your pizza.
For a more chunky tomato texture, you can smash the cooked tomatoes with a fork. If you prefer your tomato sauce smooth, you can absolutely pulse it in a food processor or blender. Just don’t let it run because then you’ll have tomato soup.
This sauce is best used immediately, and spread as thinly as possible. If you’re too heavy-handed with it, the bottom of your pizza crust won’t cook. Don’t worry though! A little of this sauce goes a very long way.
To see the process from start to finish, check out this video!
Friday Family Pizza Night is a weekly occurrence in my family. After years of development and practice, Friday Family Pizza Night became the chance to showcase this Anytime Pizza Dough. And boy is it wonderful.
When I first started Friday Family Pizza Night several years ago, I used a slow-rising pizza dough with an overnight rise. But eventually I got tired of making essentially two meals on Thursday nights, so I started developing a faster (and even more delicious) pizza dough. This Anytime Pizza Dough is so amazing that you can actually make it the night before and let it rise until you’re ready to use it!
It was years in the making, but I’m finally ready to share my Anytime Pizza Dough! It is an ambitious pizza dough for a weeknight, but it’s so worth the effort. And with planning, this can be an ambitious weeknight dinner, or it can be a special weekend treat.
This Anytime Pizza Dough is herb-y and chewy and versatile and everything that is perfect about pizza. And I hope you love it.
Beginners Start Here
If you’re new to working with yeast specifically, or new to baking in general, these three articles will help you tremendously when working with this recipe! Even if you’re not new to baking, these three articles will have lots of good information to help you with all of your pizza and bread baking endeavors!
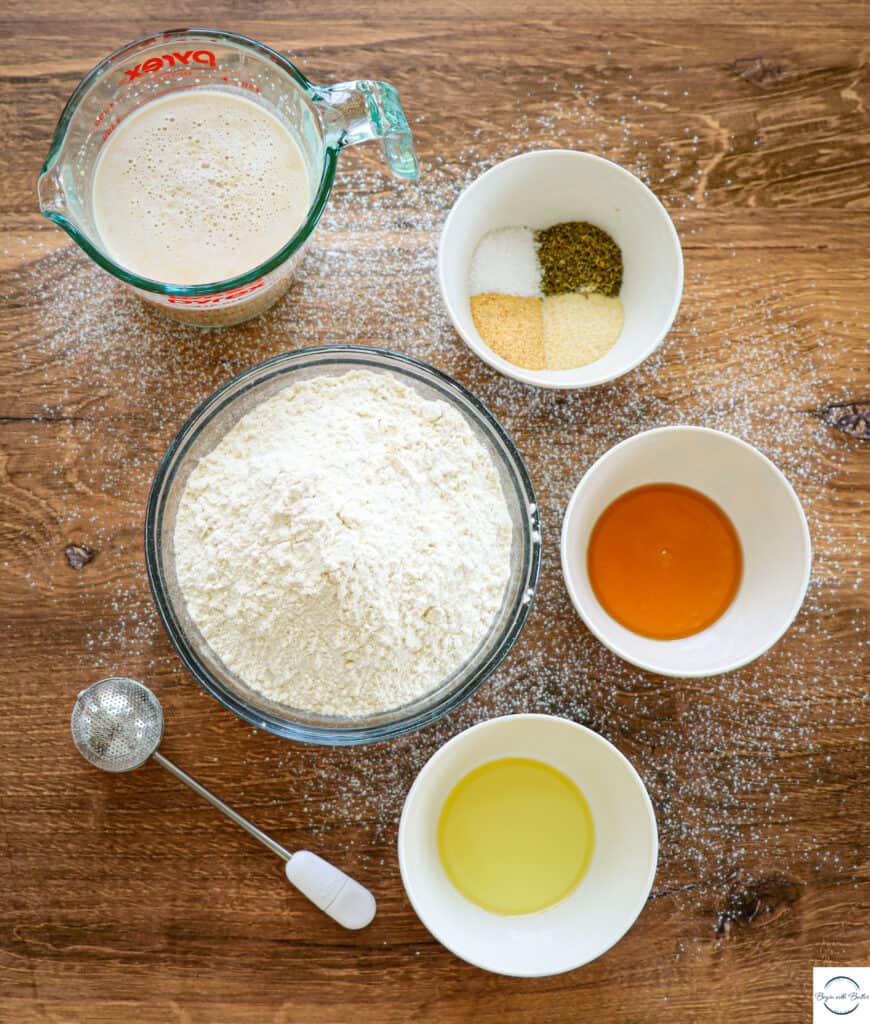
To start this recipe, prep your mise en place. It is highly recommended that you use a digital kitchen scale and metric measurement for this recipe. Without a digital kitchen scale, it is much more likely that you will over-flour your dough and end up with a dry pizza dough.
And…nobody wants a dry pizza dough.
Having everything prepared beforehand will make it much easier to execute this wonderful dough.
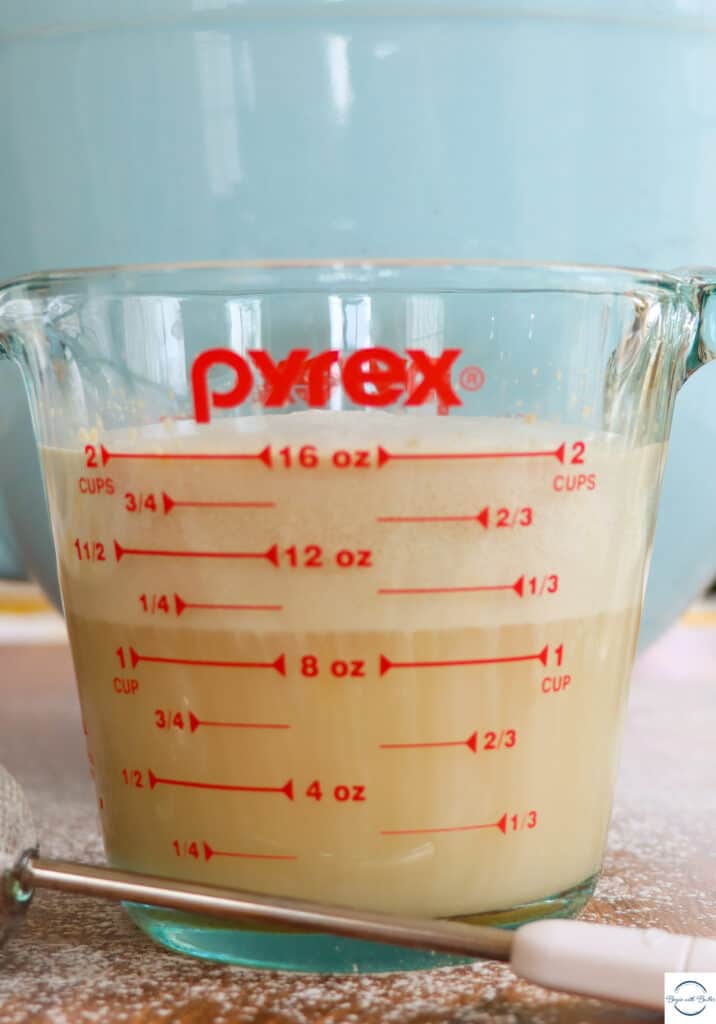
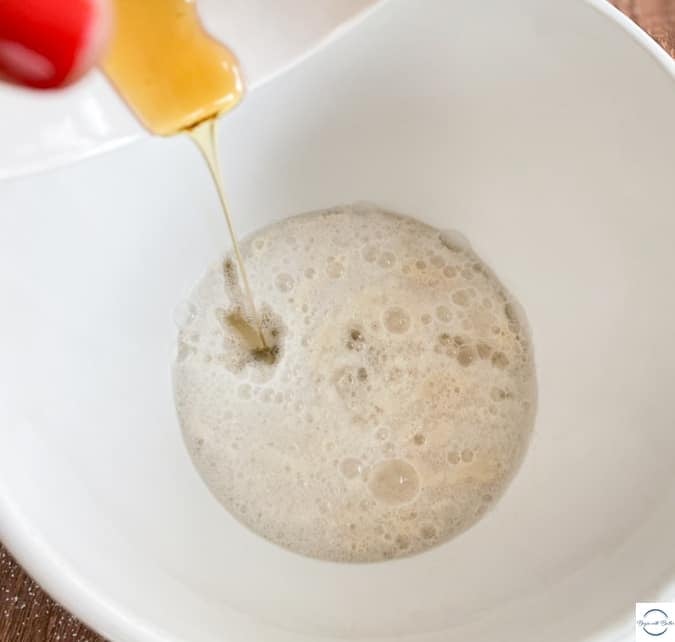
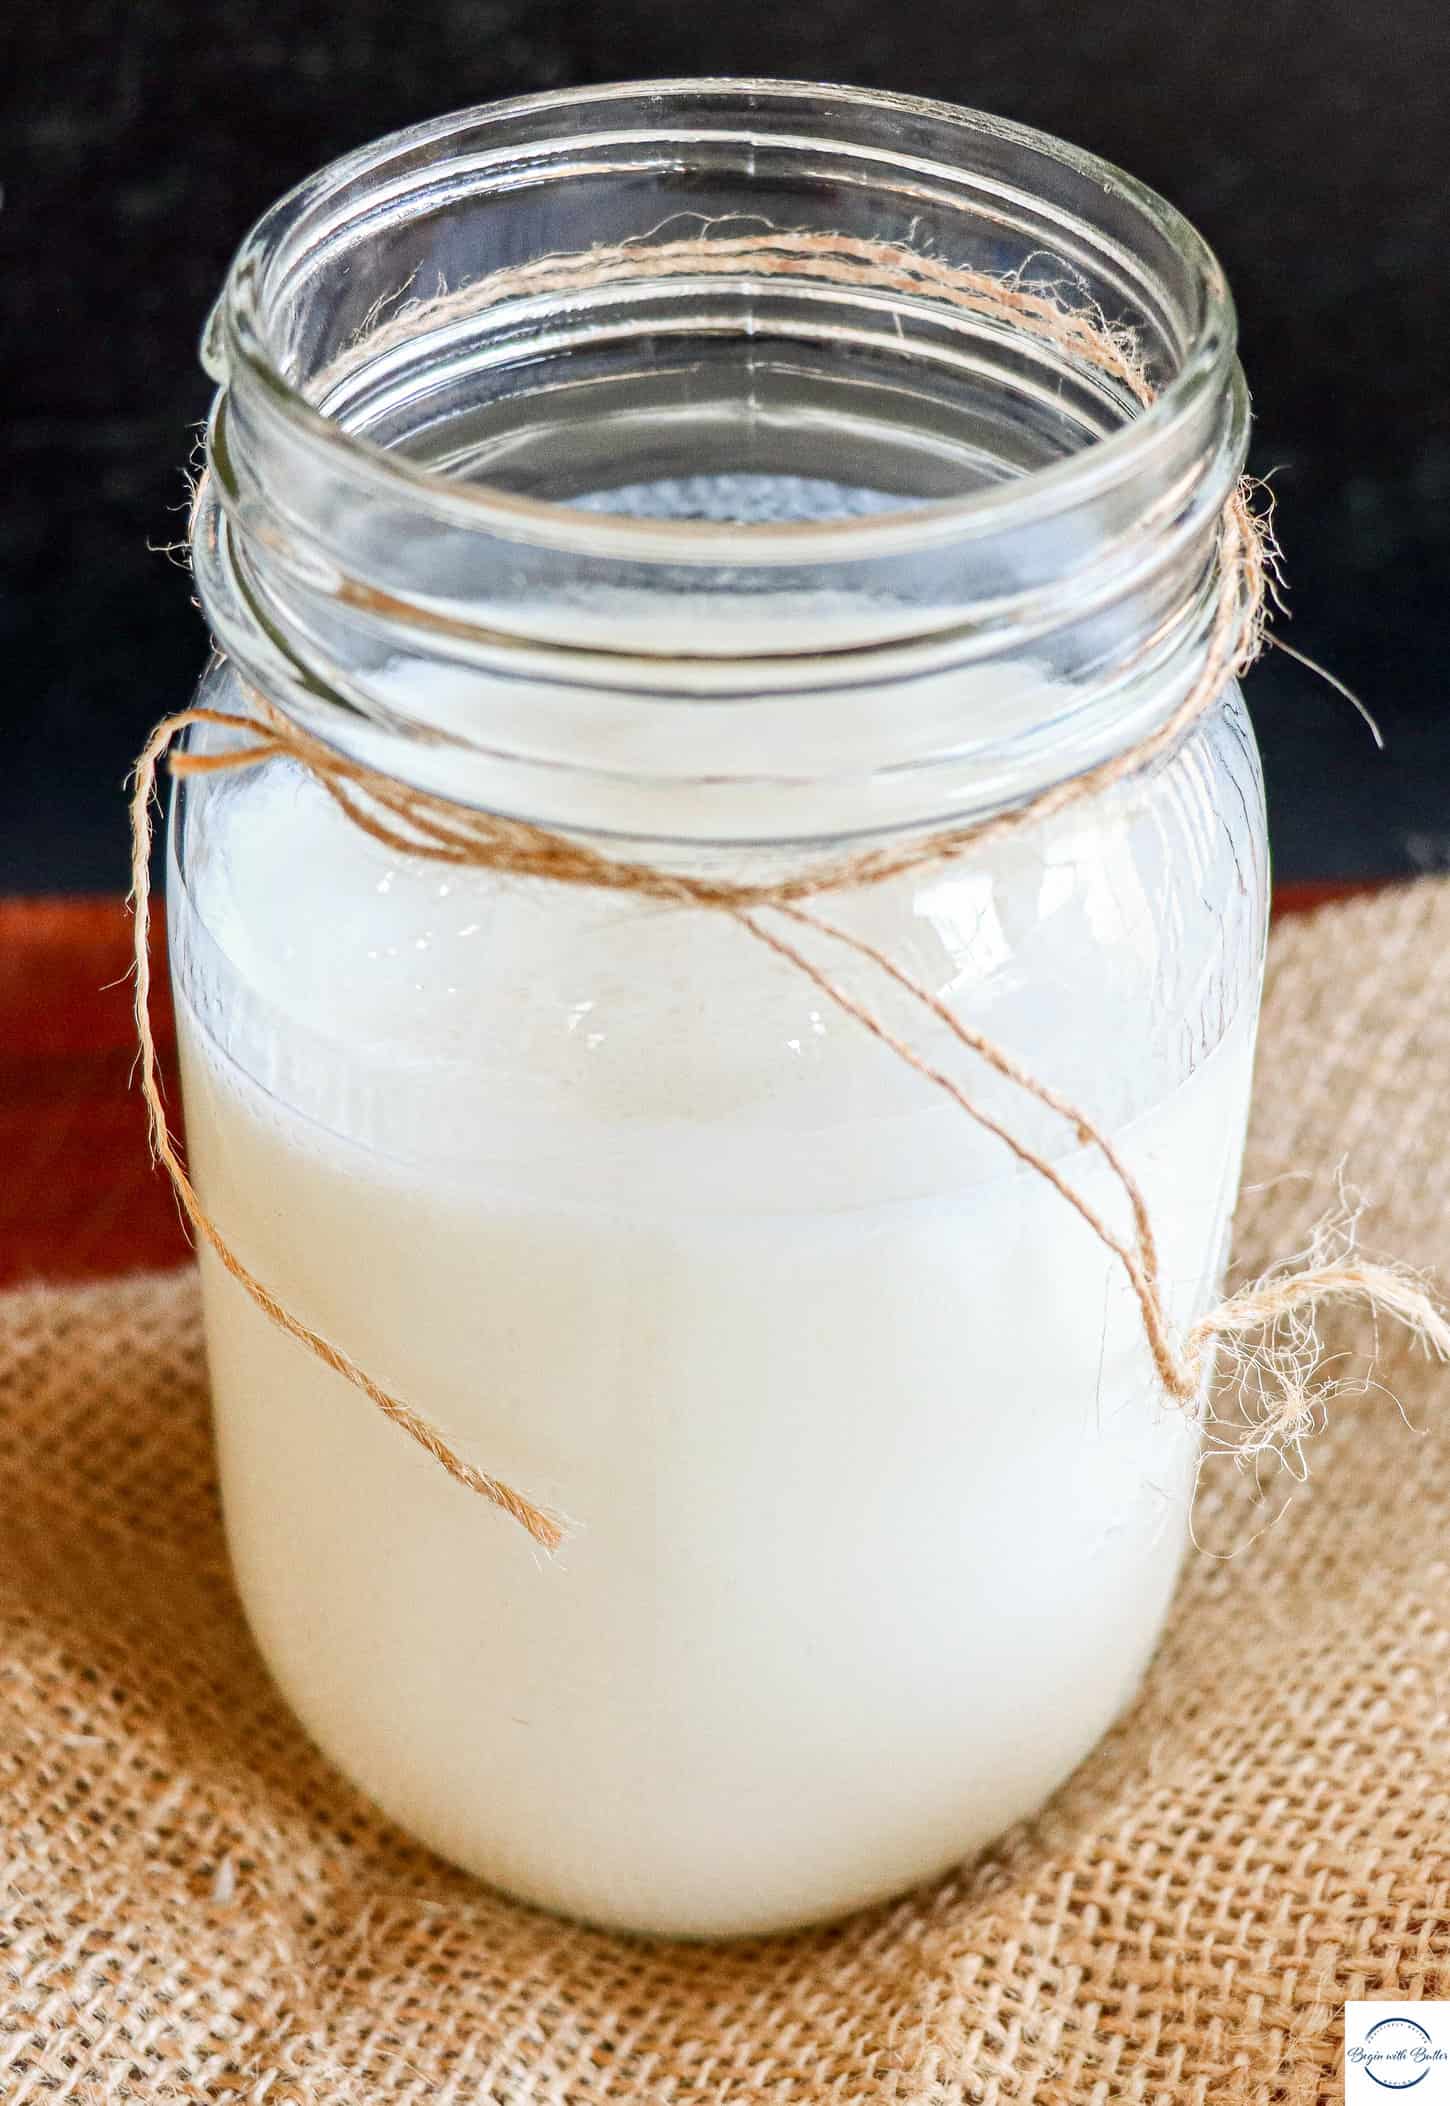
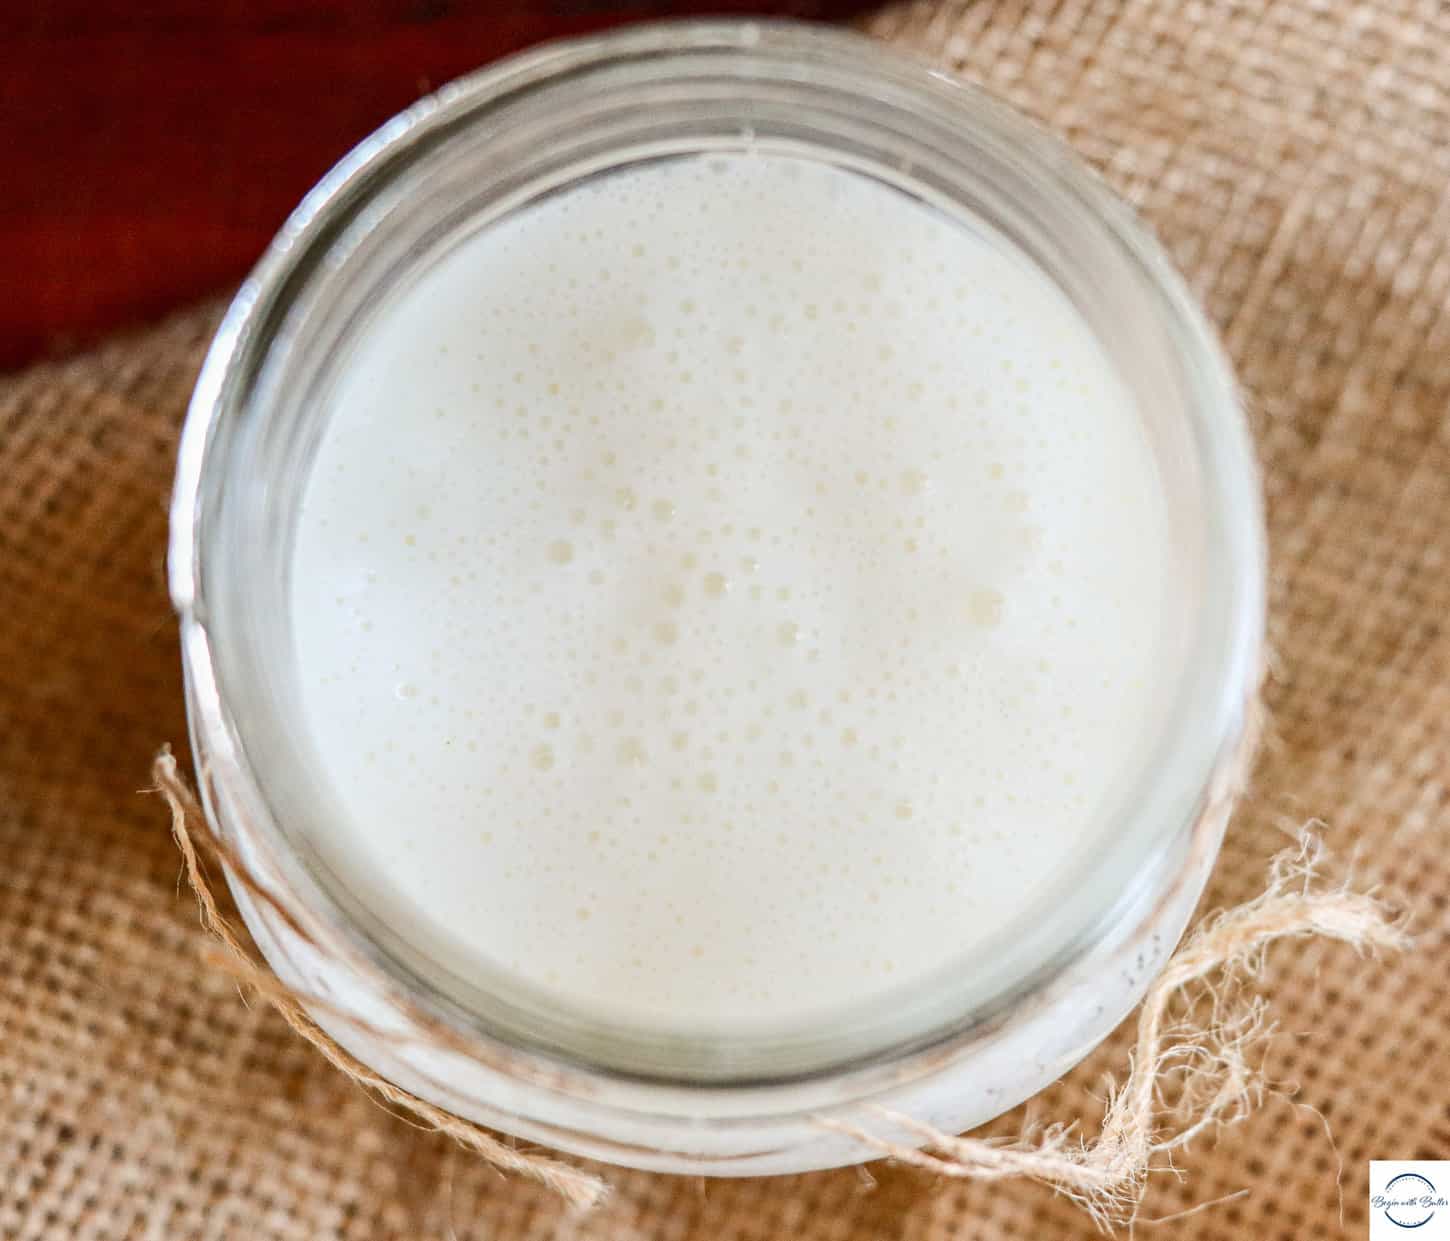
The last part of your mise en place should be adding your yeast and your natural sugar to water that is between 110°F and 115°F. After 8-10 minutes, it should look like this:
The foam on top of the water lets you know that the yeast is alive and active.
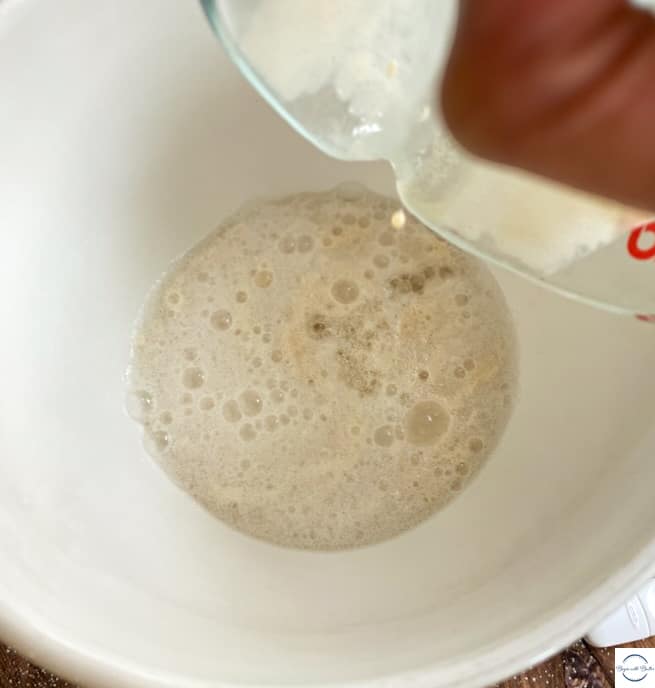
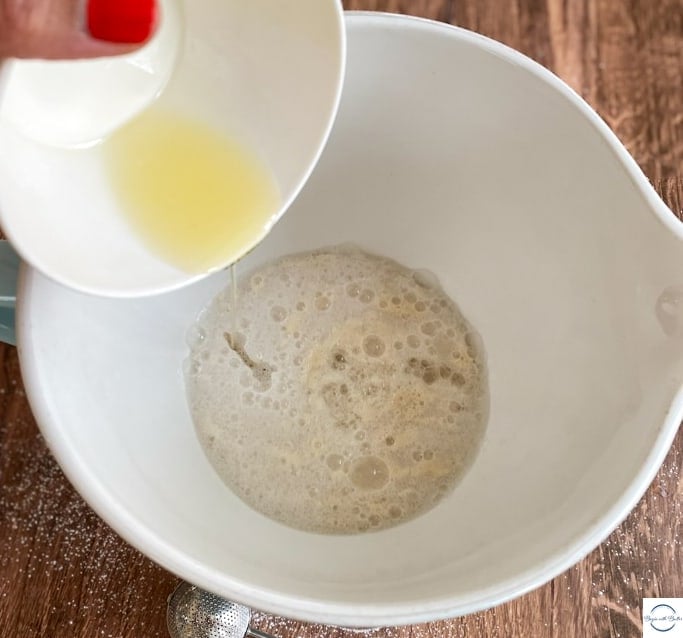
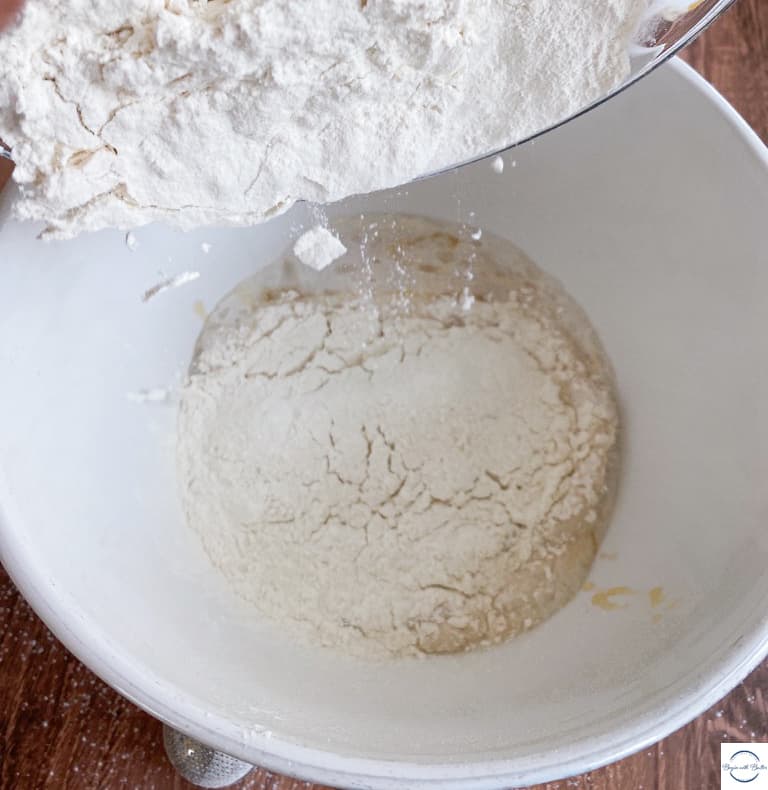
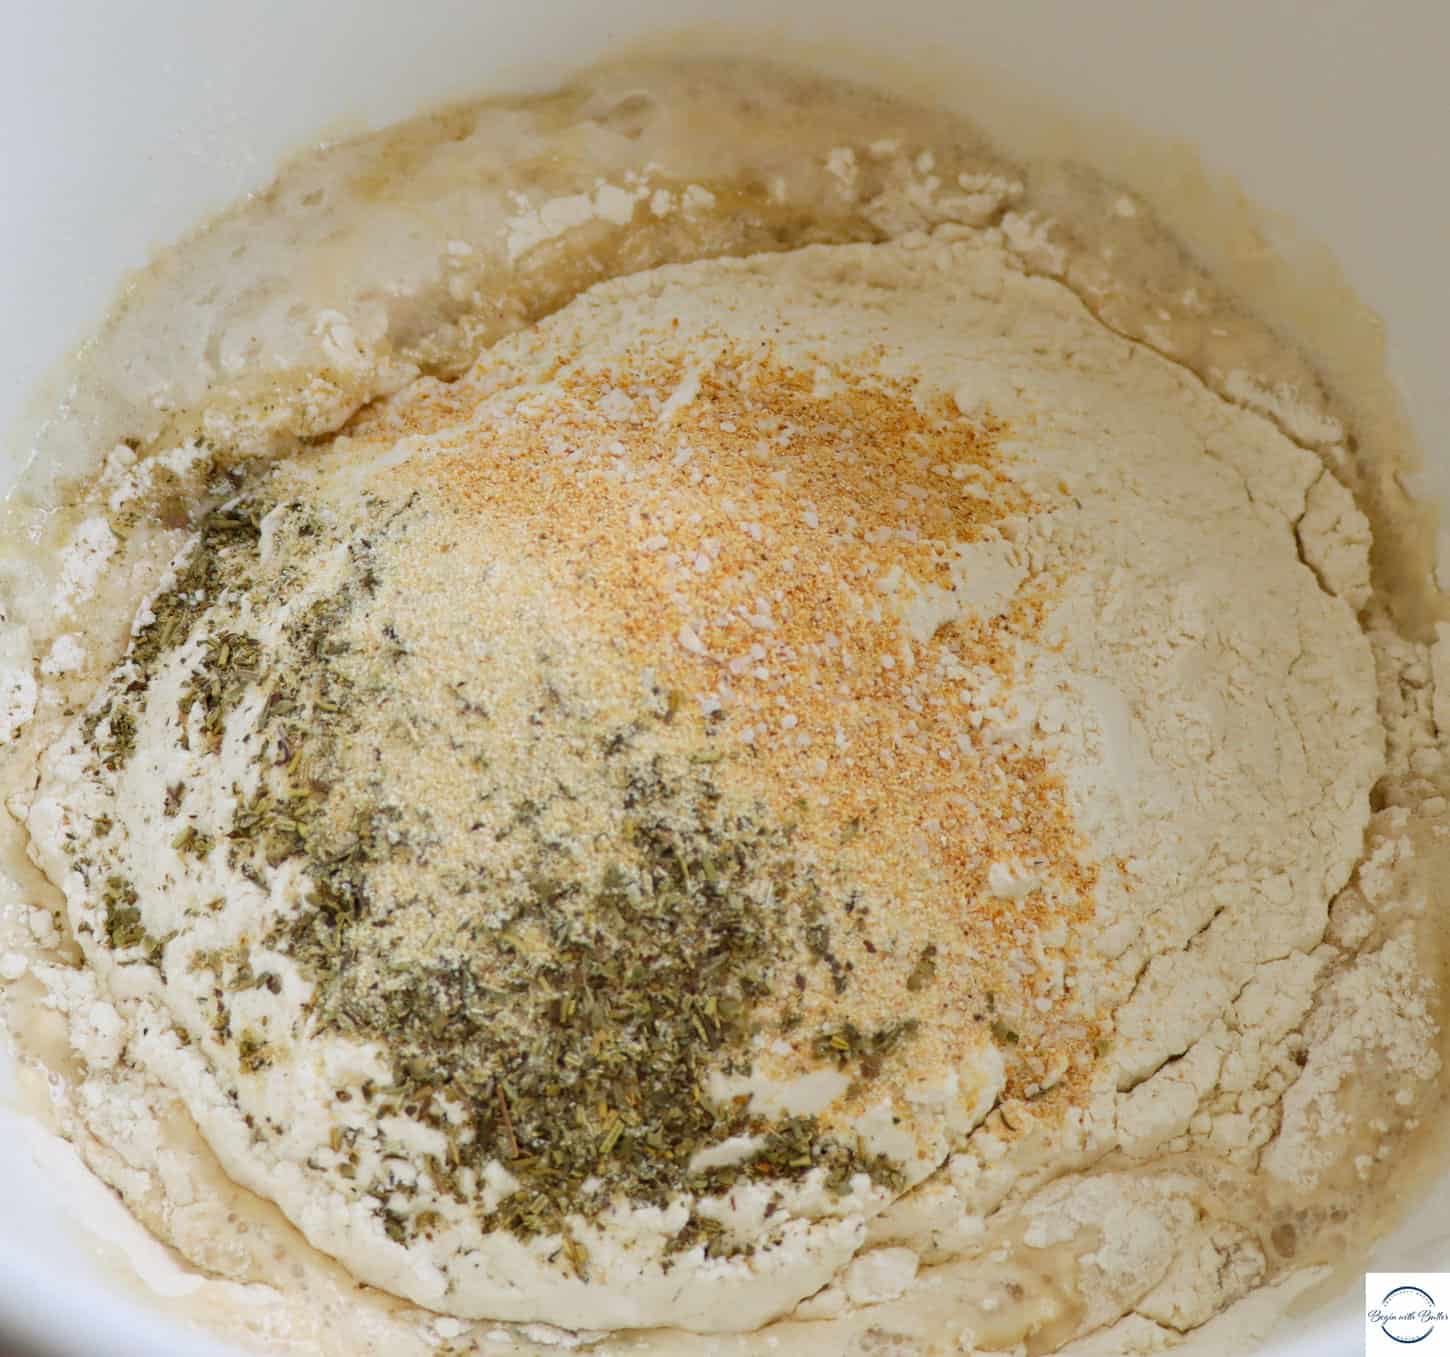
Next, add the yeast/water mixture, oil, honey, flour (all of it!), salt, Italian seasoning, garlic powder, and onion powder to the bowl of a stand mixer or a large mixing bowl.
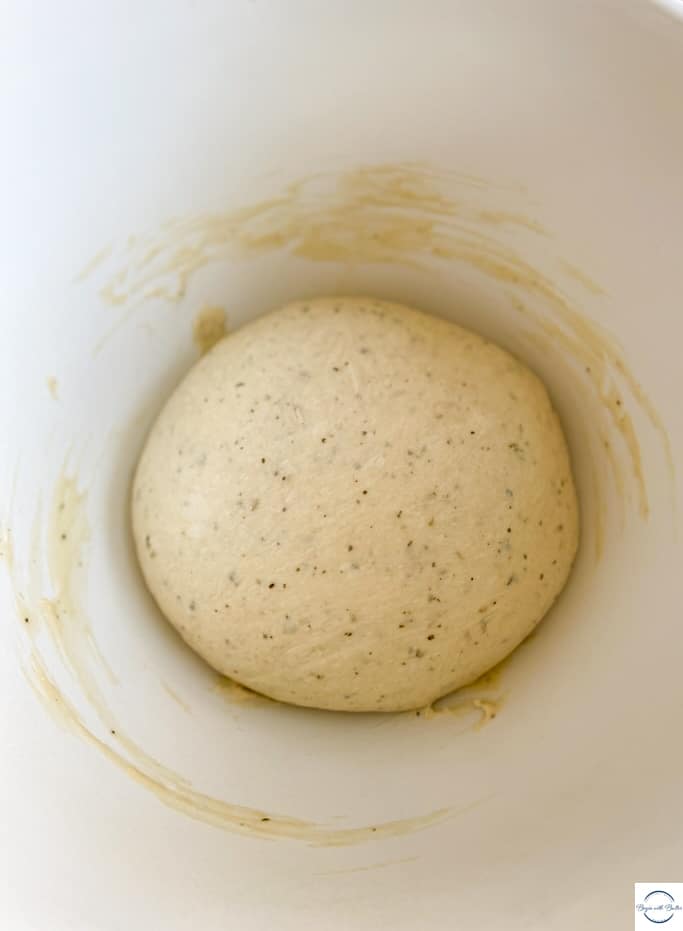
Using the dough hook attachment of your stand mixer, combine all of the ingredients until they form a tacky (but not sticky) dough ball. If the dough is still extremely sticky around the four minute mark, add 1-2 more tablespoons of flour. Don’t add more than two tablespoons; the best fix for stickiness is kneading. This process takes about 5-7 minutes in a stand mixer.
Your dough will go from shaggy:
To perfect:
Fellow hand kneaders, fear not! I made a video just for you to show you the technique that I use for kneading bread dough by hand. This video is for my Perfect Sunday Dinner Rolls, but the kneading technique is the same!
https://www.instagram.com/tv/CVs3v3gAMFu
Once the dough feels tacky (but not sticky!) to the touch, it’s time for the Windowpane Test. The Windowpane Test is a quick check that breadmakers use to determine whether their dough is strong enough and elastic enough for its first rise.
To do this test, pull a quarter-sized piece of dough from the dough ball. Working in a circle, gently pull the dough until it is very thin. If the dough stretches to the point of translucence without breaking, then it’s done! For many bread doughs, this will happen between 5-10 minutes with a stand mixer, or 12-20 minutes if kneading by hand.
Once your dough passes the Windowpane Test, you’re ready to move on. Spray your hands lightly with cooking spray and remove your dough. Spray the empty bowl lightly with cooking spray, form the dough into a ball, and let it rest, covered lightly with plastic wrap or a clean kitchen towel, for 45-60 minutes.
(The first rise is an amazing time to prepare toppings btw.)
Shaping the Dough
After the first rise, use your digital kitchen scale to separate the dough into three equal dough balls. Sprinkle a piece of parchment paper lightly with flour and place each dough ball on top of the parchment. Lightly dust the tops of the three dough balls with flour and cover again with plastic wrap or a clean kitchen towel for thirty minutes.
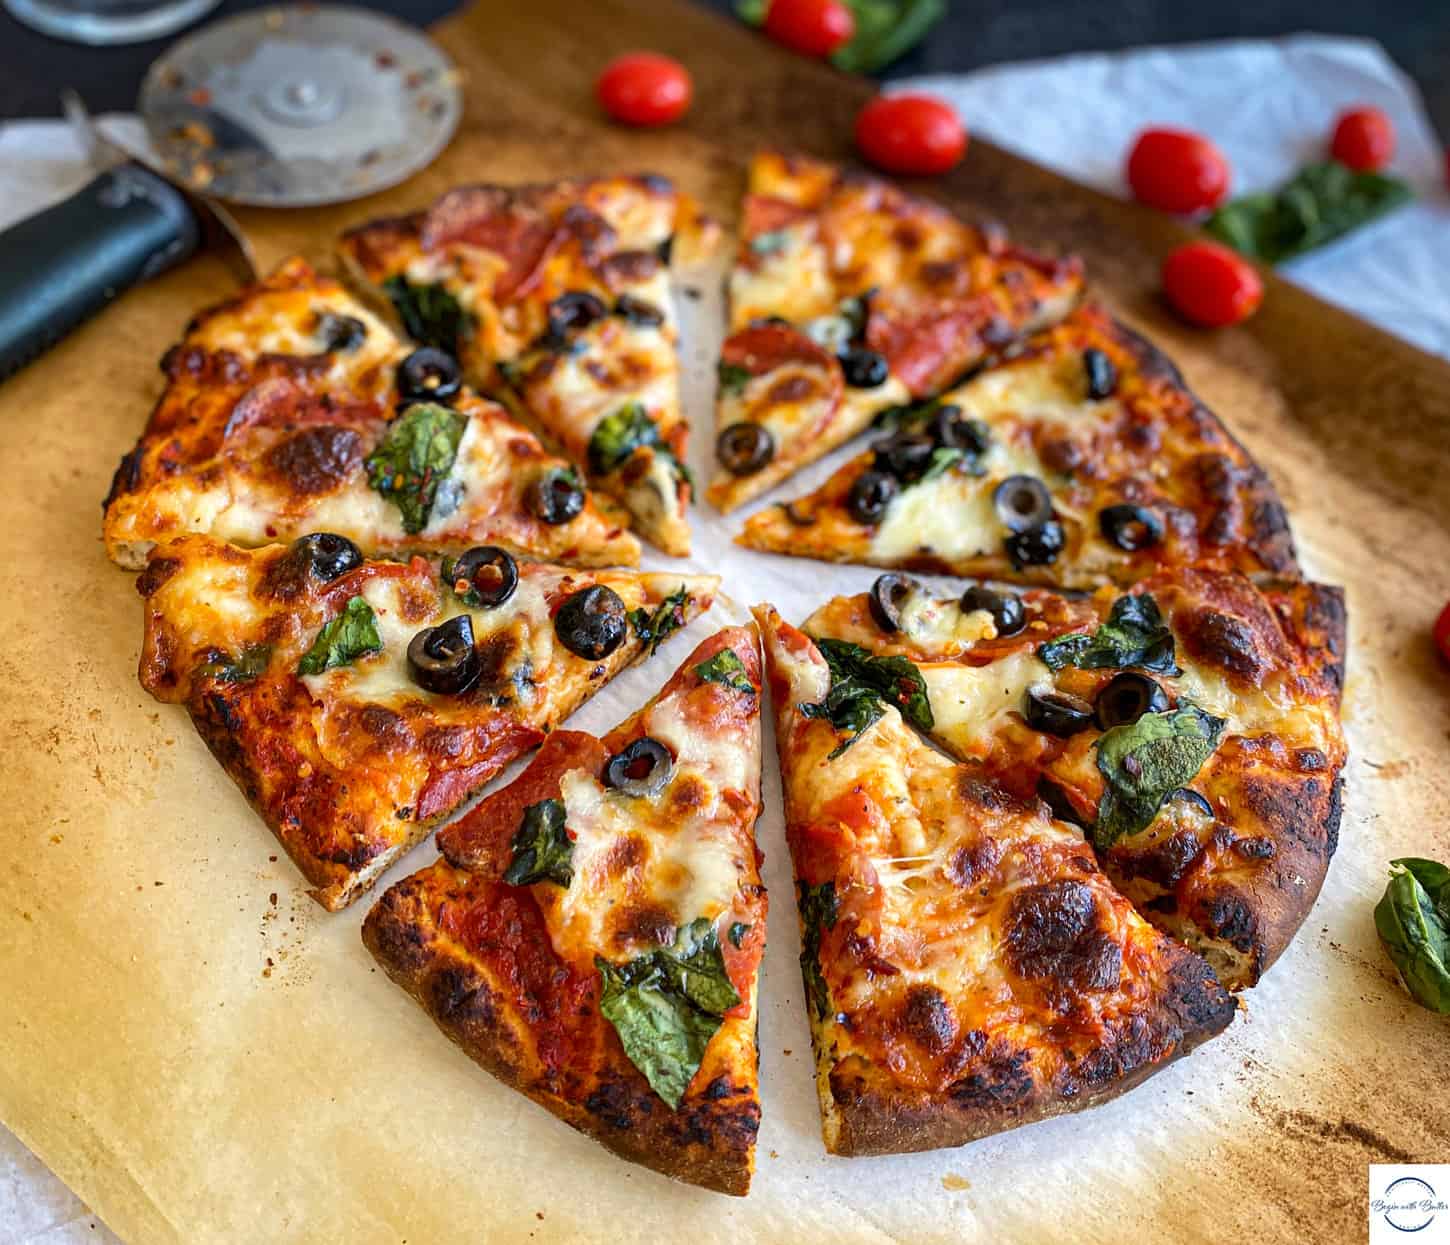
Once the second rise is done, the pizzas are ready to shape into your favorite pizza shape. Do you like hand tossed? Me too. This pizza is perfect for that. Do you prefer an artisan-style pizza with a huge, chewy crust? This pizza is great for that too. Are you a native Chicagoan who eschews anything but deep dish? This crust has your back. Is New York style pizza your thing? This pizza dough will go as thin as you need it to go.
For shaping instructions, check out this quick video! You can use this basic technique to make your crust as thick or thin as you like!
That’s it Friends! Once your dough is shaped, you’re ready to top it with as many toppings as your heart desires.
**To avoid desperate sadness, remember to build your pizza directly on parchment paper or on a pizza peel that is covered with corn meal**
Well, maybe within reason. If you put too many toppings on your pizza, that beautiful crust won’t cook and you’ll be eating undercooked, sad dough with perfectly caramelized toppings on it. Best to use a light hand with the sauce and toppings until you’ve practiced your technique. The good thing about pizza is that even mediocre pizza is great food.
A Couple of Notes About Baking
I use a pizza stone for the best results with this Anytime Pizza Dough. Mine lives on the floor of my oven full-time and is well-seasoned. It gives me a perfect crust every time.
I used to use the convection function in my oven and bake pizzas at very high heat (500°F). Over time, I realized that this was leading to perfectly cooked cheese and an underbaked bottom crust. So, I changed the rules; I lowered the temperature, put the baking stone in the middle of the oven, and I raised the baking stone from the floor of the oven to the middle. And it worked perfectly.
Family, I did it; I am officially a member of The Great Resignation.
You heard that right. I am diving head first into full-time entrepreneurship with Begin with Butter and The Gloria Bakery.
On Tuesday, January 18, 2022, I logged off of my work laptop for the last time, grabbed two forgotten sweaters from a broken, forgotten briefcase, lifted my “Hello” sign off of my office door, took a last look at the nameplate that adorned that office door for nearly nine years…and then walked straight out without looking back.
I then took some time to plan for this exciting year, and to think about what I wanted my first post-resignation blog post to be.
I wanted it to be witty and breathless and effervescent and fun and pregnant with expectation.
I landed on pancakes. Don’t ask how I landed there because I honestly don’t know.
But these are amazing pancakes.
These are seriously so good. And so simple. So let’s dig in!
Beginners Start Here
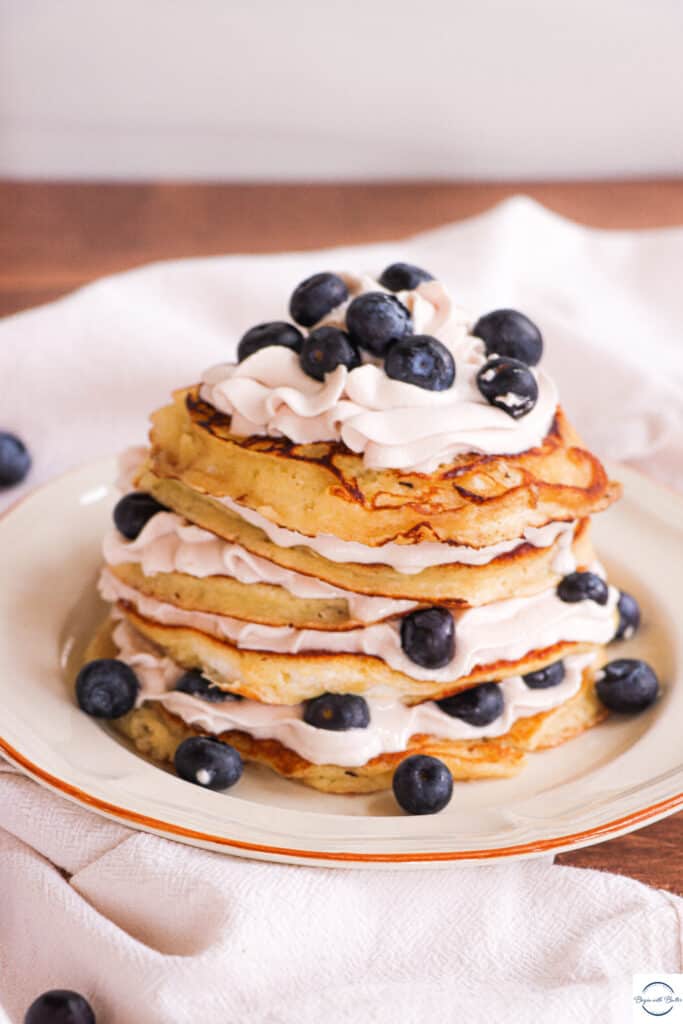
These pancakes are the perfect vehicle for maple syrup, plain whipped cream, blueberry sauce, or the Crème de Cassis whipped cream that I’ve paired it with here. Of course you can top with fresh berries too!
One of the things that makes these classic pancakes so deliciously airy and perfectly dense is the fact that the protein-rich egg whites are whipped to stiff peaks, and the fatty, yummy yolk shines as a soloist in the batter, before those egg whites are barely incorporated by being folded in.
To that end, there are a couple of BwB articles that are very helpful if you’re trying to make perfect pancakes:
Also, pro tip: use the best butter you can source for these pancakes. You won’t regret it.
Equipment Needed for This Recipe
In addition to two bowls, you’ll need a couple of items (note: these are affiliate links, and I make a small commission if you purchase from any of these links):
Before starting on the recipe proper, you’ll need to do a couple of preliminary steps.
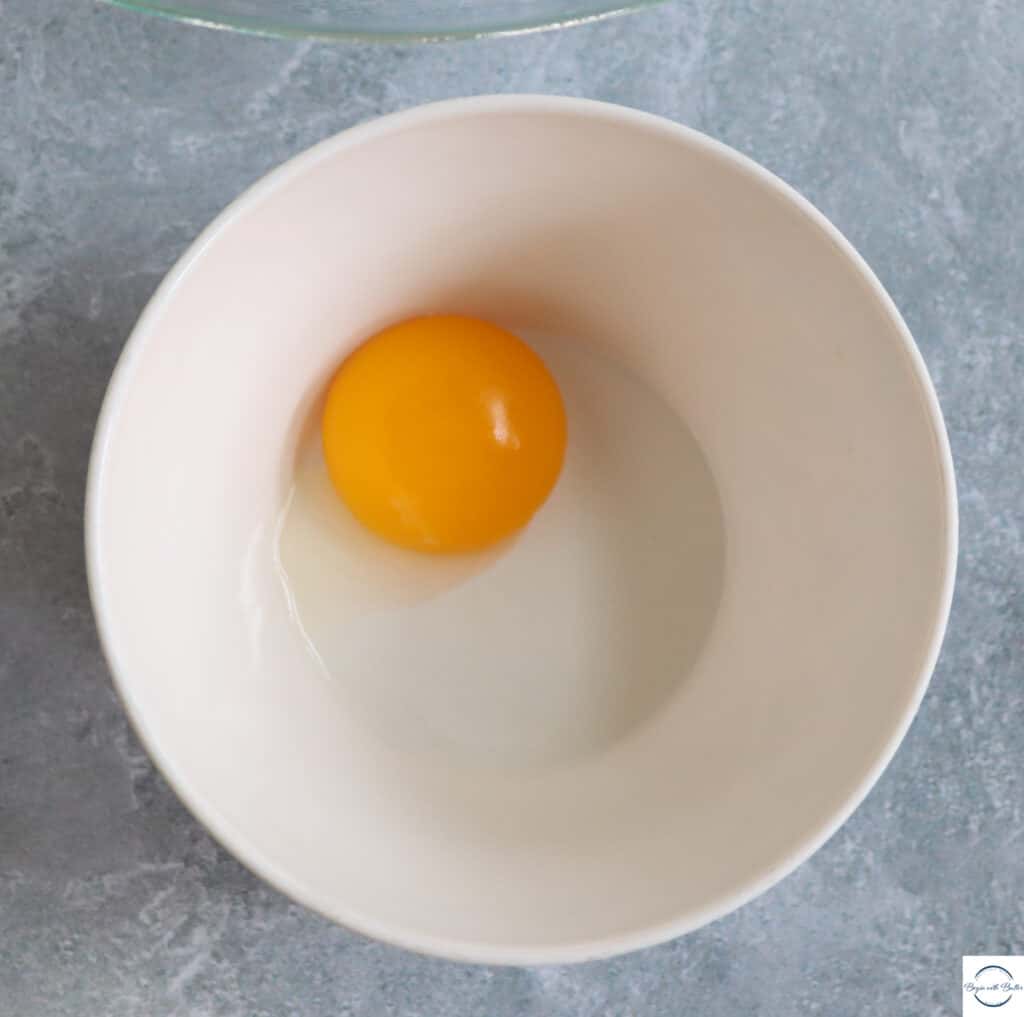
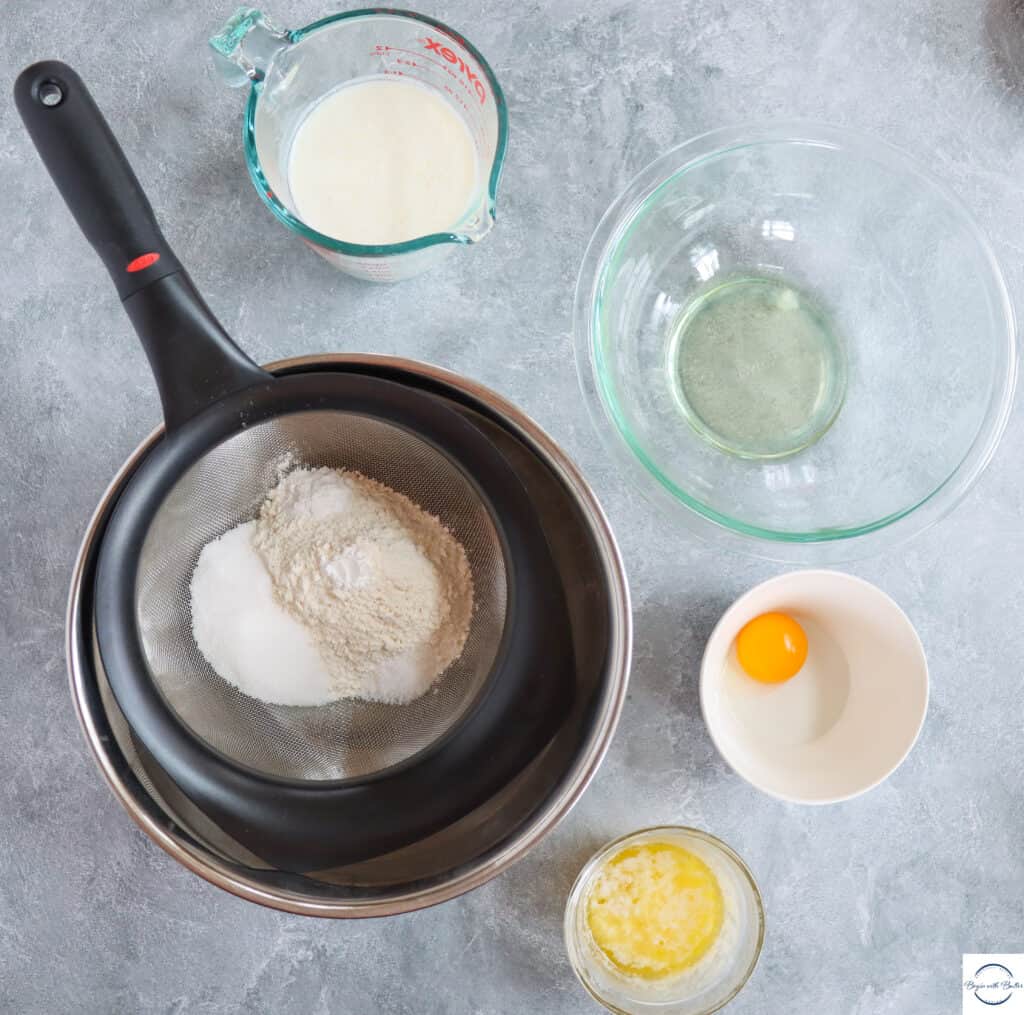
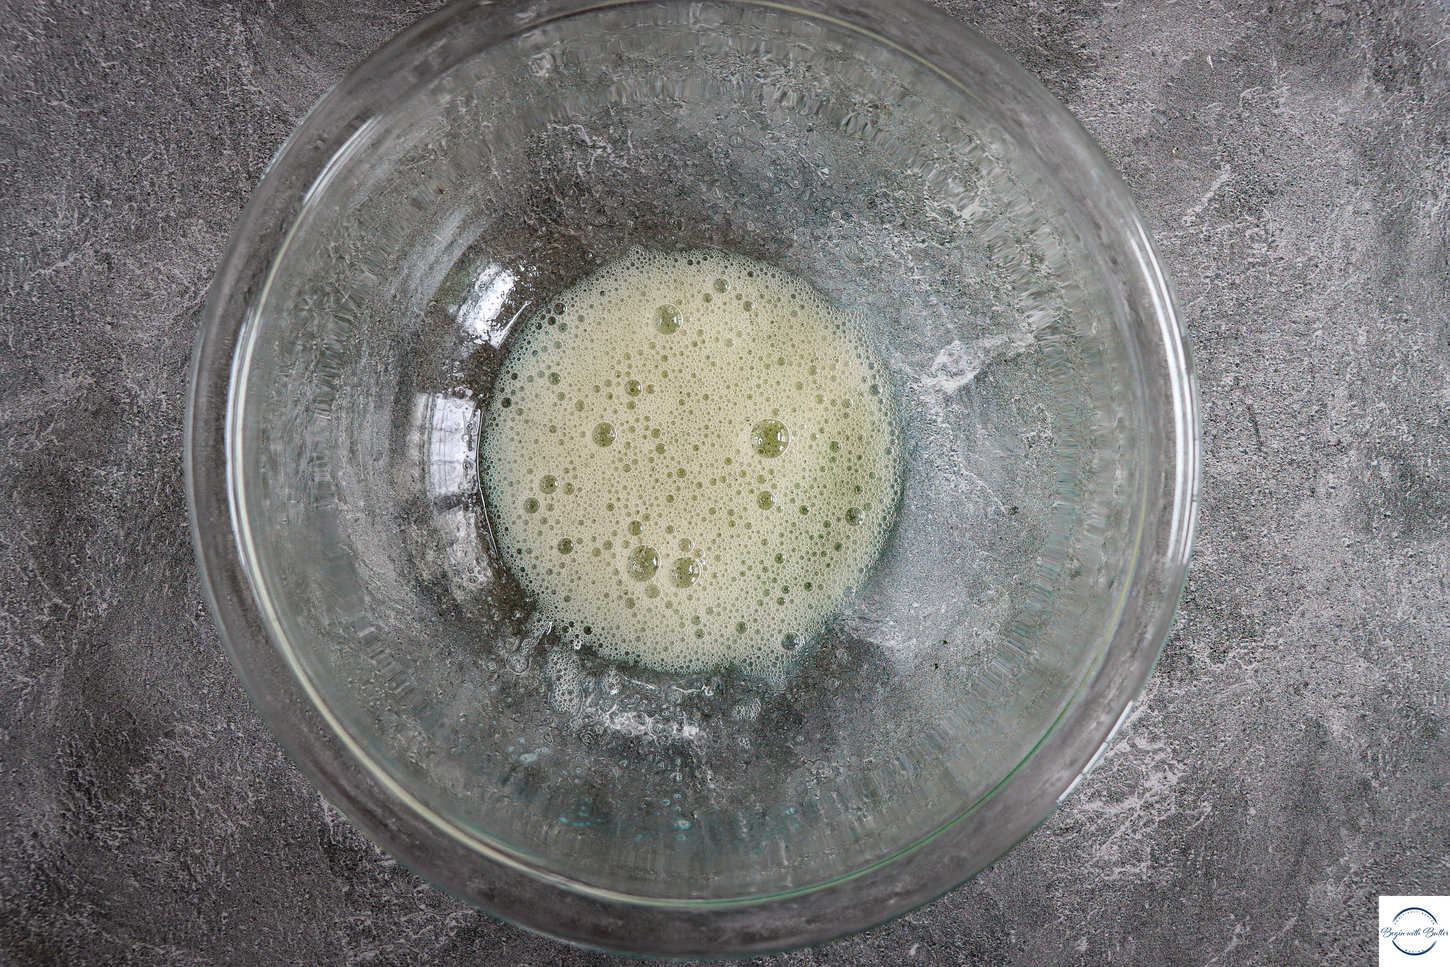
First, you’ll need to separate your egg, since we use each part separately in the recipe. It’s much easier to separate an egg when it’s cold, so I recommend doing this first. To separate, crack it gently on a flat surface (not the edge of a bowl) and then gently use your fingers to crack it open. Use your most gentle touch because you have to fully remove every trace of egg yolk in order for the egg white to whip properly. If the yolk breaks when you crack the egg, you’ll have to try with another egg.
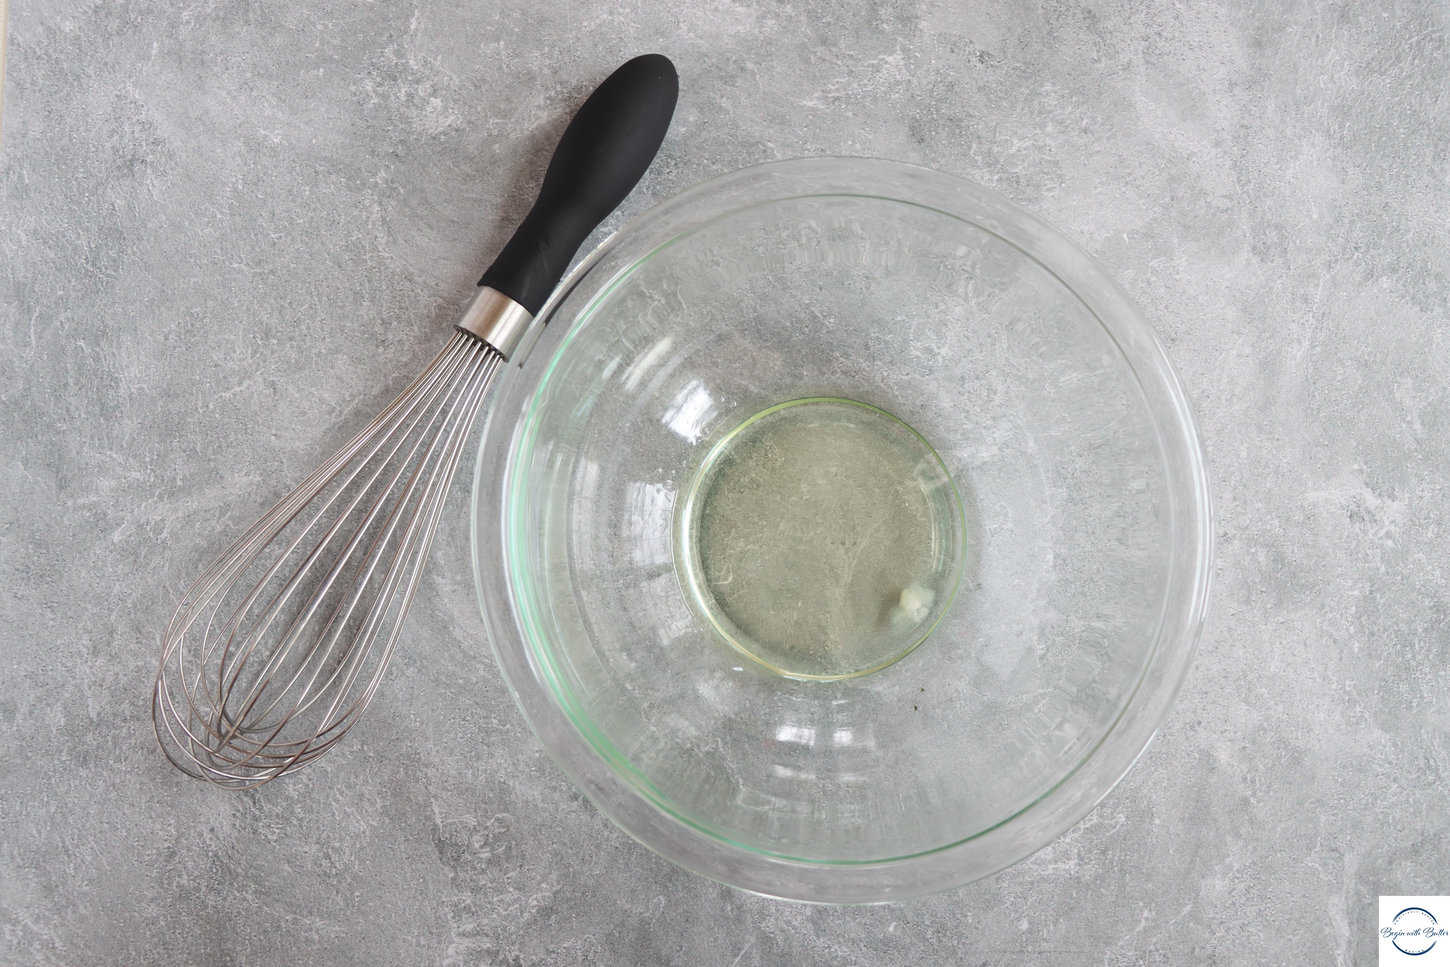
Place the egg white in a very clean metal or glass mixing bowl, free of fat and debris (these will keep the egg from whipping properly). Place the egg yolk in a separate small bowl.
This recipe uses a “sour milk” buttermilk hack, because buttermilk can sometimes be difficult to source. Sour the milk by adding the vinegar to the whole milk, stirring to combine, and then allowing it to sit for 5-10 minutes. I realize that this is more vinegar than is traditionally used for this buttermilk hack, but it works in this recipe. I promise.
Gather the rest of your ingredients and prepare your mise en place:
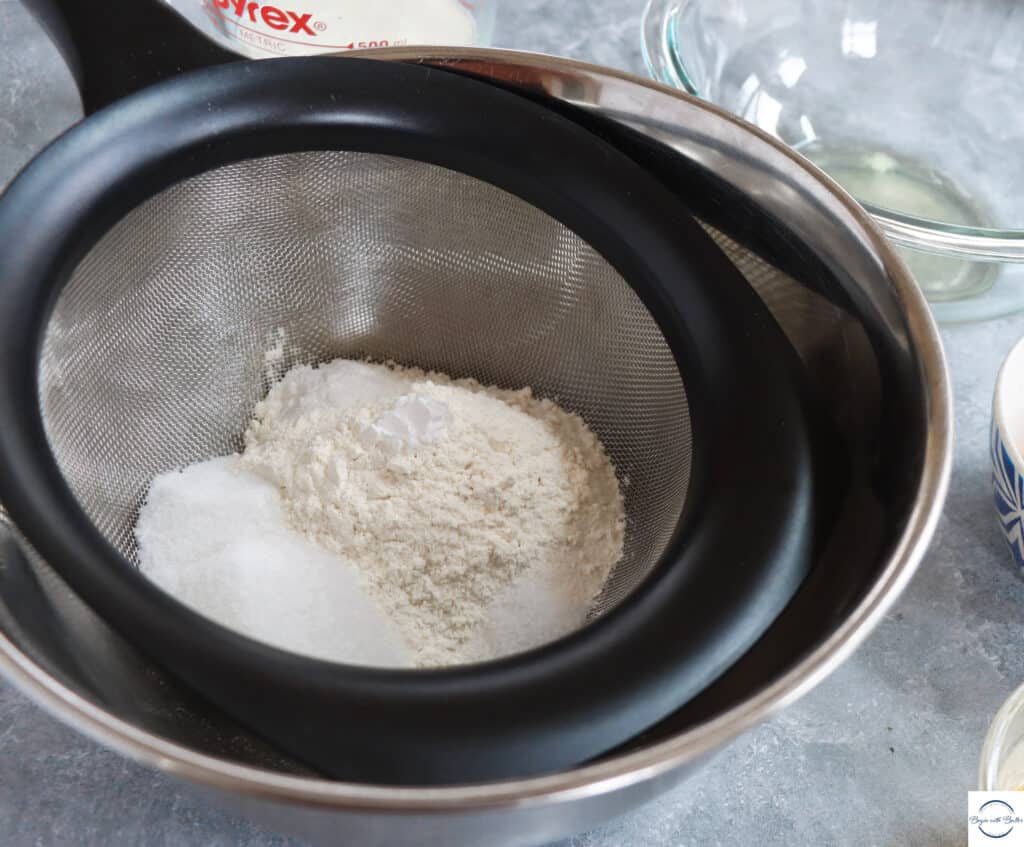
Begin by sifting your dry ingredients (all purpose flour, granulated sugar, baking powder, baking soda, and salt) into a large bowl.
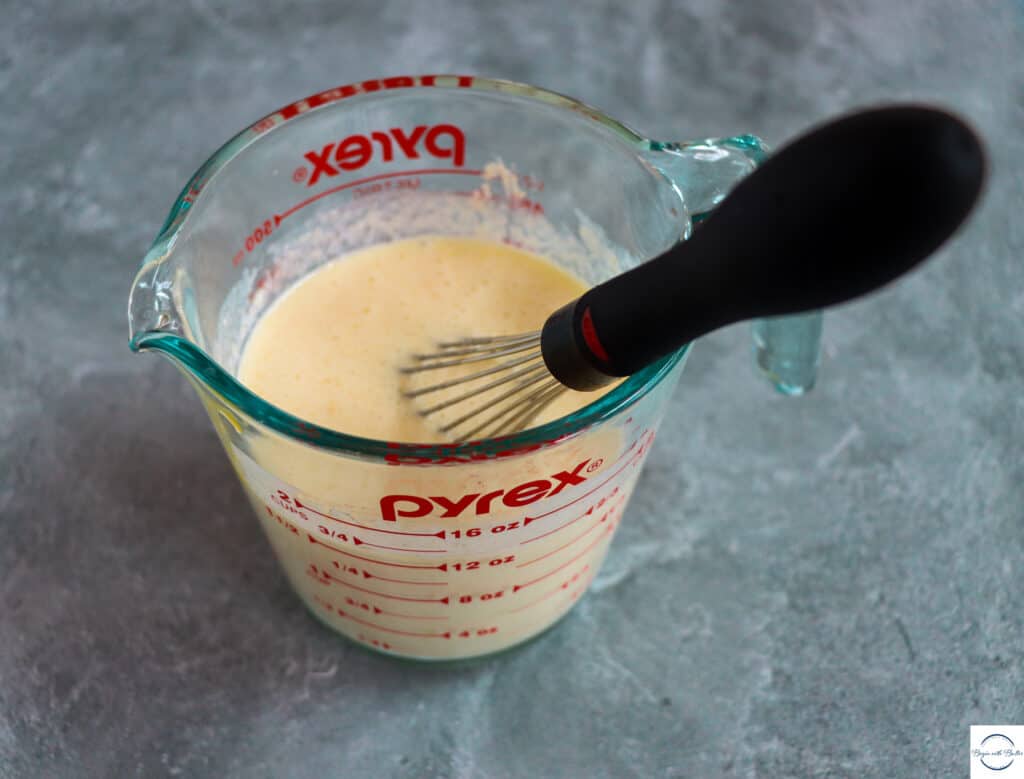
Then, combine the milk mixture, egg yolk, melted butter, and pure vanilla extract in a 2-cup liquid measuring cup.
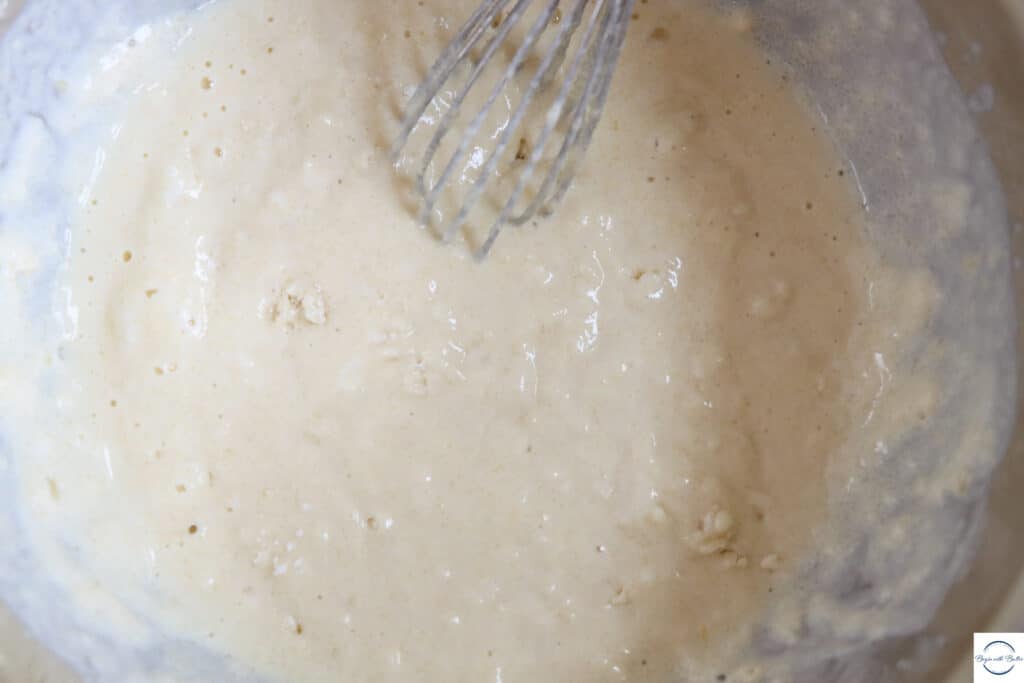
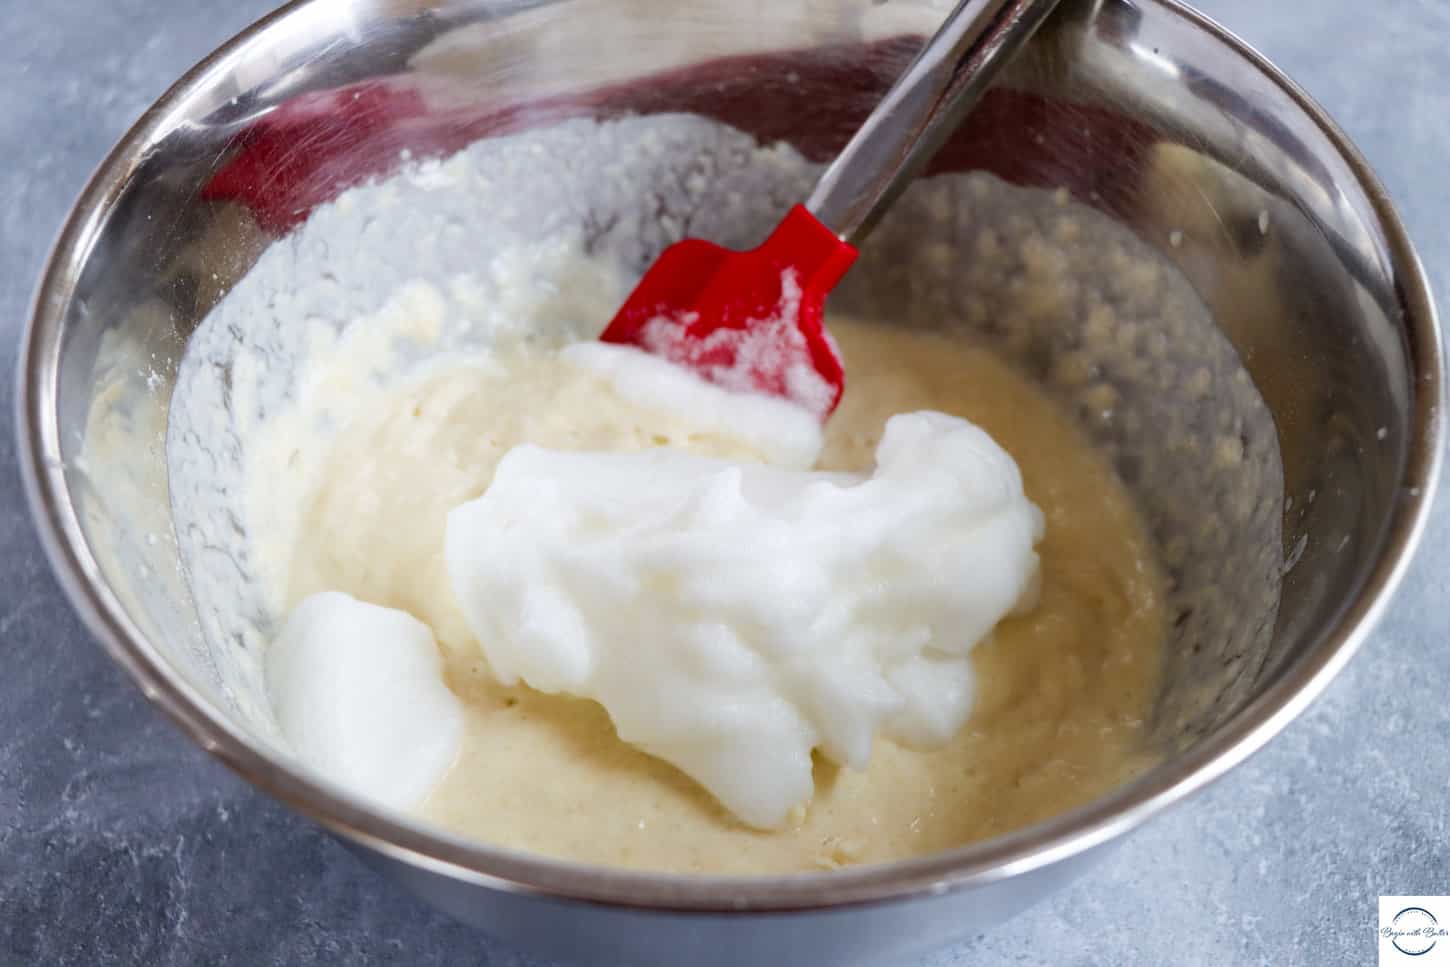
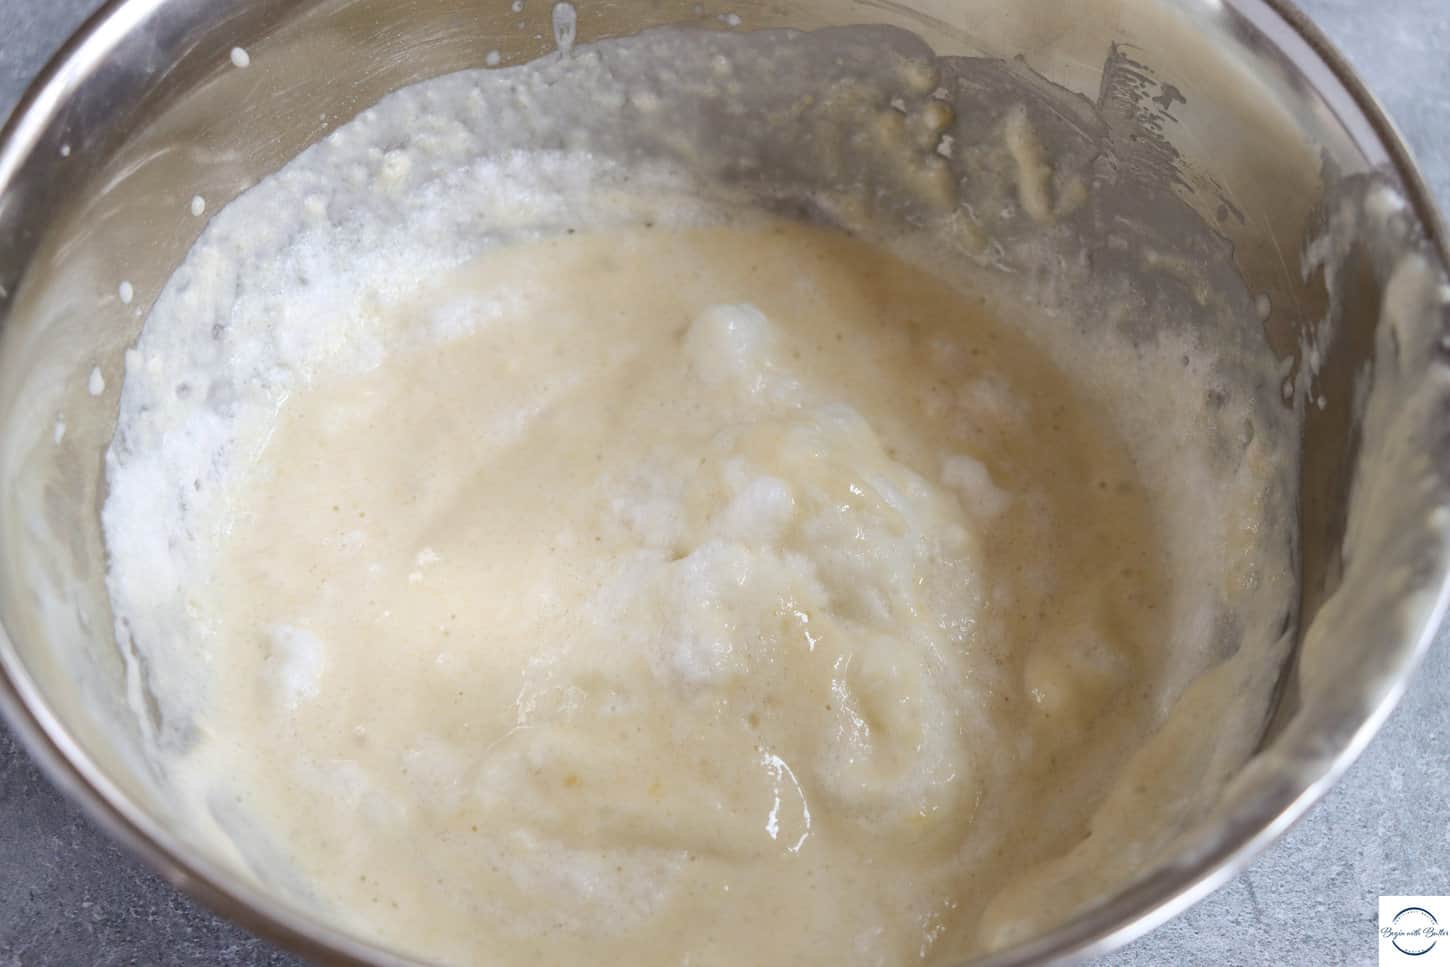
Add the wet ingredients to the dry ingredients and whisk until the mixture is the texture of a lumpy futon (really!) and there are a few streaks of flour left. Do not whisk until smooth.
Set aside your batter and grab that balloon whisk! It’s time to whip some egg whites.
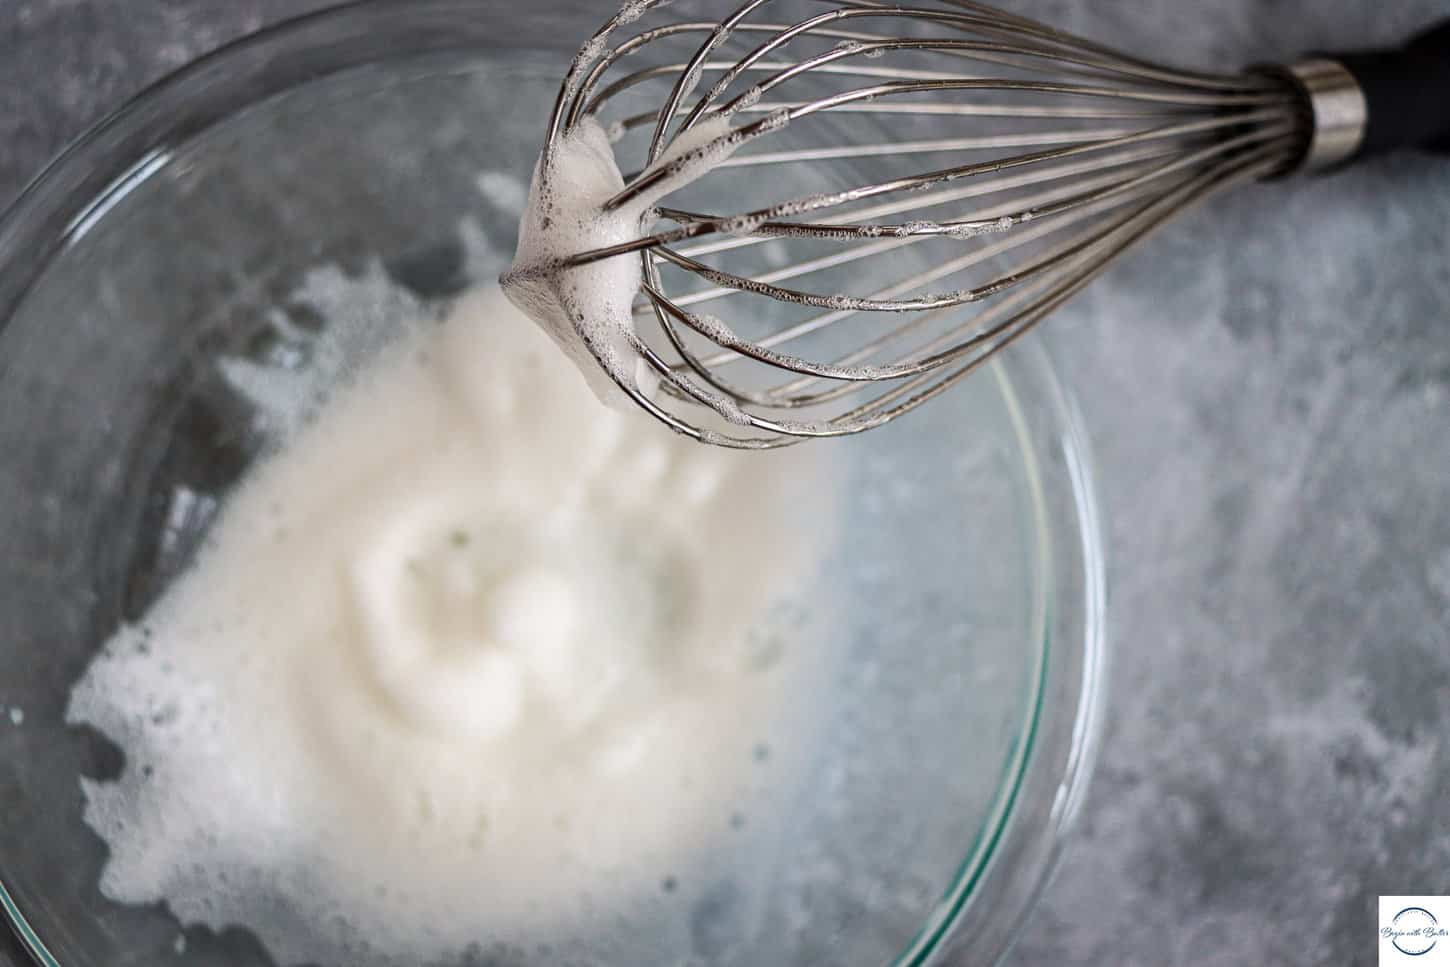
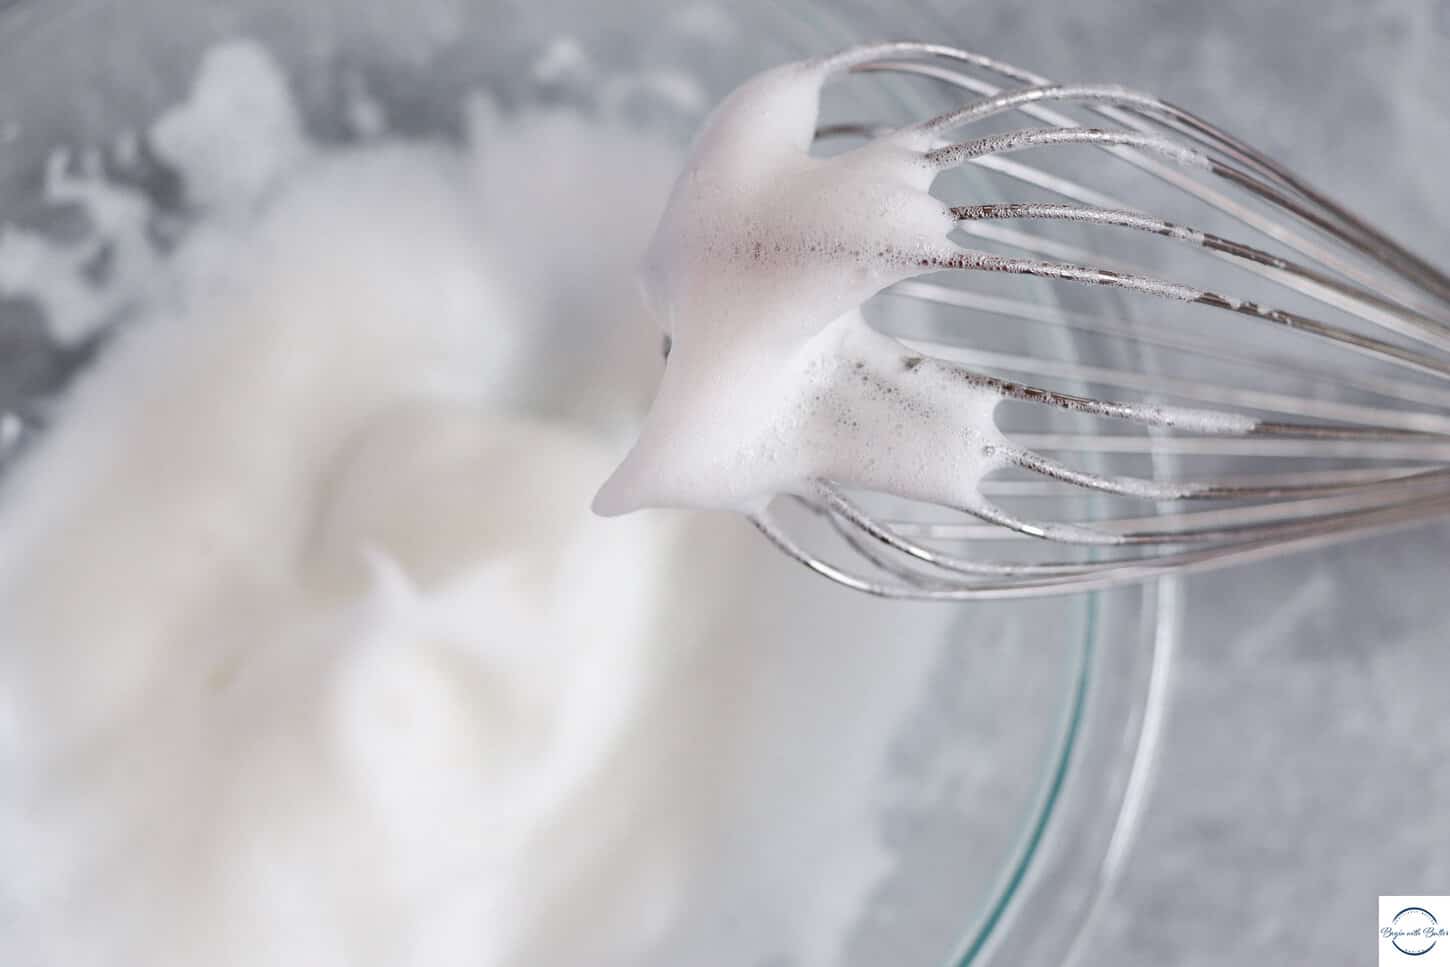
Use your balloon whisk to steadily whip your egg whites. This process can take anywhere from 2-5 minutes, depending on a number of factors:
The temperature of the egg white (warm egg whites whip more easily);
Whether you’re working consistently or resting your arm (which is okay!); and
Your technique. To reach perfectly airy egg whites, you’ll need to use a consistent, circular wrist motion. This comes with practice!
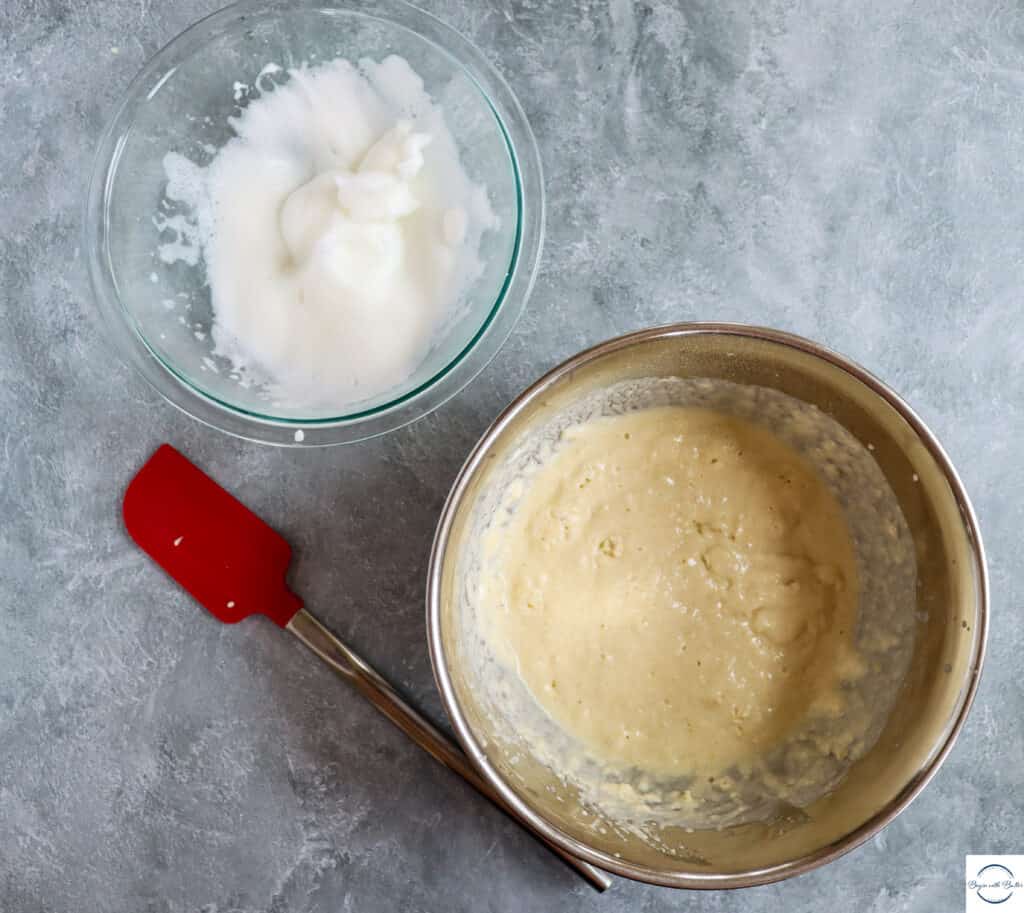
Your egg whites will go from snotty, to foamy, to…perfect.
Once your egg whites are whipped properly, you’ll need to fold them into the rest of the batter. There’s an amazing Schitt’s Creek reference here, but you can see the technique for whipping and folding egg whites in this video, starting at about the 1:20 mark:
Don’t feel pressure to incorporate every atom of whipped egg white into your batter! Some exposed egg white is fine.
Once the egg whites are folded into the batter, let it rest! Resting means to just leave it alone and do something else for a while. Warm your skillet. Make bacon and eggs. Straighten your work area. Replace your messy bun with another messy bun. Anything to keep you busy for 10-30 minutes.
If you’re crunched for time, you can absolutely make these right away! Resting just allows all of the flour to moisten without additional stirring.
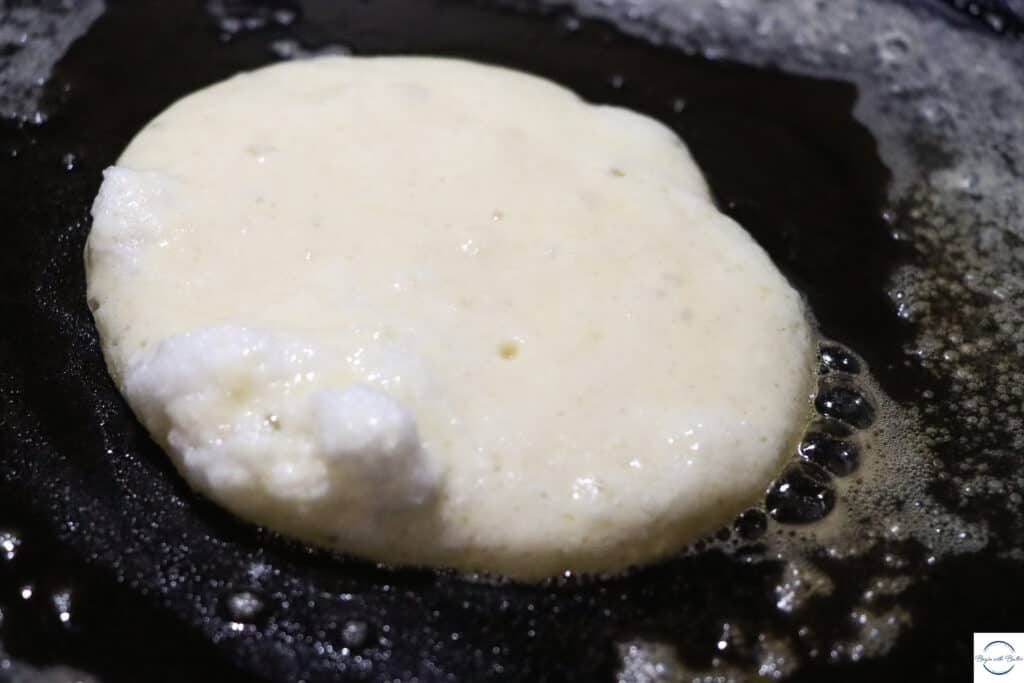
To make the pancakes, heat a cast-iron skillet (preferred, you can also use a non-stick pan) over medium high heat. Reduce the heat to medium and add a tablespoon of butter. Once the butter is melted, add the pancake batter. A 1/4 cup dry measuring cup works well for this task. One pancake is ideal, but you can also make two at a time in a 12″ skillet.
After a proper rest, the lumps have mostly dissolved. And don’t worry about the egg white!
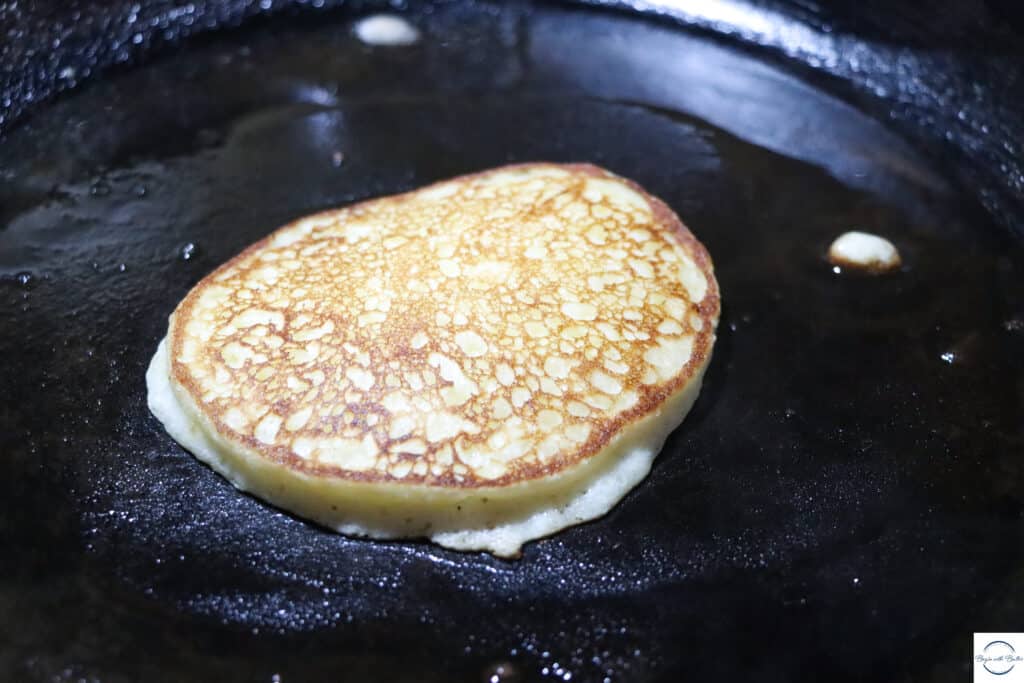
Allow the pancake to cook on the first side until there are several bubbles around the edge (60-90 seconds). Then, flip the pancake and…
I say this with all sincerity…
DO NOT TOUCH IT.
Please don’t smush.
Family. Please do not smash the pancake once you turn it! Allow all of that good leavening and egg white to do its work for the next 45-60 seconds, then remove it from the pan. Repeat with the remaining batter, and then get ready to enjoy!
For special occasion pancakes, try the Creme de Cassis whipped cream! It is so simple and comes together really quickly. Pure maple syrup is also incredibly delicious in this recipe; you’re really unlimited with your toppings.
It’s my sincere hope that you’re ready to tackle these pancakes after reading this post. If you have any questions, shoot me an email or leave it in the comments! I’m always happy to offer a quick tip.


")