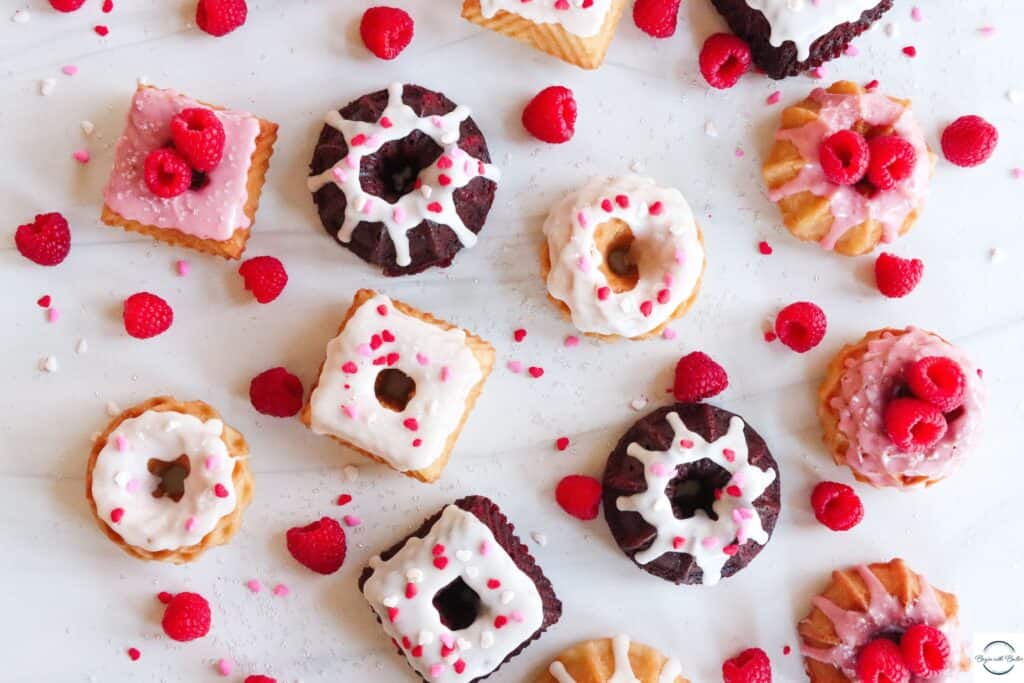
There’s a lot going on here at Begin with Butter. And it’s happening really fast. So fast, that I thought I’d tell you all the updates in one handy dandy place for you so that you could visit all of these new things at your very own pace.
Let’s get to it!
The Begin with Butter Home Baking Academy is Now Open!
I’m so excited about the Begin with Butter Home Baking Academy, friends. Because it’s the evolution of the next phase of Begin with Butter; to teach the “whys” and “hows” of baking in a fun and approachable way. Up first: cake!
You can get to the BwB Home Baking Academy directly from the BwB website! Just click “Home Baking Academy” in the top menu. Like this!
The BwB Home Baking Academy currently has two cake courses available! First, there’s the Creative Cakes Course (USD $97), for those of you who are recipe rebels and want to make your own cake recipes. If your creative gene feels stifled when you’re following others’ recipes and you want to confidently create your very own cake recipes, then Creative Cakes is perfect for you!
(I, too am a recipe rebel, so I understand you all amazingly well.)
Not ready to create your own cake recipes? No problem! The Perfecting Cake Techniques Course (USD $49) is “perfect” for those of you who struggle to find consistency with others’ recipes. In this course, you’ll learn how to confidently execute the most important techniques in most cakes. After this course, you’ll never ever wonder how to correctly “cream butter and sugar until light and fluffy” ever again (among other things). ???? You’ll also learn the all of the techniques that I use to turn out perfect cakes (and happy customers) every time at my cottage bakery, The Gloria Bakery.
Ready to check out the courses? Click here to get started!
Office Hours–Update!
One of my favorite parts of every week is hosting my weekly Office Hours; they’re currently on Wednesdays at 1:00 p.m. EST on Instagram Live. Office Hours are your opportunity to have your most vexing baking questions answered with me live! I usually put out a poll on my Instagram Stories to gather questions a day or two in advance, but in my kitchen, you can always come as you are (and bring your questions with you)! Some people just pop in to watch. And who can forget the impromptu giveaways? ????
Office Hours are always a great time, where we answer questions and do baking demos and do our part to break your biggest and smallest baking barriers. It’s grown by leaps and bounds since we started a couple of months ago, but there’s been one question that has lingered for about that long:
“Why are you hosting Office Hours at 1:00 on Wednesdays?”
Friends, I’ve heard you and we are changing the time for Season Two of Office Hours! So, effective July 2, 2022, the next season of Office Hours will move to Saturday mornings at 11 a.m.! Let’s make cakes and breakfast pastries together and answer your toughest baking questions in time for your weekend bake.
to see some of our Office Hours so far? Check out this one from April, where we did a Swiss Meringue Buttercream demonstration:
These are just a few of the episodes that we’ve done, and I’m super happy to spend the time with you all each week.
Interested in seeing more Office Hours? Click here to go directly to the Begin with Butter videos tab and see each and every episode we’ve done! We have one more episode in Season One (on June 15th), then a one-week break to prepare for Season Two!
The New Site!
If you’ve been here for a while, you might have noticed that we did some redecorating around here. ????
I am beyond thrilled with the new BwB branding and website, and even more than the beauty, it’s much more functional!
Here are just a couple of the highlights so far:
Optimized for Mobile
I really wanted every viewer to have the same incredible experience, whether they were on desktop or mobile. So, with this new site, we’ve optimized the whole thing for our mobile users!
The Recipe Tab is Now Categorized
On the new BwB site, I wanted you to be able to go straight to the recipes you’re looking for. So, we categorized the recipes into Cakes, Pound Cakes, Bread, and Finishing Touches to make recipe navigation a breeze:
This is just the beginning of the new Begin with Butter; there are lots of changes coming in the next few months, so keep your eyes peeled! I can’t wait to share!
This Goat Cheese Skillet Focaccia post is sponsored by Vermont Creamery. However, all of the opinions are my own.
* Also, this post contains an affiliate link for the oven thermometer that I use and love in my kitchen. *
I have such a love for fresh bread, Family.
When I first began baking, bread SCARED me. It took an incredibly long time for me to become proficient with yeast and bread shaping techniques. I am now confident and proficient with yeast bread (and you can read more about yeast right here), but it was a bumpy road.
This focaccia from Alexandra’s Kitchen is the bread that I wish I learned first. But, of course, because I like to do things the hard way, I decided to bump along the curriculum at the Culinary School of Hard Knocks instead.
It’s my process really.
Now, I’m so happy to be able to share this Goat Cheese Skillet Focaccia with you! It’s inspired by the Alexandra’s Kitchen focaccia and scaled to fit in my favorite cooking vessel: my cast-iron skillet. It also features my absolute favorite goat cheese from my friends at Vermont Creamery, and it is beyond easy! Fresh bread? Little effort? Check and check.
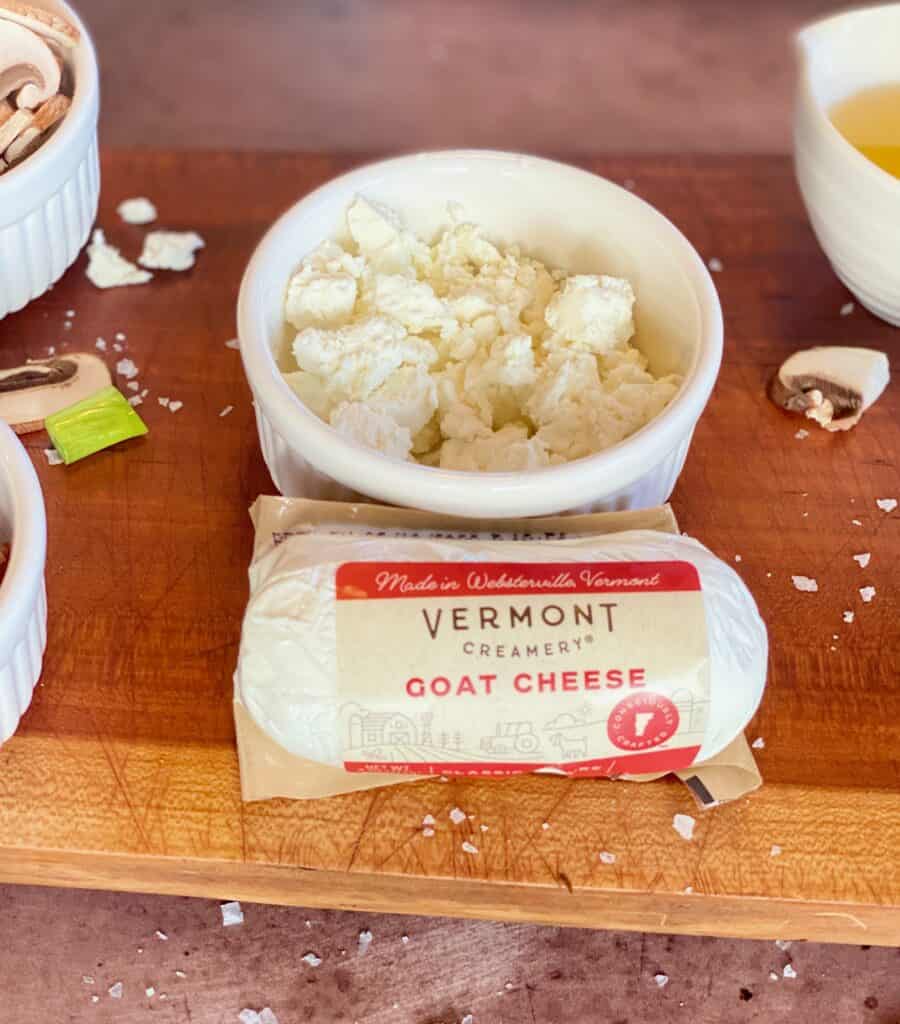
Why Vermont Creamery Goat Cheese?
I actually fell head over heels in love with Vermont Creamery Goat cheese late last year, after I spread some on a piece of warm baguette. It…was so decadent. Perfect texture. Perfect salt level. So creamy and dreamy.
I could not wait to eat it with everything. ???? So, when I recently partnered with Vermont Creamery and got the green light to develop a recipe that features their goat cheese, I jumped at the opportunity!
How to Make this Goat Cheese Skillet Focaccia (With Video Tutorial!)
When I say this is easy, Family…
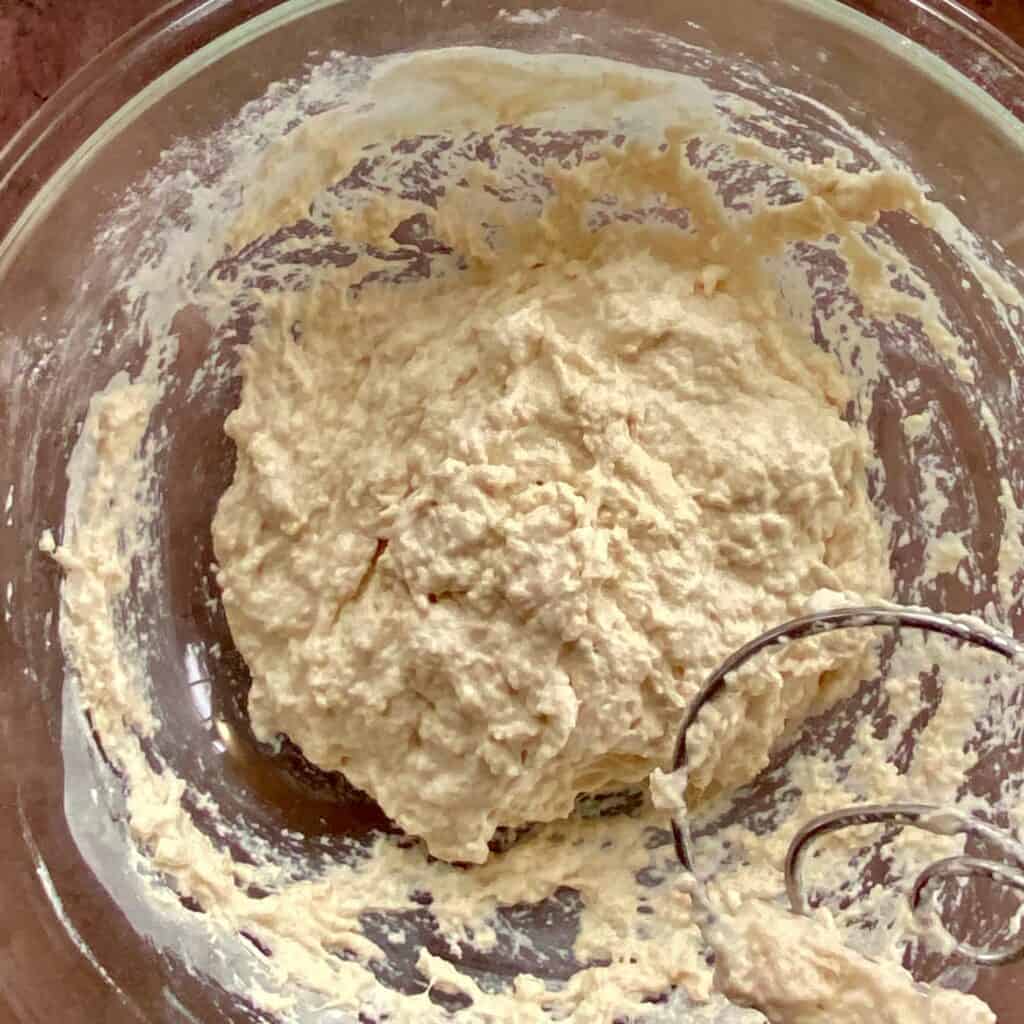
The bread itself has FOUR ingredients. Flour. Water. Salt. Yeast. It’s a lean dough and a no-knead dough at that!
Flour. Water. Salt. Yeast.
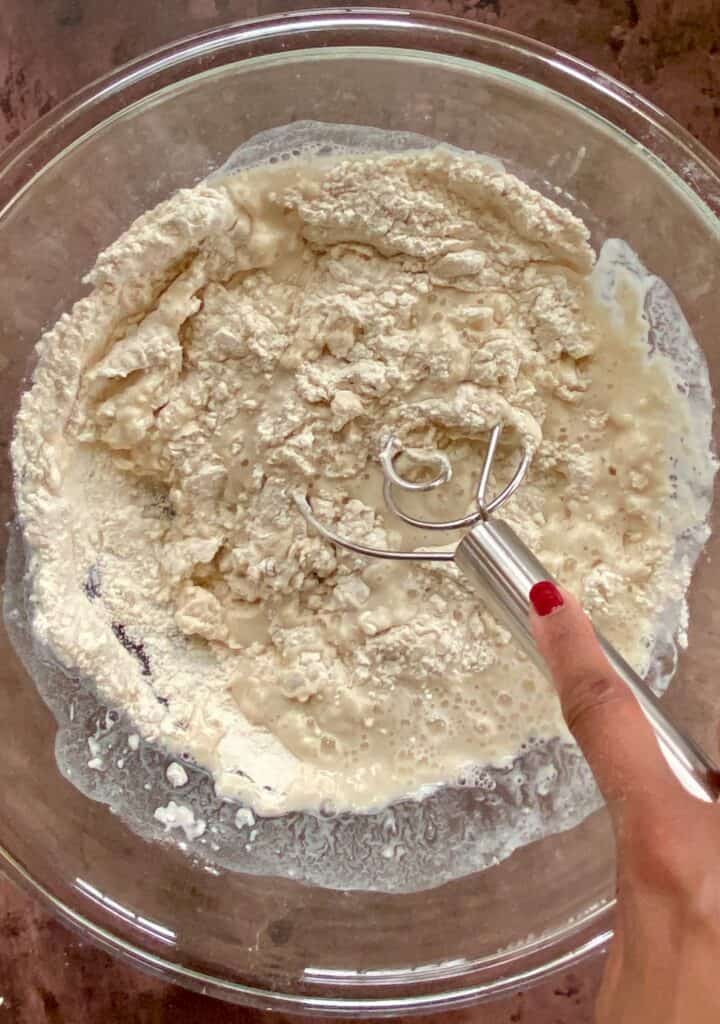
Whisk or stir the dry ingredients together, then add the water and stir.
Very important note: even though this dough comes together in one bowl, you should always check the viability of your yeast first! See the “How to Proof Yeast” section of this post for more details!
The dough will originally look very dry. Keep stirring until it looks like this!
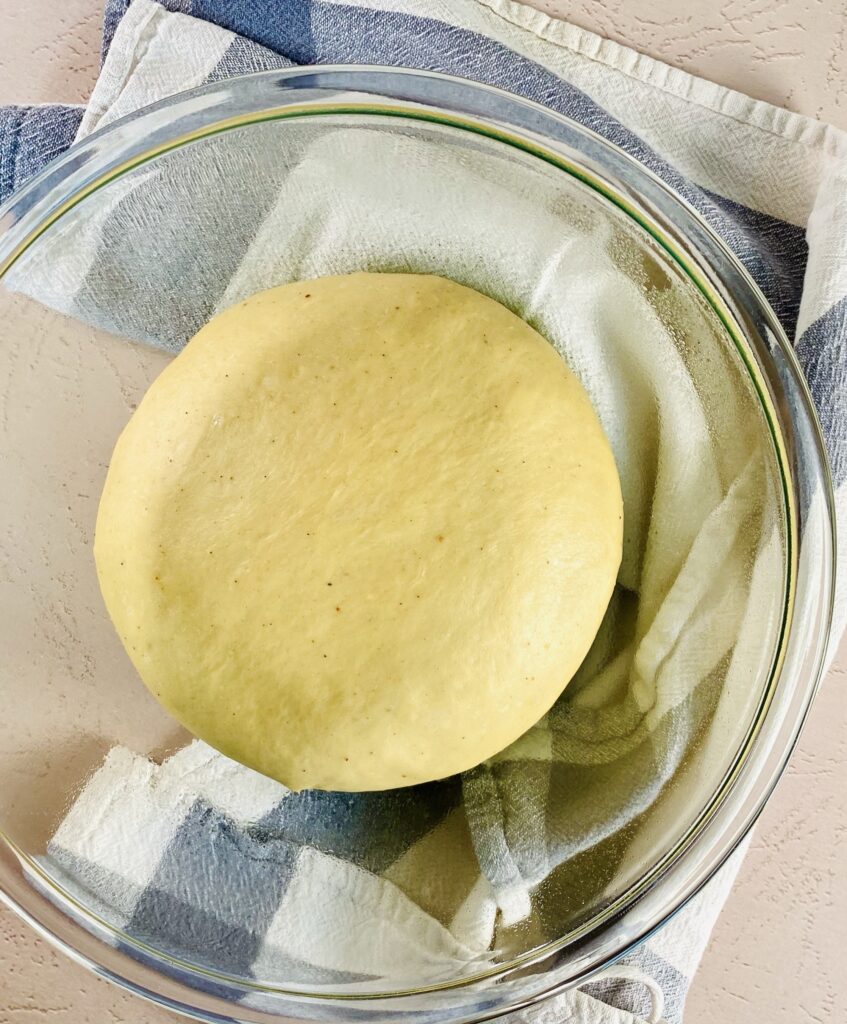
Then, cover it and leave it alone for two hours. Really! Let it rise at room temperature for 1.5-2 hours, or until it has doubled in size.
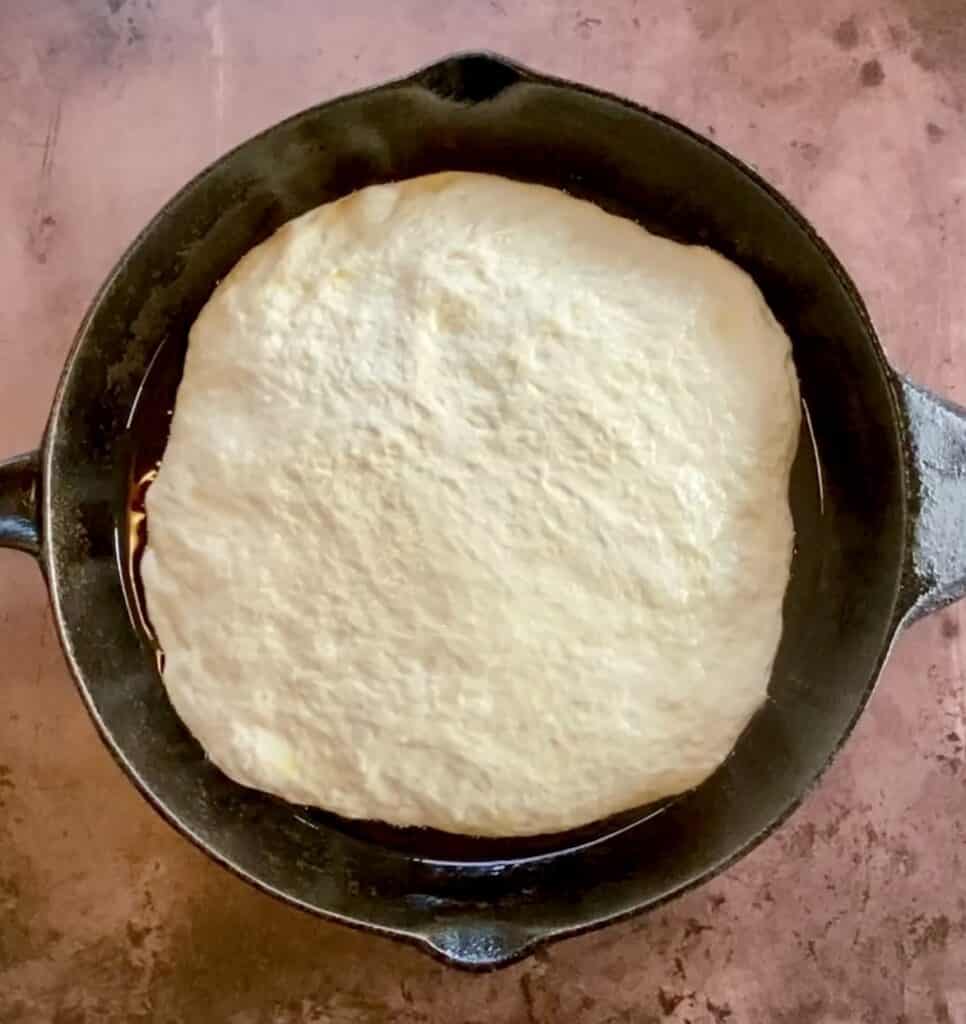
After the initial rise, place the dough in the refrigerator for at least 12 hours, but up to 24 hours. Remove from the refrigerator and get ready for fun!
Place olive oil on your hands and fold the focaccia in on itself four times.
Place two tablespoons of olive oil in your cast iron skillet and cover the whole surface with it. There will be extra oil in your skillet. Don’t worry about wiping it out!
Turn the focaccia around in the oil, covering all sides. Make sure that the entire surface of the dough is covered in oil; small pockets of oil are okay!
Allow the dough to rise, uncovered for 2-3 hours, or until the focaccia looks like this:
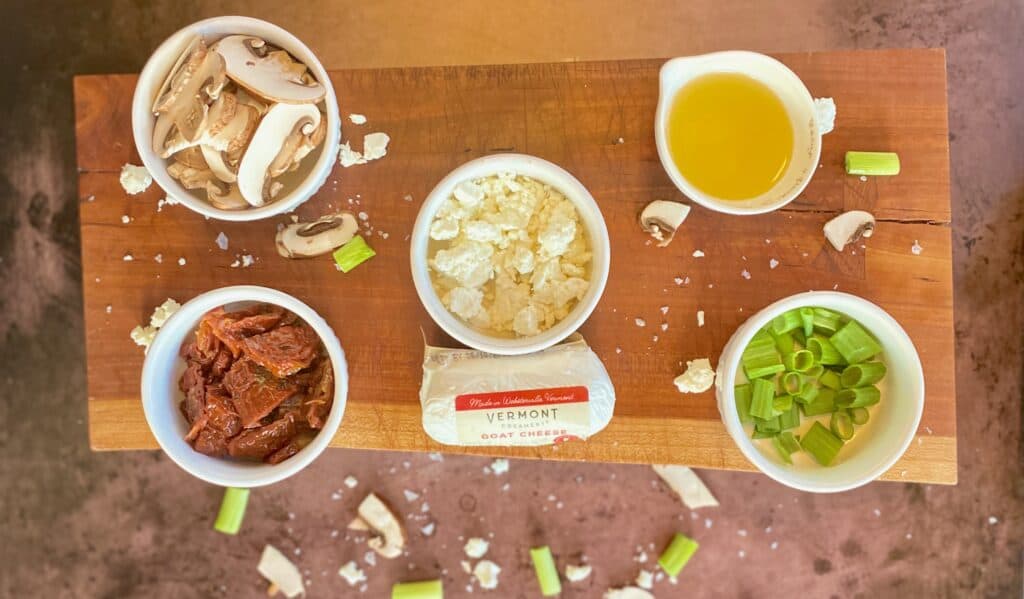
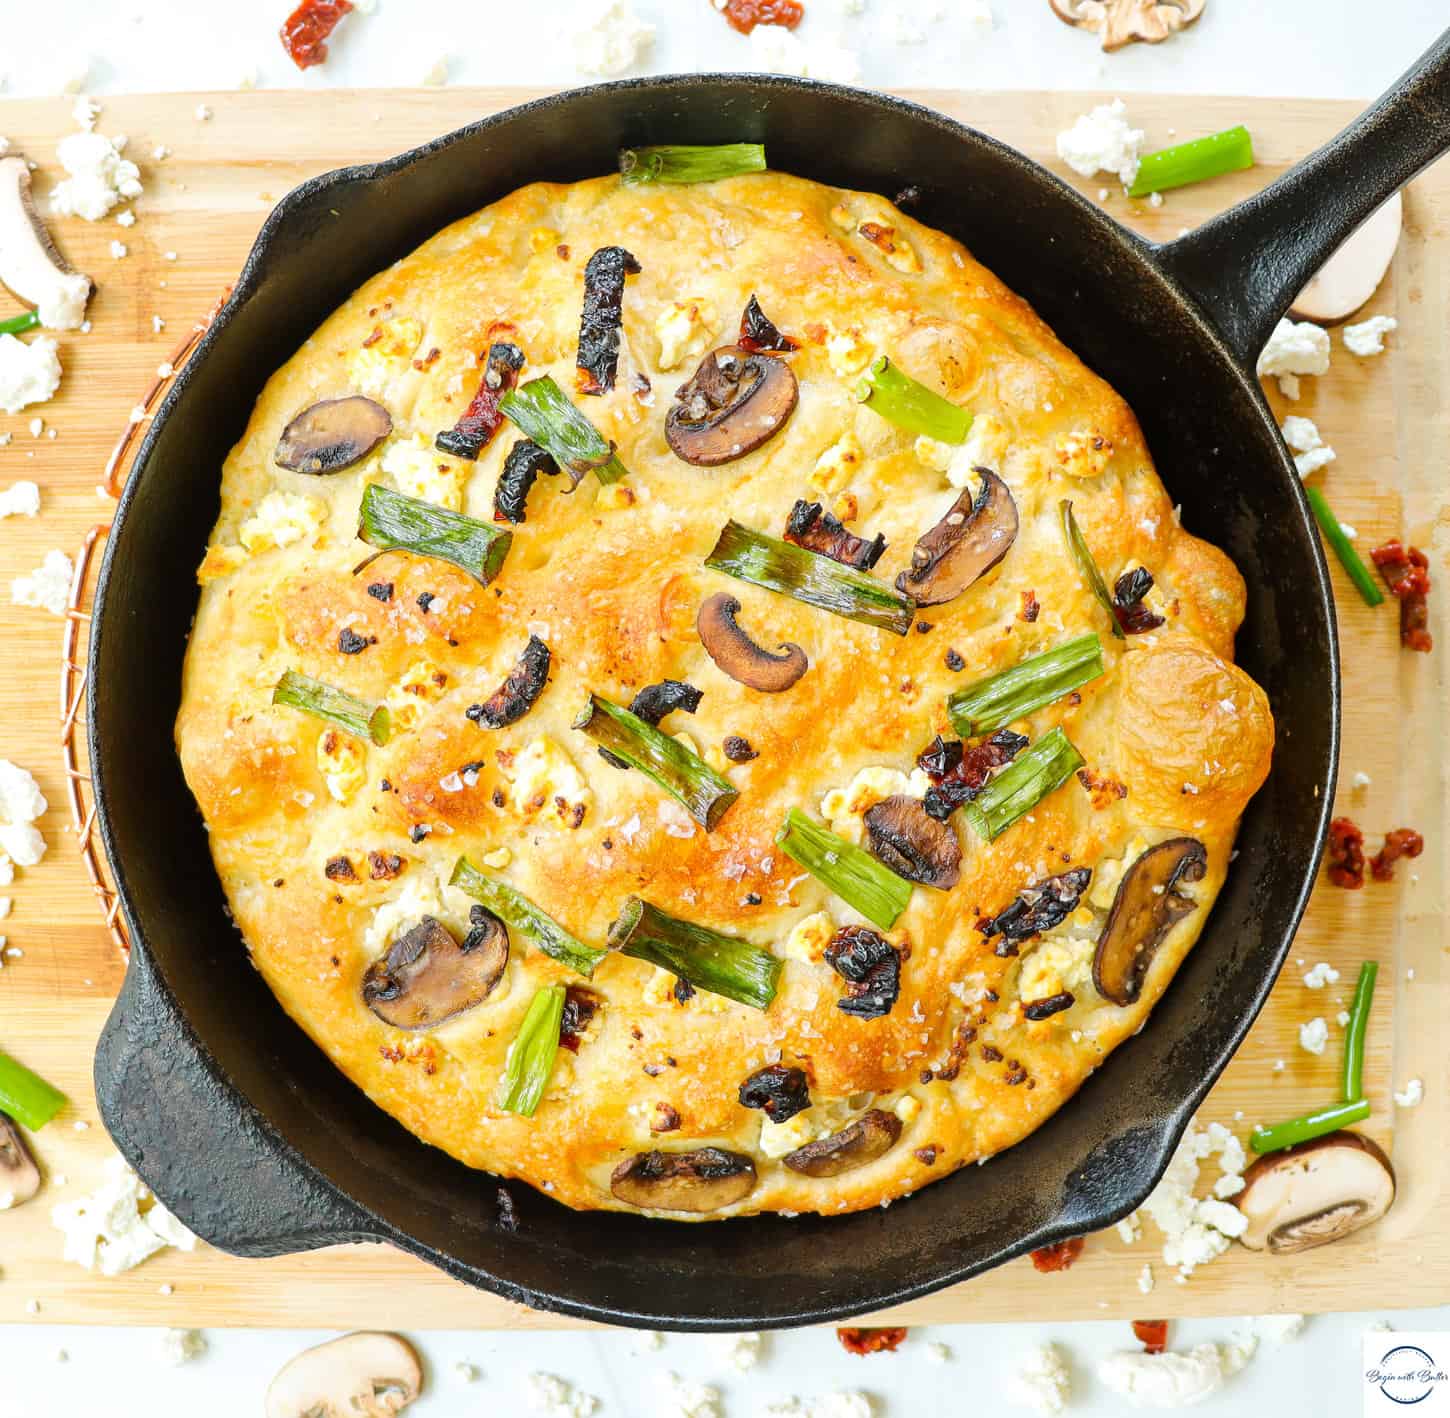
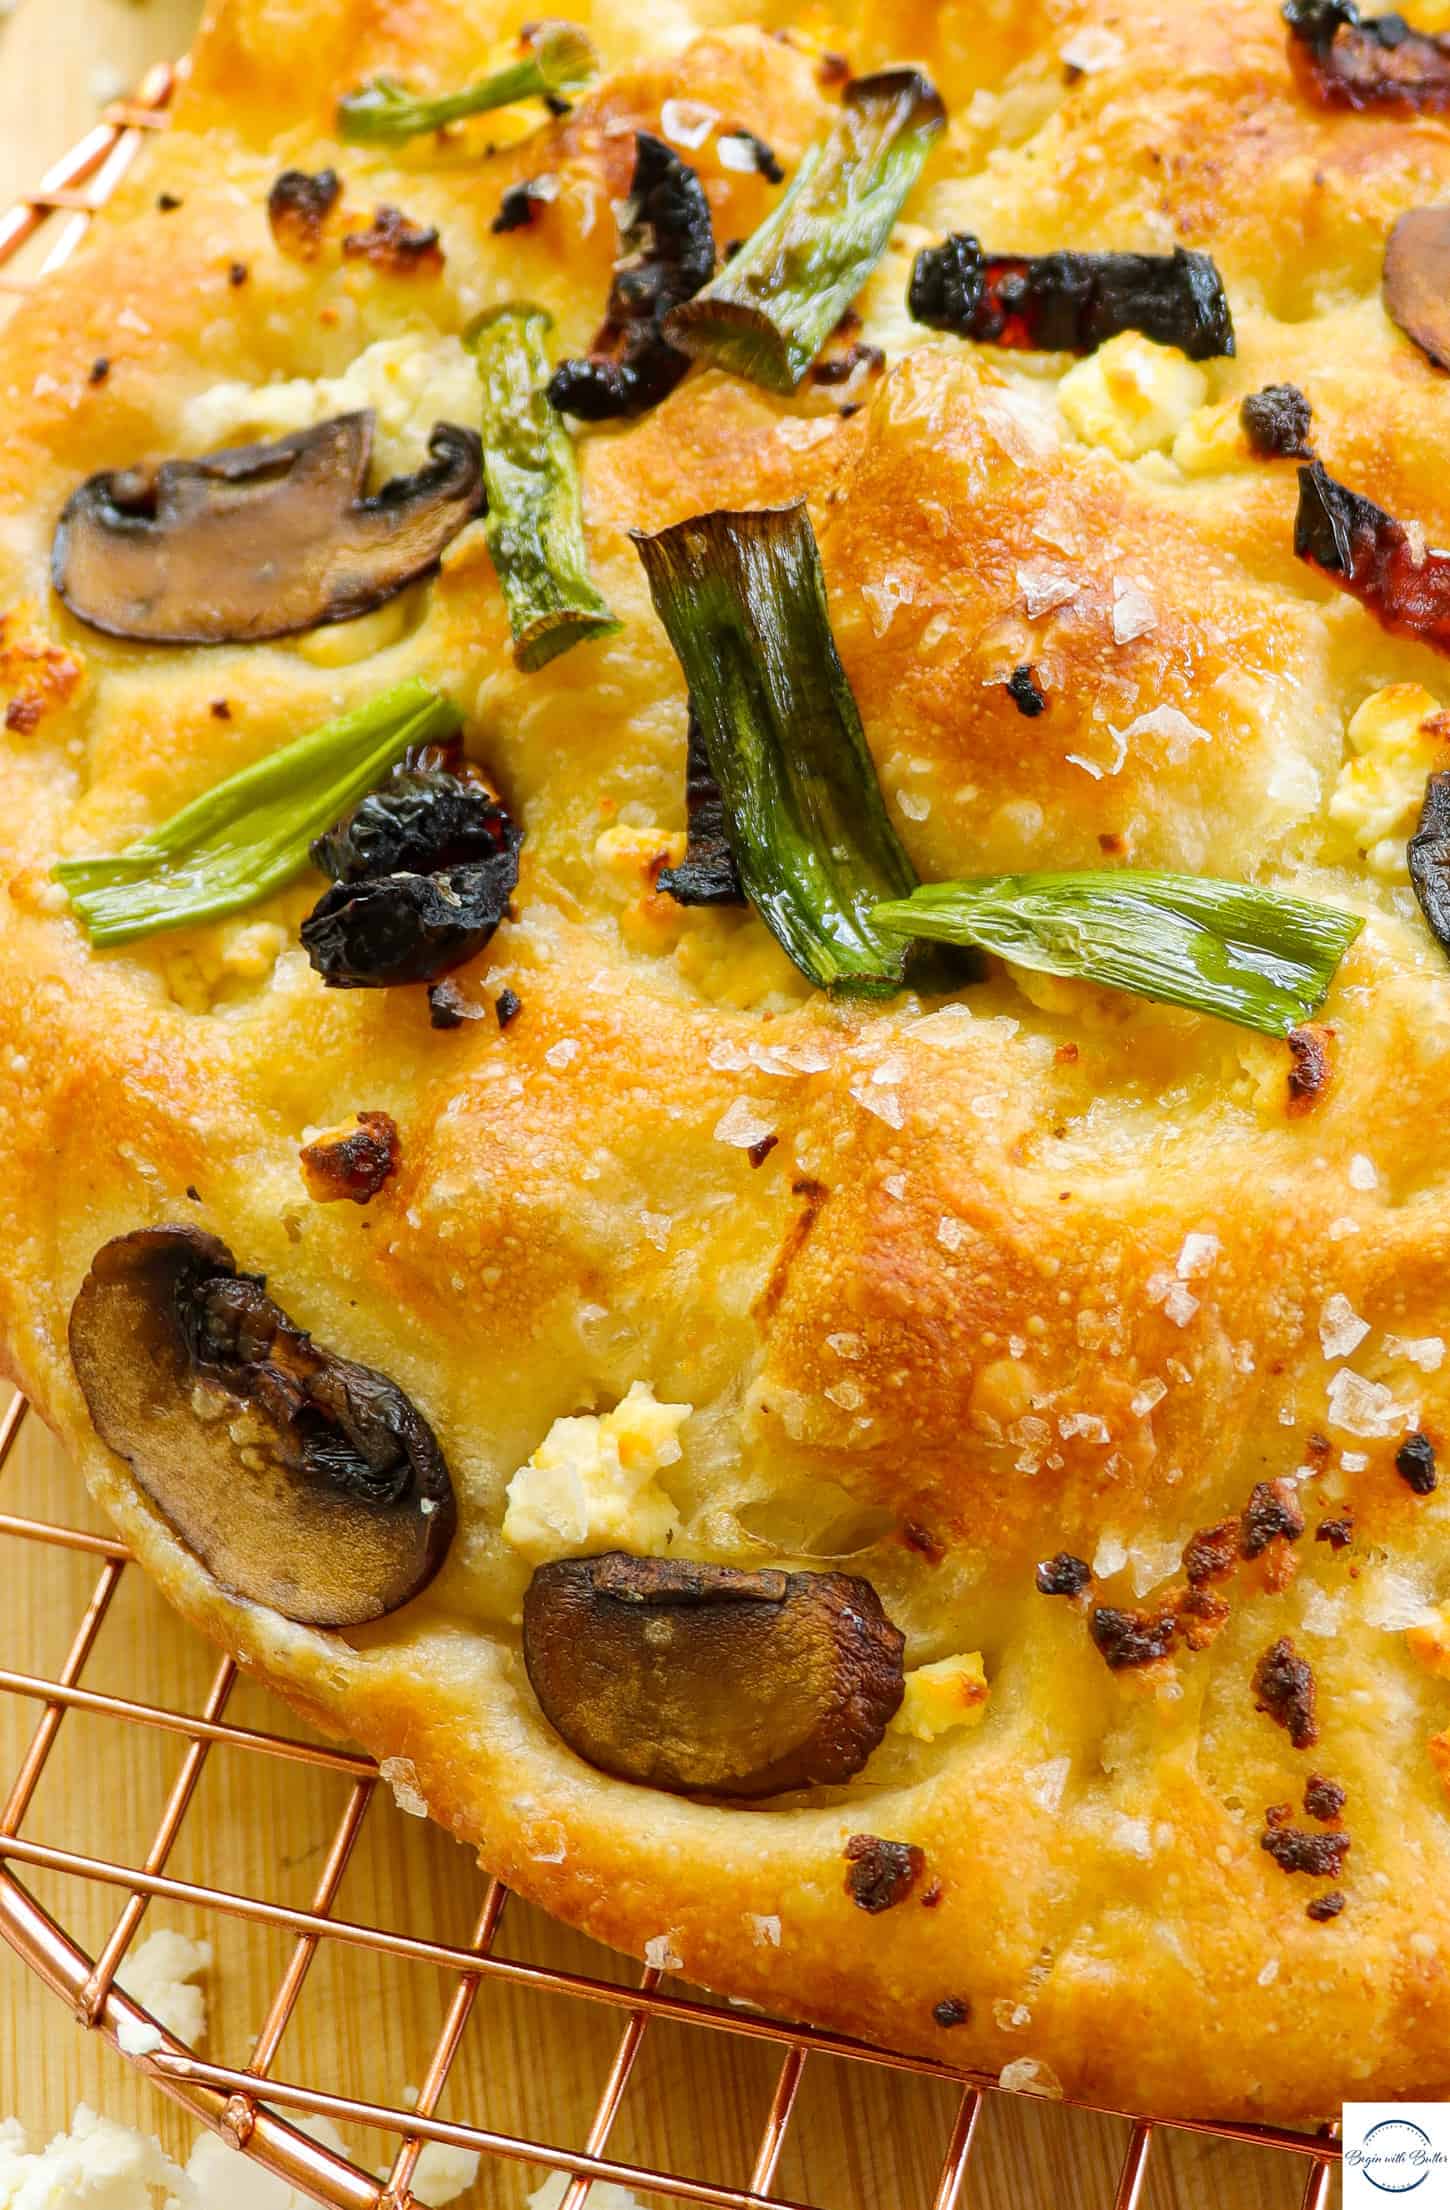
While the focaccia is rising, prep your ingredients. In addition to the Vermont Creamery Goat Cheese (a must), I added sun-dried tomatoes and mushrooms when building the focaccia, and scallions at the end of the baking time.
45 minutes before baking, pre-heat your oven. It’s important to make sure that your oven is a real 425°F when you bake this focaccia, so give it enough time to get there! An oven thermometer takes the guesswork out of oven temperatures as well.
Once the dough has finished rising, oil your hands and dimple the dough. Make sure that you go all the way to the bottom of the skillet!
Add your toppings. I’m telling Y’all, don’t skimp on the goat cheese. During *ahem* copious amounts of testing, I found that crumbling the goat cheese worked better than using large chunks of goat cheese.
I love this goat cheese so much.
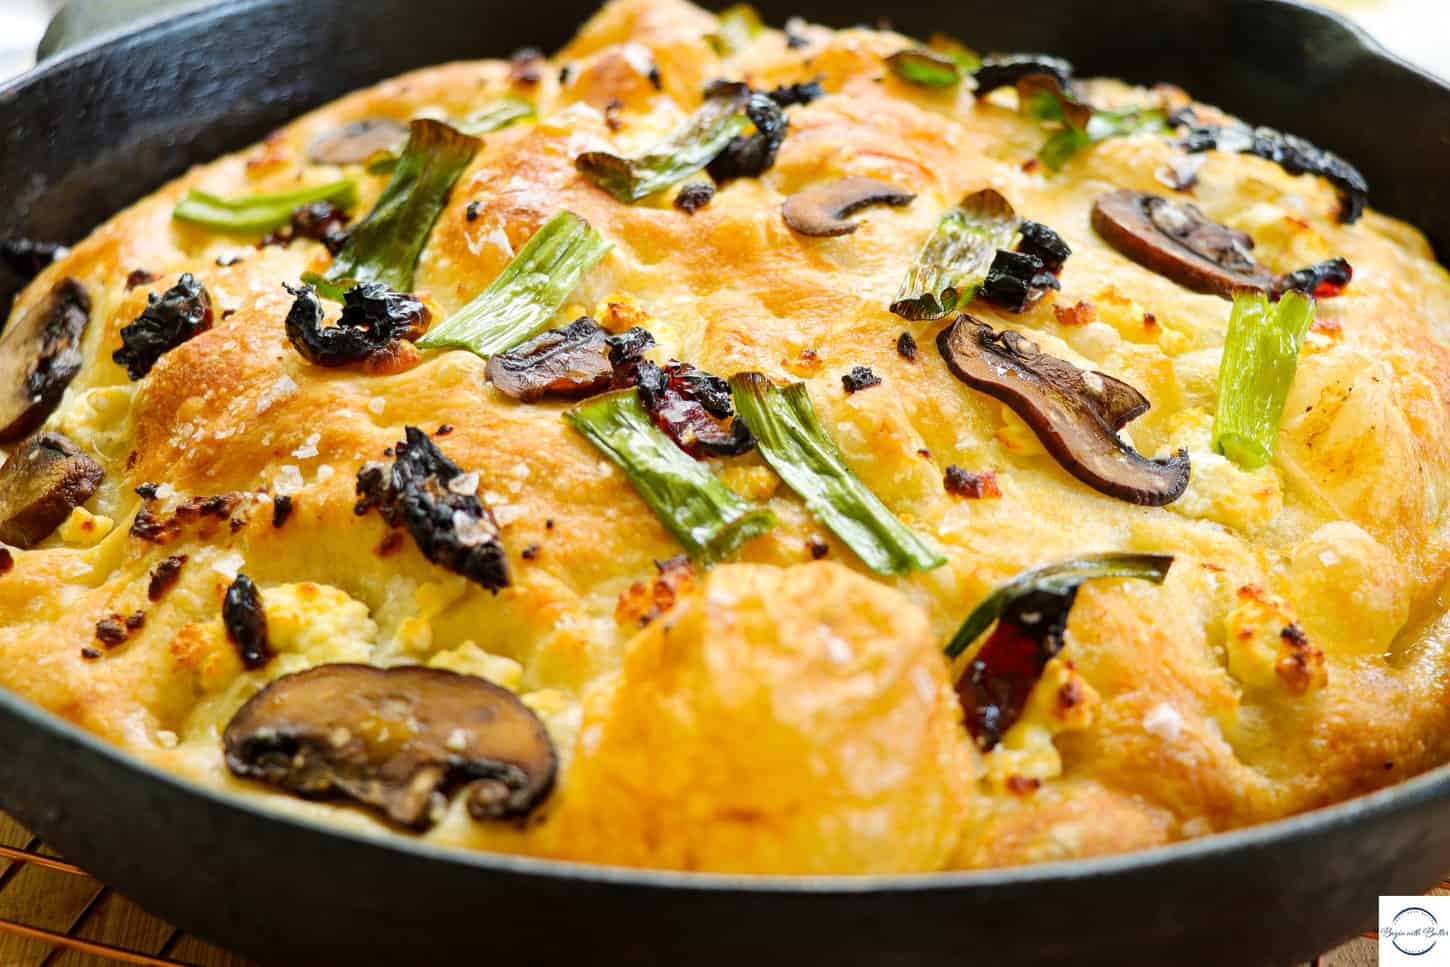
Bake in a 425°F oven for 18 minutes. If you’re adding scallions, add them at the 18-minute point. Be careful! Cast iron is incredibly hot! After adding scallions, bake for another 8-10 minutes, checking frequently. The focaccia is done when it looks like this:
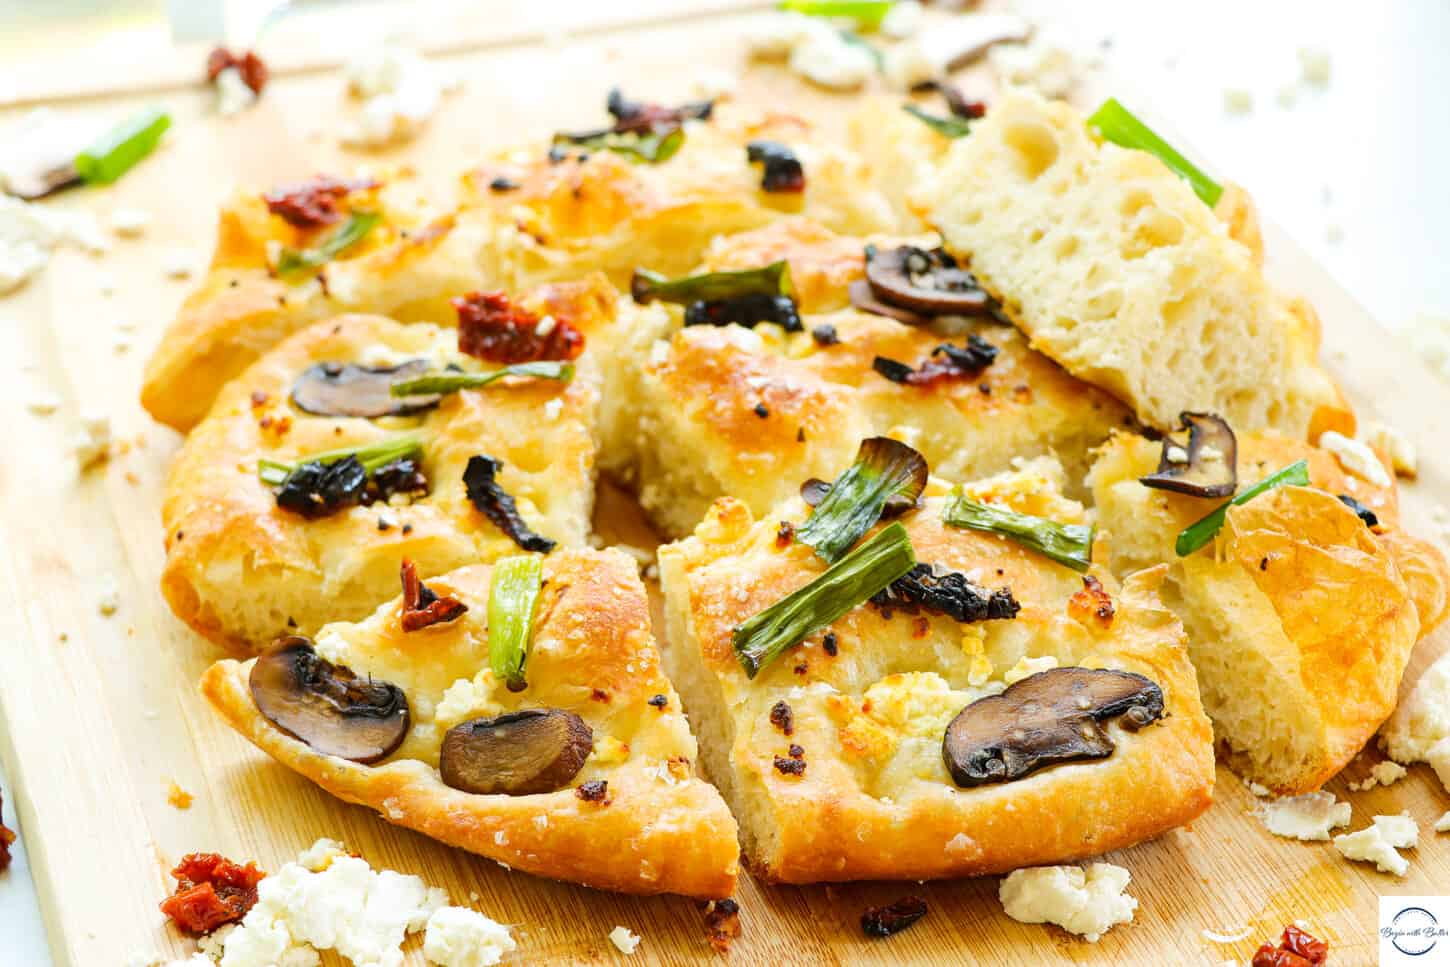
When safe to do so, remove the focaccia from the skillet and put on a cooling rack. This bread is ready to cut in 30-45 minutes, or when it is slightly warm. It’s best on the same day that it’s made, but I have frozen it as well.
This bread is so amazing. I’ve tested it over and over again and it still usually disappears the same day that it was made. In my house, that’s saying something!
I hope you all love this recipe that’s so dear to me. Cast iron skillet cooking is my preferred method, and finding new uses for my favorite cooking vessel is so cool to me!
Want to check out the Instagram post to see how I made this amazing bread? It’s right here!
Do you love baking cookies? Ever wonder why your cookies are sometimes perfectly, and sometimes a crumbly mess? Click here to download my FREE guide, “Five Easy Tips for Chewy Cookies!”
There’s a lot of bread that comes from this kitchen. This post is courtesy of a happy little 79% hydration accident with some pizza dough that has me very, very excited.
There are several ingredients that create big impact in different types of bread. One of the ingredients that has the biggest impact…is water.
That’s right. The amount of water that you use in your bread dough impacts the texture and chew of your bread in a huge way.
Let’s jump right in.
Baking Science: Water = Hydration Level
In bread baking, hydration level is determined by comparing the amount of flour versus the amount of water (or other liquid) in that dough.
So, if you have a bread dough that uses 1000 grams of flour, and the recipe calls for 600 grams of water, then the dough is a 60% hydration dough.
In his book Water, Flour, Salt, Yeast, author Ken Forkish artfully uses baking percentages to create various types of artisan bread and incredible pizza dough.
Why Does Hydration Matter?
The hydration level in your bread dough impacts the interior crumb and the external crust of your bread. So, it’s important because it literally impacts everything about your bread’s structure.
Low Hydration Doughs
In lower hydration doughs, this means a slightly thicker crust and a tight internal bread structure with smaller holes.
Low hydration doughs can be easier to work with, since they don’t contain as much water and are thus not as sticky as high hydration doughs. I say can be because low hydration doughs can be extremely stiff, which can make it difficult to tell when the dough is ready to rise (and can lead to over-mixing, which, ironically, makes the dough even more stiff).
Popular examples of lower hydration doughs include bagels (55-65%), and sandwich bread (58-65%).
High Hydration Doughs
In higher hydration doughs, the higher ratio of water to flour means a thinner crust and those signature huge, non-uniform holes that we love to see in our favorite artisan breads.
High hydration doughs are a dream come true for many bread bakers, since they create that amazing chew that’s so popular in artisan breads. They can be a challenge for new bread bakers, since more water in the dough means a more sticky dough. Some high hydration doughs require more advanced kneading techniques as well, which can be intimidating for newer bread bakers.
Popular examples of higher hydration doughs include my new favorite pizza dough (79%…recipe soon!) and focaccia (70-80%).
If you’re starting to develop your own bread recipes, it’s important to consider hydration during your initial process. Want a chewy, light dough? Try 68-70% hydration to start. Want something more toothy and dense? Try 60-62%. Whatever you do, I encourage you to try. Proof your yeast, write out your recipe, and go for it.
If you need help I’m here! You can always, always always reach out to me at hello@beginwithbutter.com with baking questions. I’m happy to help!
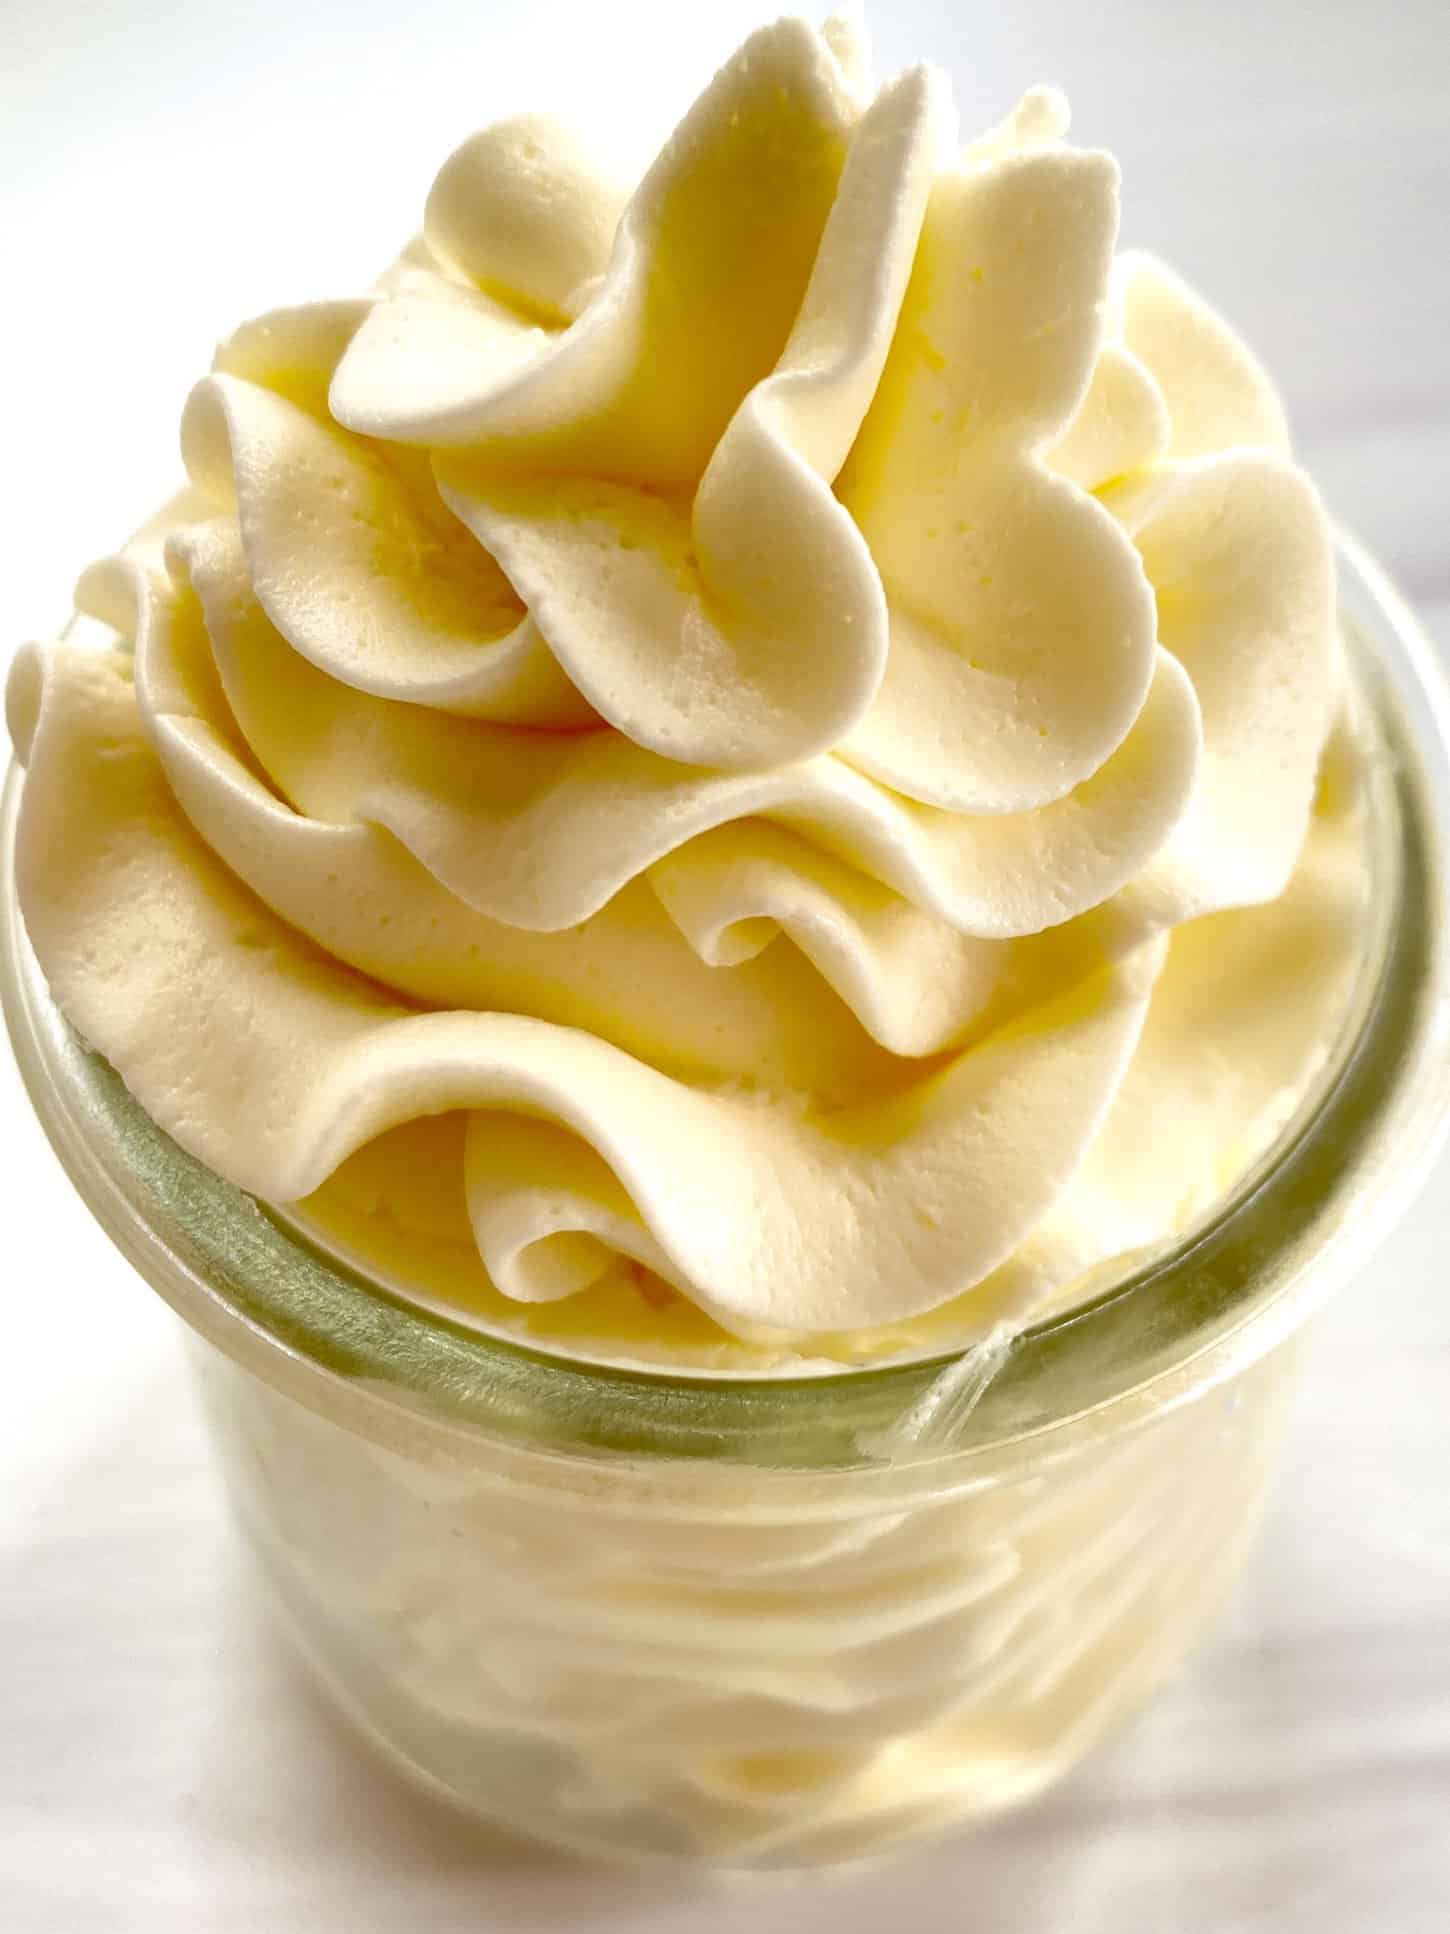
Friends, I’ve recently spent a lot of time figuring out the best tips and techniques to make Swiss Meringue Buttercream.
And I do mean a lot of time. So much time, in fact, that I’ve hit a lot of common snags in the process, and have tested different methods for fixing those snags!
Swiss Meringue Buttercream (or SMBC for short) is luscious and airy and decadent. The version that I settled on for my Limoncello Layer Cake is perfectly balanced between sweet and buttery, and the texture…
FAMILY…THE TEXTURE…
But while Swiss Meringue Buttercream is incredibly rewarding, it has a bit of a reputation for being difficult to make. Which is a shame, really. Because it belongs on everything.
So I’m here today to walk you through the whole process from start to finish! Let’s gooooooo!
Before You Begin
The main ingredients in Swiss Meringue Buttercream are egg whites, granulated sugar, and, ahem, butter. ???? So it’s best to have the best ingredients that you can source to get the most out of this amazing cake topper.
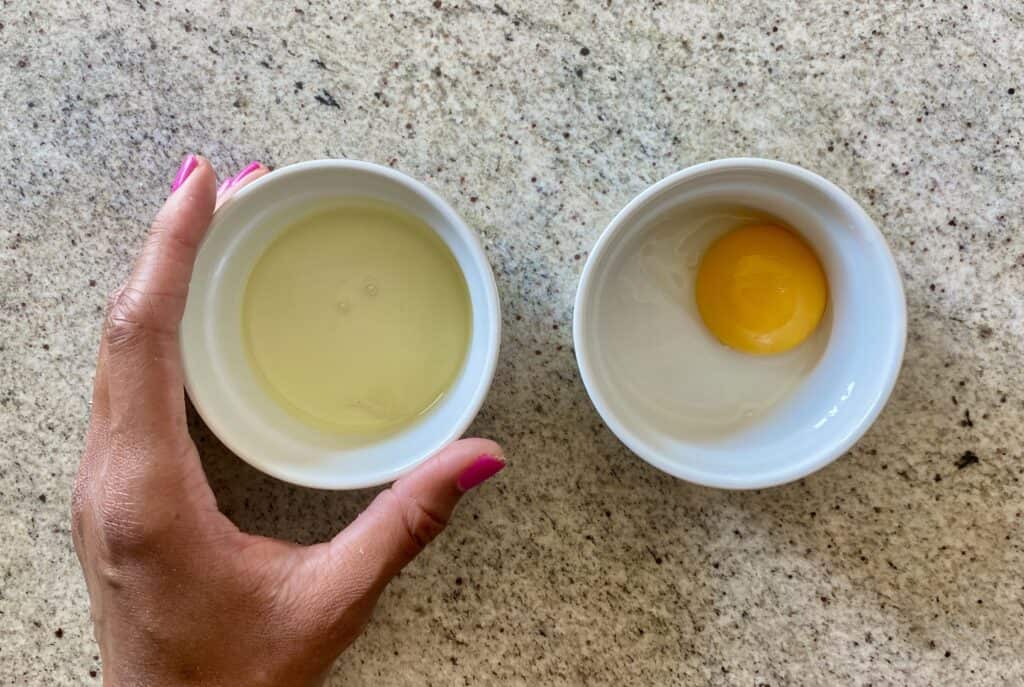
Speaking of egg whites, I always separate fresh eggs to make meringue. I’ve heard legendary tales of people who are able to whip carton egg whites to stiff peaks, but I have never seen carton egg whites whip up to the beautiful, stable stiff peaks that I’ve gotten consistently with freshly separated egg whites.
More on egg whites (because I’m clearly invested): the egg whites have to be completely separated in order for the meringue to work. Because any trace of egg yolk in your egg whites (or residual fat in your mixing bowl) could prevent the meringue from forming properly, which wouldn’t be a good sign for your buttercream.
Weather will play an important role in making SMBC. If it’s hot and humid outside, it can take longer for the buttercream to finally come together. It’s definitely doable though!
The temperature of the butter plays a huge part in the success of this buttercream. If the butter itself is too warm, then it could actually prevent the buttercream from fully forming and encourage a soupy, separated mess. If it’s too cold, you could get chunks of butter that don’t nicely incorporate into your buttercream.
Plan to take your time. This buttercream is extremely decadent but it is not a “quick and easy” recipe (quick: no; easy: YES!). I’ve never had a good SMBC come together in less than 45-60 minutes, and sometimes it takes longer than that if your buttercream has to take a time out!
Intimidated? Don’t be! For visual learners, I even did an entire Office Hours on SMBC the other day, which you can view right here!
To make Swiss Meringue Buttercream, first begin by separating egg yolks from egg whites. I separate using my hands, but a separating tool or the shell-to-shell method work just as well. Note that your egg whites will look yellow-ish at this stage. If the yolk is intact when it’s separated, it’s all good.
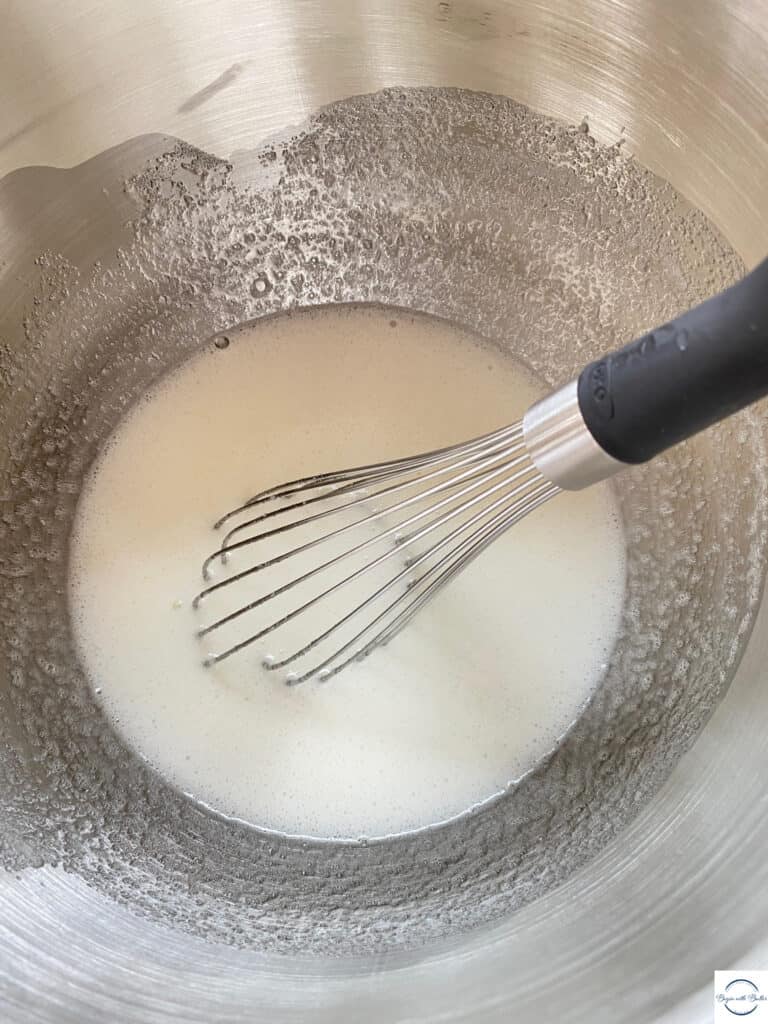
Next, add the separated egg whites and granulated sugar to a stainless steel stand mixer bowl and whisk with a balloon whisk until most of the snotty texture from the egg whites is broken up and incorporated.
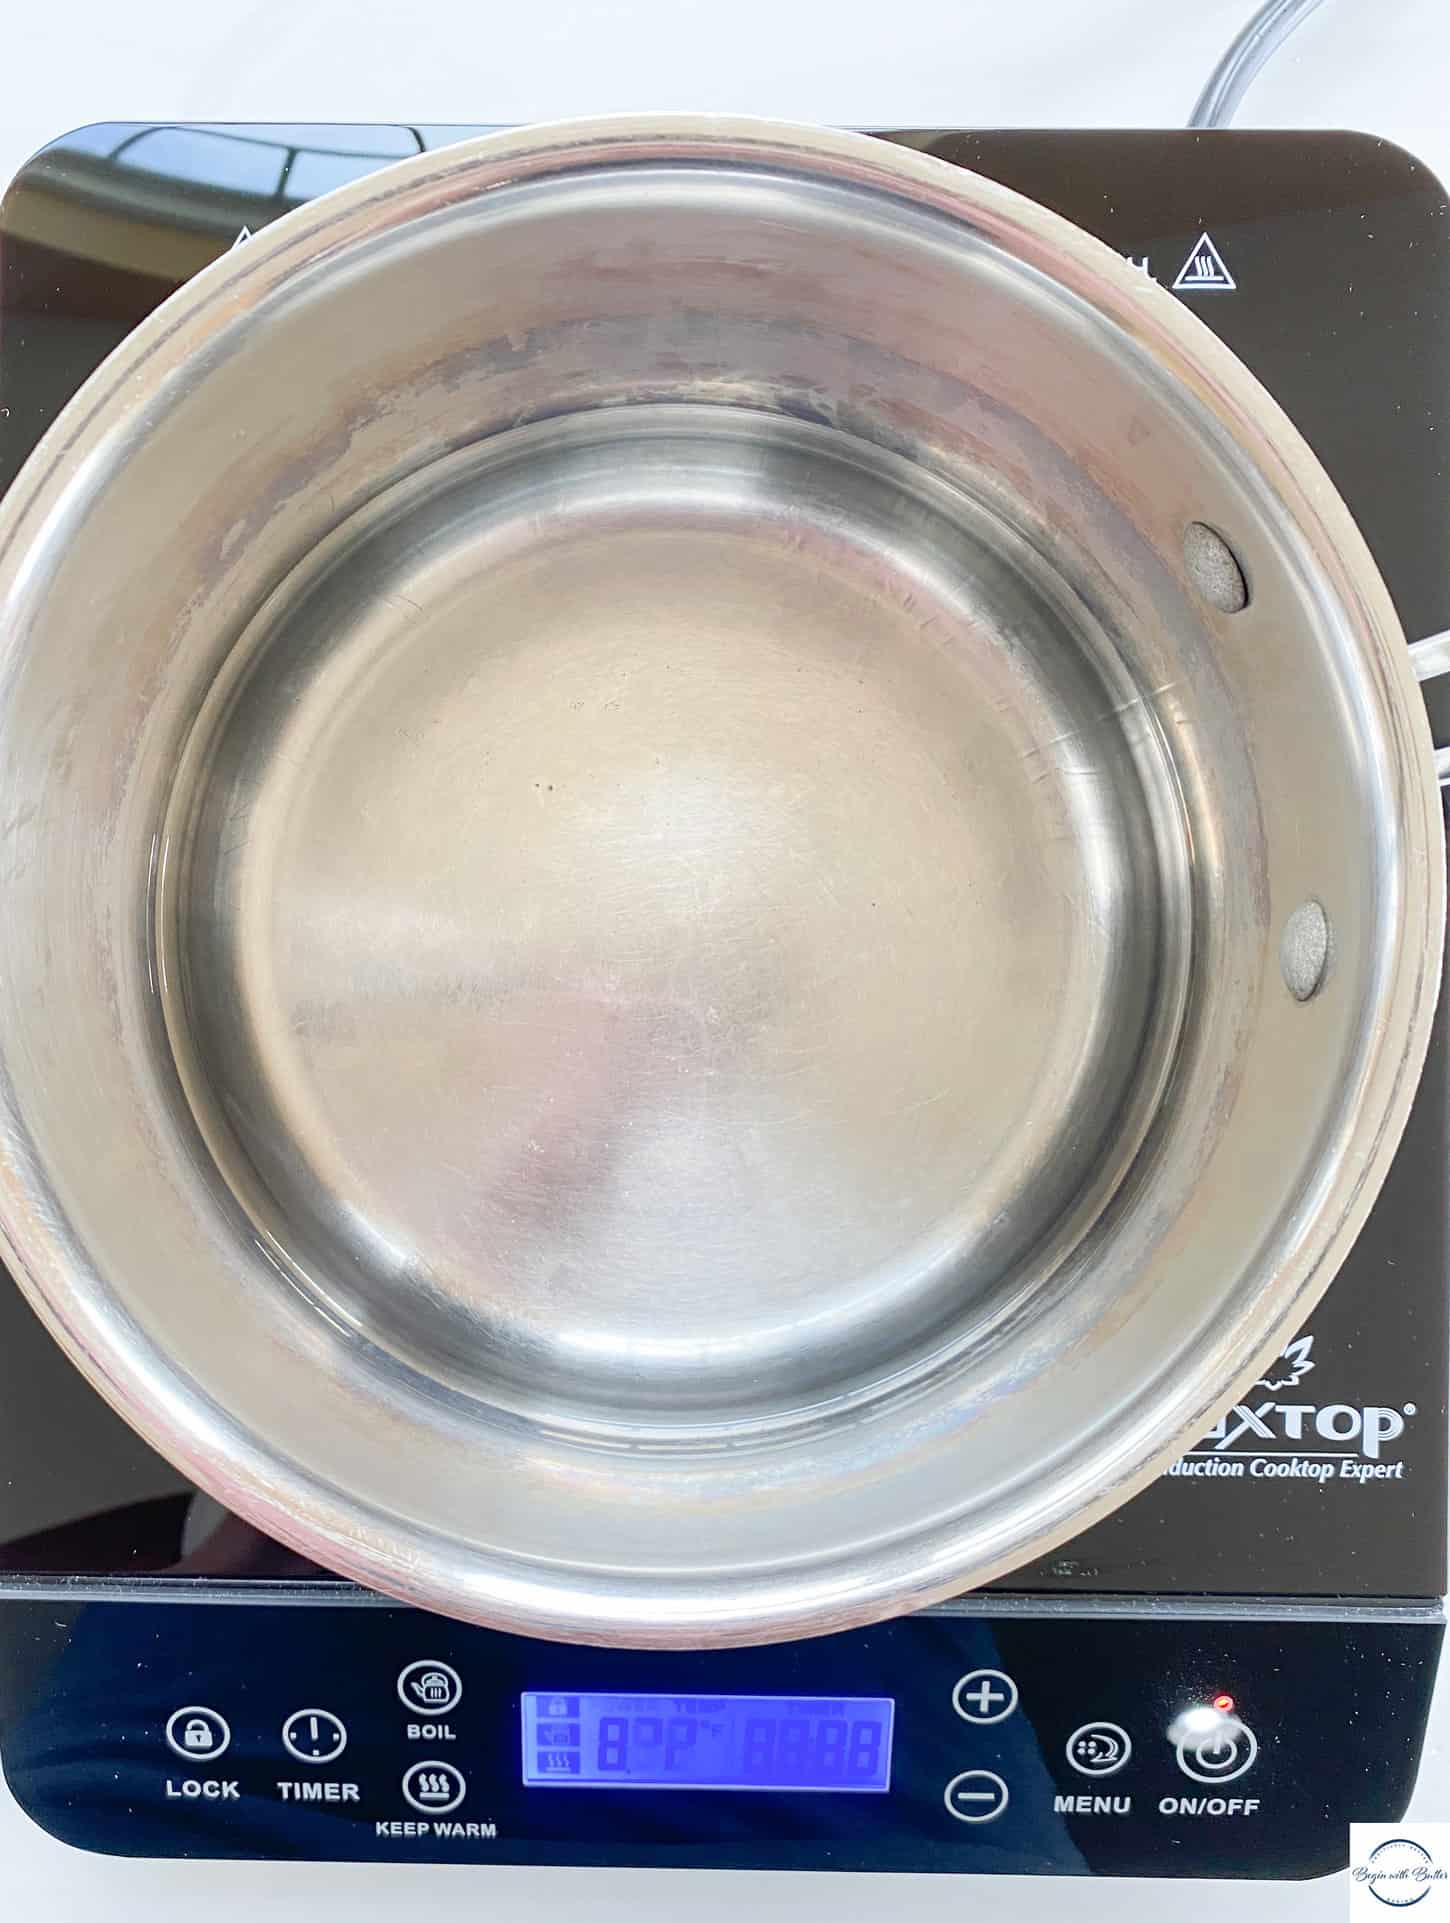
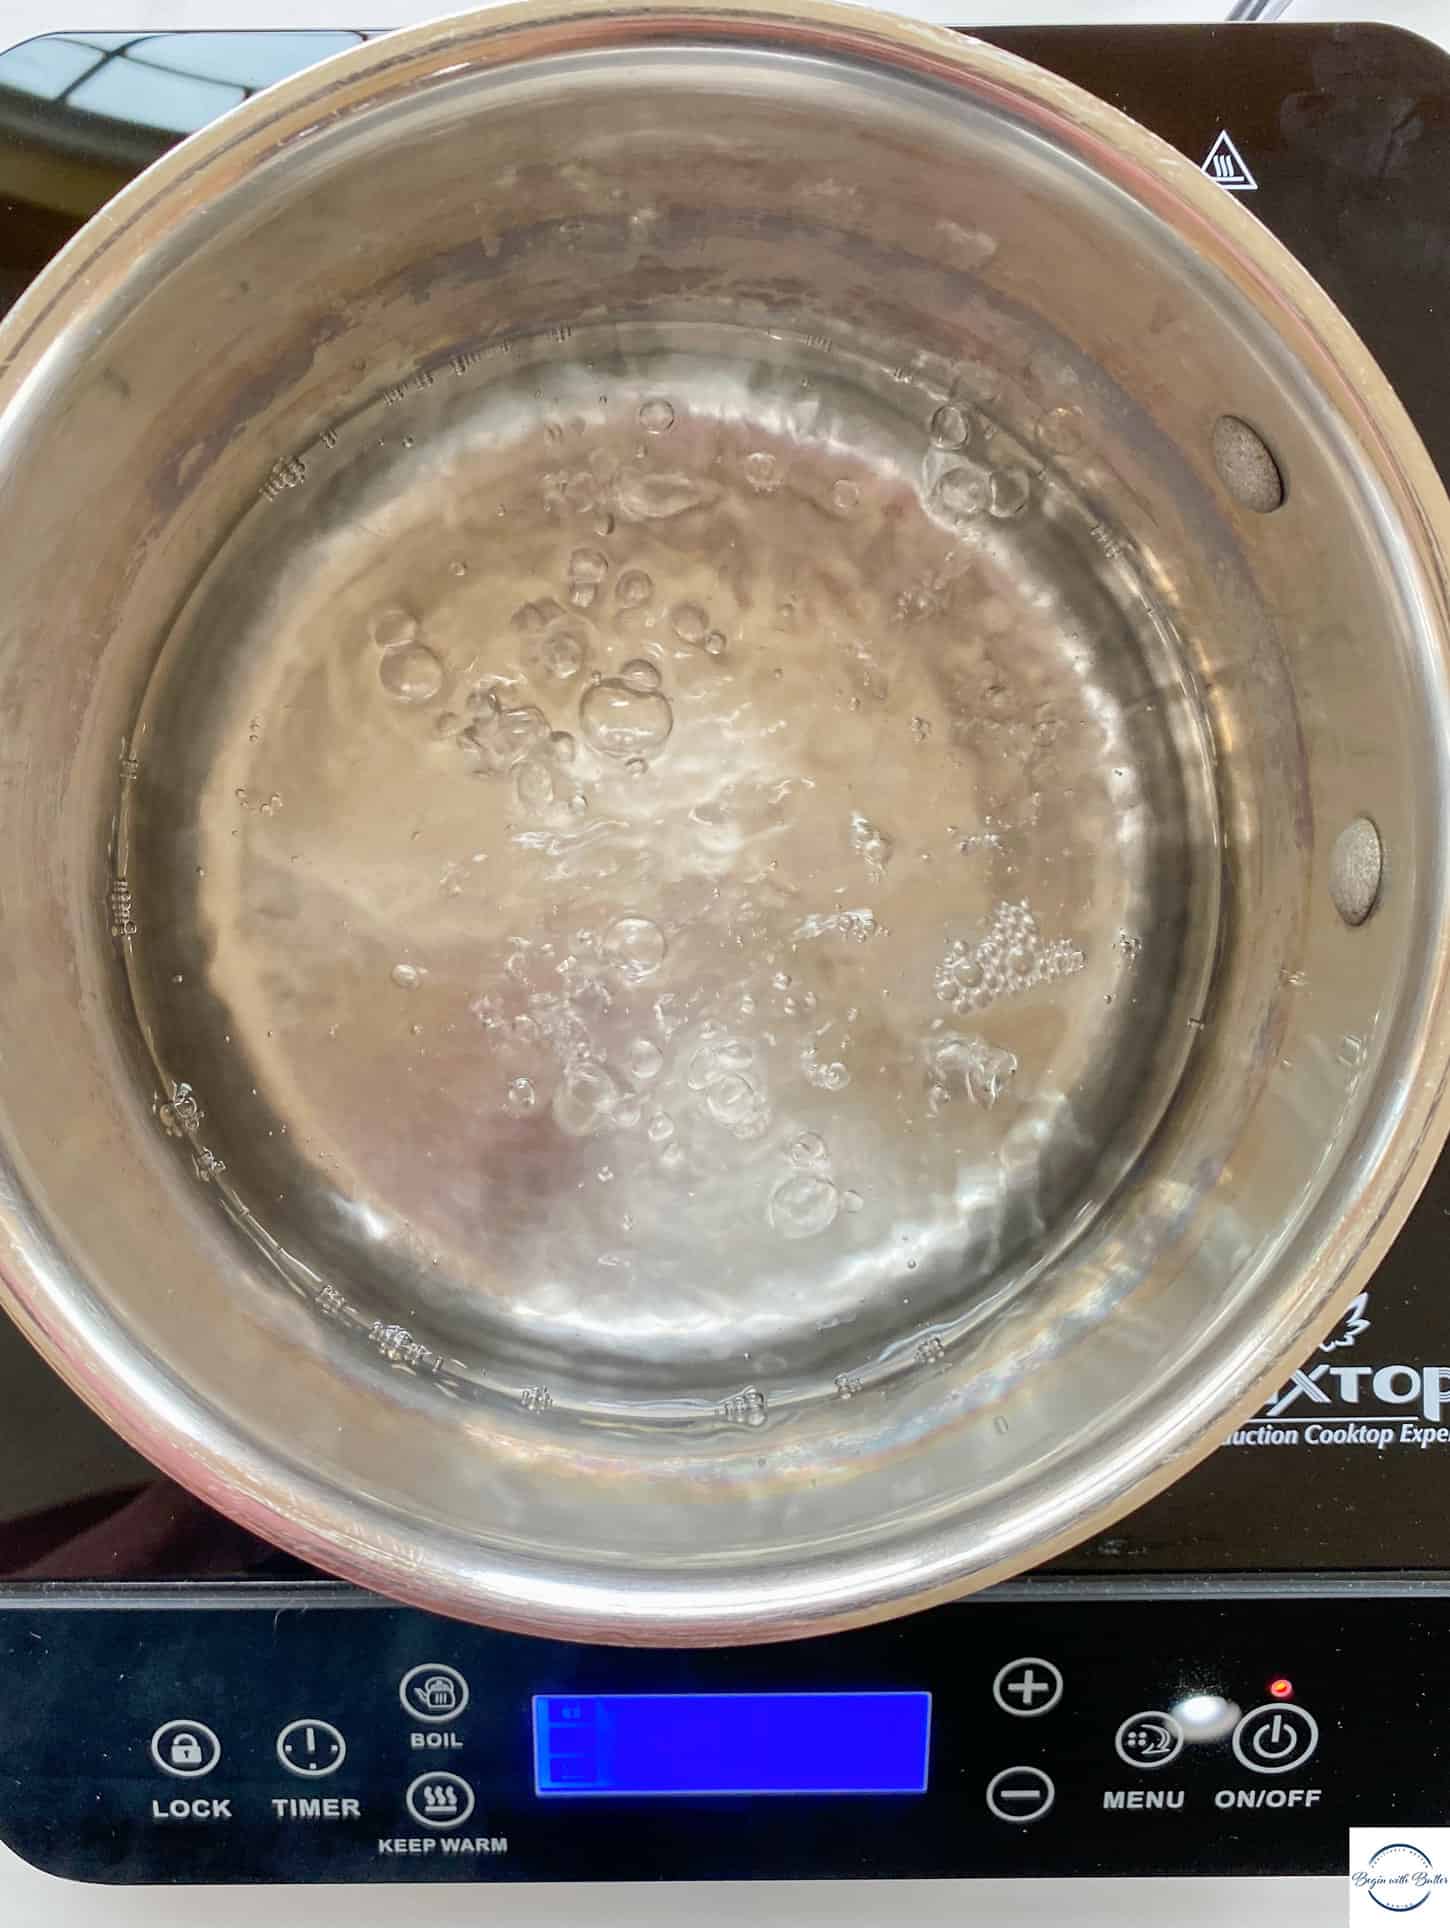
Place two or three inches of water into a large saucepan (large enough to accommodate the whole bottom of your stainless steel mixing bowl, but not enough to touch the bottom of the mixing bowl) and bring to a boil. Reduce the water to a steady simmer.
Place the mixing bowl over the saucepan while the water is simmering, making sure not to touch the water beneath. Stir constantly with the balloon whisk until the sugar is completely dissolved. This takes anywhere from 2-4 minutes. It’s important that the sugar is completely dissolved before moving on from this stage. You can check by rubbing a very small amount of the mixture between your fingers. If you feel absolutely no sugar granules and the mixture looks completely uniform (no snotty streaks!), then you’re ready to move on!
From Meringue to Swiss Meringue Buttercream
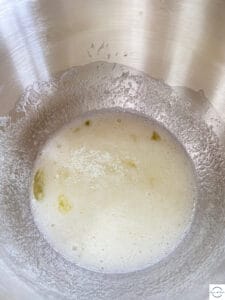
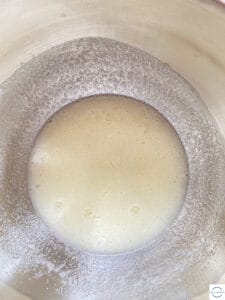
From the double boiler, place the mixing bowl directly on your stand mixer. Both the bowl and mixture will be pretty warm, so be careful! Using the whisk attachment, start mixing on low speed (on a KitchenAid Artisan, this would be speed 2-3). Keep going for 1-2 minutes, or until the mixture stops sloshing around in your bowl.
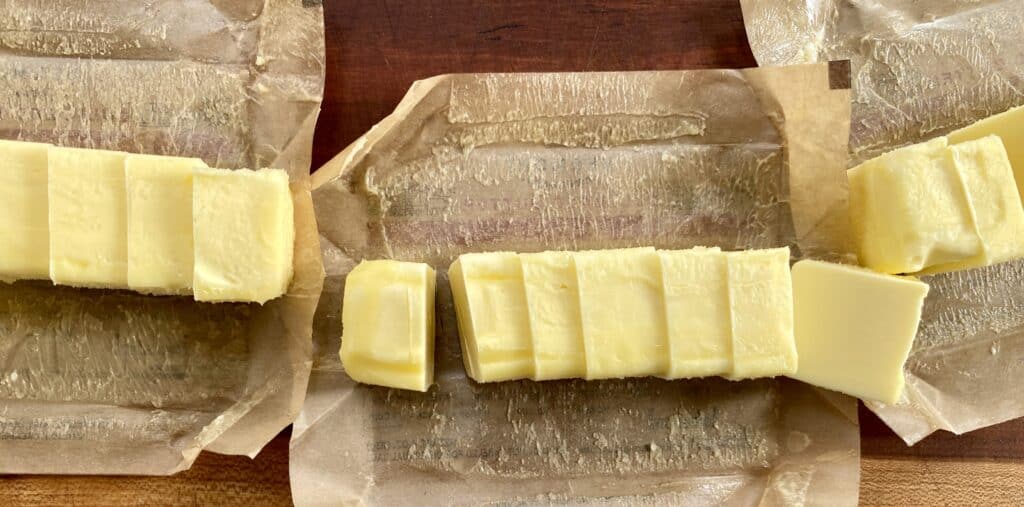
Turn up the speed to medium (on a KitchenAid Artisan, this would be about speed 4-5) and allow the mixture to continue working for anywhere from 4-10 minutes (you read that correctly; temperature and humidity can impact this step greatly). The meringue will go from a yellow-ish color to a stark white color during this second phase of mixing, but it will still be very loose. *Note: this is also the time when I usually cut my butter into chunks of about 1-1.5 tablespoons.*
Turn your mixer up to max power and let ‘er rip. This is one of the few times that I open my mixer wide up like this, and honestly, I think my mixer appreciates the opportunity to show off. Keep an eye on your mixer; the meringue will start to climb the bowl once it’s formed.
For a great video on meringue technique, check out this short video!
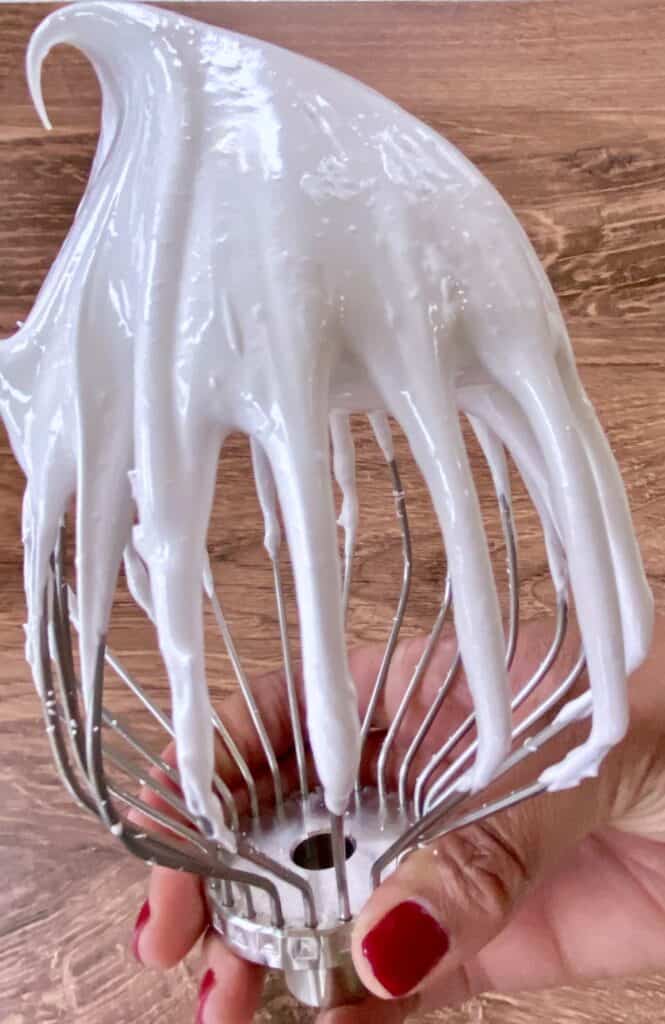
For SMBC, we want a stiff meringue. This buttercream is different from the meringue on my Easter Coconut Cake, my Coconut Meringue Pound Cake, and my Lemon Meringue Pound Cake in this regard; those all use a more floppy meringue topping. Here, we want a nearly stiff peak. So, in addition to climbing the bowl, we’re looking for meringue that doesn’t slide back down the sides of the bowl after climbing it. You’ll be able to see when it reaches this stage.
Test the meringue by pulling the whisk attachment out of the bowl. If the meringue peaks don’t flop over and are nearly stiff, you’re ready to move on.
Becoming Swiss Meringue Buttercream
The temperature and timing of the butter are especially important to Swiss Meringue Buttercream.
Family. Practice is key!
With your mixer on low/medium speed, add 1-1.5 tablespoon-sized pats of butter at a time.
Some people like to switch from the whisk attachment to the flat beater attachment on their stand mixer, to get a smoother buttercream. This is purely a matter of personal preference; staying with the whisk attachment will lead to a lighter, more whipped Swiss Meringue Buttercream, and the flat beater attachment will lead you to a smoother, more uniform buttercream.
Both have their place, but I love the look, texture and mouthfeel of a slightly whipped Swiss Meringue Buttercream in the spring and summer months.
Don’t add another pat of butter until the previous pat is completely mixed into the meringue.
Make sure that you only add 1-1.5 tablespoons of butter at a time. My butter cuts are never perfect, but if a piece gets larger than 1.5 tablespoons, I know that it needs to be cut down. Adding too much butter at once can encourage the buttercream to separate instead of forming.
A Word…
Yes, this note deserved its own heading, because it’s the place where people think they’ve gone horribly wrong.
Remember that gorgeous, fluffy, stiff meringue that we made to start this endeavor?
Of course you remember. It took half an hour to make! ????
It WILL deflate a bit once you start adding butter. RIP to the first few batches of SMBC that I threw away at this point, thinking that I’d ruined them.
As the fat in the butter disperses into the meringue, the meringue will deflate quite a bit. As the video just showed, it might actually even become kind of runny.
KEEP. GOING. DON’T. PANIC.
Keep adding butter, on pat at a time, with your mixer on a consistent low/medium speed. You will be almost at the end of the butter phase (usually 3-5 pats of butter left) before you’ll notice a buttercream texture. If your buttercream starts to thicken too long before those last 3-5 pats of butter, turn the speed down and keep going.
Yes, really! You don’t want it to come together too quickly or you risk over-mixing it.
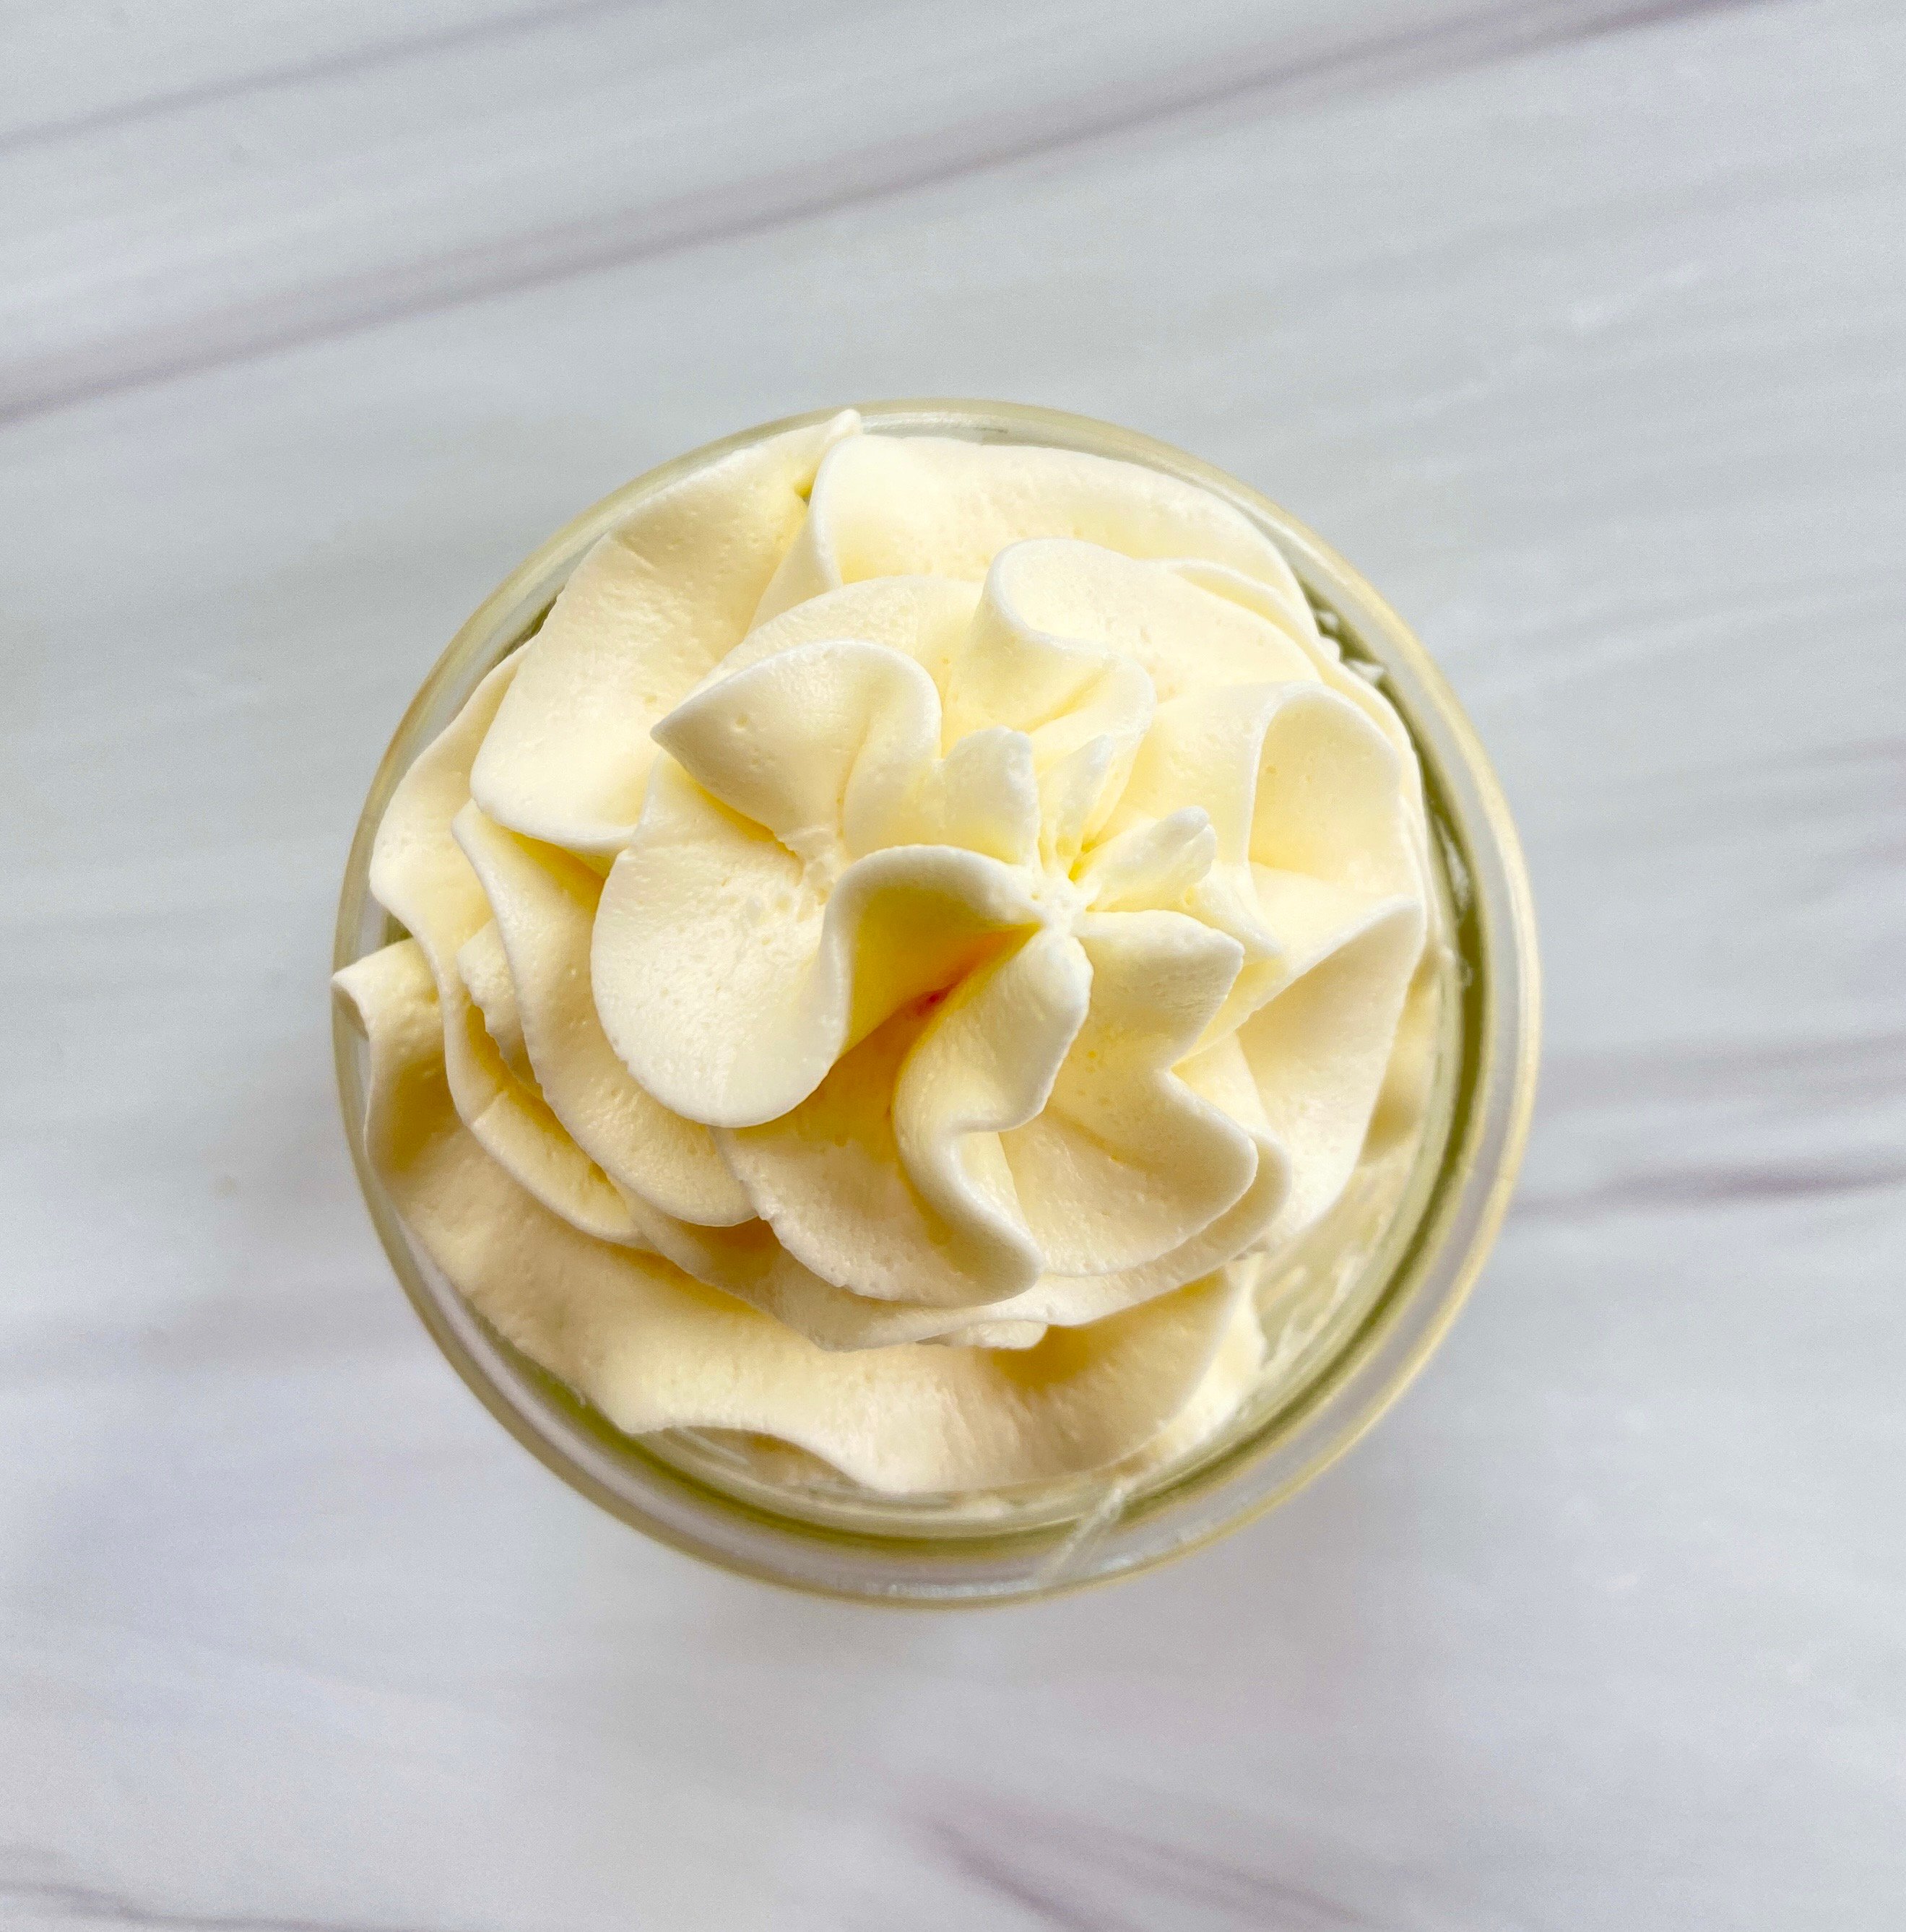
After all of the butter is fully incorporated into the buttercream, and no traces of butterfat remain, add the vanilla and salt. Continue mixing on low/medium speed, just until you see the buttercream reach a smooth, fluffy consistency.
Pro Tip: For an even more fluffy consistency, stop mixing at this point and refrigerate the buttercream for about thirty minutes. Finish with a flat beater for the most amazing buttercream of your life!
The Big Finish
If it’s worked consistently (and not over-whipped), Swiss Meringue Buttercream comes together in about 45-60 minutes. A lot of this has to do with air temperature as well, since a warmer kitchen will make the butter melt faster. Faster butter melt contributes to soupy buttercream, so in really warm weather, I’ll leave the butter in the refrigerator for a longer period of time.
At the time you start adding butter, your butter should still be cool, but not straight from the refrigerator. If the butter is room temperature (like it would be if you were making a cake or cookies), it’s generally too warm for Swiss Meringue Buttercream and you should start again with cooler butter.
When it’s done, it’s a dream. It can be spread on cakes, piped on cupcakes, or just eaten with a spoon (don’t judge me).
It’s definitely a time commitment, but it’s totally worth it. It can also be made several days ahead! In order to revive it, allow it to sit on the countertop for 10-15 minutes, then put it back into a stainless steel mixing bowl over a double boiler. Stay with it and keep it over the double boiler just until you see the sides start to melt.
The very instant that you see the sides of the buttercream begin to melt, put it back on the stand mixer with the paddle attachment and mix until it’s smooth and dreamy. It will be as fresh and ready to use as if you’d piped it directly after making it.
Troubleshooting FAQs for Swiss Meringue Buttercream
Swiss Meringue Buttercream is a process, to be sure, but it can also be a little intimidating to execute. I’ve gotten a lot of amazing questions about this buttercream since I posted my Limoncello Layer Cake, so I’ll answer some of them here! If you have additional questions, ask away! I’m happy to update this section.
In general, there are two pieces of advice for Swiss Meringue Buttercream; either put it in the fridge (a “time out” as it were) or keep mixing. I’ll explain further in each FAQ:
At the end of the mixing time, my buttercream looks really watery and loose. Can it be saved?
It’s possible! The most important thing to do at that point is to stop mixing, as loose buttercream at the end of mixing means it is over mixed. Take the buttercream off of the mixer and place it in the refrigerator for an hour. Yes, an hour. The butterfat needs an opportunity to firm back up so that it can help create the buttercream texture. I call this a buttercream time out!
My egg whites won’t go to stiff peaks. What do I do?
The meringue part of Swiss Meringue Buttercream is actually the most time consuming part of the whole process. In a KitchenAid mixer, it usually takes about 20-25 minutes to make a good, stiff meringue from start to finish. If you’re at the 20-minute mark and the meringue still isn’t at stiff peaks, check your temperature. Is it hot and humid in your kitchen? Then a 15-20 minute meringue timeout in the fridge will help!
My buttercream is chunky. What do I do?
Make sure your butter is the right consistency before adding it to your buttercream. If it’s too cool, then it won’t transition seamlessly into your buttercream; it will break into pieces. If you’re adding butter too quickly then you’ll start to get a chunky buttercream. Once you notice this, stop adding butter until the butter that is already in the buttercream gets completely smooth.
My buttercream looked perfect and then got really lumpy and gross! Should I throw it out?
Don’t throw it out! It’s just been over-whipped and needs a good time out in the fridge. Start with 30-45 minutes (depending on how hot your kitchen is), then gently try to re-mix it on medium speed using your flat beater. If it doesn’t show signs of coming together within 10-15 seconds (yes, that quickly!), then it needs more of a time out in the fridge.
This SMBC has been my literal obsession for longer than would be sane to admit. But I’m so happy that I spent the time with it that it needed. I hope you have an amazing time, making incredible cakes, with this as the final topping. It’s the LBD that every cakes needs, in my humble opinion.
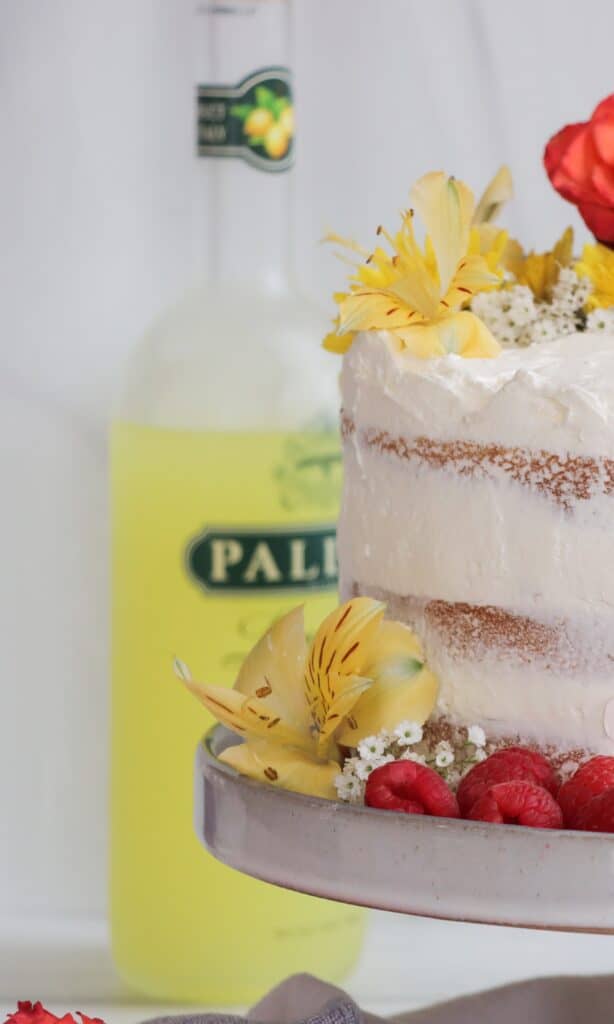
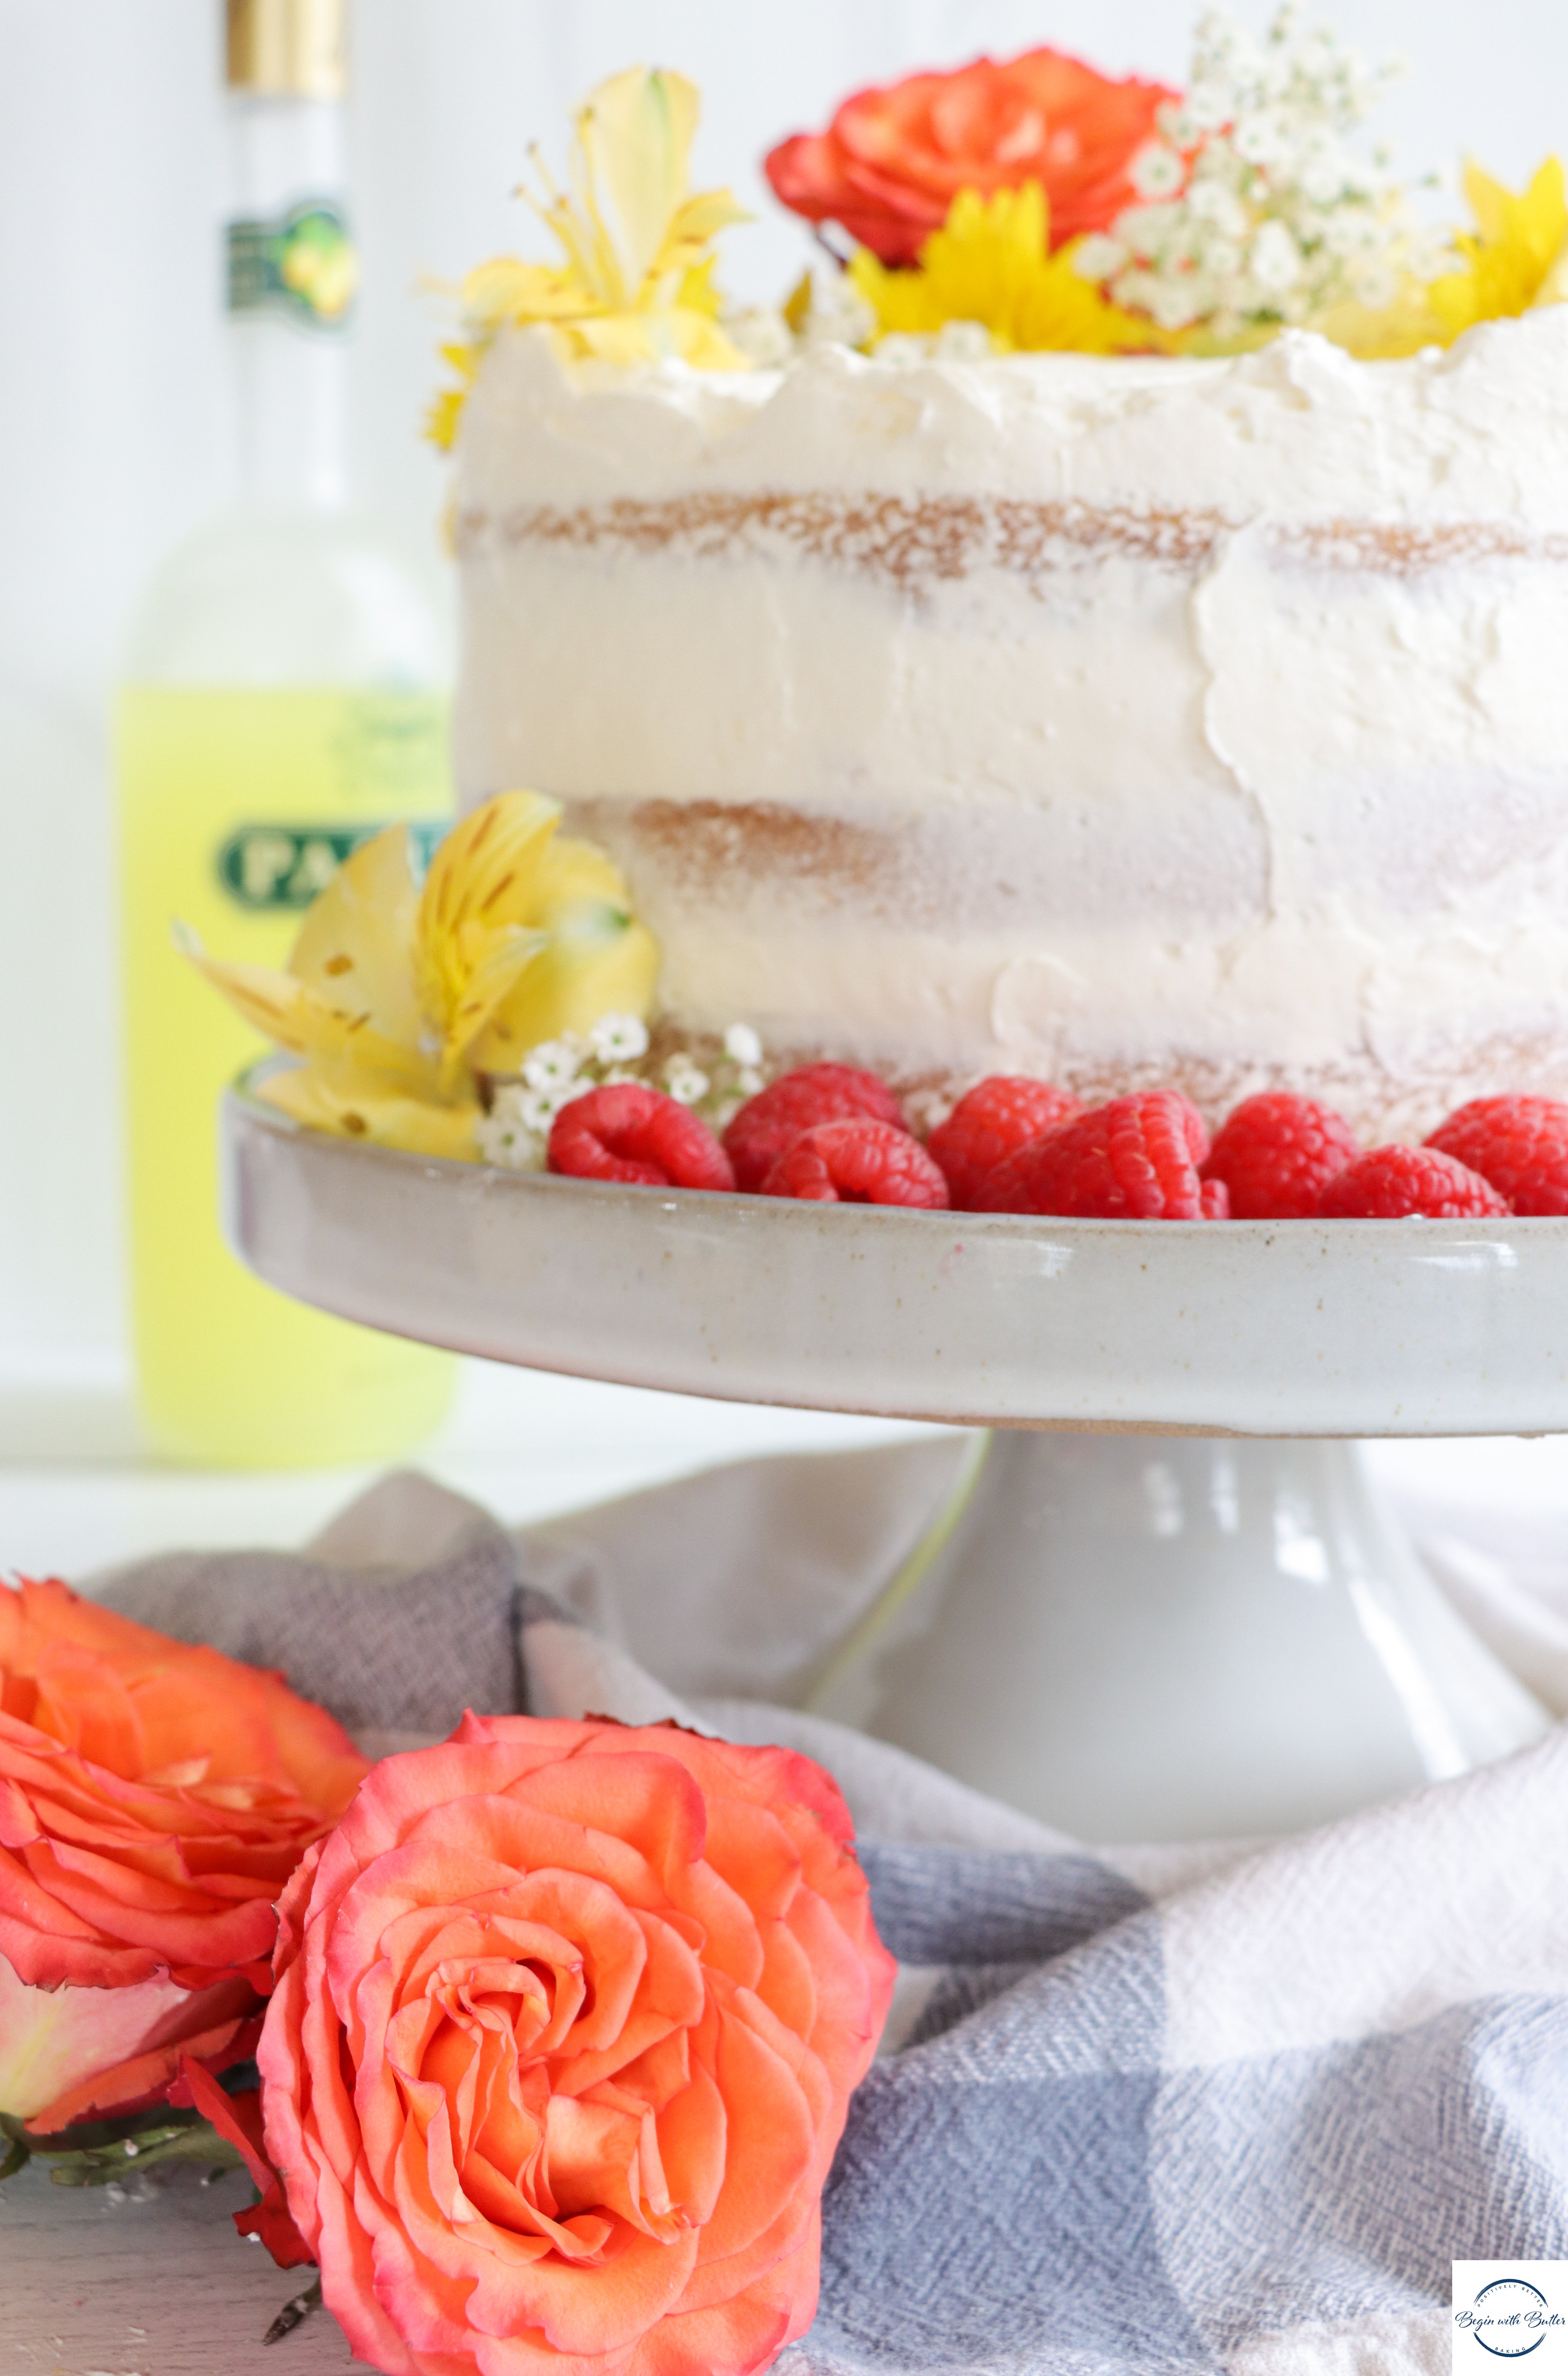
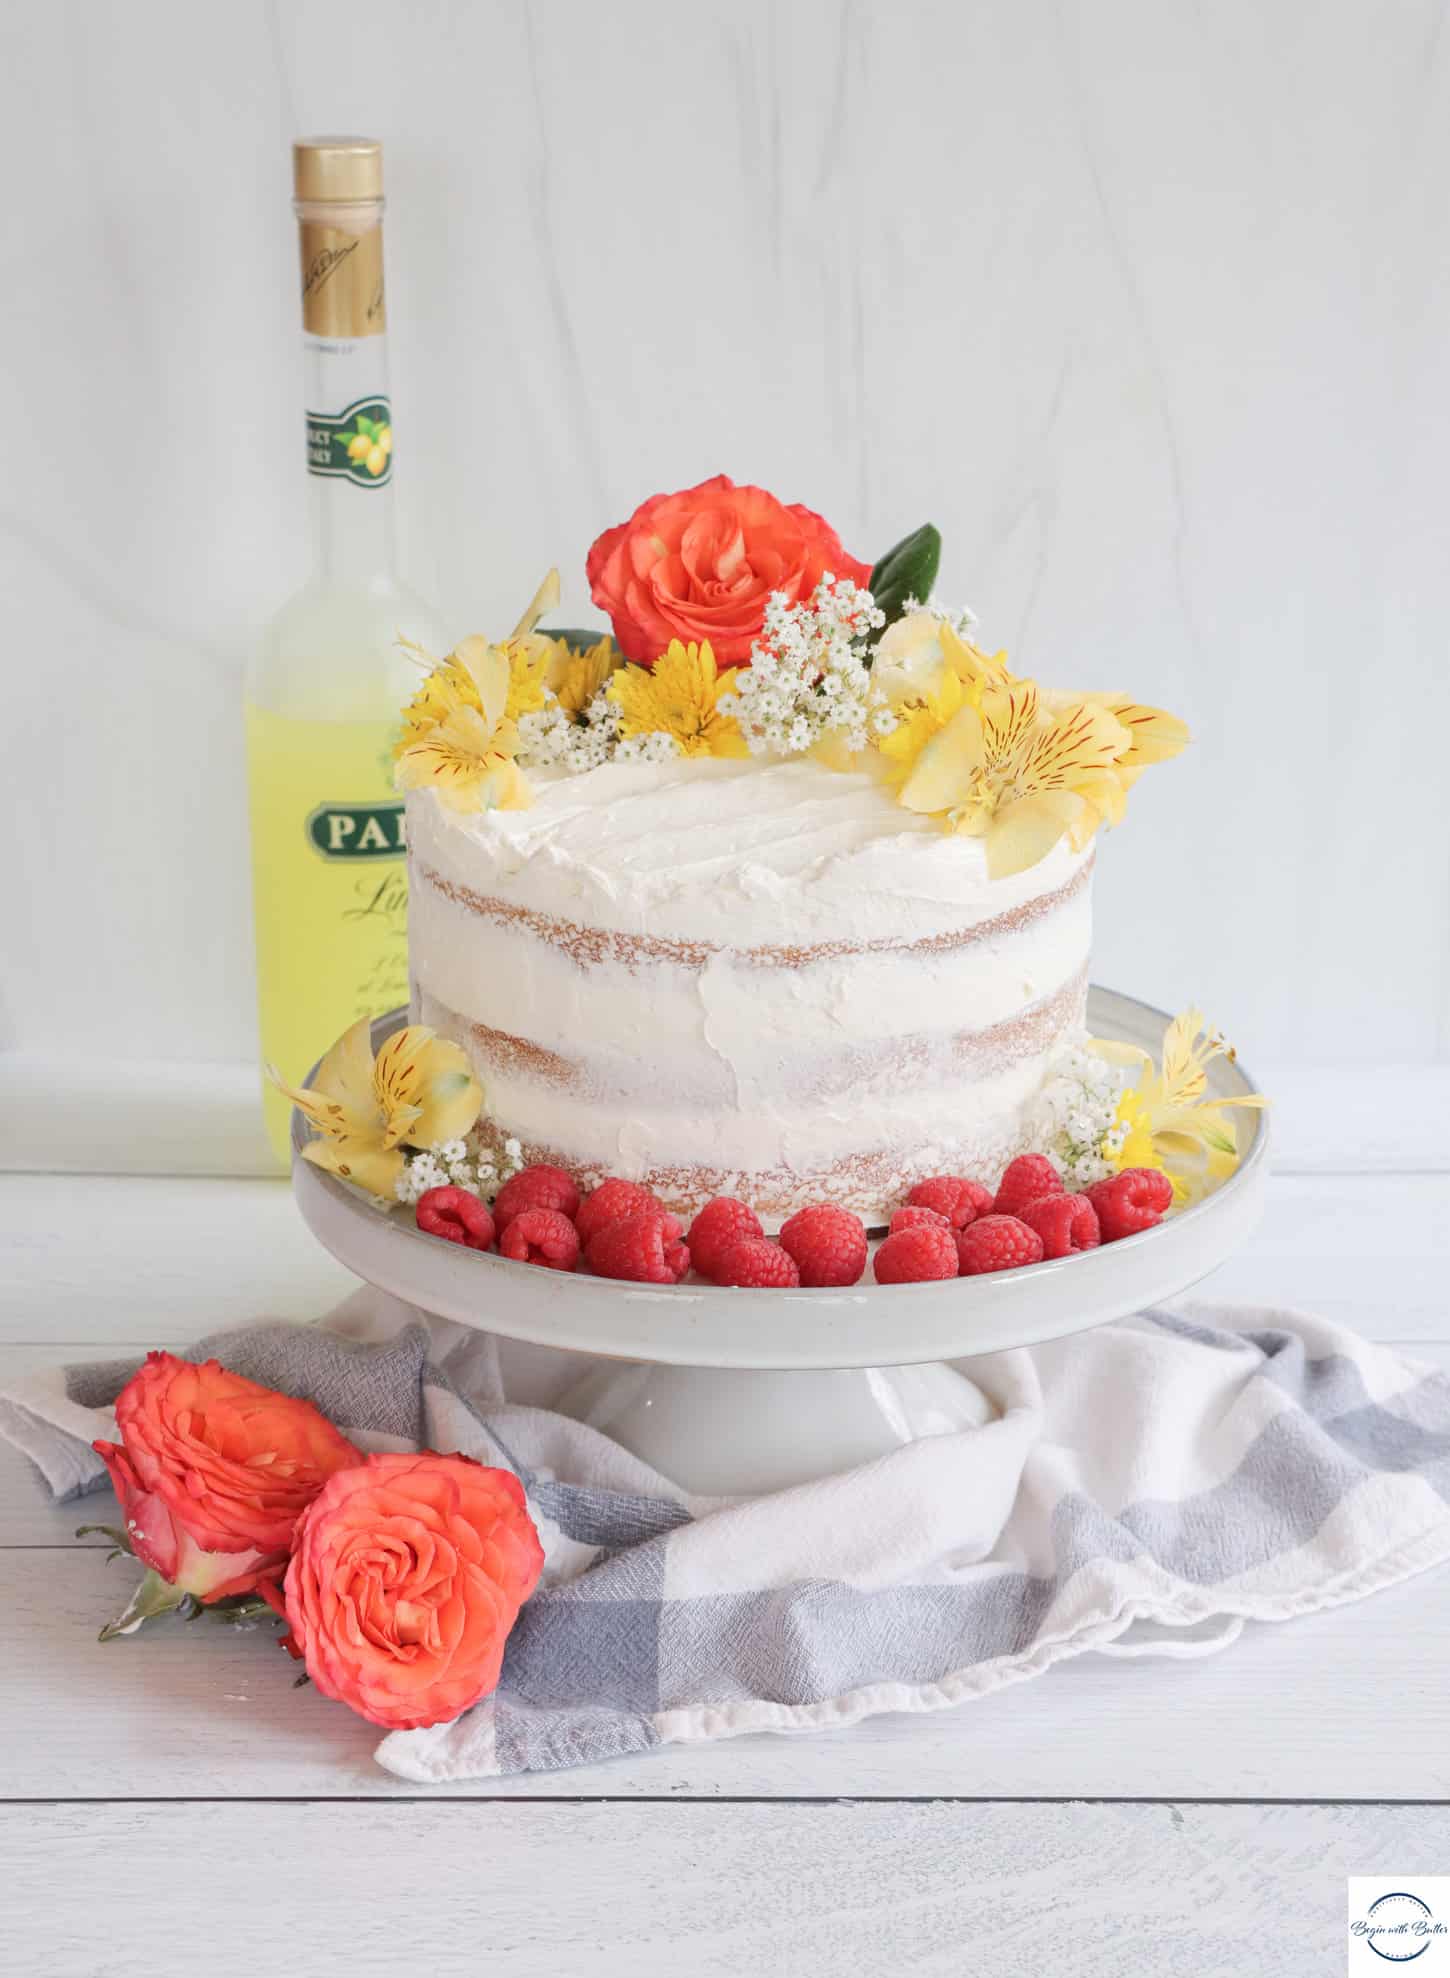
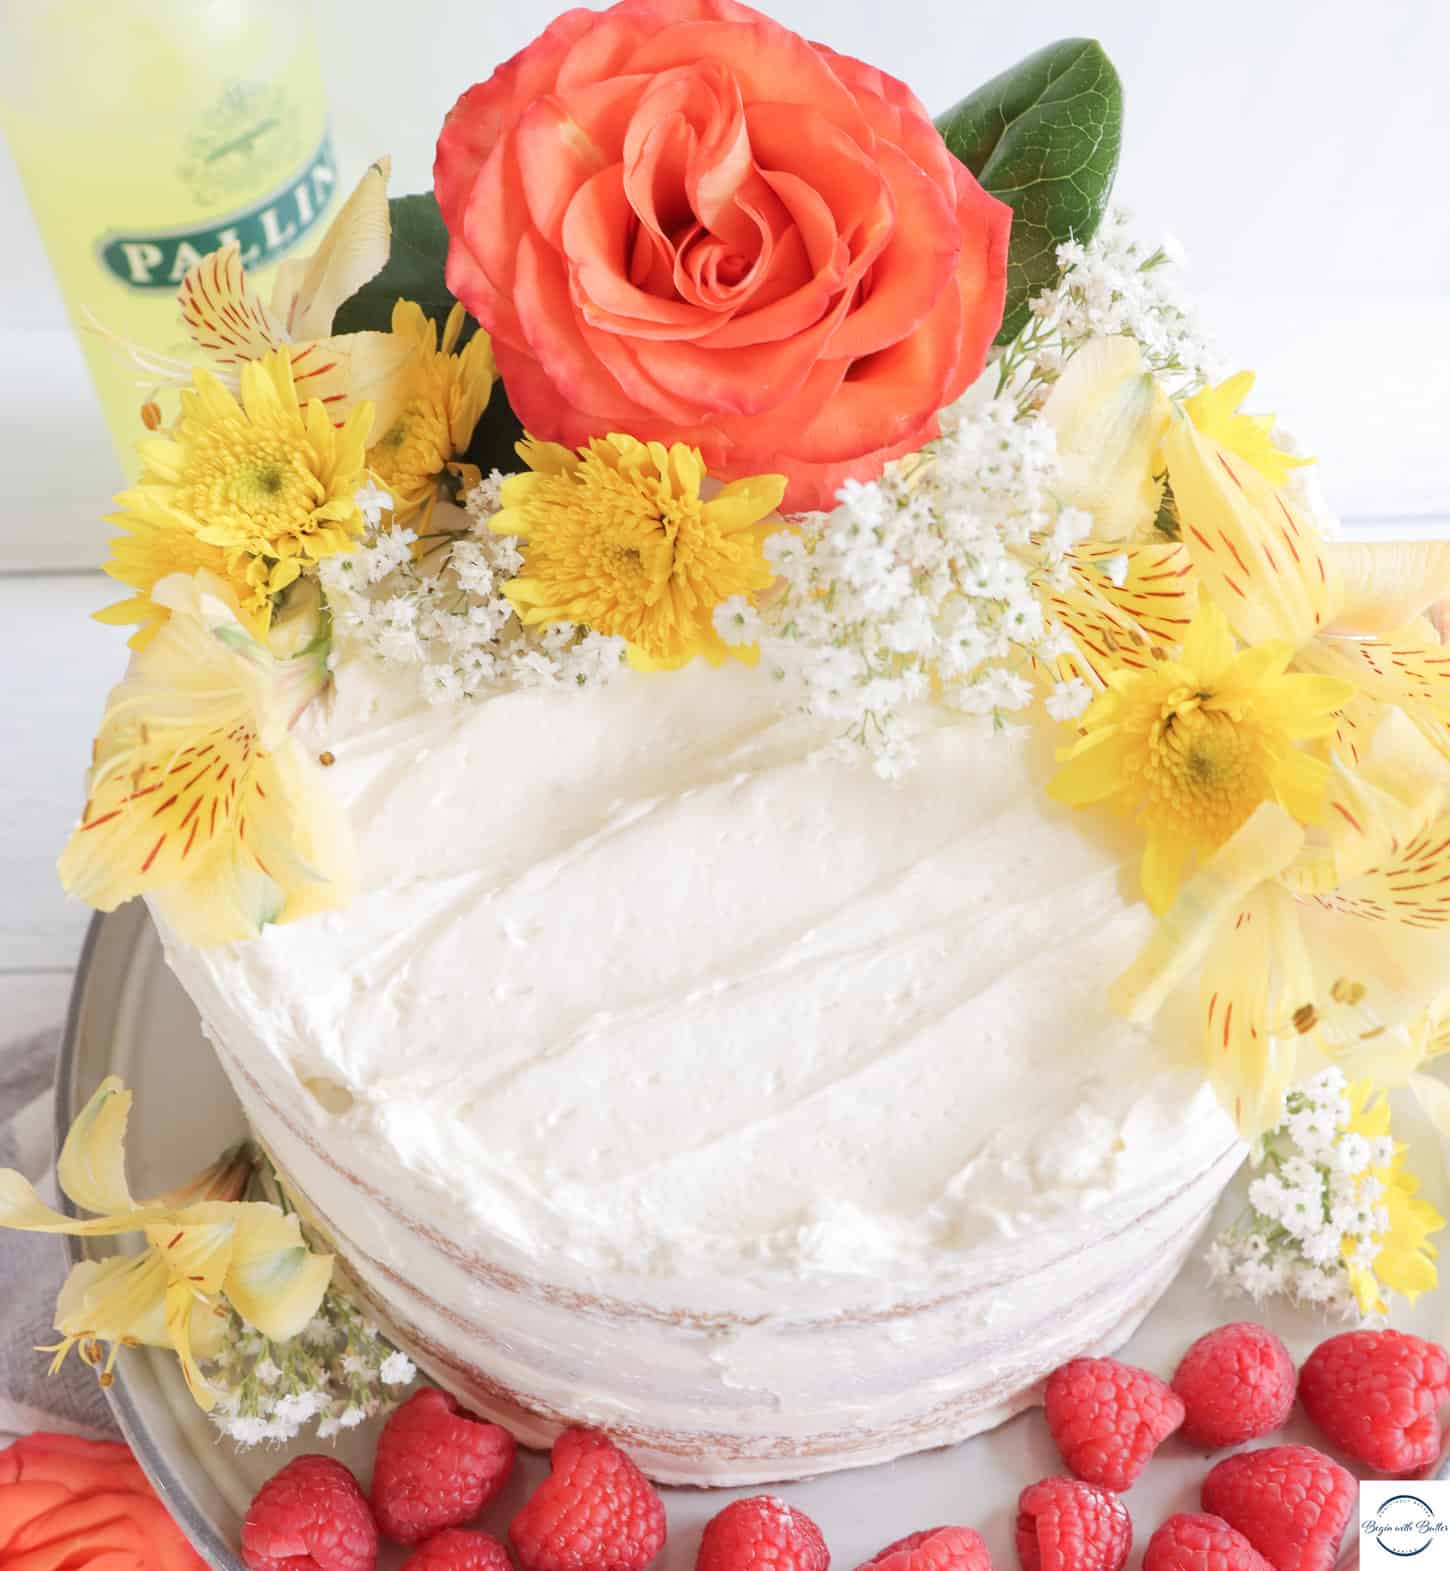
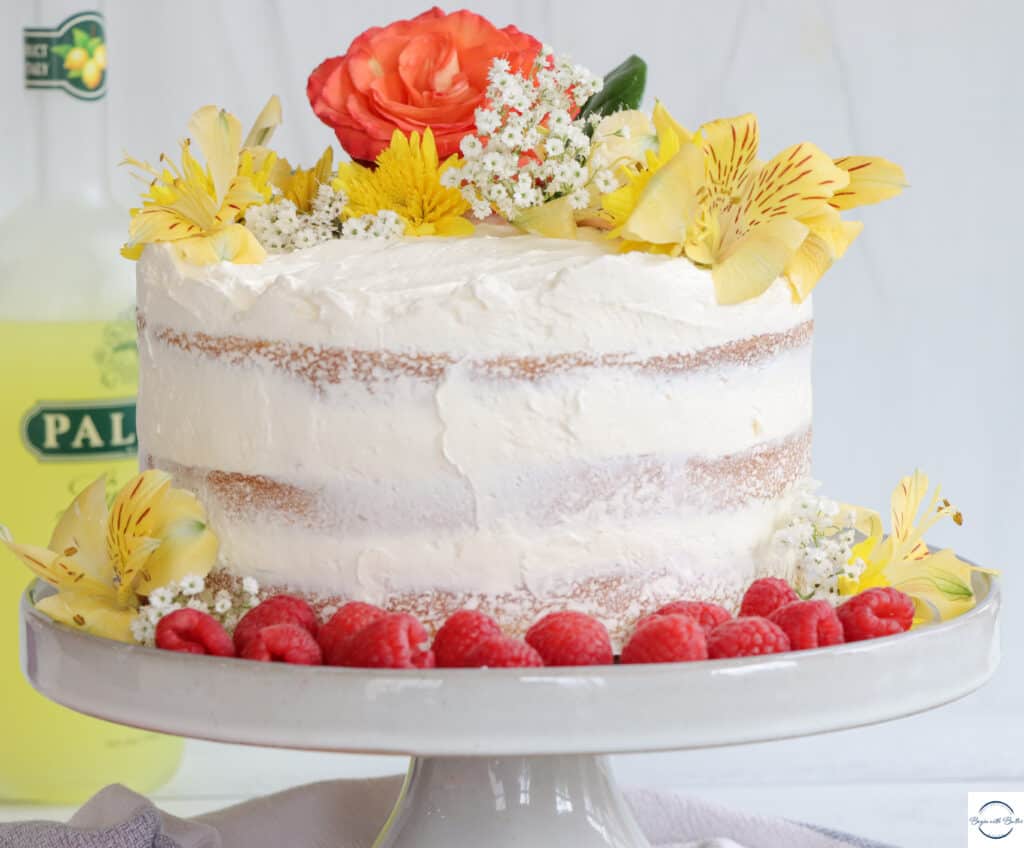
We had some spring-like temperatures here recently, so of course I was inspired to create cake. The promise of spring was a false promise, and we’ve been plunged back into the depths of winter, but the seeds of spring baking have already germinated.
I find inspiration everywhere, Y’all. Specifically, the inspiration for this cake came from the sight and smell of some early blooms that I saw on my morning constitutional. The poor blooms were fooled by the early spring-like weather. I was arrested by the vision and immediately thought of Limoncello.
Limoncello is an Italian liqueur. It’s bright and bold in color and taste, and it’s got a big bite. It’s yummy and aggressively lemony, and it’s everything that those poor flowers needed to be in order to survive that false spring.
Even the lemons that are traditionally used to make limoncello are known for their hardiness; according to Italy Magazine, authentic limoncello comes from lemons found in the Costeria Amalfitana (Amalfi Coast) region in Italy, since those lemons “grow with a thick skin that is rich with essential oils, fragrant and with a strong aroma.”
Those flowers must have some limoncello lemon genes, because they survived the false spring. ???? Inspiration intact, I knew that this cake was meant to be.
About this Cake
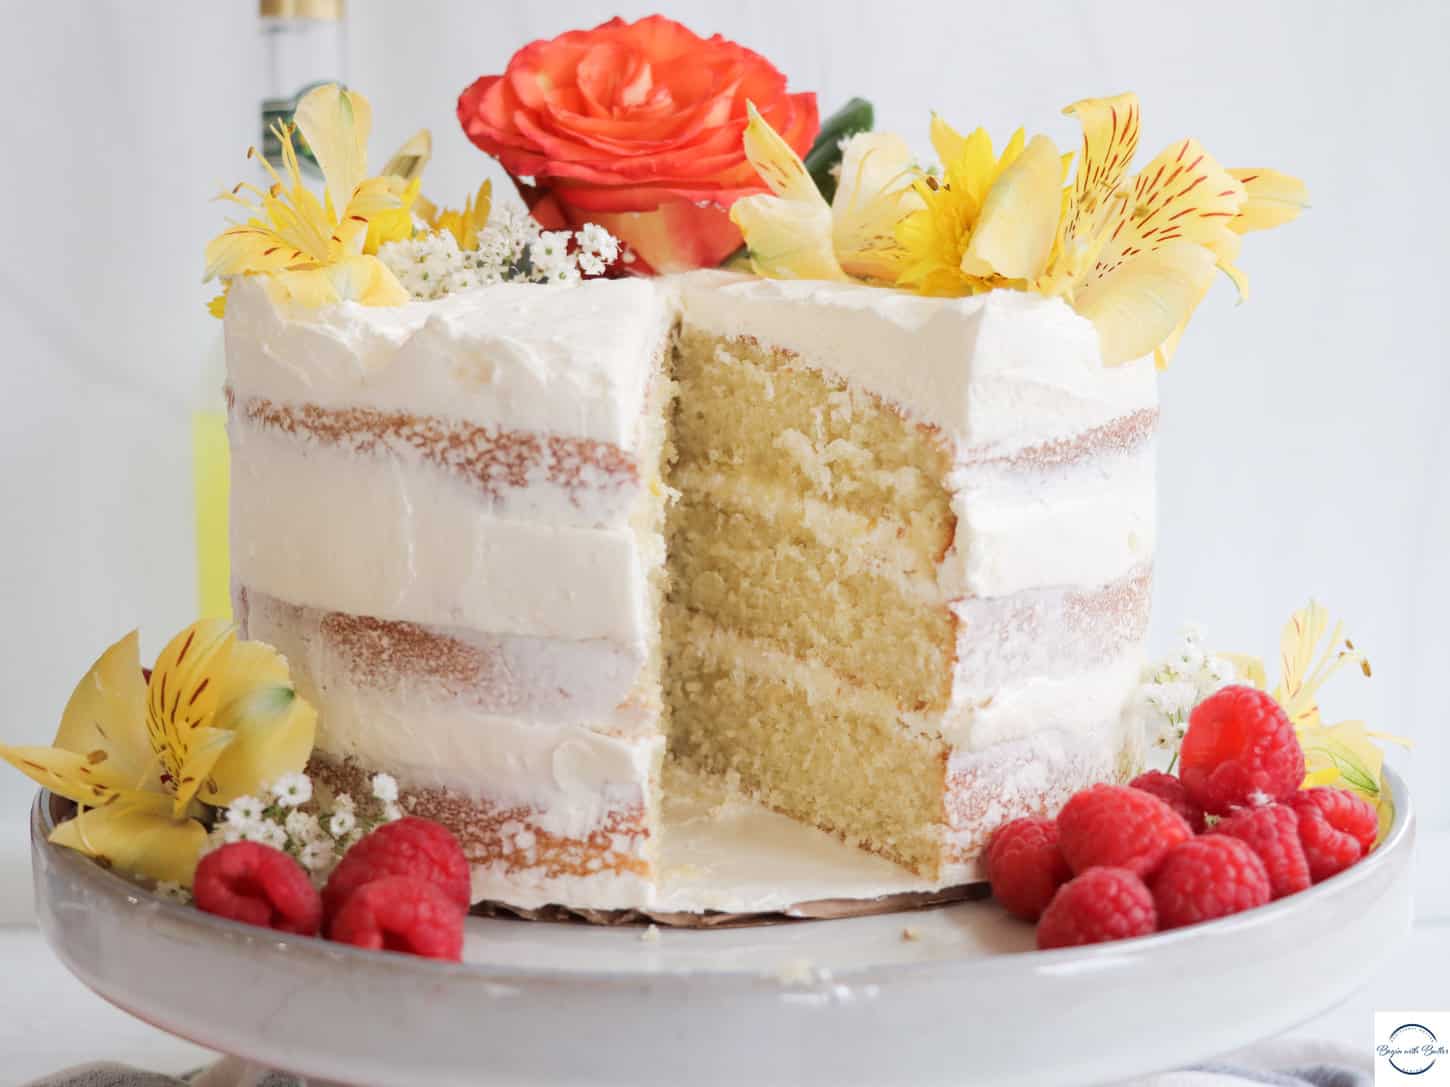
From concept to creation, this cake has been a dream come true. It features an airy, moist crumb and a perfectly decadent and balanced Swiss Meringue Buttercream, which truly allows the limoncello flavor to shine.
While there is the potential for limoncello in every layer of this cake, the classic limoncello “bite” is not overpowering (the “bite” cooks out of both the cake and the simple syrup, and it’s not enough to overwhelm the sugar and butter in the buttercream) and you’re left with a wonderfully smooth and special lemon flavor in this cake.
To be sure, you can replace the limoncello with lemon extract, and you’d make a tremendous cake. BUT, Friends, this cake is at its level best when it features this wonderful ingredient from the Amalfi Coast. In every recipe that I develop, I’m always looking for that ingredient that makes consumers wonder “what is that wonderful thing that I can’t quite place”? In this cake, the limoncello is that ingredient.
Beginners Start Here
If you’re new to baking, or if you’re like me and just love learning about baking science, here are a couple of articles from the BwB site that will help you get off to a great start with this fun recipe!
These resources are super useful to help you understand the techniques that you’ll need to successfully execute this Limoncello Layer Cake.
Important Tools Used in this Recipe
Below, you’ll find some tools that I used for this Limoncello Layer Cake. **I get paid a small commission if you purchase directly from some of these links, but they are truly amazing products that you’ll find in my kitchen.**
If you have them already, great! Think of this as a checklist to help you build the confidence that you’ll need to execute this recipe!
I am incredibly proud of this recipe, and how it went so perfectly from recipe concept to actual cake. I hope you love love love it! Don’t forget to tag me on Instagram @beginwithbutter so that I can shout you out when you’ve made it!