
This post is sponsored by Vermont Creamery. However, all of the opinions are my own.
Spoiler alert: my opinion of Vermont Creamery is that their products are the GOAT.
Family. Easter just got an upgrade. Birthdays just got an upgrade. Sunday dinners just got an upgrade. This coconut cake is unbelievable and I am incredibly proud of it.

When I start my cake development journey, I’ll often close my eyes and daydream about the finished project. Let it come to me in a dream, as it were. The crumb. The taste. The smell. The perfect bite.
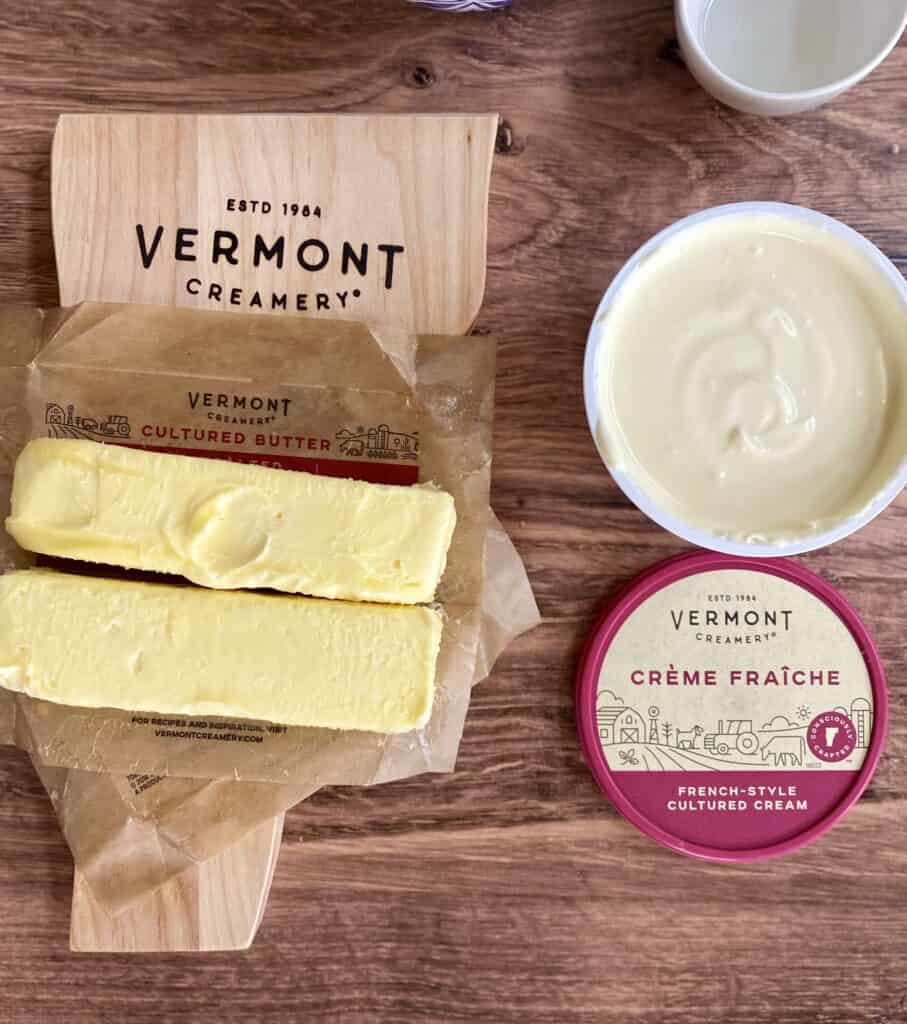
This cake came to me in one of those dreams. And, thanks largely to the incredible butter and crème frâiche from Vermont Creamery, the vision of a cake that came to me in a dream is now available to you all in real life.
Why Vermont Creamery?
Y’all know I love a good story. And this is a good story.
You see, the name Begin with Butter isn’t accidental. It’s an homage to the fact that I truly believe that the quality of key ingredients-like butter-play an important role in the outcome of baked goods. For that reason, I always try to use the best ingredients I can afford.
Over the years, I’ve become particularly picky about the butter that I use in my recipes.
For me, it really does Begin. With. Butter.
You see, butter is a multi-tool that impacts color, texture, and flavor of your baked goods. While the right one can take your cookies, cakes and breads over the top, the wrong one can leave you with an underwhelming outcome.
When it comes to butter, there are two characteristics that make the difference: the butterfat percentage and whether the butter is sweet cream butter or cultured butter.

I did a post on butter basics a while ago on my blog, but to recap:
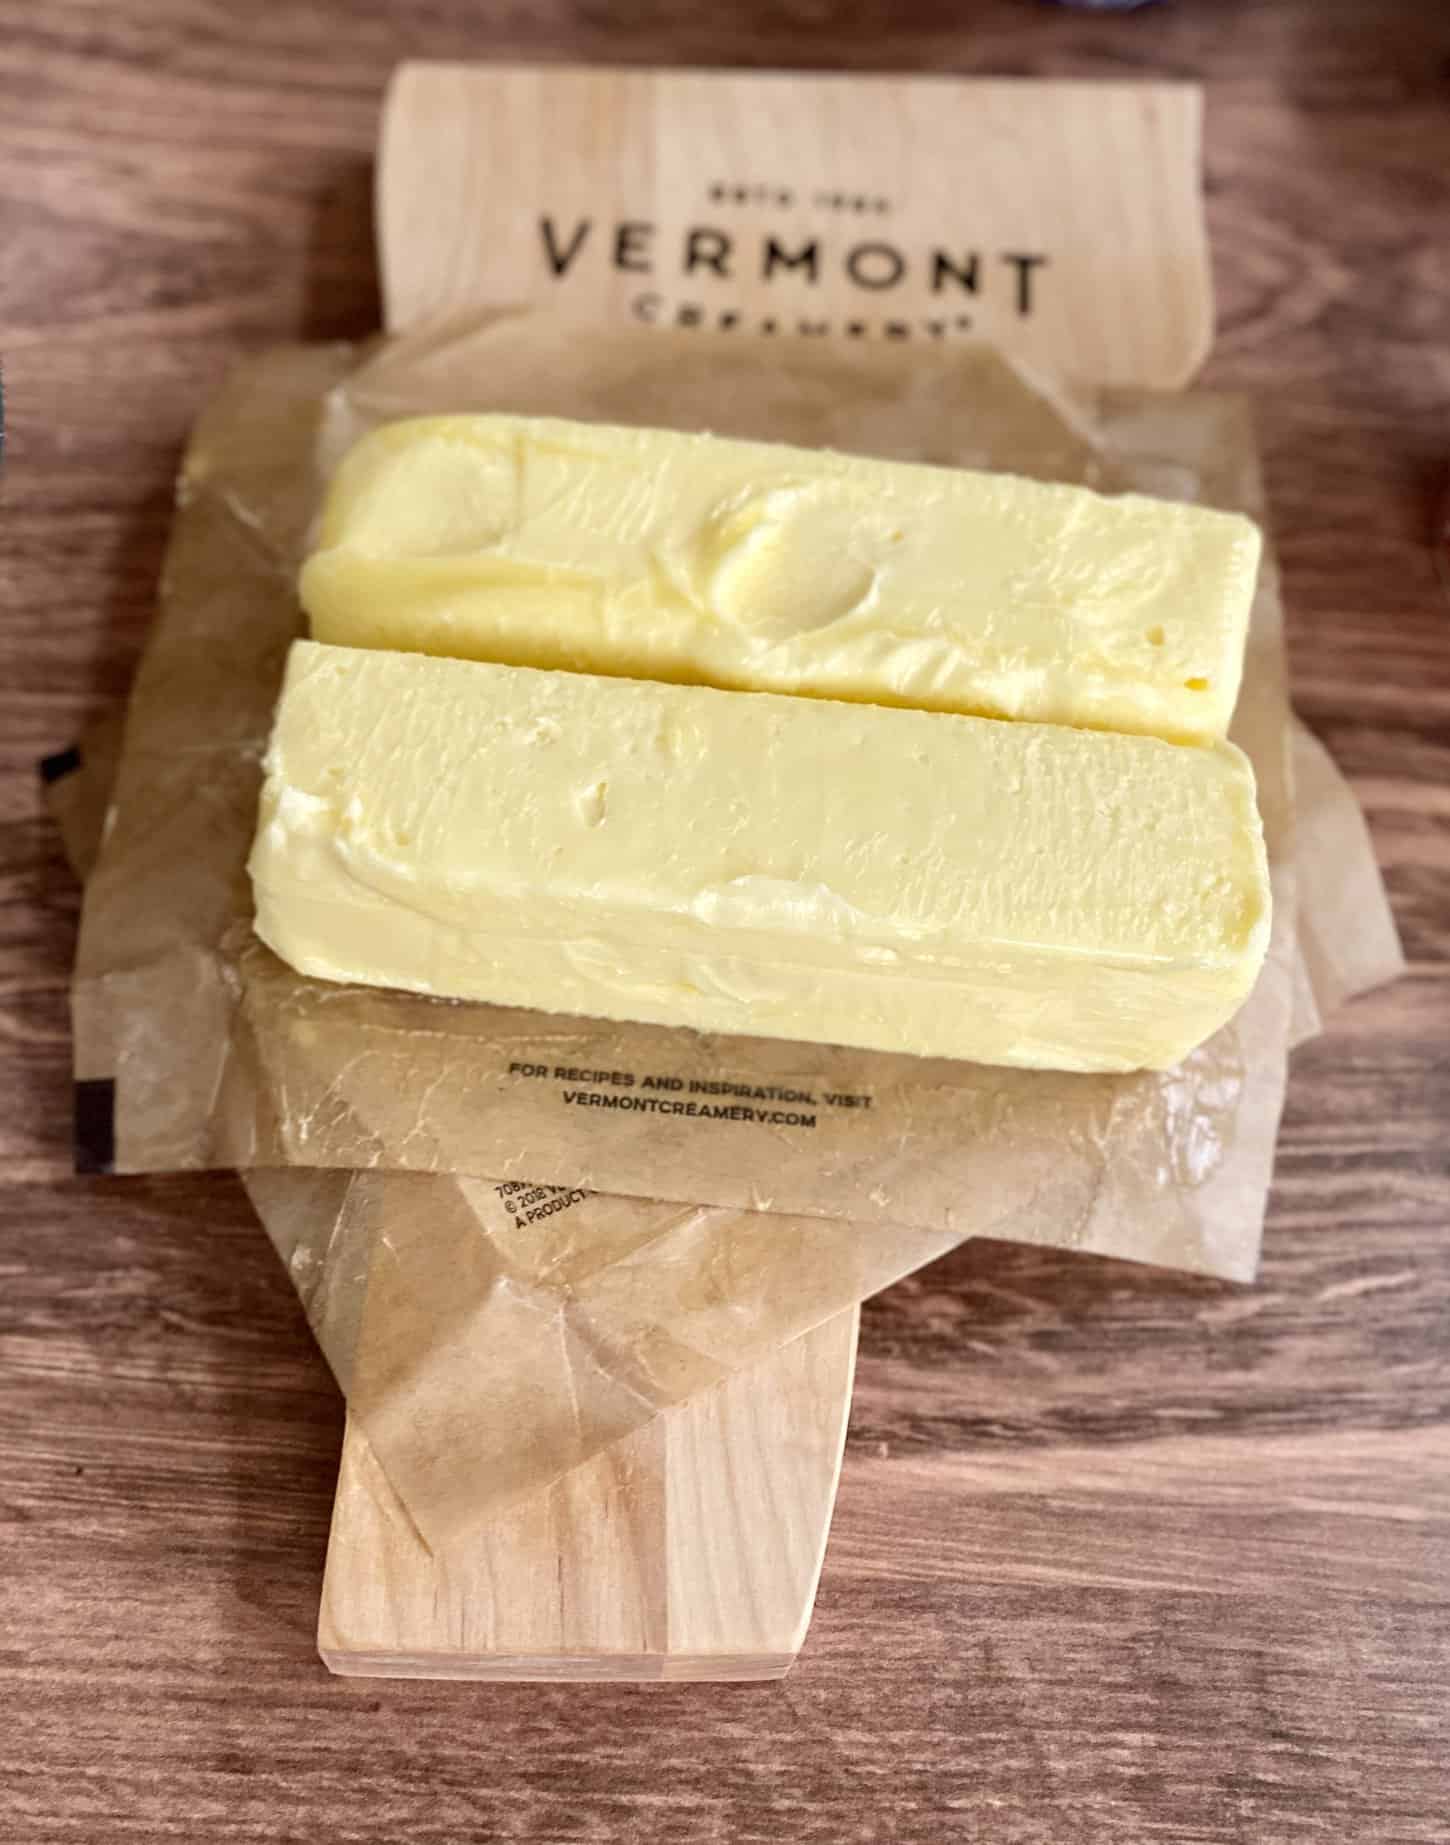
The higher the butterfat percentage that a butter has, the more it will impact flavor and texture. There is a noticeable difference in taste and texture between a product baked with Breakstone butter (at 80% butterfat) and Vermont Creamery butter (specifically, their 82% butterfat butter, but they do have an 86% butterfat butter as well). The product made with Vermont Creamery butter will have a more delicious, butter-forward flavor, and it will have a noticeably more luxurious crumb.
Another key characteristic in butter is the whether the butter is sweet cream butter or cultured butter. Because–and I don’t mean to be dramatic here–this LITERALLY MAKES ALL THE DIFFERENCE. Sweet cream butter is churned right after milking, which produces a more mild, milky tasting butter. But cultured butter?
Y’all. Cultured butter is the IT girl of butters. It’s made when a producer adds good bacteria to fresh milk or cream, and then allows the cream to ferment for a day or two. Only after that fermentation period does the cream get churned into butter.
I’ve grown to favor cultured butter over sweet cream butter, because I love the buttermilk-y smell and taste that the culturing process creates. It’s like an extra hug from the butter and who wouldn’t want that?
When I find something I like, I test it over and over again to make sure that it fits with my personal taste and the flavor profiles that I want to build. My husband might call it an obsession, and he’d be right.
Until May of 2021, I used Kerrygold exclusively. Kerrygold is a well-known brand among bakers, and even though I’d tested it against other butters many times over the years, it had always come out on top.
Until May of 2021, that is. I’d heard good things here and there about Vermont Creamery butters and cheeses, so when I decided to do a butter test on my blog for Mother’s Day, I tried it and OH MY GOODNESS FAMILY it left every other butter I tested in the dust. I’d made hundreds of lemon pound cakes before that day in 2021, and the lemon pound cake with Vermont Creamery butter was the best lemon pound cake I’d ever made.
And it wasn’t just me! I did an 8-person blind taste test (did I mention obsessed?) and the Vermont Creamery cake sample won handily. Since then, I’ve come to use their butter exclusively, so when the opportunity came to partner with them, it was my best culinary dream come true.
About This Cake
When I was daydreaming about this cake, I wanted a coconut cake that featured an airy but decadent sponge. I wanted big coconut flavor in the cake-to include actual coconut-and I wanted it to look gorgeous when it was cut.
I wanted this cake to be a delicious attention hog, so I knew that it needed huge punches of flavor. To that end, I added a sweet/tart raspberry filling that compliments the coconut sponge and airy meringue beautifully.
And I knew that my Vermont Creamery butter would balance those big flavors and lend the perfect level of decadent texture to the sponge.

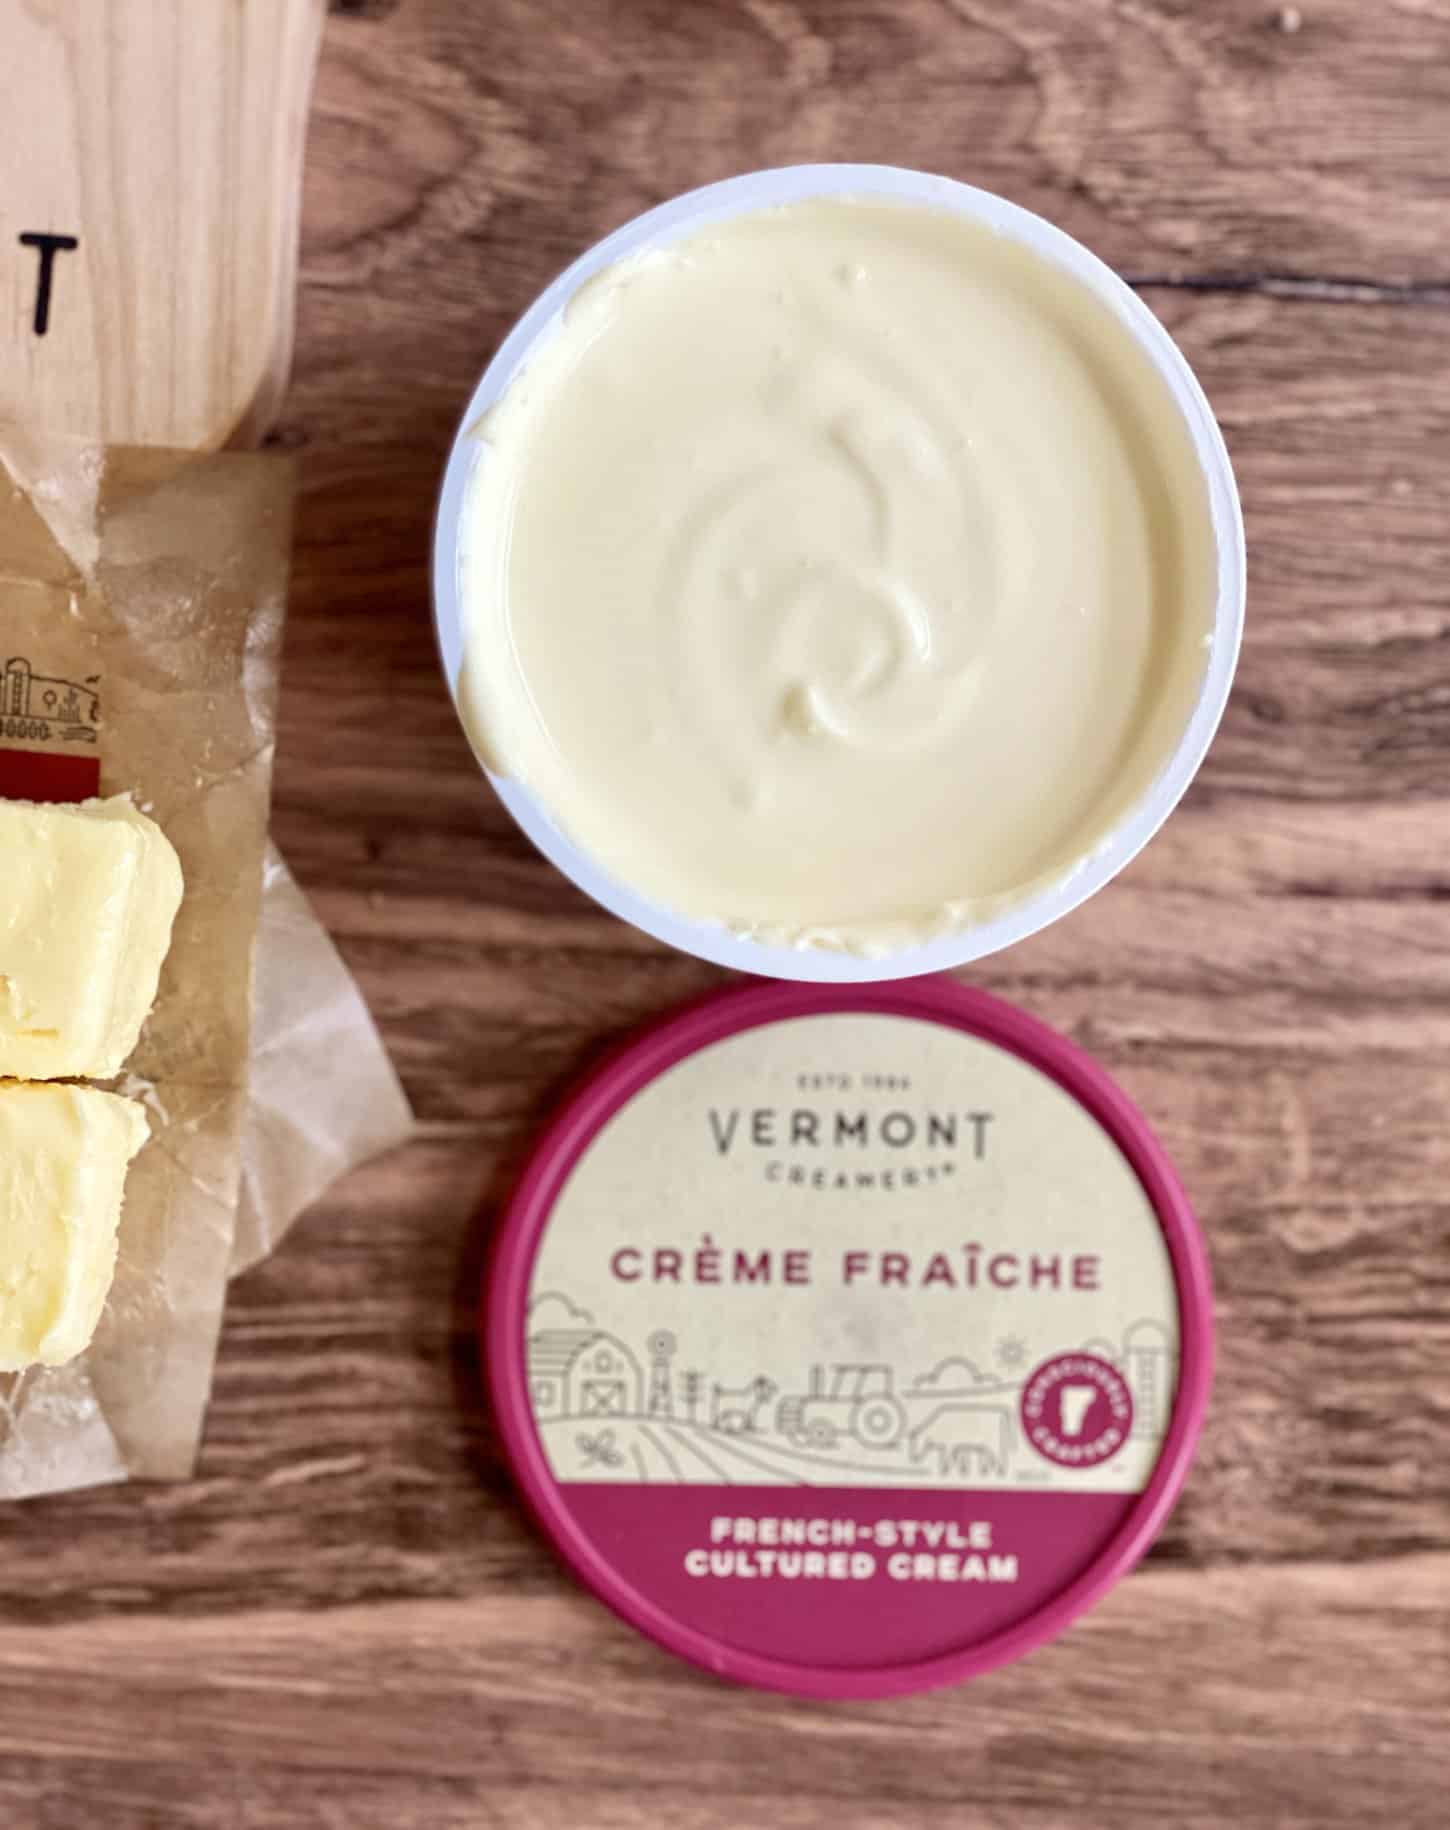
My friends at Vermont Creamery also sent some of their unbelievably decadent crème frâiche to use, and Friends, that crème frâiche was the ingredient that I didn’t know this cake needed. It contributed to such a luxurious, soft crumb to this cake that it ended up tasting like a dream.
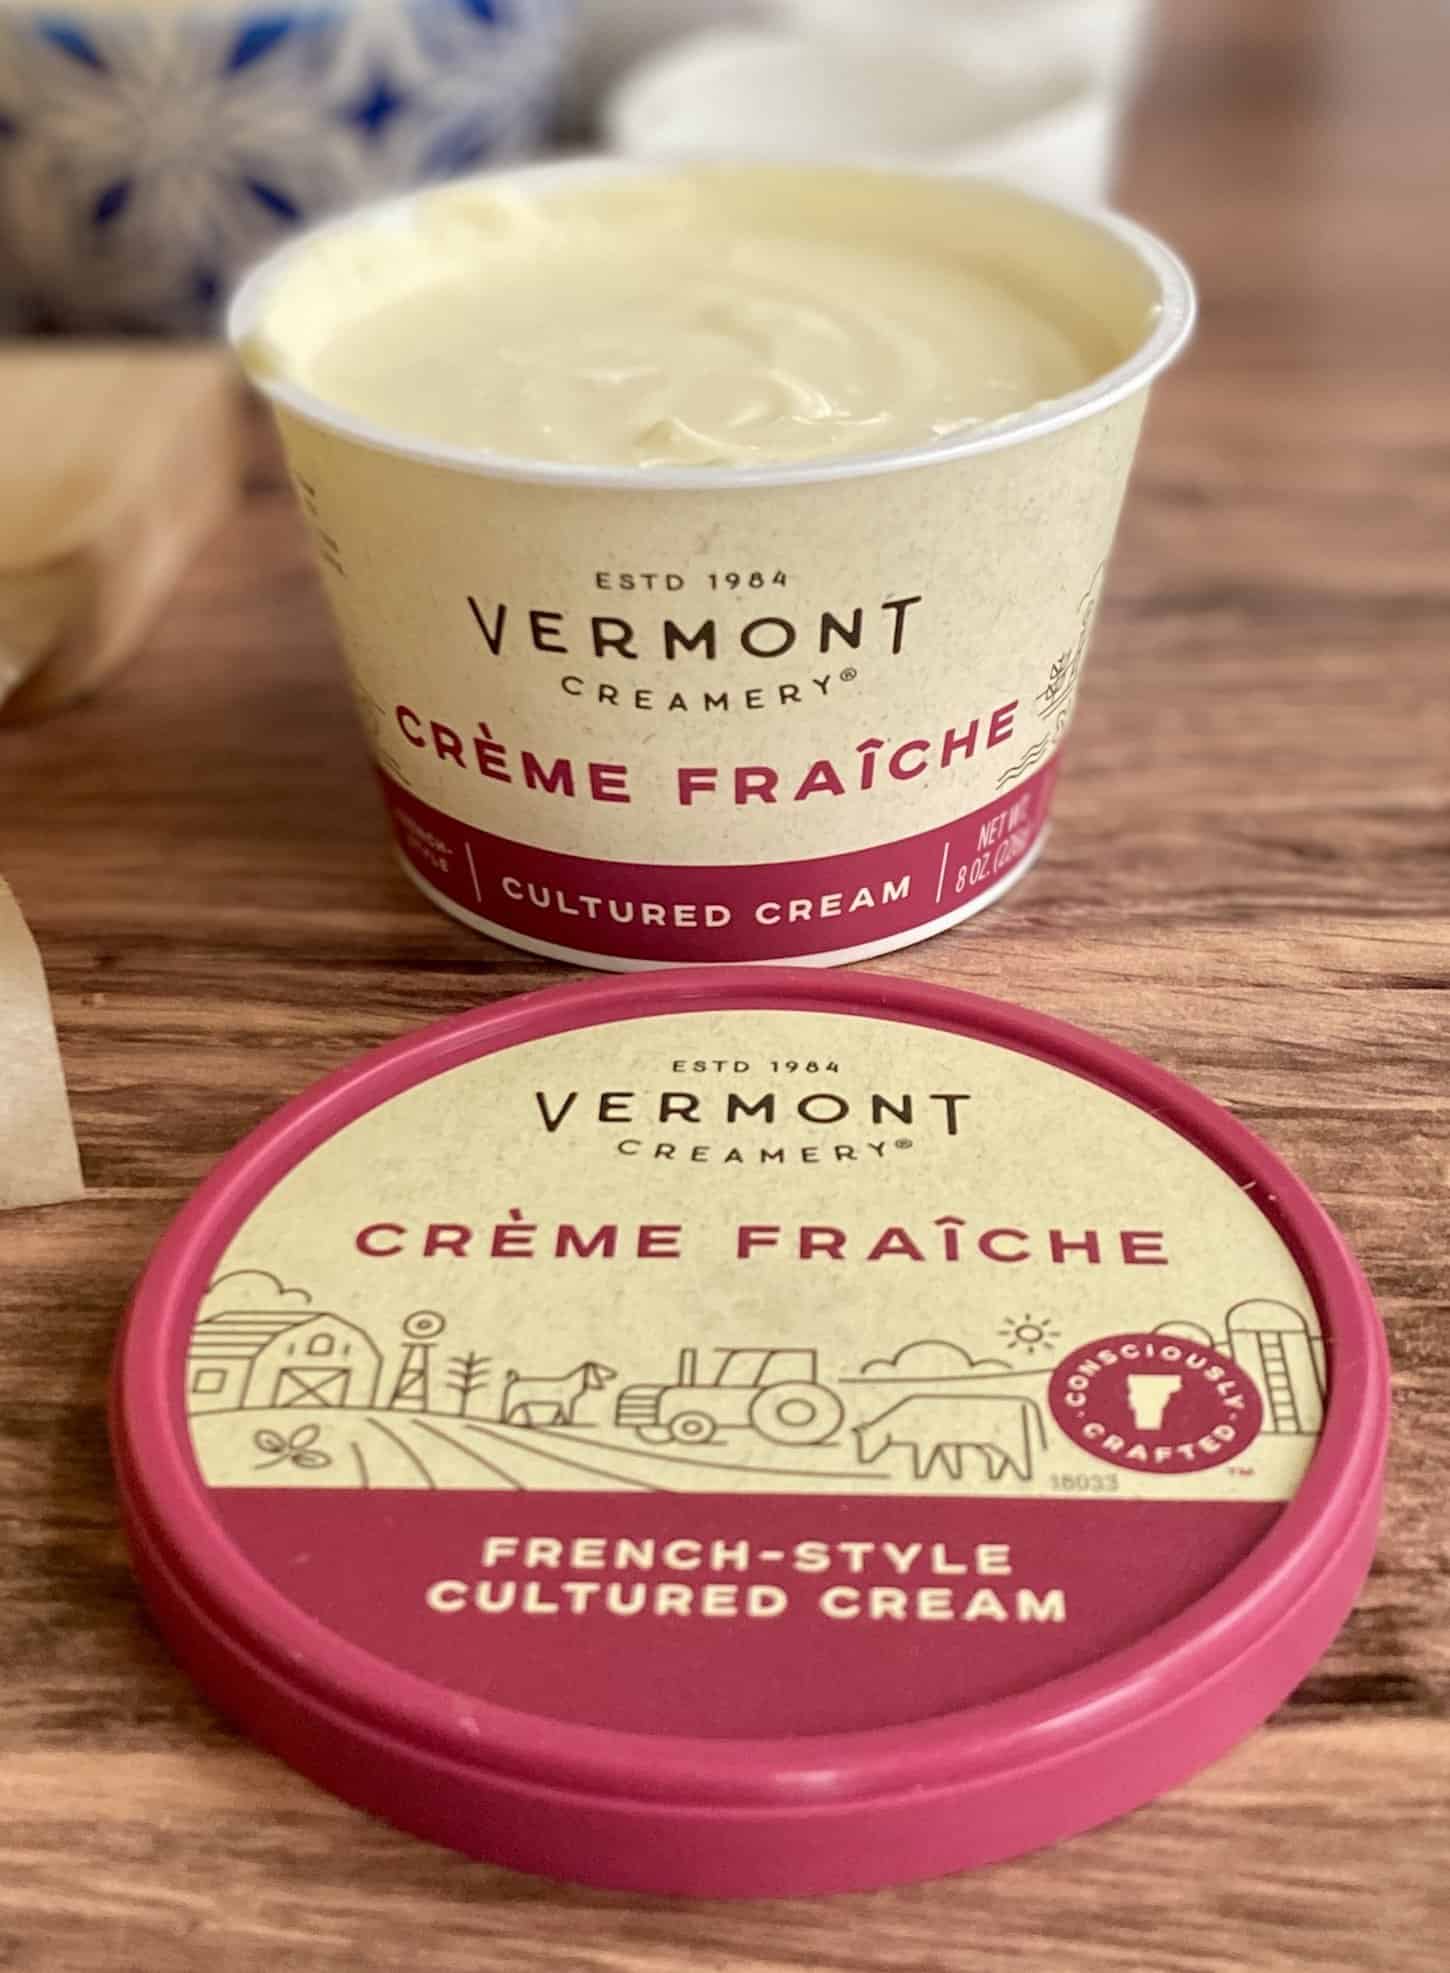
I was so right to choose Vermont Creamery products for this cake. It is a true manifestation of my vision and I am so proud to have developed it.
Beginners Start Here
If you’re new to baking, or if your stand mixer is covered in dust, here are a couple of articles from the BwB site that will help you get off to a great start with this recipe!
- Meet Your Kitchen BFF–Your Digital Kitchen Scale!
- How to Cream Butter and Sugar (With New Video!)
- Baking 101: How to Measure Ingredients
These resources are never mandatory reading, but they are super useful to help you understand the techniques that you’ll need to successfully execute this amazing cake. Happy Reading!
Start With the Filling
Before I start the cake, I make the raspberry filling. The filling needs to be completely cooled before it’s added to the cake, or else it will leak out of the cake and that will be a sad day.
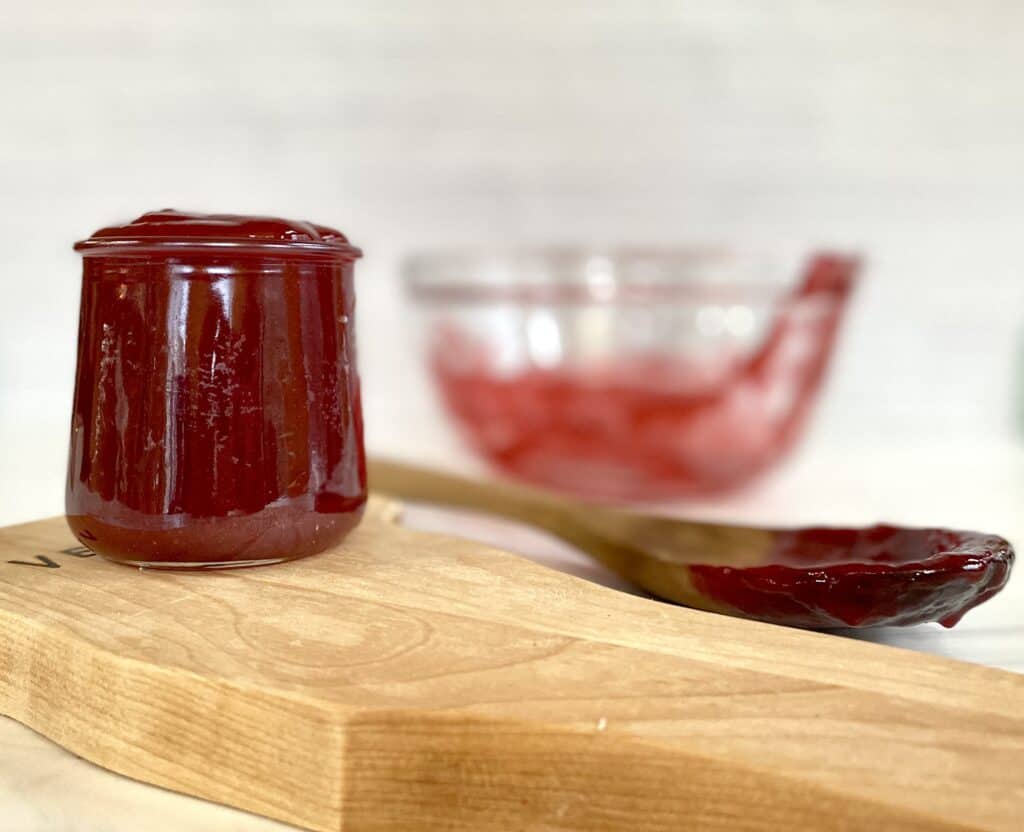
Once the raspberry filling is done, place it in a heat proof container. After it’s cooled, place in a refrigerator for at least four hours, or until it reaches a jam-like consistency.
Make the Cake With Me
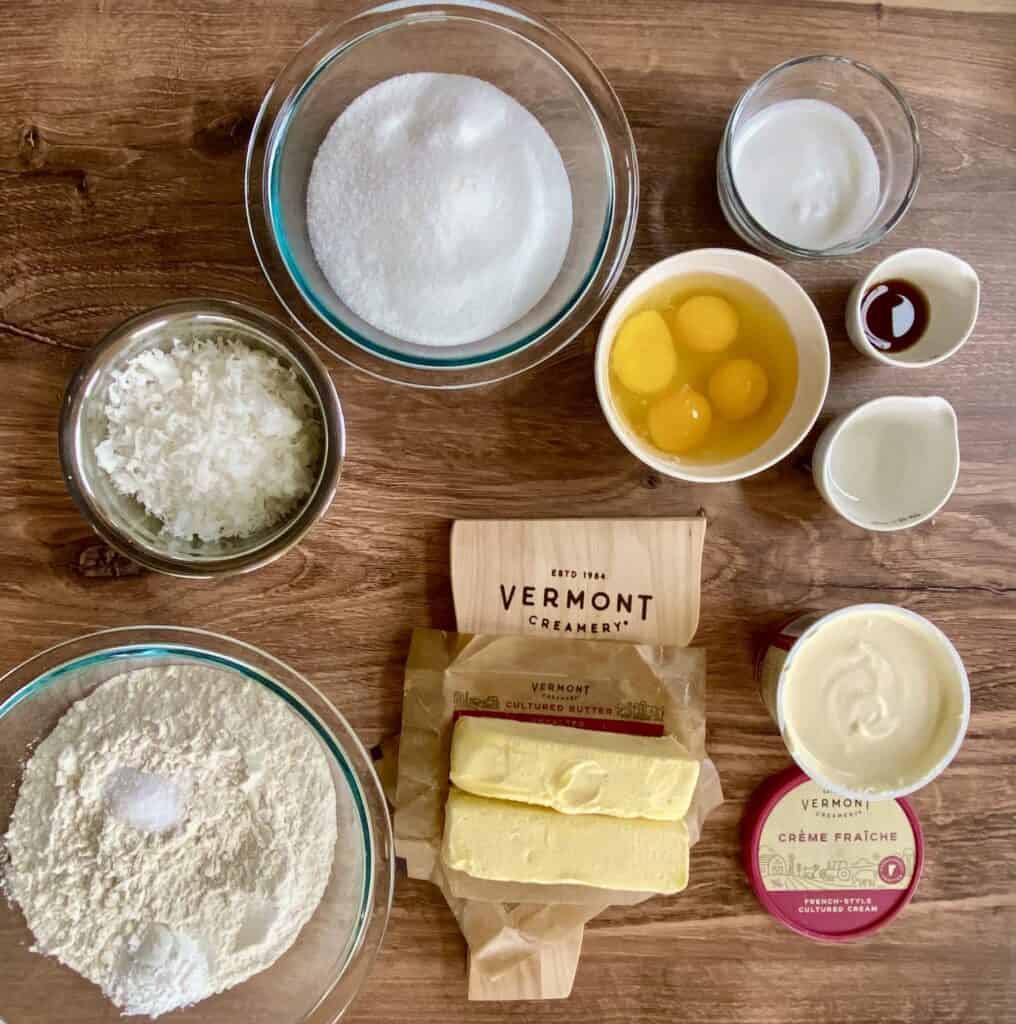
As always, I start this cake by prepping my mise en place. Allow cold ingredients (butter, crème frâiche, egg whites, eggs, and coconut milk) to come to room temperature for at least an hour before starting.
Properly prepping sets me up for a confident, calm bake. Because this cake takes the better part of a day, setting up properly is a must.
Begin by warming your oven to a true 325°F. Use an oven thermometer to ensure that your oven gets to the proper temperature!
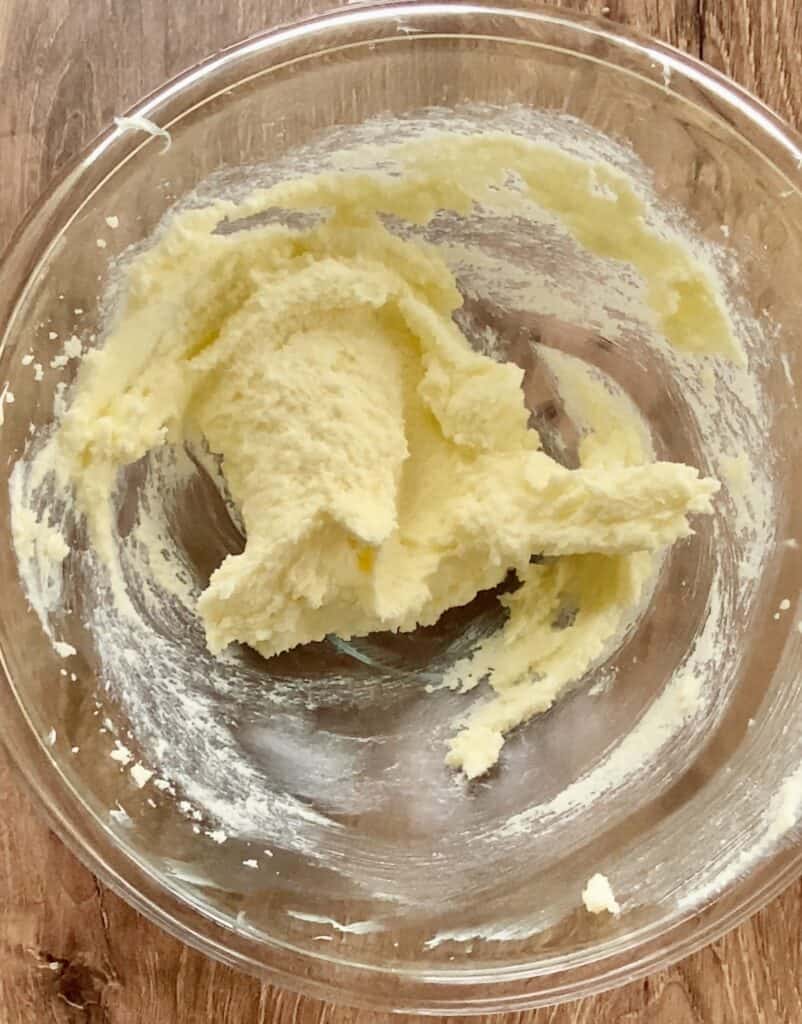
Start your batter by creaming butter and sugar until it light and fluffy. A properly creamed butter and sugar should have a cloud-like texture and be very light in color.
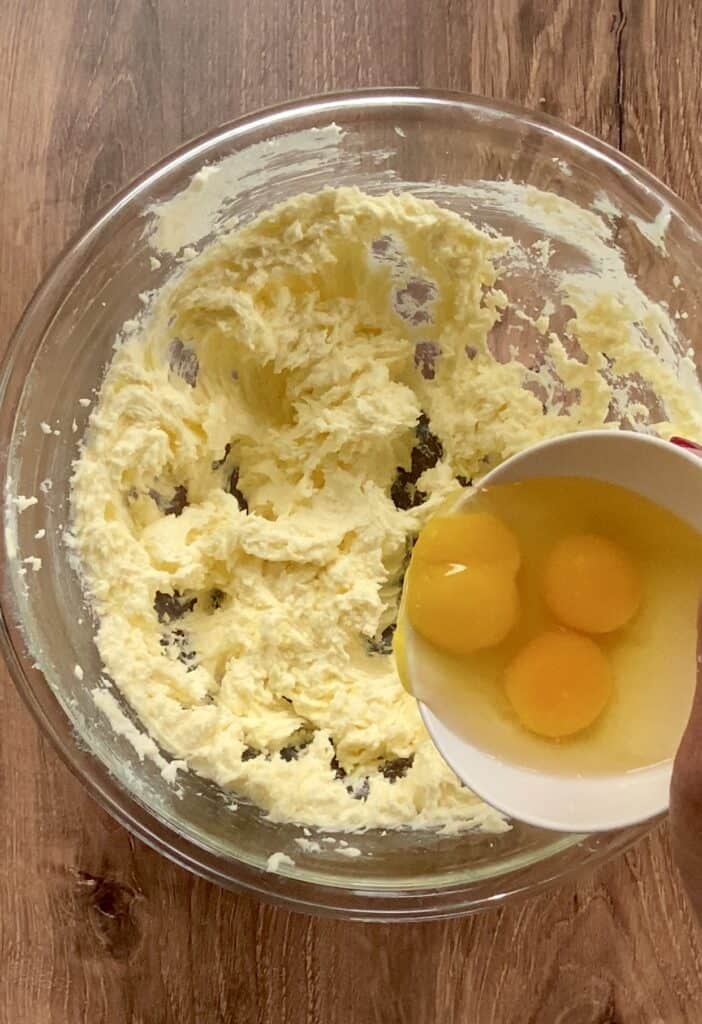
Next, add the egg whites, one at a time, until the mixture is completely combined. It’s important to remember to add eggs and egg whites one at a time, so that you ensure a cohesive cake batter!
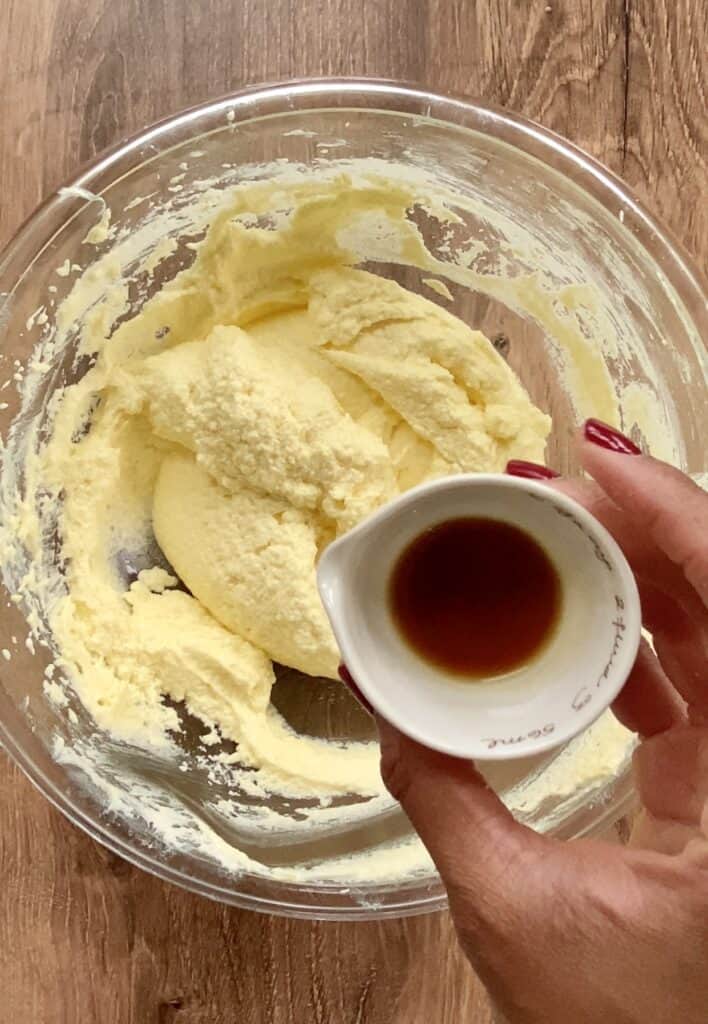
Add your extracts and mix thoroughly. This is your last chance to mix to your heart’s content because flour is on deck!
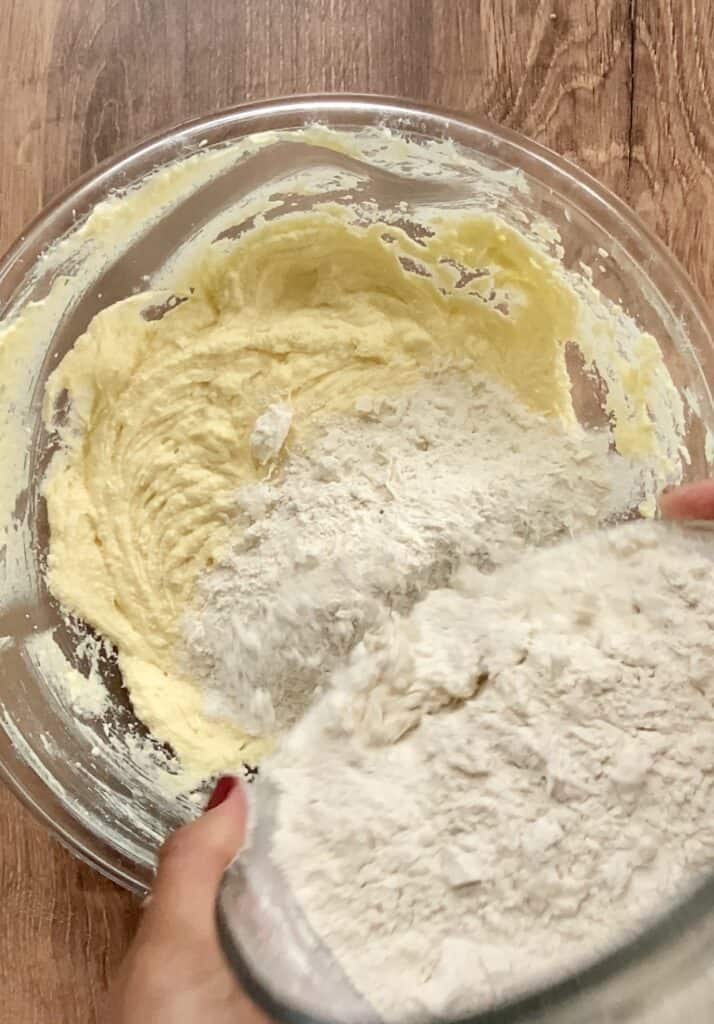
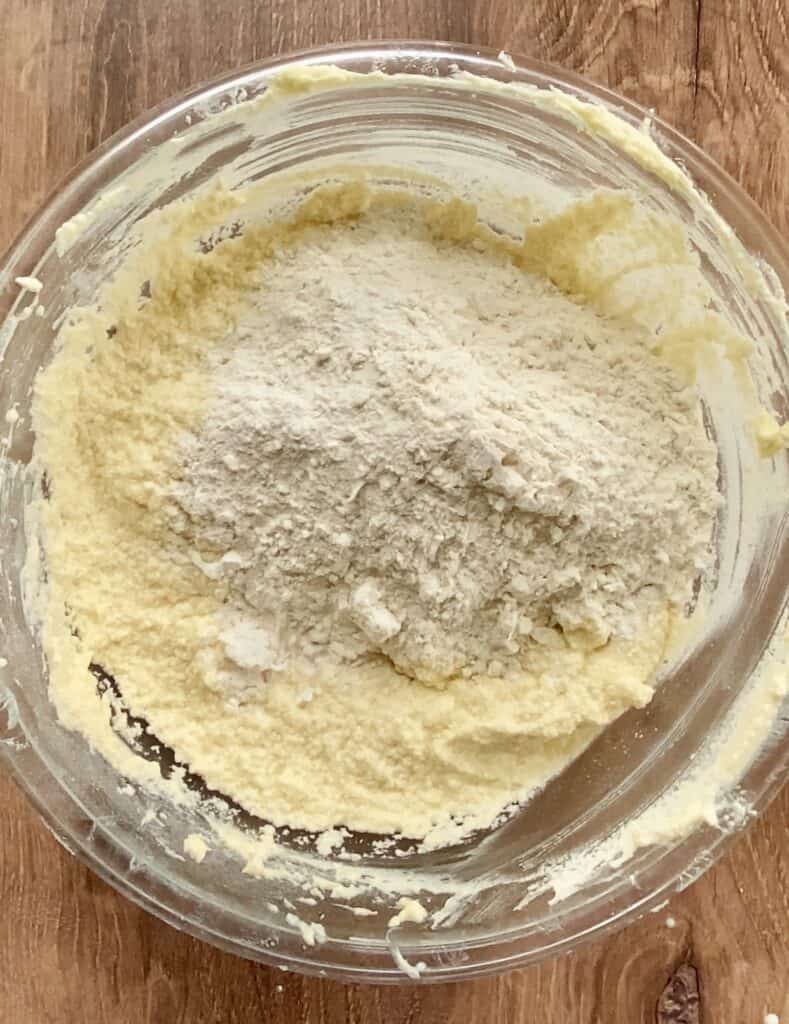
Next, add half of the flour and mix until just combined:
Add all of the crème frâiche/coconut milk mixture and again mix until just combined:
Finally, add the rest of the flour mixture and mix until just a few flour streaks remain.
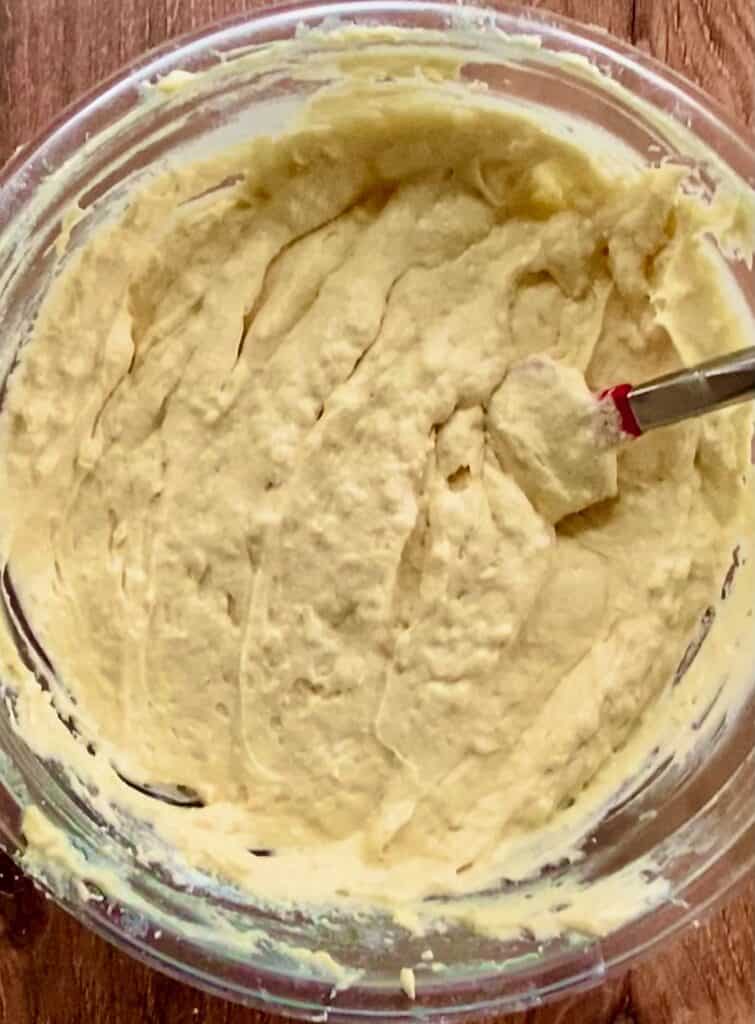
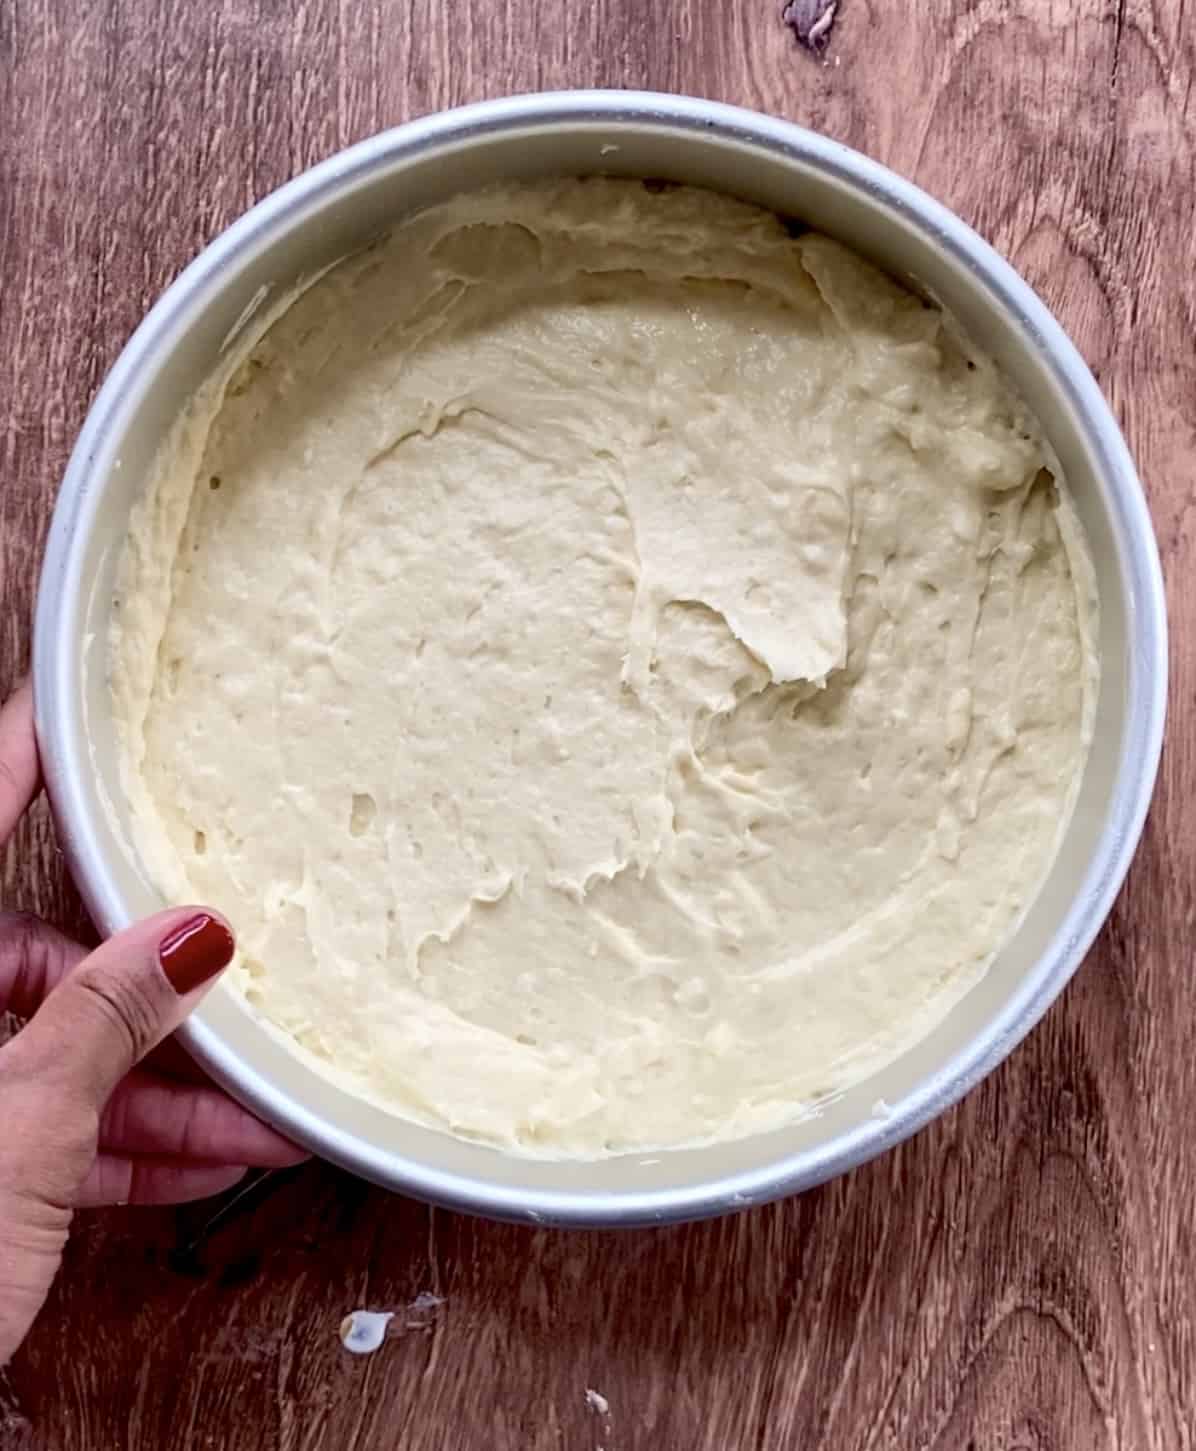
Use your spatula to scrape the sides and bottom of the bowl, and give one good stir. This is a pretty thick batter, so don’t worry!
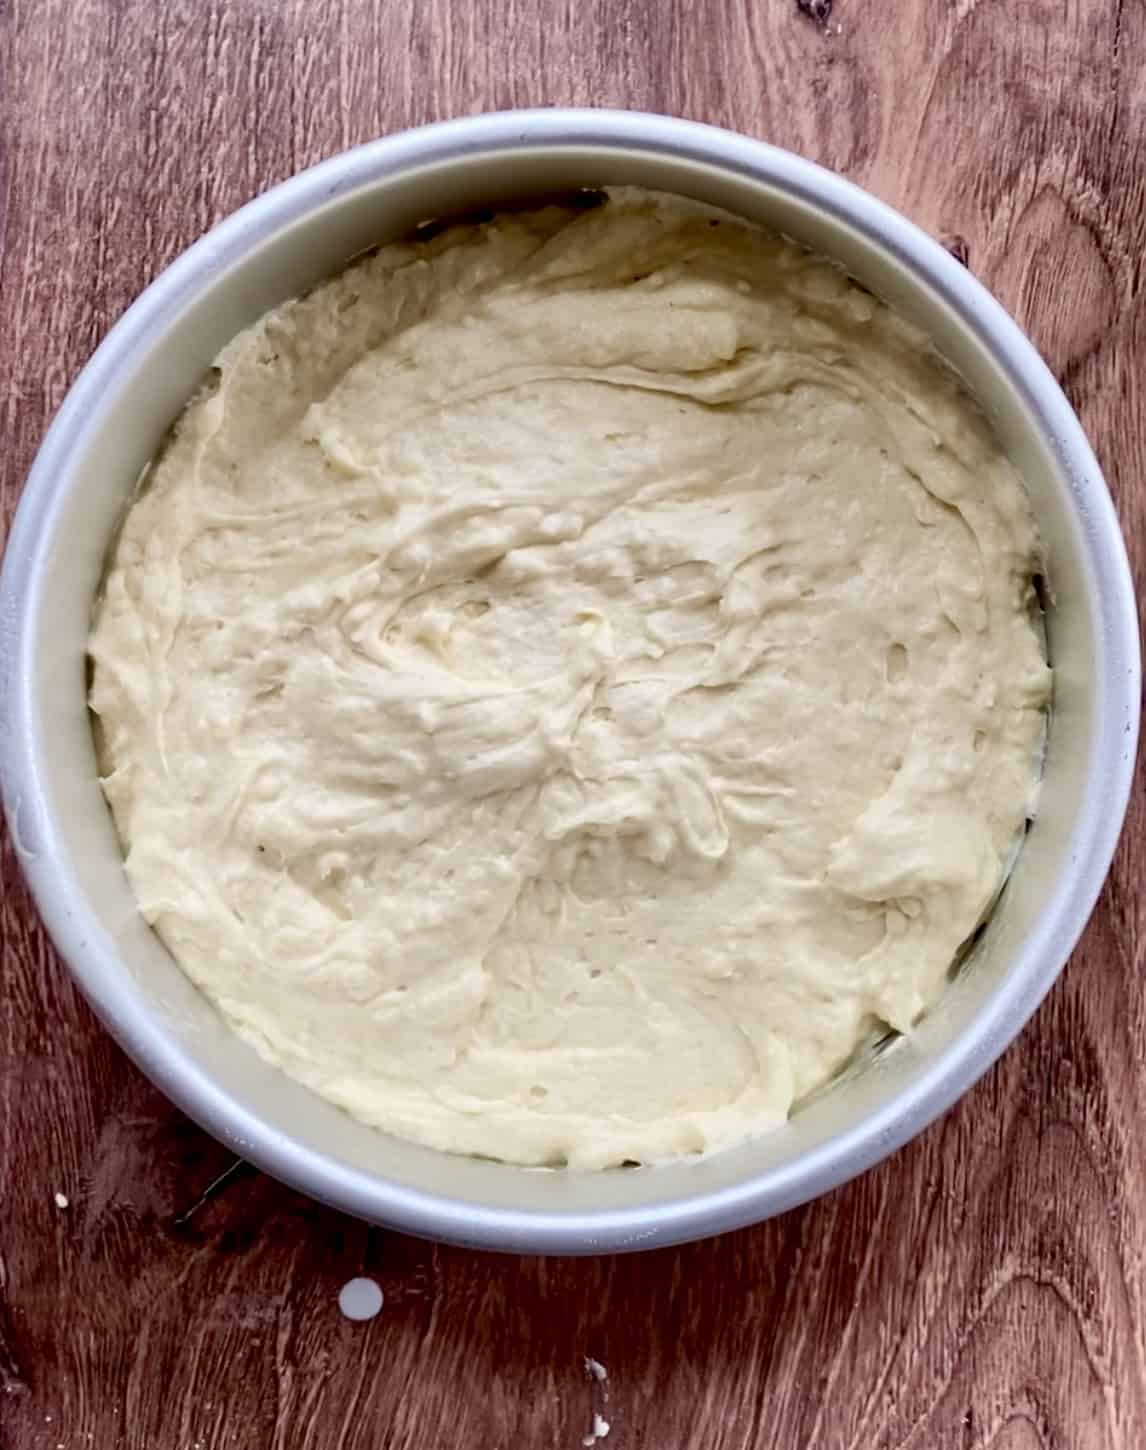
Split the batter into three prepared 8″ cake pans. Level the batter by using a spatula and then tapping the cake pan gently on the counter.
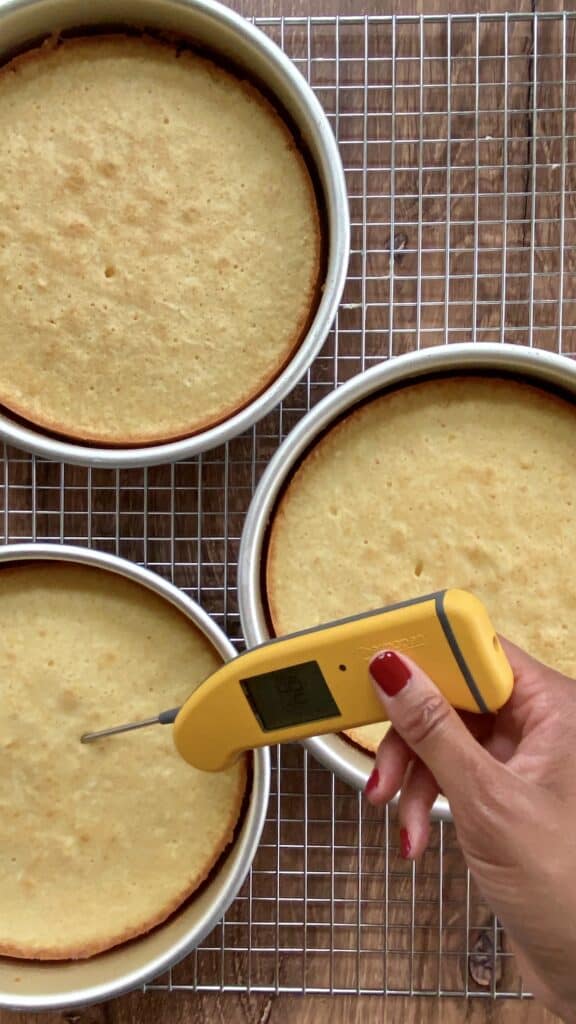
Bake at 325°F for 25-35 minutes. You’ll know it’s done when an instant-read thermometer reads 210°F or when a toothpick comes out clean. I highly recommend using an instant-read thermometer for the most accurate result.
Allow the cakes to cool completely and prepare the simple syrup. To make the simple syrup, add equal parts sugar and water to a sauce pan and boil until the sugar is completely dissolved. Allow the mixture to cool completely and then add to a small measuring cup or squeeze bottle.
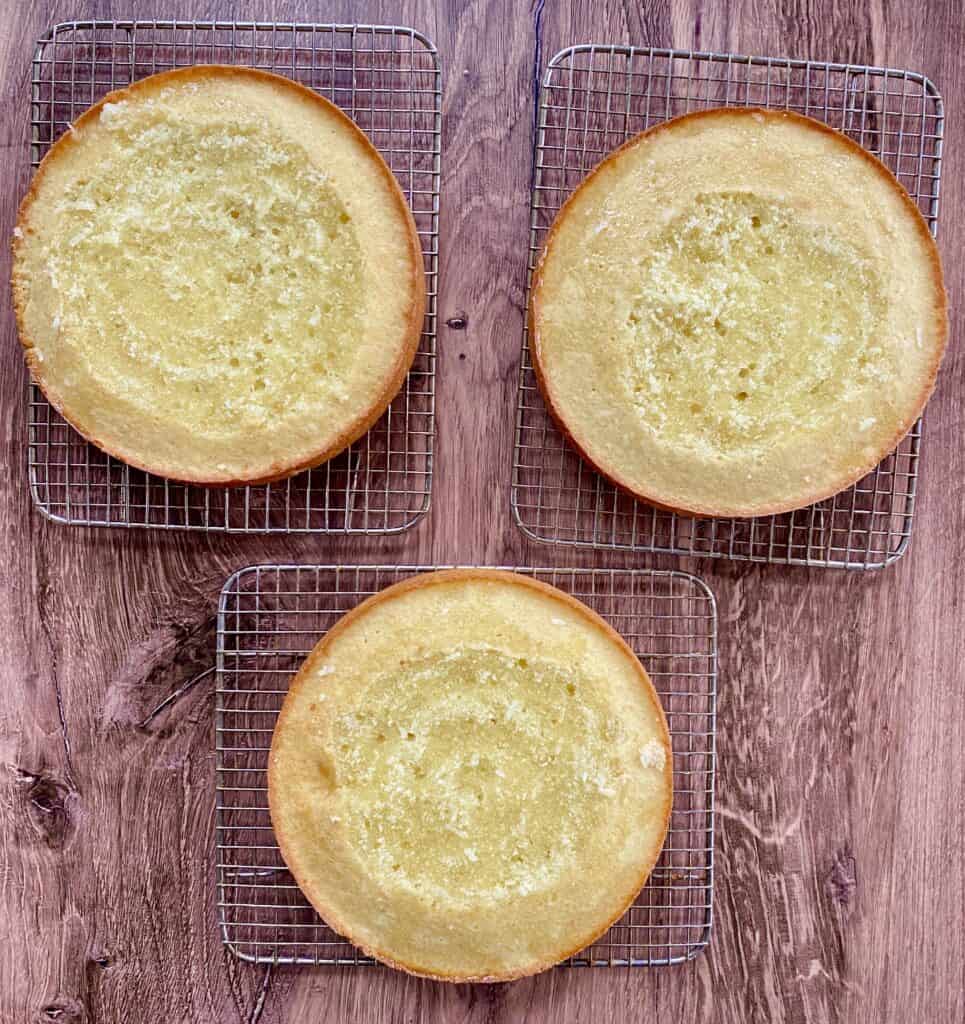
Once the simple syrup and cakes are cooled, cut off the domes and place simple syrup atop the cut cakes. The simple syrup is a professional’s secret for avoiding dry cakes!
Onto finishing touches!
The Finish
This layer cake looks difficult, but it is one of the easiest to build. First, make the meringue:
A couple of tips about meringue:
- Use a metal mixing bowl to make your meringue, and make sure it is squeaky clean. If there are any traces of dirt or fat on your mixing bowl then your meringue won’t form.
- Use real egg whites. The pasteurized whites in a carton won’t work as well. Yes, it can be a pain to separate all of those eggs, but I just think about how lucky I am that I don’t have to do it all day in a pastry kitchen. I take my time, turn on some music, and by the second song the task is done.
- Also about egg whites: when separating egg whites, I use three bowls. One for the yolks, one for the egg white that I’m working on, and my mixing bowl. That way, if I have one egg that doesn’t separate properly and I end up getting the yolk in with the egg white, I haven’t ruined the whole batch of egg whites.
- To check whether the sugar is completely dissolved, I rub some of the egg white mixture between my thumb and forefinger. If I feel any sugar granules whatsoever, I keep stirring until the sugar is completely dissolved.
Here’s a video tutorial for how I finish this cake and get amazing results!
Here’s how I do it!
Y’all. I had an incredibly fun time developing this cake from start to finish. The unbelievable quality of the Vermont Creamery products that I used made this cake really come to life, and I’m so proud to partner with them. I hope you love this cake as much as I do! Don’t forget to tag @beginwithbutter and @vermontcreamery on Instagram when you make it, so that we can see your amazing results!
Enjoy the recipe!
Print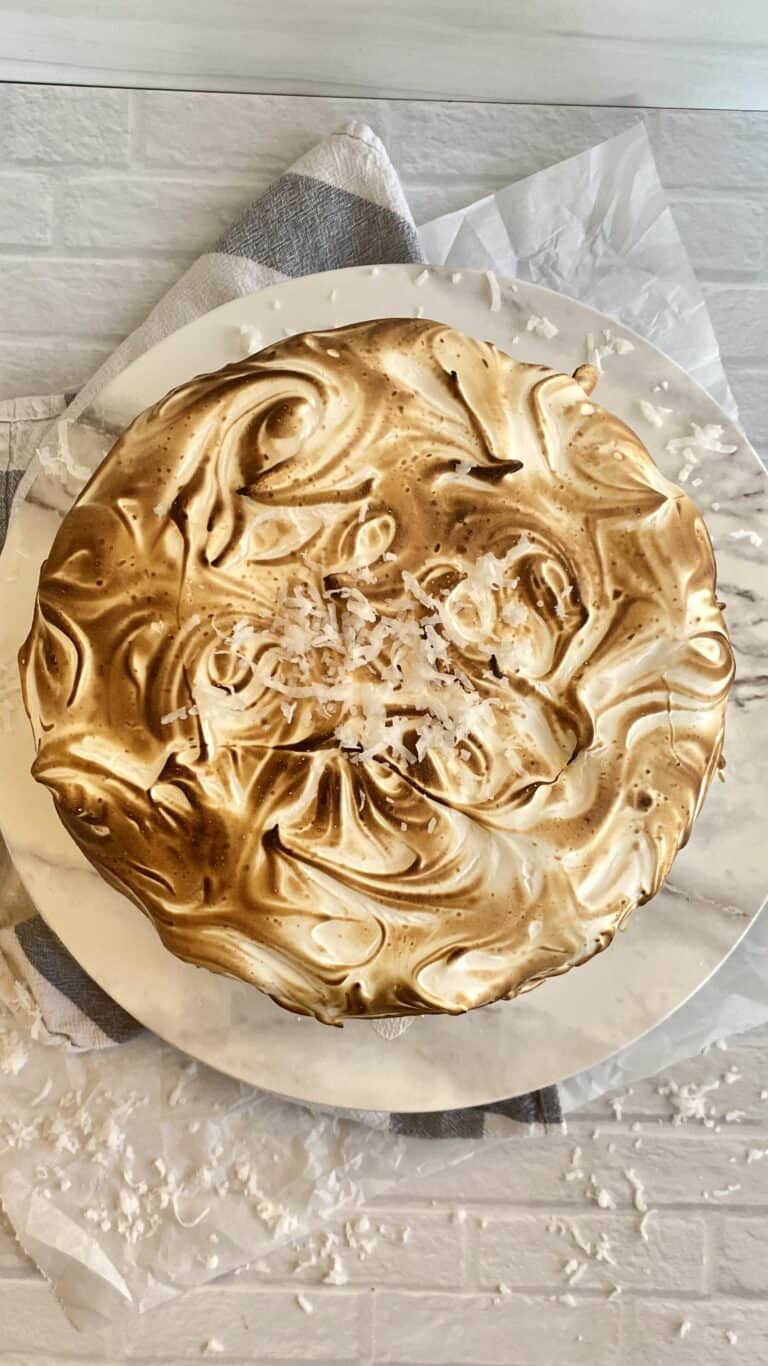
THE Easter Coconut Cake
This decadent, airy coconut cake is perfect for any table. Filled with a decadent raspberry sauce, this coconut cake is a worthy dessert for holidays, birthdays, and special Sunday dinners.
- Total Time: ~5 hours (with cooling time)
- Yield: 18 servings 1x
Ingredients
For the Cake:
- 320 g (2.5 c) cake flour
- 2 tsp baking powder
- 1 tsp kosher salt
- 95 g (1 cup) shredded, sweetened coconut
- 230 g (1 c) butter
- 350 g granulated sugar
- 4 eggs
- 2 egg whites
- 2 tsp coconut extract
- 2 tsp vanilla extract
- 227 g crème fraîche
- 63 g coconut milk
For the Raspberry Filling:
- 340 g fresh raspberries
- 350 g sugar
- 1/2 tsp salt
- 1 tbsp Creme de Cassis or Chambord (optional)
- 1.5 tbsp cornstarch
- 1.5 tbsp water
For the Simple Syrup:
- 100 g granulated sugar
- 125 g water
For the Meringue:
- 10 egg whites
- 600 g granulated sugar
Instructions
Before the Batter:
- Prepare the raspberry filling at least four hours in advance. It needs time to firm up in the refrigerator so that it won’t run out of the sides of your cake.
- Wash raspberries and remove any that are rotten.
- Add raspberries, sugar and salt to a small saucepan. Stir to coat raspberries.
- Heat raspberry mixture over medium low heat, taking care not to boil the raspberries.
- Once the sugar is completely dissolved, add the Creme de Cassis (if using). Simmer on medium low heat until the raspberries themselves have liquefied. (~10 minutes)
- In a small bowl, combine the cold water and cornstarch. Add the cornstarch mixture to the raspberry mixture and bring to a low boil for 30-45 seconds.
- Once the raspberry sauce coats the back of a spoon, it is done. Strain sauce into a medium bowl with a fine mesh strainer to remove the seeds.
- Allow to cool completely on the countertop and then refrigerate, covered, until ready to use.
To Make the Batter with a Stand Mixer:
- Preheat oven to 325°F. It’s highly recommended to use an oven thermometer for this recipe, since proper oven temperature will impact the outcome of your cake.
- Take out three 8″ round cake pans. Cut parchment circles for each cake pan and set aside.
- Combine the flour, baking soda, and salt in a medium bowl.
- Sift the flour mixture into another medium bowl. Using your fingers, crumble the shredded coconut into the flour mixture. Whisk to combine and set aside.
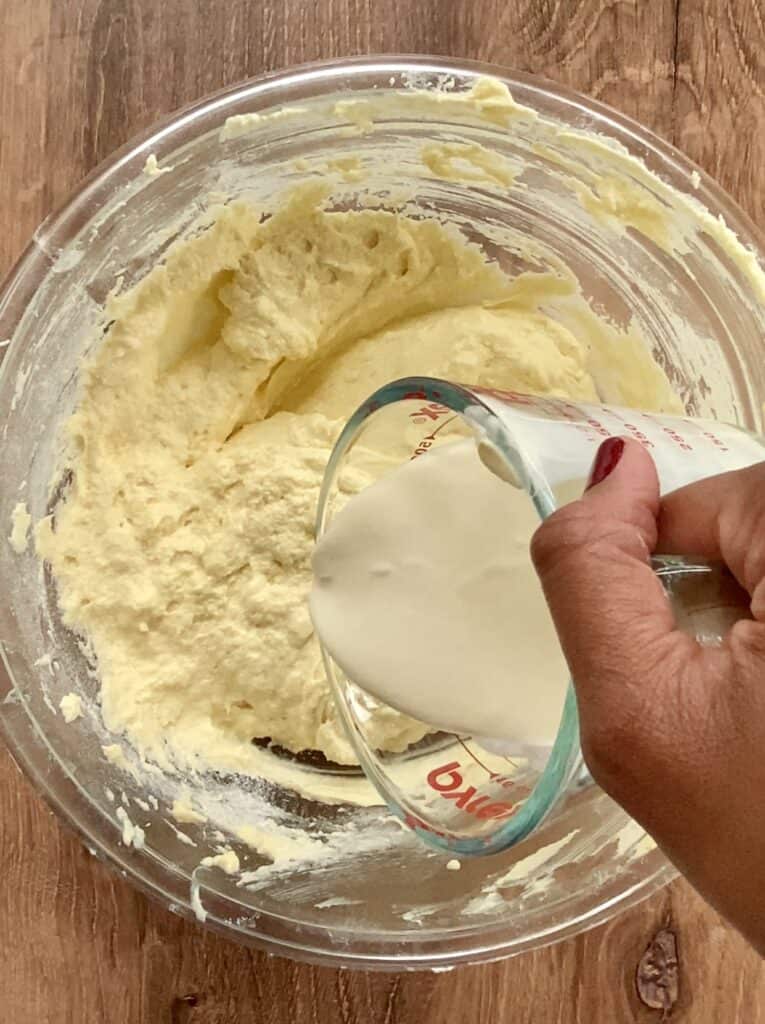
- Combine the creme frâiche and coconut milk in a liquid measuring cup and set aside.
- Place the room temperature butter in the bowl of your stand mixer. Mix on low speed until smooth. (30 seconds)
- Slowly add the granulated sugar and mix on medium speed until the mixture is light and fluffy. (5-10 minutes)
- Add egg whites, one at a time, mixing for at least 45 seconds after each addition. Scrape the sides and bottom of the bowl as needed. The mixture will look very airy at this point. (2 minutes)
- Add the whole eggs one at a time, mixing for at least 45 seconds after each addition. Scrape the sides and bottom of the bowl as needed. (4 minutes)
- Add vanilla extract and coconut extract and mix until thoroughly combined. (1 minute)
- Add half of the flour/shredded coconut mixture and mix on low speed until combined. (30-45 seconds)
- With the mixer on low speed, add all of the creme frâiche/coconut milk mixture and mix on low speed until combined. (~1 minute).
- Add the second half of the flour/shredded coconut mixture and mix on low speed until combined. (~1 minute)
- Using a rubber spatula, fully scrape the sides and bottom of the bowl. Then, stir the batter until it is smooth and consistent. Make sure to fully scrape the bottom of the bowl during this step! This is a thicker cake batter so don’t worry!
- Prepare the three 8” cake pans for baking (I use butter and flour, but baking sprays work as well). Place parchment round at the bottom of each cake pan to help prevent sticking.
- Fill cake pans evenly. I use a digital kitchen scale, and my cake pans each hold roughly 500 g of cake batter.
- Level out the cake batter with a spatula. Tap the cake pans on the countertop to help prevent large bubbles in your cakes.
To Make the Batter with a Hand Mixer:
- Preheat oven to 325°F. It’s highly recommended to use an oven thermometer for this recipe, since proper oven temperature will impact the outcome of your cake.
- Take out three 8″ round cake pans. Cut parchment circles for each cake pan and set aside.
- Combine the flour, baking soda, and salt in a medium bowl.
- Sift the flour mixture into another medium bowl. Using your fingers, crumble the shredded coconut into the flour mixture. Whisk to combine and set aside.
- Combine the creme frâiche and coconut milk in a liquid measuring cup and set aside.
- Place the room temperature butter in a large mixing bowl. Mix on low speed until smooth. (30-45 seconds)
- Slowly add the granulated sugar in two additions and mix on medium speed until the mixture is light and fluffy. (7-12 minutes)
- Add egg whites, one at a time, mixing for at least 45 seconds after each addition. Scrape the sides and bottom of the bowl as needed. The mixture will look very airy at this point. (~2 minutes)
- Add the whole eggs one at a time, mixing for at least 45-60 seconds after each addition. Scrape the sides and bottom of the bowl as needed. (4 minutes)
- Add vanilla extract and coconut extract and mix until thoroughly combined. (1 minute)
- Add half of the flour/shredded coconut mixture and mix on low speed until combined. (30-45 seconds)
- With the mixer on low speed, add all of the creme frâiche/coconut milk mixture and mix on low speed until combined. (~1 minute).
- Add the second half of the flour/shredded coconut mixture and mix on low speed until combined. (~1 minute)
- Using a rubber spatula, fully scrape the sides and bottom of the mixing bowl. Then, stir the batter until it is smooth and consistent. Make sure to fully scrape the bottom of the bowl during this step! This is a thicker cake batter so don’t worry!
- Prepare the three 8” cake pans for baking (I use butter and flour, but baking sprays work as well). Place parchment round at the bottom of each cake pan to help prevent sticking.
- Fill cake pans evenly. I use a digital kitchen scale, and my cake pans each hold roughly 500 g of cake batter.
- Level out the cake batter with a spatula. Tap the cake pans on the countertop to help prevent large bubbles in your cakes.
To Bake the Cake:
- Bake the cake at a true 325°F for 25–35 minutes, or until an instant read thermometer reads 210°F. It is important to not overbake this cake.
- Allow the cake to rest for five minutes, and then turn out on a cooling rack to cool completely.
To Make the Simple Syrup:
- Combine sugar and water in a small saucepan and bring to a boil.
- Stir occasionally until the sugar is completely dissolved.
- Remove the simple syrup from the heat and allow to cool completely.
- Place the simple syrup in a small bowl or squeeze bottle.
To Make the Meringue:
- Bring 3” of water to a low boil in a large (3 qt.) sauce pan. Reduce to a simmer.
- Carefully separate 10 eggs, placing the egg whites in a clean, nonreactive metal bowl (either a stand mixer or large stainless steel bowl). Add sugar and whisk to combine.
- Place metal bowl over the top of the sauce pan while the water is simmering. Whisk the egg white mixture over the sauce pan until all of the sugar is completely dissolved. (~3 minutes)
- Remove the metal bowl from the stove. Using the whisk attachment on either your hand mixer or your stand mixer, whisk the mixture on lowest speed until it is nearly opaque. (~1-2 minutes)
- Increase the mixer to medium speed until the mixture begins to look light and fluffy. (~4 minutes for stand mixer; ~5-6 minutes for hand mixer)
- Increase the mixer to highest speed until the meringue is done. To check the meringue, remove the whisk attachment from the mixture and invert it. If the meringue slowly folds down over the whisk attachment, it’s complete. (~2 minutes for stand mixer; ~3 minutes for hand mixer)
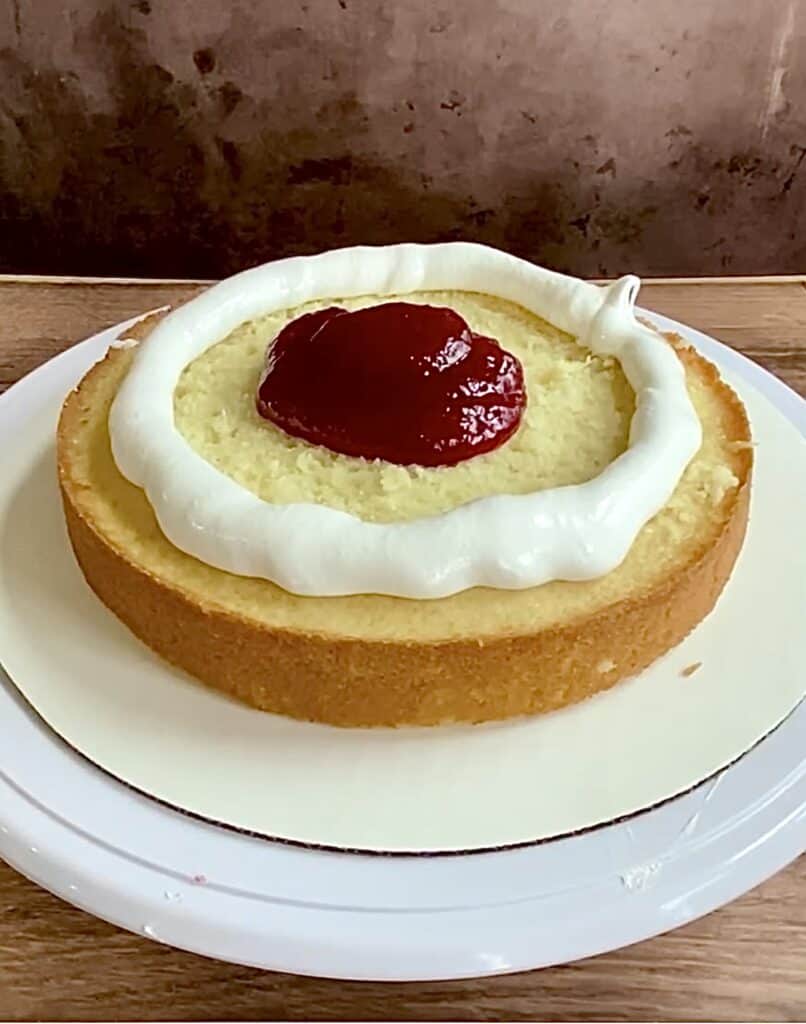
To Build the Cake:
- Place a 10” cake round on a turntable or a cake stand.
- Place a dollop of meringue on the round to secure the bottom cake.
- The cakes will be slightly domed from baking. Gently cut off the domes to make them level.
- Once you’ve sliced off the top of the cakes, use either a spoon or a squirt bottle to add simple syrup to the cut layers.
- Pipe a thick dam of meringue around the edge of the layers. Spoon 4-5 tablespoons of raspberry filling in the center and spread to the edges of the dam.
- Place the second layer on top of the first layer. Repeat the meringue dam and the raspberry filling.
- Invert the final layer (so that the cut side is facing down) and place on top of the other two layers. Press down gently and double check to make sure the cake is level.
- Using an offset spatula, quickly spread the meringue over the cooled cake. Using clean fingers, pull or swirl the meringue. If desired, use a butane torch to toast the meringue.
Notes
- This cake can be stored in the refrigerator for up to five days. Allow to warm on the counter for 30-45 minutes before cutting.
- Prep Time: 1 hour
- Cook Time: 25-35 minutes
- Category: Dessert
Nutrition
- Serving Size: 1 slice
- Calories: 565
- Sugar: 76.4 g
- Sodium: 208.5 mg
- Fat: 19.3 g
- Carbohydrates: 93.3 g
- Protein: 6.3 g
- Cholesterol: 86.8 mg