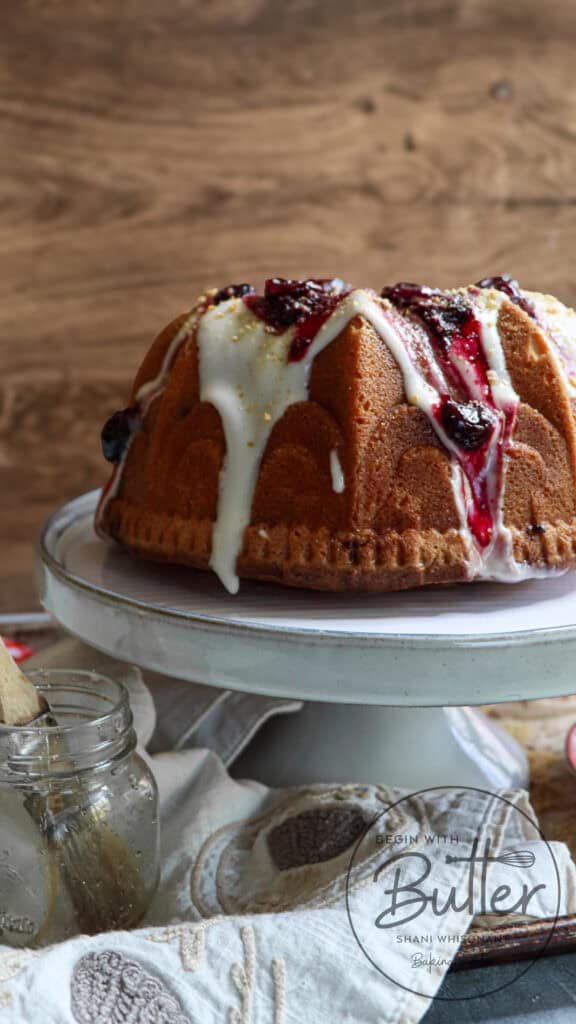
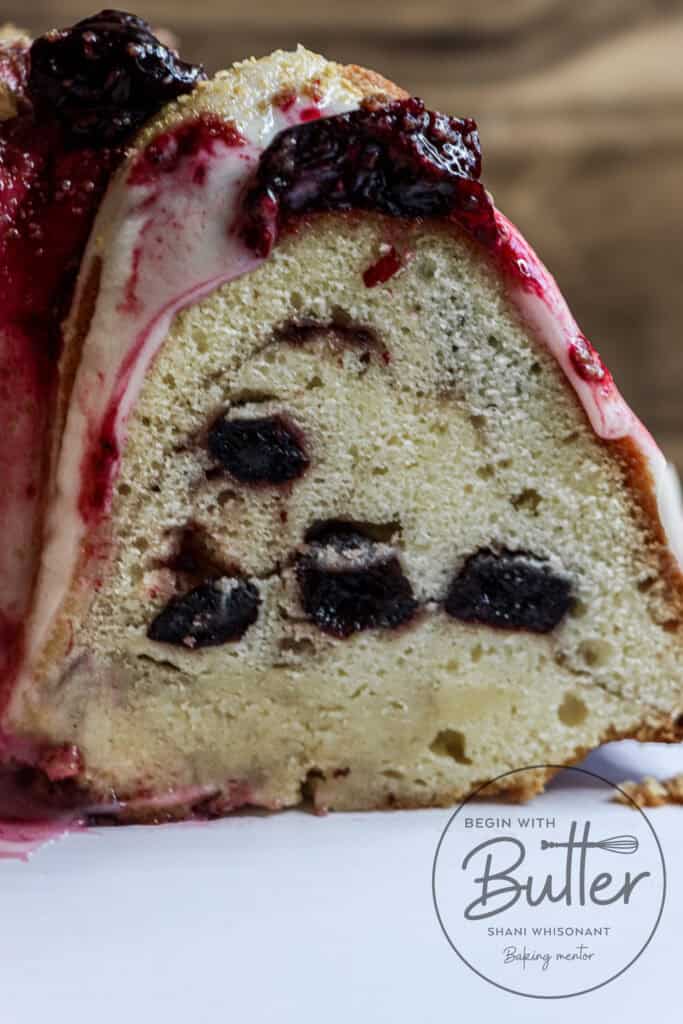
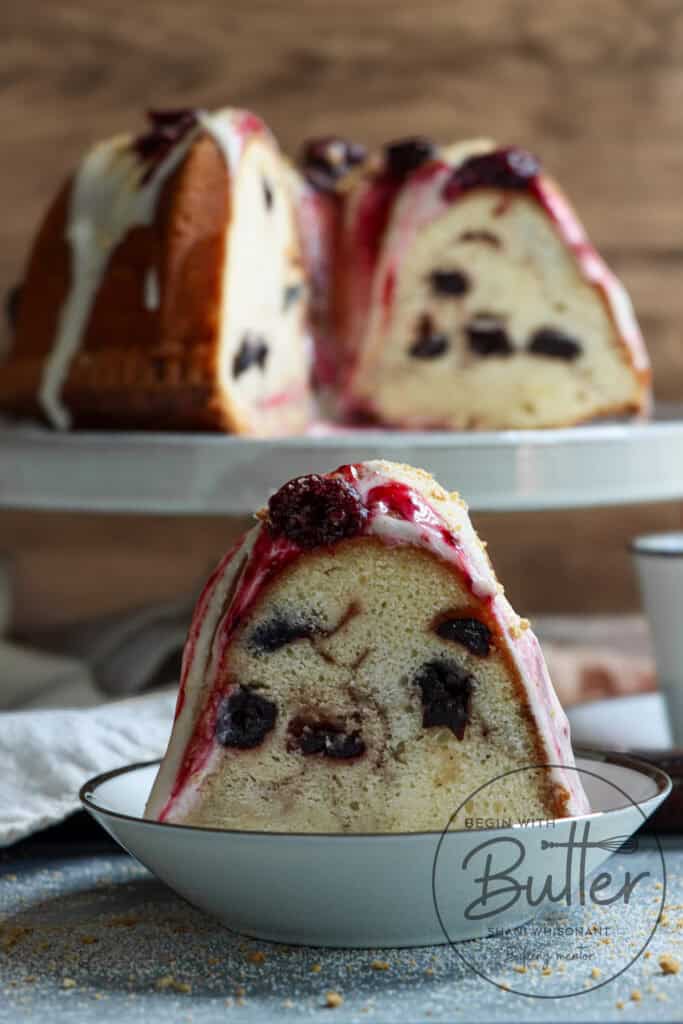
Let’s talk about it. The vanilla cake base of this Cherry Cheesecake Pound Cake utterly and deliciously melts in your mouth the moment it hits your tongue. That makes way for the delightfully lush cherries in the cake to hit your palette, which causes immediate (and involuntary) toe curling and eye rolling in utter bliss.
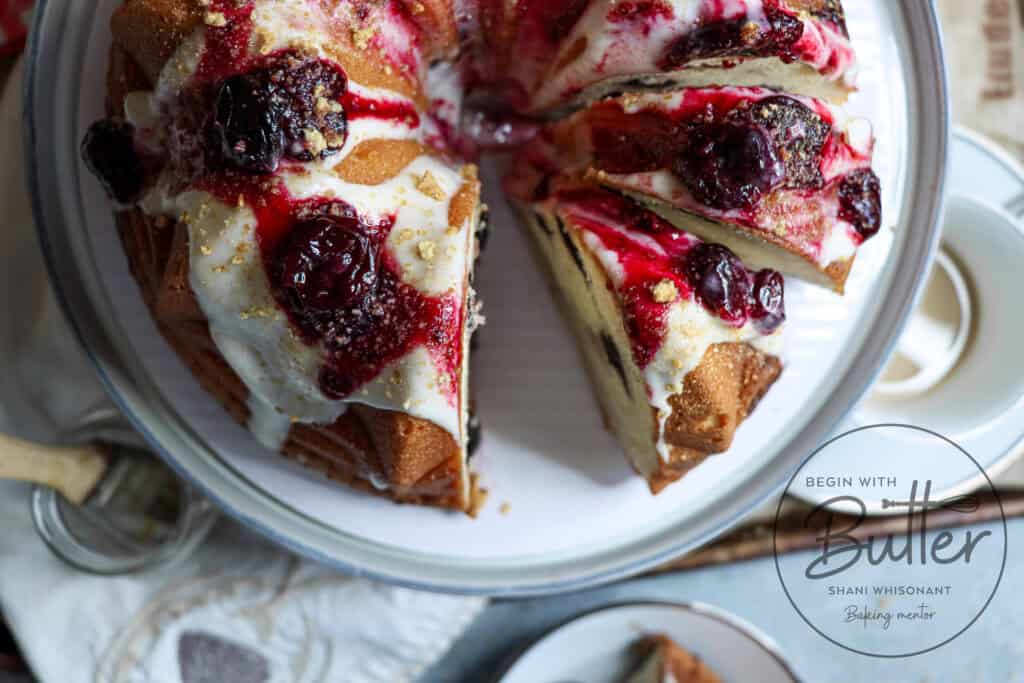
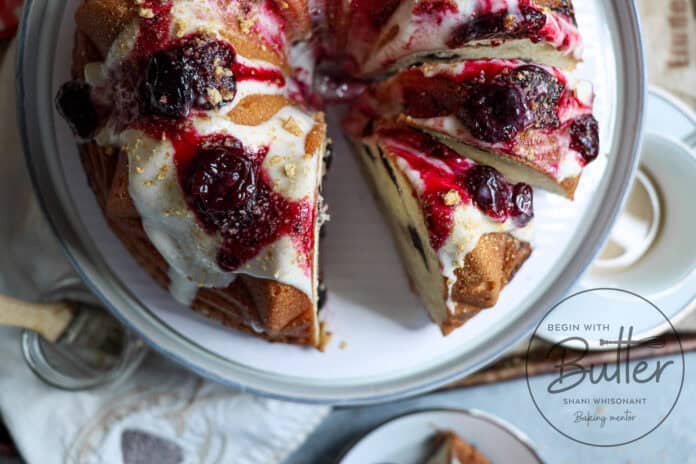
If that wasn’t enough, the cream cheese glaze is the smooth, tangy finisher that ties together the rich cake with the sweet cherry swirls in the cake. To make this even more impossibly delicious, I added more cherries as a garnish on top of the cake, and crumbled graham crackers to mimic a graham cracker crust. The result is a delicious contrast in textures and flavors, dancing in your mouth in the most wonderful way.
In this Post:
The Recipe
Print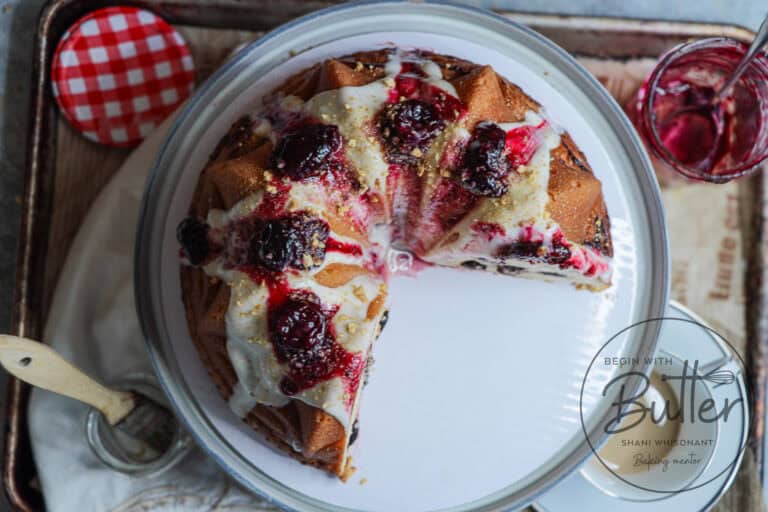
Cherry Cheesecake Pound Cake
This Cherry Cheesecake Pound Cake is luxury defined. A tangy, moist vanilla cake is swirled with impeccable cherry filling for an experience that is just superb. Make this one today and stun guests at your next gathering.
- Total Time: 5-7 hours
- Yield: 18 servings 1x
Ingredients
- 350 g (2 1/2 cups) pitted cherries
- 100 g (1/2 c) granulated sugar
- 1/2 tsp fine sea salt
- 2 tsp fresh lemon juice
- 63 g (1/3 c) water
- 384 g (3 c) all-purpose flour
- 1/2 tsp baking soda
- 1 tsp kosher salt
- 171 g (3/4 c) unsalted butter, room temperature
- 59 g (1/4 c) full-fat cream cheese, room temperature
- 500 g (2 1/2 c) granulated sugar
- 6 eggs, room temperature
- 1 vanilla bean (or 1 tbsp pure vanilla extract)
- 250 g (1 c) buttermilk
- Crushed graham crackers, for garnish
- 84 g (1/3 c) water
- 67 g (1/3 c) granulated sugar
- 1/8 tsp fine sea salt
- 1 tbsp pure vanilla extract
- 154 g (2/3 c) cream cheese, room temperature
- 240 g (2 c) confectioner’s sugar
- 1 tsp pure vanilla extract
- 1 1/2 – 2 1/2 tbsp whole milk
- 1/8 tsp fine sea salt
Instructions
To Make the Cherry Filling/Sauce:
- Place cherries, granulated sugar, fine sea salt, lemon juice, and water in a medium saucepan over medium-high heat. Bring to a boil and then reduce to a simmer over medium heat.
- Stir regularly to make sure that the liquid is not sticking to the bottom of the pan. Continue simmering until the sauce has thickened to a jammy consistency. Remove immediately from the heat into a heat-proof container. Set aside until the cherries are room temperature. Place ⅓ of the cherries in one small container (these will be your topping), and ⅔ of the cherries into a second small container (these will be your filling).
To Make the Cake:
- Set oven to a true 325°. An oven thermometer will help you determine whether your oven is actually the correct temperature.
- Sift together all-purpose flour, baking soda, and kosher salt into a medium bowl. Set aside.
- Place the room-temperature butter and cream cheese in a large mixing bowl, or the bowl of your stand mixer. Mix on medium speed until the fats are completely smooth.
- Using a sharp knife, cut open the vanilla bean pod lengthwise. Scrape out the vanilla beans. Add them to the granulated sugar in a small bowl or deli cup. Massage the vanilla beans into the sugar to infuse the sugar. (If using a deli cup, combine the sugar and vanilla beans, put the top securely onto the deli cup, and shake to your heart’s content!). Place the (nearly) empty vanilla bean pod in your buttermilk to continue the infusing fun.
- Add the infused granulated sugar and cream the mixture until light and fluffy. (psst…don’t know what it means to “cream until light and fluffy”? Take a look at this article!) Scrape the sides and bottom of the bowl as necessary to ensure even mixing.
- Add the eggs, one at a time. Mix each egg until it’s fully incorporated before adding the next egg. Scrape the sides and bottom of the bowl as necessary to ensure even mixing.
- Add all of the pure vanilla extract (if using) and mix until fully combined. If using infused vanilla sugar, you can skip this step.
- Add half of the flour mixture and mix on low speed until nearly combined.
- Remove the vanilla bean pod from the buttermilk. Add all of the infused buttermilk and mix on low speed until nearly combined. Scrape the sides and bottom of the bowl as necessary to ensure even mixing.
- Add the second half of the flour mixture and mix on low speed until nearly combined. Scrape the sides and bottom of the bowl with a stiff spatula, and fold the batter until it is smooth and combined.
- Prepare a 10- or 12-cup bundt pan as you normally would.
- Place half of the batter into the pan, then gently tap the pan on the countertop to pop any large bubbles and help the batter ease into the deep grooves of the pan. Make a trench in the center of the batter. Add half of the cherry filling. Try not to touch the sides of the pan with the cherry filling.
- Gently create another layer of batter over the filling. Make another trench and place the second half of the filling in the trench, being careful not to touch the sides of the cake pan. Cover the entire cake with the remaining batter, then gently (and minimally) swirl the cake batter with a skewer or the handle of a small spoon.
- Bake at 325° for 65-75 minutes, or until the internal temperature of the cake reaches 212°F.
- Remove the pan from the oven. After ten minutes, remove the cake from the pan by inverting the pan onto a cooling rack. Allow to cool completely.
To Make the Vanilla Simple Syrup:
- Place granulated sugar, water, and salt in a small saucepan. Bring to a boil.
- Remove from the heat and add pure vanilla extract. Stir to combine.
- Once the cake is fully cooled, brush with the fully cooled simple syrup.
To Make the Cream Cheese Glaze:
- Place the cream cheese in a medium sized mixing bowl.
- Use a hand mixer to mix the cream cheese until it is completely smooth.
- Place the confectioner’s sugar, fine sea salt, vanilla extract, and 1 ½ tbsp of whole milk into the mixing bowl.
- Using a small whisk, stir gently to combine. Stir until the confectioner’s sugar no longer collects moisture from the milk or the cream cheese.
- If necessary, add up to 1 ½ tbsp more of whole milk, but do it ½ tsp at a time.
- The final glaze should be the consistency of thick honey, and should pour easily over the sides of the cake. Use a spoon, spouted measuring cup, or squeeze bottle to spread the glaze over the cake. If desired, crumble graham crackers over the entire cake to mimic a graham cracker crust.
- Enjoy!
Notes
Need help mastering the steps of this pound cake? Want help understanding the baking science behind this luxurious recipe? Fear not! I have a number of resources, below, to help you gain confidence not only with this Cherry Cheesecake Pound Cake, but also with all of your pound cakes going forward!
- Prep Time: 1 hour (active)
- Cook Time: 65-75 minutes
- Category: Dessert
Cherry Cheesecake Pound Cake Ingredients
Recipe tinkerers, unite! By reading this section, you’ll learn some of the important baking science in this recipe, which will help understand how to personalize this recipe to a degree. While I don’t recommend wholesale changes to an existing recipe, there are always fun touches that you can add to make it your own! Read on to learn more!
All-Purpose Flour – This kitchen staple is this pound cake’s backbone! While it might be tempting to reach for cake flour, stick with all-purpose for this recipe – its higher protein content gives us that pleasantly plump, tight-crumbed texture we need in a proper pound cake. Cake flour would make things too delicate and fluffy, which isn’t the goal here. Plus, cake flour would not support the weight of the cream cheese, buttermilk, and cherries, and that could lead to sunken cherries in this cake.
Kosher Salt – Salt is the flavor balancing superhero – it counteracts the sweetness of the sugar while magically making the cherry and vanilla flavors pop even more. Without it, your cake would taste overly sweet, which would be a sad ending to all of your labor. Overly sweet is a real concern in this cake, since we have granulated sugar in the cake and a sweetened cherry sauce swirled in the batter. So, salt is imperative!
Baking Soda: With acidic ingredients like buttermilk and cream cheese in our recipe, baking soda is our leavener of choice. It reacts with these acids to create the carbon dioxide bubbles that help our cake rise to perfect heights.
Unsalted Butter – Butter adds its distinctive delicious flavor, but it does so much more – as butter melts during baking, it helps tenderize the proteins in the flour to achieve perfect balance. Plus, when creamed with sugar, it traps air bubbles that give your cake that perfect pound cake texture.
Full-Fat Cream Cheese: The cream cheese is another member of this fat all-star team – its tangy notes balance the sweetness, while its unique protein structure helps create an incredibly tender crumb in this Cherry Cheesecake Pound Cake. Just like its namesake, this cake melts on your tongue, and this ingredient is a big reason for that!
Granulated Sugar – Sugar isn’t just for sweetness! When creamed with butter, it creates millions of tiny air pockets that give your cake structure. It also helps create that gorgeous, deep golden crust we all fight over.
Eggs – Talk about nature’s perfect contradiction! These kitchen MVPs are basically two ingredients in one shell – the proteins in the whites build structure and strength, while the fatty yolks work to tenderize those same proteins. Strangely enough, though, both characteristics work together perfectly for cake perfection.
Vanilla Bean or Pure Vanilla Extract – Vanilla adds more than just flavor! Vanilla actually enhances our perception of sweetness, meaning we can get maximum yum without having to add extra sugar. I prefer vanilla beans in this recipe, for the extra delicious punch, but you can absolutely use pure vanilla extract. Make sure to use pure vanilla extract in your baking, as vanilla flavoring has additional ingredients that can impact the flavor of your cakes.
Full-Fat Sour Cream – Don’t even think about reaching for the low-fat stuff here – full-fat sour cream is bringing its A-game with both fat and acidity to make this cake amazing! The fat tenderizes the proteins in the egg whites and flour, while the acidity interacts with the baking soda to help create rise.
Buttermilk – This is the secret weapon in this Cherry Cheesecake Pound Cake, doing way more than just adding moisture. Its natural acidity works hand-in-hand with the baking soda to create the perfect rise, while also breaking down the tough proteins in flour to give you an incredibly tender crumb. Plus, buttermilk’s subtle tangy flavor gives depth to both the cream cheese and cherries, while helping to balance out the sweetness of the cake.
Now that you know the science, there’s some additional resources that will help you become more confident with every Cherry Cheesecake Pound Cake you ever make! Read on for additional blog resources that will help you take all of your pound cakes to the next level!
Techniques for the Best Cakes
Here at BwB, we’re about more than recipes; the main goal is to create great bakers who feel confident every time they put on their aprons.
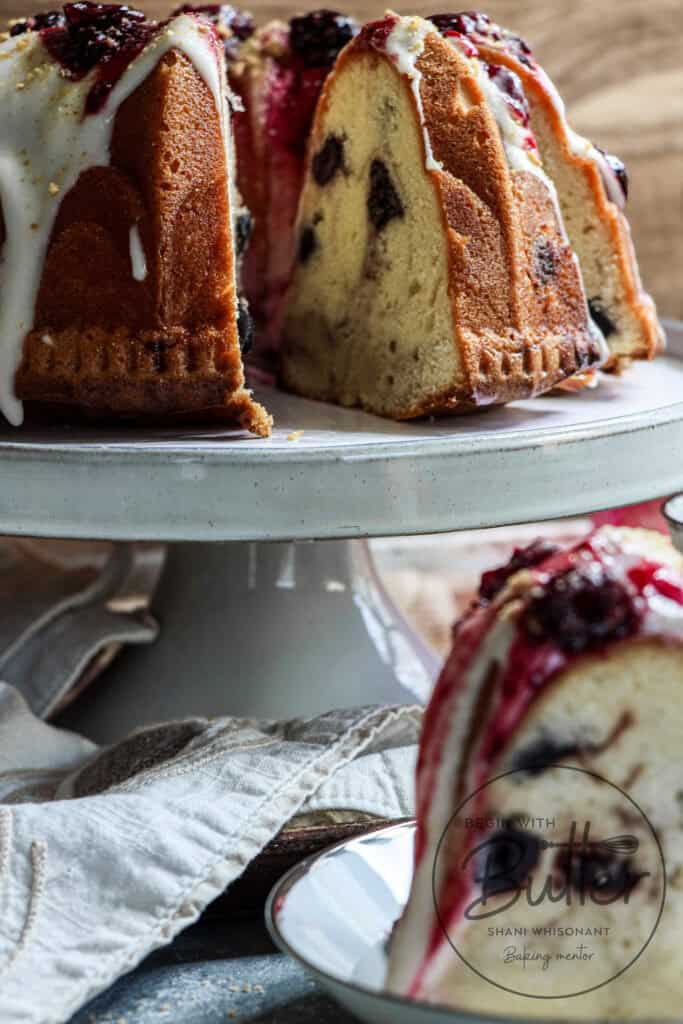
To that end, I’ve cultivated some great technique resources from the Begin with Butter site to help you create the most gorgeous (marble) pound cakes of your life. Read on to get a ton of confidence-building tips!
- My Favorite Bundt Pans
- Sifting: Quick Technique, Huge Impact
- Meet Your Kitchen BFF–Your Digital Kitchen Scale! (this one is particularly important for this cake!)
- Technique Tips for the Best Pound Cakes
- How to Cream Butter and Sugar (With New Video!)
- Baking 101: How to Measure Ingredients
- How to Grease a Bundt Pan
- The Best Tools for Perfect Pound Cakes
- Knowing When to Stop a Technique
- Begin with Butter Home Baking Academy | Perfect Pound Cakes Class!
These resources are super helpful to help you build consistency and confidence on your Cherry Cheesecake Pound Cake journey. Happy reading!
But wait! There’s more! Grab your coffee or a glass of wine and get ready to check out my favorite equipment!
Important Tools
Guess what? Begin with Butter has its own Amazon Storefront, where you can find all of the amazing equipment that I used in this Cherry Cheesecake Pound Cake! Want even more specific product recommendations? Check out the product links, below.
I do get paid a commission when you purchase, but these are the tools that I use all the time in my own kitchen.
If you have these tools already, great! Think of this as a checklist to help you build the confidence that you’ll need to execute this cake!
- Taylor Oven Thermometer
- ThermoWorks Square Dot Thermometer
- Ozeri Pronto Digital Food Scale
- OXO Digital Food Scale
- KitchenAid Hand Mixer
- KitchenAid Stand Mixer
- Stainless Steel Mixing Bowl Set
- Deli Containers for Prep
- OXO Spatula Set
- Sifter
- My Absolute Favorite Pound Cake Pans
Conclusion: Thanks Mom. For Everything.
This Cherry Cheesecake Pound Cake was made possible by the loving support from my Mother-in-Law. From the time she laid eyes on me, she took me under her protective wing and she’s loved me fiercely for the last 20+ years. She asks for so little from anyone, yet she’s the first to show up for everyone. What an amazing blessing to have a woman like my mother-in-law in my life.
If this cake brings you joy, I am supremely happy. It’s my sweet homage to a super special woman, and I hope, when I make it for her next visit, that she rolls her eyes at me in the best way possible.
I’d love to see your take on this Cherry Cheesecake Pound Cake! Find me at beginwithbutter.com, or come hang out with me on Instagram @beginwithbutter, where I share tips, tricks, and plenty of baking science to help you become a more confident baker. Tag me in your creations – I absolutely love seeing what comes out of your kitchen! And if you have specific questions about this or any other recipe, drop me a line at bakingbestie@beginwithbutter.com. Can’t wait to share Day 10 of our holiday baking adventure with you tomorrow!



This recipe feels so special with the love and meaning behind it. I love the personal touch you’ve added and the invitation to connect—I’ll definitely be tagging you when I bake this!
Thank you so much. This means the world to me. ❤️ And please feel free to connect once you’ve made it!