The Basics of Butter

Home » Featured Recipes » Page 39

Friends. I am the bona fide owner of a site called Begin with Butter, and I haven’t discussed butter. At all.

Let’s go ahead and chalk that up to being a rookie mistake. But it’s a rookie mistake that’s going to get fixed tuh-day.

Time for a deep dive into butter.

That actually sounds fun and delicious.

Isn’t it Just Butter? Why is This Important?

Excuse me while I curl into a fetal position and sob.

Butter is one of the most important elements in all of baking! It is one of the primary ingredients in almost all conventional baking recipes (and also in a huge number of savory baking recipes). It has an enormous ability to impact flavor, texture, and color in almost anything you bake.

If flavor, texture and color don’t matter to you, then I guess this isn’t for you (but I…have questions). If you want to improve those three elements of your baking, think of this post as your entrée into the rare air of exceptional home bakers and professionals the world over.

But no big deal. Totally your choice.

What, Exactly, is Butter?

Well, to start, butter is a fat. But it is SO. MUCH. MORE.

It’s commonly known that butter is a fat that adds a whole lot of flavor to whatever dish you’re making. But, in the baking world, butter is actually dissected all the way to its bare elements in order to decide which kind of butter is best for a specific recipe.

I can hear you now. “Sorry Shani, what?!”

Here’s the thing. Not all butter is created equal for baking use. Whether you’re making a flaky pie crust or a luscious lemon pound cake, the components of your butter make an enormous difference in your final product. Sometimes the butter itself is as important as any technique.

Let me say that again: there are times when an ingredient (in this case, the butter) is as important as any technique that you’re using in a recipe. In other words, you really want to have both of them in order to help a recipe reach its maximum potential.

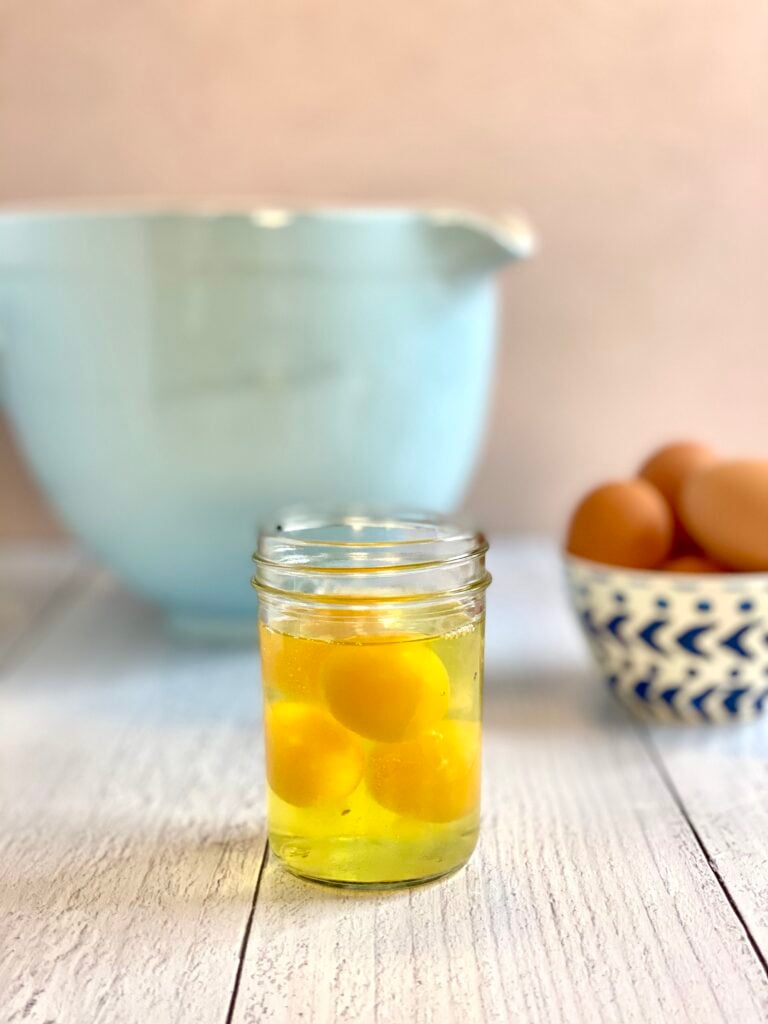
So, what is butter? It’s a semi-solid emulsion, made from milk or cream, that contains butterfat, water, and some milk solids.

Saints. Saying that butter is an “semi-solid emulsion” is just a fancy way of saying that butter is not quite liquid and not quite solid. It’s somewhere in between and it’s composed of fat and liquid that can be separated from one another.

The fat content is key in butter. In the United States, in order to even qualify as “butter”, a product has to have at least 80% butterfat.

TL;DR version: Butter is a fat. So it contains a lot of fat.

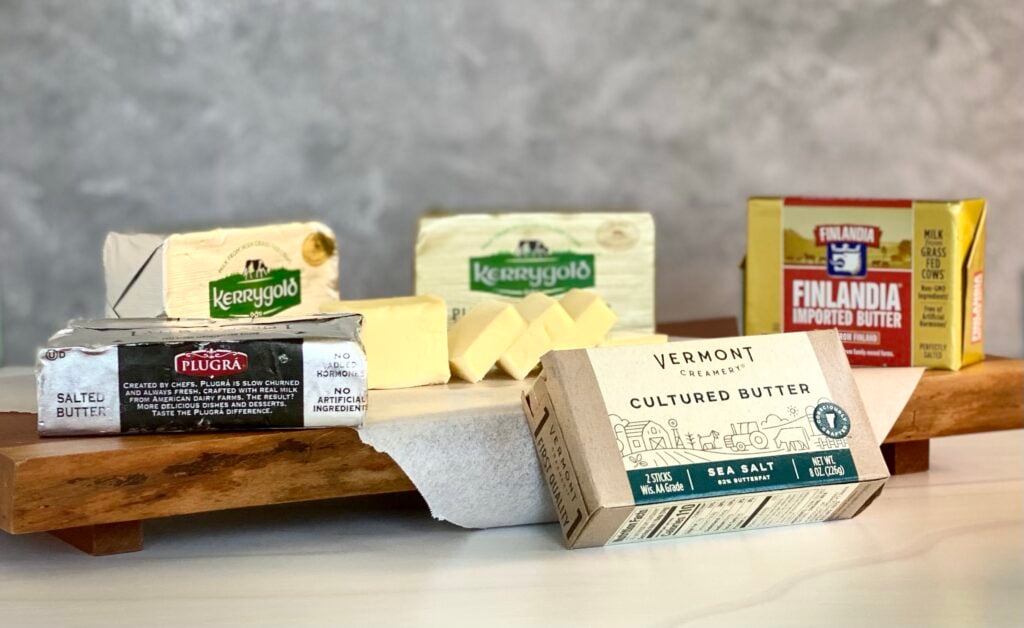
American-Style Butter and European/ “European-Style” Butter.

American-style butter is most commonly known as “sweet cream butter”, and most American-style butters weigh in right at that 80% butterfat mark. Land O’ Lakes, a name that is synonymous with butter in the United States, sits exactly at 80%. Land O’ Lakes is the most famous of American-style butters and has been for generations; it’s actually the one that my mother used when I was growing up.

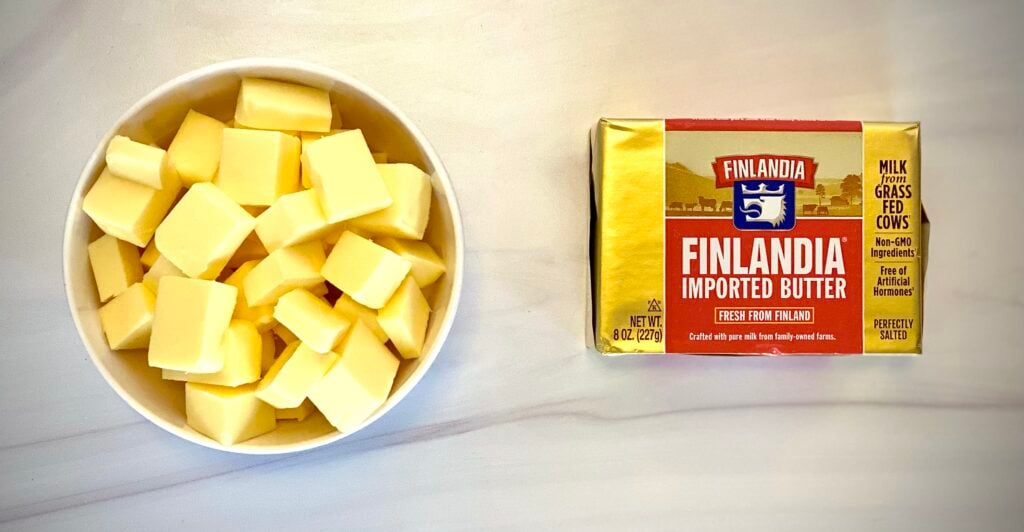
Not all “American-style” butters are American butters. Finlandia makes an excellent sweet cream butter and its butter is crafted in Finland.

European or “European-style” butters typically range from 82-83% butterfat, which leads to a much more distinct buttery flavor.

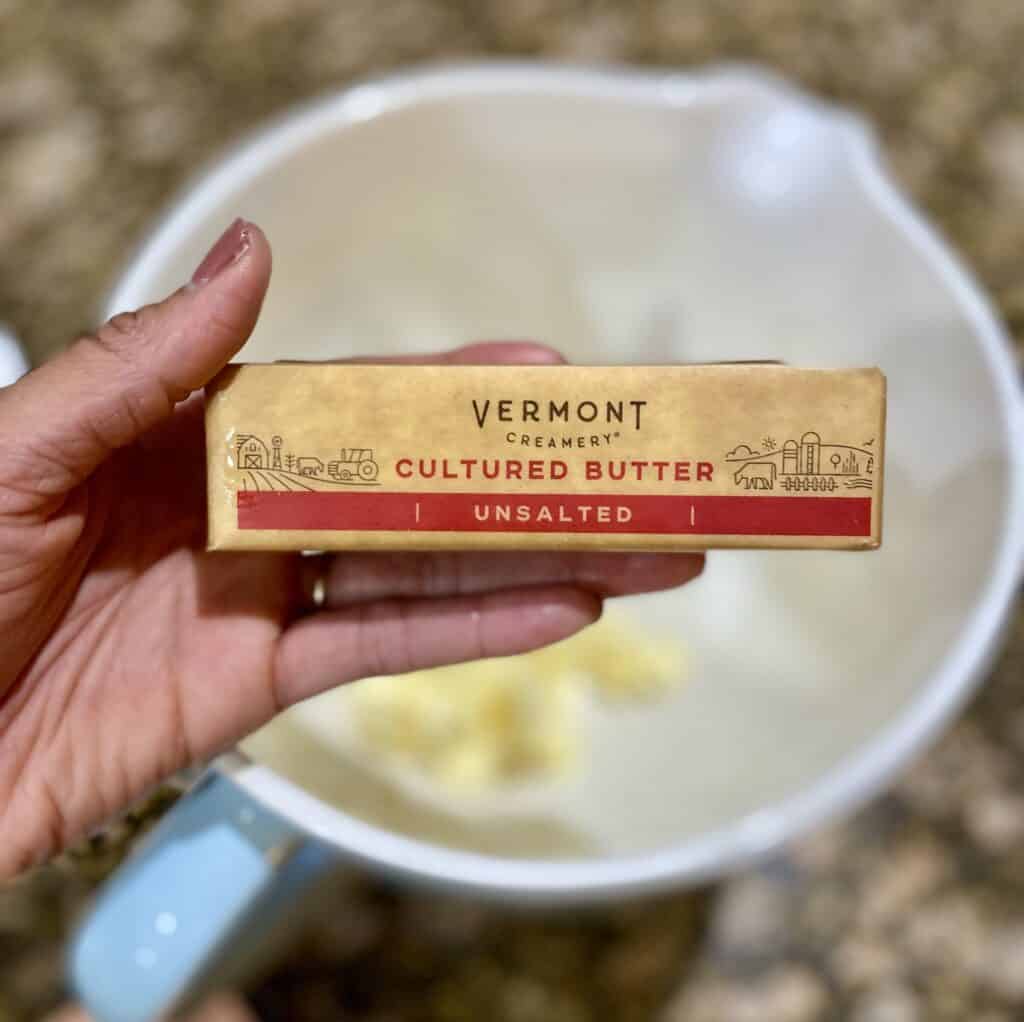
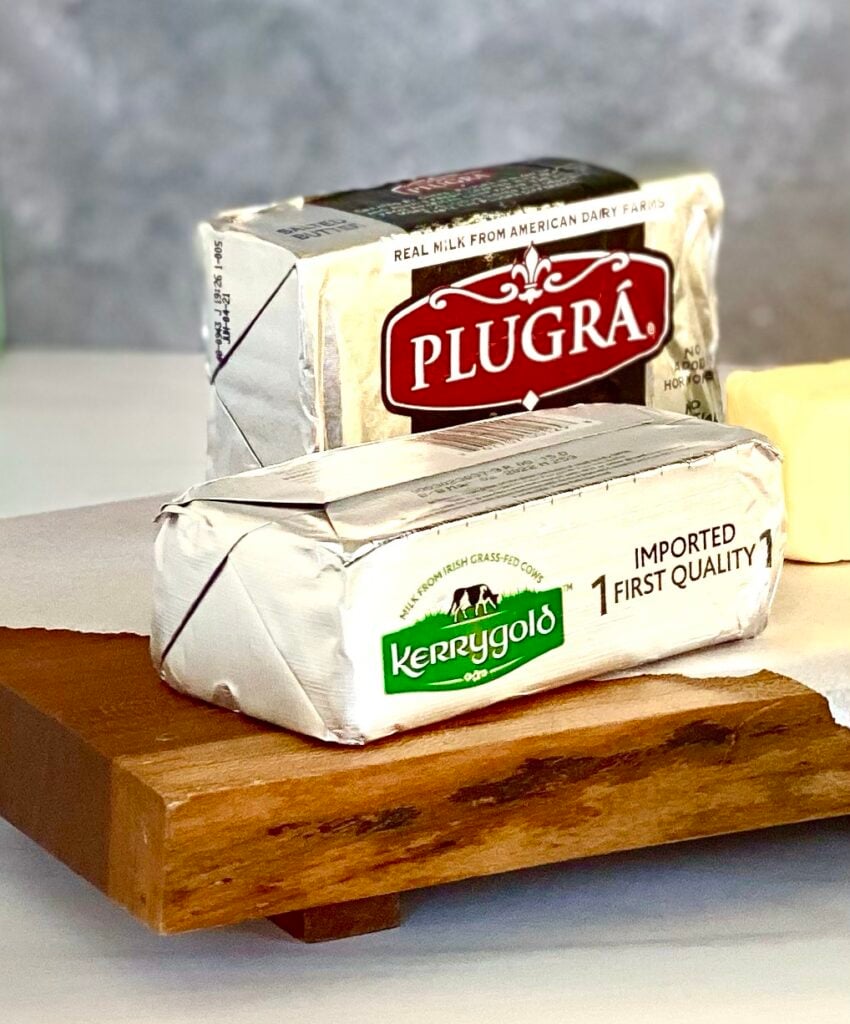
**note: when I say “European-style”, that just means that these are butters with at least 82% butterfat content that are not actually produced in Europe. A couple of examples of “European-style” butters are or Vermont Creamery (American) and Plugra (American).There is one other important distinction between American and European/European-Style butters that I’ll talk about more, below!**

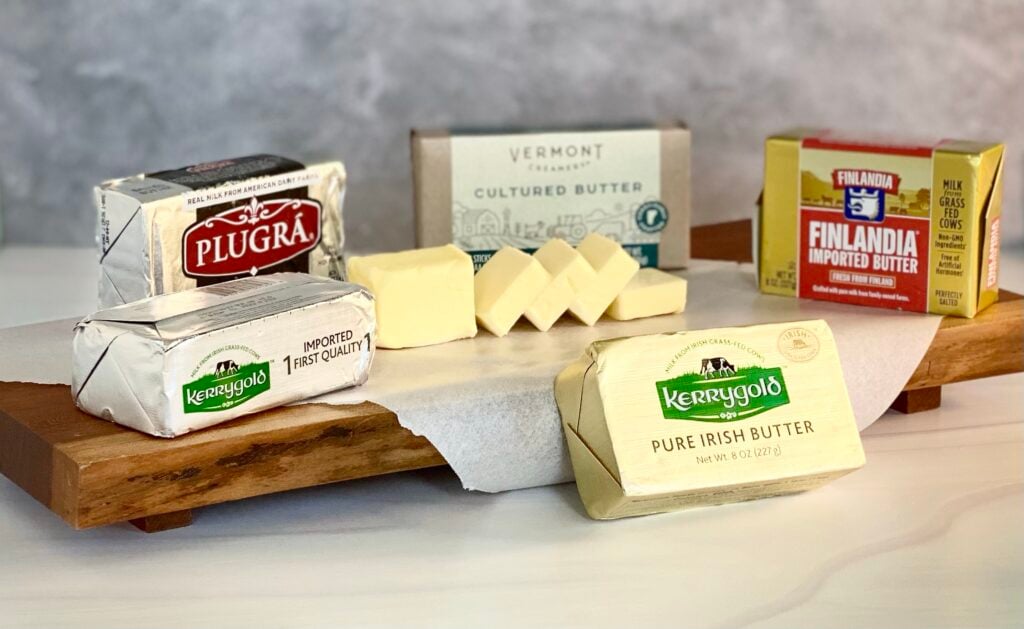
Some European/European-style butters can get as high as 86% butterfat. This next-level butterfat content is the glorious, gluttonous holy grail of butters and it’s meant to be slathered on warm, fresh artisan bread. This butter can be extremely hard to come by, but it’s worth the exorbitant price tag for a special occasion.

Butterfat?

Yes! Butterfat!

When milk or cream are churned, they separate into two main parts. Butterfat is the semi-solid element that separates from the liquid and is the main component in any butter.

The total difference between 80% butterfat Land O’ Lakes and 82% butterfat Vermont Creamery butter is actually much more than you’d think. Yes, baked goods with an 82% butterfat butter will be noticeably more buttery.

In addition, butter with a 2% higher butterfat content creates a softer texture for your cakes and adds a very noticeable golden color to your cookies.

Butter with a higher butterfat content also comes to room temperature more quickly for baking, since higher butterfat content means less water and that equals faster melt (this is a blessing for cakes and an absolute, soul-crushing, demoralizing curse for pies; you can overcome this with practice though.)

In short, when baking, less water and 82% butterfat takes your baked goods to the next level.

What is Cultured Butter?

Besides the butterfat content, the true distinction between traditional American and European/European-style butter, though, is that European/European-style butter is usually “cultured”. This does not mean that European/European-style butter has better manners and observes afternoon tea. This does mean that the milk or cream is infused with active cultures (bacteria) and allowed to ferment before churning, leading to a distinctly tangy flavor in the finished product.

Sweet cream butter (like Land O’ Lakes or Breakstone), on the other hand, is butter made from milk or cream and churned shortly after milking. Cultured butter is still butter from milk or cream, but with one distinctive difference: active cultures and time.

Active cultures are live bacteria that are added to milk and allowed to sit, or ferment, for a period of time. After that fermentation is done, then the milk is churned into butter. Since cultured butter is usually European/European-style butter, it’s typically churned longer than American butter in order to separate more fat from the water and achieve that higher butterfat content, in addition to that tangy je ne sais quois from the fermentation process.

My mouth is watering.

Salted vs. Unsalted?

To salt or not to salt…THAT, friends, is the question.

Salted butter is butter that has salt added during the churning process. The salt adds a bit of flavor and also serves as a preservative for the butter.

“Preservative” just means that natural salt helps butter last longer in the refrigerator case of your local grocer and in your refrigerator. I’m not talking about those preservatives that none of us can spell or say.

Unsalted butter is…butter without salt. Because it lacks salt, it doesn’t last as long on store shelves or in your refrigerator. Butter can be frozen in its original packaging, though, so if you find yourself doing bulk butter shopping, you won’t have to worry about this as much.

I cannot be the only person who does bulk butter shopping.

What I Use

In my experience, cultured and salted butter adds an unidentifiable umami to baking when it’s done correctly. This does take trial and error, though, so if you’re new to baking, I would recommend using an unsalted, cultured butter until you have developed your baking taste.

Baking with salted butter can be very rewarding, but it can quickly go wrong if you don’t remember to adjust the amount of salt in your recipe to accommodate for the salt in your butter. For beginners, this can be a lot to remember and a very frustrating experience.

My Recommendation for Baking

Like many things with baking, which butter you use is a personal preference. It’s my opinion that baked goods made with cultured, higher-butterfat butter taste noticeably better than baked goods made with sweet cream butter.

These are some examples.

BUT

If the only thing available is sweet cream butter, by all means use it! I would never encourage someone to avoid the experience of baking because they didn’t have the right butter. That’s neither the purpose of this post nor is it the purpose of this blog. There are so many beautiful experiences that you can have during the baking process; I would never discourage anyone from baking because they didn’t have cultured European butter at their disposal.

We don’t do elitism here.

Plus, anything you make at home is going to taste much, much better than just about anything you can buy. I believe in you.

My Favorites.

This is the point where I get to wax poetic about my journey to my favorite butter.

I’ve tried a bunch of them since I really got started in 2013. Of course I began with what I knew (Land O’ Lakes), and then bounced around with some other brands before I discovered cultured European-style butter.

I have never looked back. I tried Plugra first, since my sister recommended it.

But Then…

I stumbled onto Trader Joe’s “Trader Jacques” brand and Saints I was changed. Trader Jacques doesn’t get the credit it deserves but that’s only because of the fact that it’s not widely available at other stores. If you are in Trader Joe’s and you have the opportunity to stock up on their butter, BUY IT ALL.

Unless, you know, they tell you that you can’t. Otherwise this is a strong buy. The looks from other patrons at checkout would totally be them appreciating your knowledge of fine French butter.

Trader Joe’s is pretty far from me, and I wanted something more accessible for my Cupcakes and Cocktails birthday party a few years ago (or at least something that could be delivered so I could avoid looking like a butter creep in the store). So, I went on a search to find another perfect butter.

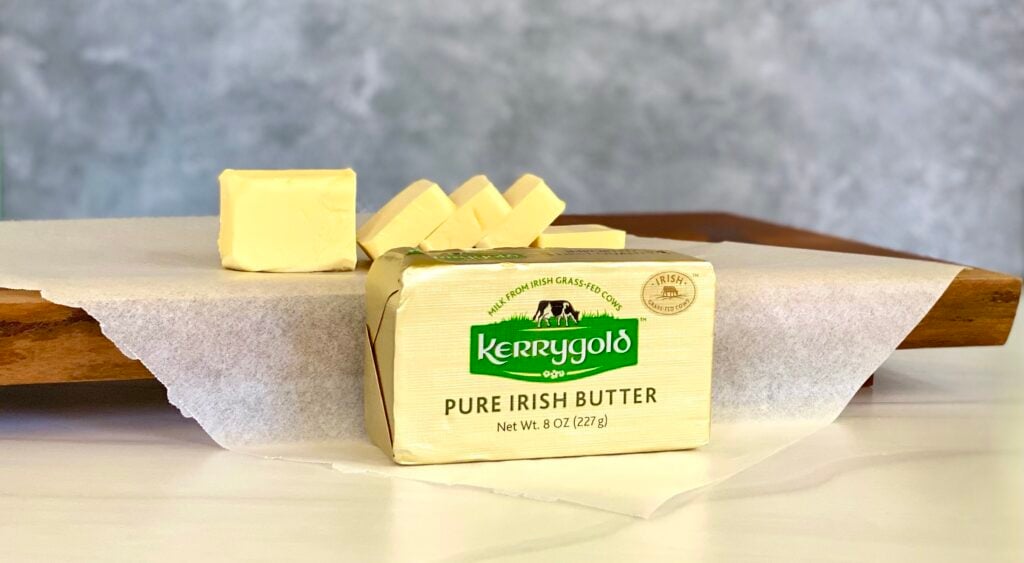
After lots of internet research and a couple of trials, I found Kerrygold. Until May 2021, this was my absolute favorite butter; I just knew that it would stay that way for my entire baking career.

I can actually smell butter right now.

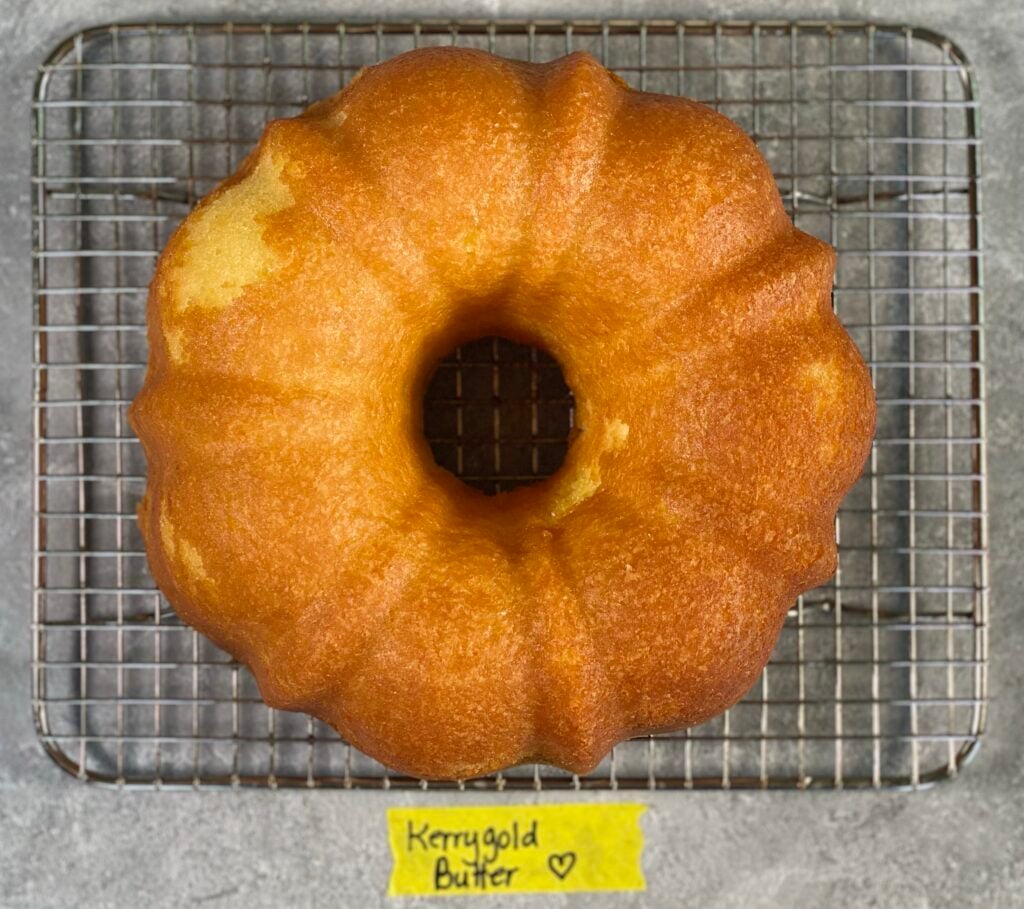
Kerrygold is an exceptional butter. It delivers a perfect crumb every single time. The color is so vibrant that it can actually look photoshopped in pictures. When I cut into a lemon pound cake, I get the most luscious and perfect aroma of butter. There’s nothing “wrong” with Kerrygold.

But Friends…

I’ve found a new favorite. And while I would still be happy to open a friend’s refrigerator and bake with whatever was in it, my own refrigerator is currently stocked with a butter whose color, flavor, and texture are second to none.

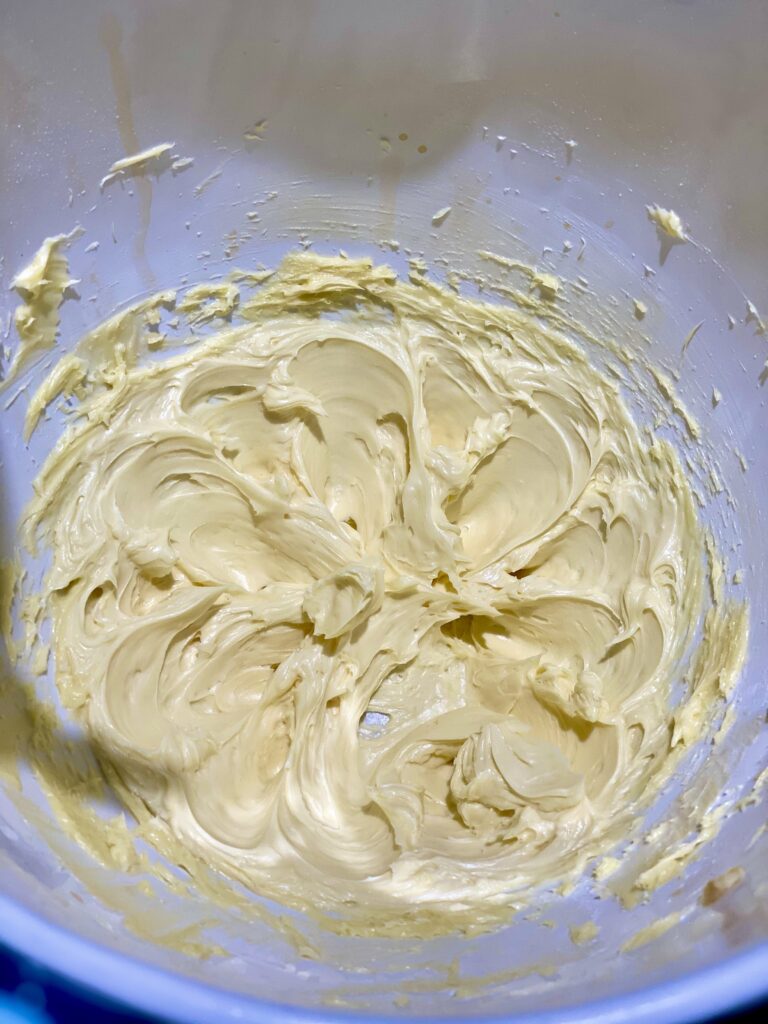
Currently, I prefer Vermont Creamery Cultured Butter with Sea Salt. The moment you open a stick of this butter, it’s crystal clear that you’re in for something very special. Right out of the box, the undeniable aroma (that of a very high quality, very fresh buttermilk) lets you know that this butter is way different than the others. For creaming butter and sugar, the 82% butterfat butter creams in recipes like an absolute dream.

This is Vermont Creamery butter. ??

The color of cakes and cookies is undeniably beautiful. And the silky texture that it creates in cakes in particular is unbelievable.

Whatever butter you choose, may you have incredible baking experiences and may you form many memories of laughing, hugging, and baking with your loved ones.

I hope you’ve found this post helpful! Don’t forget to subscribe while you’re here so that you can get notified with more helpful baking science tips!


Join the List

Subscribe to get a free video lesson and our latest content by email!

    We won’t send you spam. Unsubscribe at any time.

    Family Sunday Sessions: King Arthur Baking’s Jam Blossoms

    1
    Home » Featured Recipes » Page 39

    “If you bungle raising your children, I don’t think whatever else you do matters very much.” –Jacqueline Bouvier Kennedy Onassis

    Let me be painfully honest here, Saints: baking with children can be equal parts wonderful and frustrating.

    Wonderful because it’s time to hear their funny stories (this time was mostly about Roblox and friends) and truly connect with them while making something delicious (or, as my little ones call it, “unboxing a recipe”). I love seeing their baking knowledge expand before my eyes.

    It can be frustrating because I’m usually left alone to complete the task and to the clean up the mess. And also because my children love to play with ingredients and all I can see is {insert flying emojis here} when they do that.

    But they are high-energy children, they want to learn to bake, and we enjoy spending time together, so we sometimes find fun, accessible baking projects to do.

    We’re not making carrot cake together, folks. Usually, it’s cookies or some kind of all-in-one cake recipe that will teach them a smidge about baking science but not be so difficult that they get frustrated or bored. If the ingredients list exceeds 10, I don’t even attempt it with my children. Not yet!

    This is what we’re not doing. Not yet.

    This weekend, I wanted to make one of my childhood favorites: thumbprint cookies. Remember those? The shortbread cookies with the raspberry thumbprint in the blue tin? I would gorge on those when that blue tin came into the house. Long after the blue tin became a repository for errant sewing supplies, I would occasionally peek inside and pray for just one thumbprint cookie.

    King Arthur Baking’s jam blossoms are a take on those cookies. Here’s the recipe.

    Y’all. I am so happy that we did this together. This experience reinforced for me how much I truly do enjoy baking with my babies.

    Shhhhhh…she is very serious when she works.

    The children did most of the heavy lifting for this recipe so that I could take plenty of pictures.

    The Prep:

    First, because it’s spring and there’s never a bad time to add lemon curd to anything, I decided to use curd for some of our cookies. The children decided that they wanted strawberry preserves.

    My daughter immediately started the top oven before she did anything else. My son…tried to start the bottom oven. Two more inches and my mini chef will be ready!

    They…weren’t thrilled to do mise en place (the technique where you fully prepare all of your ingredients before starting to bake), but when it was all said and done, they understood. For more on mise en place and why it’s helpful for bakers of all ages, click here.

    No pictures of completed mise en place, Saints. The children wanted to keep rolling! #OuiChef

    In the Mix:

    We mixed everything except the flour until it was very smooth. Note: once the flour goes into a cookie recipe, you should only mix until the flour is incorporated if you want to avoid tough cookies.

    A Hot Time (Also, We Lost One):

    Cookies on the pan and into the oven! The recipe says to bake for 10-12 minutes, but we (I) turned them halfway. This is not a knock on the recipe! My ovens each have a “hot spot” so I always turn cookies in order to encourage even browning.

    This is the part where my son decided that he was bored and wanted to wash dishes. That is a bubble in his hair. My tiny hard worker.

    Finishing Touches:

    My beautiful sous chef made the glaze for the cookies all by herself. Bravo, Little One.

    Cookies out of the oven! Fillings on top! I could eat a bowl of this lemon curd from Sally’s Baking Addiction with a spoon. Seriously. I had to halve the recipe yesterday so that I could avoid doing just that.

    Last step. Both of them had developed an acute case of “boredom” by this point.

    We did it!

    These were so easy to make with my children. We laughed, they bickered (just a little), and maybe they learned one new thing about baking. If not, we had fun, so that’s really the ultimate win. It was definitely time well spent and I’m already thinking about our next baking adventure.

    Thanks for reading!

    Join the List

    Subscribe to get a free video lesson and our latest content by email!

      We won’t send you spam. Unsubscribe at any time.

      Do I Need Baking Soda or Baking Powder?

      If you don’t really know the difference between baking powder and baking soda, you’re in good company. Most people have absolutely no idea what the difference is.

      Full disclosure: I was among your ranks until just a few years ago. But now I have the ability to help, so help I will! Let’s do this.

      In this post:

      The Definition of Baking Soda and Baking Powder:

      They are both chemical leaveners.

      To be completely technical (sorry…baking nerd here), leavening is the ingredient that causes a chemical reaction in your dough or batter, forcing it to expand, or rise.

      There are natural leaveners (for example, yeast and whipped egg whites) and chemical leaveners (mainly baking soda and baking powder, and occasionally cream of tartar).

      For this post, we’re focusing on the two most common chemical leaveners found in a home kitchen: baking soda and baking powder.

      This is a photo of baking powder and baking soda
      These two!

      Chemical leaveners work by creating a reaction between a base (or alkaline substance) and an acid (or acidic ingredient). The result is carbon dioxide bubbles that force your batter to expand. It’s the same chemical reaction that we learned about in middle school science with that papier-mâché volcano and the red food coloring. Remember that science project? Same principle.

      It sounds like an oversimplification but it’s really not! That’s truly all there is to baking powder and baking soda. They’re not so intimidating when you think about them like that, are they? Let’s go on ahead and break it down.

      Baking Soda Needs Acid.

      In chemistry terms, baking soda (or bicarbonate of soda) is a base. That means that in order to create bubbles, it needs something acidic. Think of baking soda as “needing a little oomph”, like I did here with white vinegar:

      A little oomph.

      Common examples of acids used in baking soda recipes are buttermilk, lemon juice, vinegar, brown sugar, yogurt, apple sauce, cream of tartar, and even yummy molasses.

      For people who are making my Red Velvet Cupcakes or my Ruby Red Velvet Pound Cake, remember that red velvet preparations require natural cocoa powder and baking soda. This is because natural cocoa powder is naturally acidic, and red velvet requires additional white vinegar to get the deep red color that we all expect. Well, the additional vinegar is a straight acidic ingredient. So baking soda would pair with natural cocoa powder for red velvet cake recipes.

      This is a photo of baking soda and natural cocoa powder.
      Baking soda and natural cocoa powder are best buddies. Fun fact: this tends to be more kid-friendly.

      Baking soda needs to be completely neutralized by the acid in your recipe, or you can end up with a soapy or metallic aftertaste. Ever notice this taste in your cupcakes? Too much undissolved baking soda is the likely culprit.

      If a recipe uses baking soda, it’s probably using at least one of the acidic ingredients above. That means that you likely don’t have to worry about soap or metal in your mouth. BUT it’s important to measure baking soda properly (no heaping teaspoons needed!) in order to ensure that you’ve got the right proportion to make the proper chemical reaction and to ensure that all of that baking soda dissolves.

      A tiny bit of this stuff goes a very long way. For every cup of flour in your recipe, you usually only need a very level quarter teaspoon.

      Baking Powder Has Acid.

      Baking powder contains baking soda.

      I think of baking powder as baking soda 2.0. Because baking powder is actually baking soda plus the acid that it needs in order to react and create those glorious bubbles. There’s also a third ingredient (usually cornstarch) that acts as a mediator, to keep the acid and base from combusting in the can and rendering the whole thing useless before you even get started.

      Long story short? You don’t have to do mental gymnastics in order to figure out how much acid you need to neutralize the baking soda that’s contained in baking powder because it’s already done for you. For this reason, baking powder is popular in home baking recipes, since there’s much less guesswork involved.

      It’s still potent though, and using more than necessary can lead to dramatically bad results. So…still no heaping teaspoons please and thank you.

      When developing recipes, the general rule of thumb that I use is one level teaspoon of baking powder for every cup of flour.

      For chocolate cake bakers, baking powder is what you use when you’re using Dutch-process cocoa powder. Dutched cocoa powder is cocoa powder that’s been stripped of its acidic properties, and thus it won’t react with your leavening. That’s what makes it the perfect leavening for my Ultimate Chocolate Pound Cake.

      This is a picture of baking powder and dutched cocoa powder.
      Baking powder and Dutched cocoa (plus the occasional coffee bean) is for us grown folks.

      Can They Be Used Interchangeably?

      To quote the inimitable Dr. Ian Malcolm (Jurassic Park, circa 1993): “Your scientists were so preoccupied with whether or not they could, they didn’t stop to think if they should.”

      Same energy here.

      This is a photo of baking powder and baking soda.
      These aren’t the same.

      It is true that baking soda and baking powder share a primary ingredient, and thus, in theory, you should be able to use them interchangeably with some minor tweaks.

      As we learned from Jurassic Park, theory and practice aren’t always aligned.

      The switcheroo math for baking powder and baking soda is quite tricky. Because baking soda is, pound-for-pound, much more potent than baking powder, and also because of the fact that baking powder already has the acid that baking soda needs, it’s not possible to do a simple 1:1 swap.

      Swapping baking soda for baking powder means that you also have to add additional acid to your recipe in order to make the leavening work properly. Swapping baking powder for baking soda means that you might have to reduce the amount of baking powder and any other acidic ingredient in your recipe in order to avoid an over-leavened cake.

      There’s…a lot of chemistry involved, and I don’t typically recommend ingredient swaps that will force you to significantly adjust two or more ingredients in your recipe. You can pretty much expect an unpleasant taste and texture issue when you do that.

      While I encourage trial and error for more advanced bakers in the recipe development process, for beginners I think it’s important to stick to the recipe as written. This will help build confidence in the kitchen and will also help build your baking science competence! Remember, today’s advanced bakers were yesterday’s rank beginners!

      With experience, you’ll get to the point where your experimentation will have a high probability of success, because you’ll understand the science behind these powerful ingredients. But best to learn the science first. To quote Smokey (Friday), “you gotta crawl before you walk.”

      TL;DR version: Can they be used interchangeably? Kinda. Should they? Probably not. (I don’t recommend.)

      Why Do Some Recipes Use Both?

      Sometimes, you’ll find recipes that use baking powder and baking soda. I’ve found that this happens mainly because the recipe writer intended to leave a bit of the “tangy” flavor that comes from the acidic ingredient.

      Used in just the right proportions, the acid in the baking powder and the acid in the buttermilk will dissolve all of that baking soda, whilst leaving just enough of a yummy, tangy flavor from the buttermilk to really make your recipe special. So, for many recipes that use both, it’s usually more about adding that je ne sais quois that will take the taste of the recipe over the top.

      There are some times that both baking powder and baking soda are needed to make a cake rise to the level that the recipe developer intended. Additionally, sometimes using both will help your confections achieve an even more perfect golden brown.

      How Do I Know if I’m Working with Good Baking Soda or Baking Powder?

      Test it before you start! To test baking soda, add 2 tablespoons of white vinegar to 1/4 teaspoon of baking soda (like I did in the video above). If it bubbles vigorously (like it did in the video above), then it’s good to go!

      Some people replace baking soda every 30 days. I bake almost every day and even I don’t go through a box of baking soda a month. Because potent. If you do a quick test, you can know for certain whether you’re working with viable baking soda. It’s not necessary to waste good baking soda every 30 days.

      To test baking powder, just add a quarter teaspoon of baking powder to 63 mL (1/4 cup) of very hot water. The baking powder should fizz immediately.

      I used boiling water. My Pyrex can take it.

      Whether you’re testing baking soda or baking powder, you’re looking for a vigorous reaction. If you don’t get that vigorous reaction, I recommend replacing it before you start. I would hate to see you get frustrated because you spent two hours making something that doesn’t ultimately rise.

      Baking soda finds a second life under my kitchen sink, though. It’s a great additive to dish detergent for stuck-on food (and I love love love my Scrub Mommy sponges and Dawn Powerwash for the cleaning jobs too).

      I hope you enjoyed this primer on baking soda and baking soda. Don’t forget to subscribe in order to get Begin with Butter baking tips delivered right to your inbox! Until next time!

      The Art of Mise En Place

      This week’s tip is so simple, I honestly debated whether I should give it any attention.

      But when I realized just how long it took me to learn this tip, and how horribly I struggled until I learned it, I decided to write this post IMMEDIATELY.

      If this post creates an “AHA!” moment for one person, then it will be totally worth it.

      See, I was born a menace with flour and sugar. A laughingstock among my family because I could not get it together.

      On Sundays, my mother would half-heartedly bake the most flawless creations whilst simultaneously catching up on the week’s gossip with auntie so-and-so on the beige kitchen phone with the extra long cord.

      The official phone of the 80s.

      I caught myself trying to help. And failing miserably every time.

      I remember one time when I interrupted my mother as she was on one of these Sunday calls, and she gave me the stare that could instantly end life. In my defense, I was asking a baking question. But whooooo boy that was a close call.

      My incompetence continued even after I started baking in earnest in 2014. By that time, I’d evolved enough to at least check to see if I had all of my ingredients. But it took another year before I realized that one of the biggest impediments to my baking success was the fact that I was not preparing my ingredients before I started.

      Mise en place, y’all. It changed me.

      Mise en place simply means “everything in its place” in French. It’s the process of preparing your ingredients before you begin cooking or baking, and it can instantly take you from frazzled mess to calm and controlled in the kitchen.

      1. First, a Note About What Mise en Place is NOT.

      Mise en place is not simply checking to see if you have all of the ingredients. It’s also not this:

      While it’s wonderful to take out your ingredients before you begin baking, in order to truly be prepared to bake, those ingredients need to be measured and prepared for their final use in your recipe.

      For example, both of these are 227 grams of butter. But only one of them is ready to go into a recipe:

      Many recipes call for flour, baking soda/baking powder, and salt to be mixed together and set aside while you mix other ingredients. This means that flour, baking soda/baking powder, and salt need to be measured, placed in a bowl and gently mixed before being put to the side until it’s their time to shine in the recipe.

      It does not mean that flour, leavening, and salt sit on the counter in their respective containers until it’s time for dry ingredients to be added to your recipe.

      Nope. This isn’t it.

      I’m writing this post for younger me, clearly.

      2. How to Get Started with Mise en Place

      The first step to mise en place actually doesn’t involve a single ingredient, spoon or bowl. The very first step is to read your recipe from beginning to end.

      I can see some of y’all right now:

      Seriously! By reading your recipe, you’ll understand what ingredients you need, and if you need to do anything with those ingredients before they’re incorporated into your recipe.

      Some recipes have what I call “Easter Eggs” in them, and not the cool Stan Lee kind. These eggs are unique and/or time consuming preparation steps that will stop your recipe dead in its tracks if you don’t do them before you start creaming butter and sugar. I honestly used to think that these Easter Eggs were laying in wait to destroy me.

      Want to feel anxious during the baking process? Jump into a raisin bread recipe before you read the whole thing. When you get to the “incorporate plumped fruit” part of the recipe…CHAOS. DISASTER. END SCENE.

      That’s a touch dramatic, but you’ll probably have to start over. #HelloFoodWaste

      For more about Easter Eggs in recipes (and also to learn why you might have to start over!), take a look at the video, below at the 5:00 mark. The only way to avoid surprises in the baking process is to read the whole recipe before you start. It’s ten minutes that will make all the difference. I’ve made this mistake dozens of times so that you don’t have to.

      You’re welcome.

      3. I’ve Read My Recipe. Now What?

      After reading your recipe, it’s time to gather your tools and ingredients! For reference, what you see at the beginning of the video, below, is me (and a soft cast…ugh) at the point where I’ve gathered all of my ingredients.

      The reason that I take out all of my ingredients at the same time is simple. I want to know if I have all of the ingredients and tools that I need before I start. This is also an opportunity to check ingredient freshness.

      In theory, you have all the time in the world to check the reactivity of your baking soda before you incorporate it with your other dry ingredients.

      When your gingerbread is in the oven with five minutes left and it’s clearly dense as a brick? It’s a wee bit late at that point.

      Maybe soak that sucker in Irish Cream and pretend like you intended to make drunken gingerbread brownies all along. I dunno.

      (I’ll report back after I’ve properly…researched this).

      Gathering ingredients is an important step toward completed mise en place, but it’s not the only step.

      4. Prep Your Ingredients!

      I’m a very visual learner, so for those of you like me, this is where I’ll recommend going to the video at 6:25 and seeing the process for yourself.

      Some of you are still here? Okay…

      The end goal of mise en place is to have all of your ingredients ready to incorporate into your recipe before you get started mixing your batter or dough. So, the first thing I do (as you’ll see in the video around, say, the 6:25 mark) is to put my ingredients in the same order on my counter as they appear in the recipe.

      This is a way for me to double check that I actually have all of my ingredients, and to make sure that I have enough of each ingredient.

      Once my ingredients are lined up, I gather my tools (measuring cups, measuring spoons and bowls), and mix and measure, using — you guessed it — my trusty digital kitchen scale. For most of my pastry baking, this process goes something like this:

      • Add butter directly to mixing bowl;
      • Place sugar in a small bowl and set aside;
      • Combine “dry” ingredients (flour, leavening, salt, etc.) in one prep bowl, and put that bowl next to a second bowl that the dry ingredients will be sifted into;
      • Crack eggs into another prep bowl or jar;
      • Measure liquids in jars or liquid measuring cups; and
      • Put extracts (lemon, vanilla, etc.) next to the mixer with their respective measuring spoons.
      If you’re measuring liquids in grams, you can use jars instead of liquid measuring cups. But you’ll need a kitchen scale for this.

      Mise en place is a very simple technique with a very fancy name. But it’s a simple technique that can help you build tremendous confidence as a baker and put you squarely in control during the entire process.

      Did you find this helpful? Do you still have questions? Let me know in the comments below! And don’t forget to subscribe so that you can get Begin with Butter directly in your inbox!

      The Importance of Digital Kitchen Scale

      0

      Today, dearest BBs, I want to share a tool that singlehandedly changed me from a middle-of-the-road baker to a “WOW” baker. And that tool, BwB Family, is my digital kitchen scale. While I love my stand mixer, it is not the thing that transformed me as a home baker.

      It is true that, in just about every baking show or YouTube video, you will see, WITHOUT FAIL, a gorgeous (probably KitchenAid) mixer on the countertop. It’s an impressive piece of equipment to be sure, and let’s be honest, it’s a bit of a status symbol for home kitchens.

      It’s a misleading status symbol, since it’s not the most important piece of equipment in a home baker’s kitchen. On the “scale” of importance (😝), a digital kitchen scale is the most important piece of equipment by far.

      BBs, you know I’d never lead you wrong. Hear me out.

      In this Post:

      A Digital Kitchen Scale Helps You Become Consistent. Immediately.

      With a digital food scale, you’ve now entered into a very happy place: the place where ingredients are measured by weight, and not volume.

      I hear you all. “Shani, what are you talking about?”

      In the United States, we customarily measure ingredients by volume (for example, “cups” of flour and sugar), and not by their weight (think…bathroom scale). Volume measurement means that you are measuring how much space an ingredient takes in a container, without regard to how much that ingredient actually weighs. It’s the way our mothers, and their mothers, and their mothers measured ingredients. It’s the way that recipes were passed onto us on 3” x 5” index cards with gorgeous, careful cursive script.

      Some of our mothers and grandmothers and great-grandmothers even have fancy, evolved ways of using volume measurement (again, “cups”).

      Take flour for instance. Some swear by the scoop and sweep method. Some prefer to spoon flour into a measuring cup. Some “aerate” the flour by stirring it first, then use their measuring cup to scoop a cup of flour. Some real OGs have one specific mug in their cupboard whose sole purpose is to measure everything between an eighth of a cup and two cups. All of these aunties can bake. I’m absolutely not debating this point.

      Every auntie swears by her “tried and true method” for measuring flour, just like every auntie swears that she has the one true recipe for macaroni and cheese. Using these volume measurements, you can expect to get somewhere between 120 grams and 160 grams of flour in a one-cup measuring cup. I have no idea how much flour goes in that special baking mug. That’s on another level.

      But, for the measuring cup? It sounds like a big difference because IT IS A BIG DIFFERENCE.

      Don’t believe me? Look below. I’m aiming for 128 grams:

      As you can see, all of the methods yielded more than 128 grams. The typical “scoop and shake” method that is so common in home kitchens yielded 157 grams of flour, even after I aerated it! It’s enough of a difference to ensure that you’ll never be able to replicate a recipe twice, and also that you’ll consistently over-flour basically everything.

      This is extremely frustrating for any baker, but I think it’s most frustrating for a beginner, who’s not likely able to pinpoint the exact point when a recipe went completely off the rails. So, as a beginning baker with dense, heavy buns, you’re left wondering both what went wrong, and why it went wrong. That’s not the way to build baking confidence.

      Aunties, I love all of you. I respect every pound cake, layer cake, and rum cake you’ve ever made for me. I appreciate all of the recipes you’ve shared over the years. But I’ve found that measuring ingredients by volume creates vastly different products every time I bake, and that frustrates me to no end. Much respect to those of you who can do this. For real. I was not born with this gene.

      For us mortals, using metric measurement for baking is an entirely different experience. Going back to our flour example, if a recipe calls for 256 grams of flour, you can just…add 256 grams of flour. No scooping. No sweeping. No spooning. No aerating. No flour gymnastics. Just you, your mixing bowl, your digital kitchen scale, and 256 grams of flour.

      The next time I make the same recipe? 256 grams of flour. Every time after that? 256 grams of flour. Measuring ingredients by weight is the fastest way to create consistency in your baking.

      Consistency Breeds Confidence in the Kitchen.

      Using a digital food scale is literally the first tip I give to people who are intimidated by baking, since the first key to becoming a confident baker is to use tools and techniques to build consistency. Basically, this is the home run of consistency tips.

      When you’re able to consistently recreate delicious cookies, cakes, breads and pies, your confidence builds to a crescendo. Maybe not a crescendo, because those build and then fade, but you get the point. Your confidence swells when you can make delicious baked goods consistently.

      Your confidence builds even more when friends and family start begging you to make them over and over again, and you’re able to deliver. How can you deliver, you ask? By weighing your ingredients on your digital food scale.

      The quickest way to consistency and confidence is a digital food scale. I purchased my first one on Amazon for less than $15.00, and it changed everything for me.

      A Digital Kitchen Scale Avoids Ingredient Waste.

      When you use a digital food scale to weigh ingredients, you’re using exactly how much you need in a particular recipe. Taking the flour example, above, every time I used another method, I ended up with much more than one cup of flour. Not only would this lead to an over-floured product, it means that I’m actually wasting ingredients every time I bake. {insert flying money emoji here.}

      I have two children and no extra money lying around. This alone is reason enough to justify a digital food scale.

      How to Choose a Digital Kitchen Scale.

      This is honestly a matter of preference. I’ll link the three digital scales in my kitchen, but here are the most important things that I look for when considering a kitchen scale:

      1. A scale with at least an 11-pound capacity;
      2. A scale that measures accurately (you can purchase a small set of weights to test and calibrate your scale here)
      3. A scale that provides metric measurements (grams);
      4. A scale with a larger platform for measuring (so that big bowls can sit securely without the threat of tipping over and dusting your entire kitchen in a fine mist of confectioner’s sugar); and
      5. A scale that is durable enough for daily use (no glass platforms for me).

      I do pay attention to scale design, because I do love sleek kitchen gadgets, but function is absolutely greater than form when it comes to this kitchen tool.

      As promised, here are the three that currently live in my kitchen. They’re all high performers on my list, and I honestly think you can’t go wrong with any of them. **Note: this post contains affiliate links, but I do use all of these scales in my kitchen to this day**.

      1. Here’s the first digital kitchen scale that I ever owned. It’s a great scale for beginners, even though it does not have a large platform: Ozeri Pronto Digital Multifunction Kitchen and Food Scale
      2. My sister gifted me this digital kitchen scale. It’s featured in the video, below, and has been an absolute workhorse for me for several years: OXO Good Grips 11 Pound Food Scale with Pull-Out Display, Stainless Steel (I recently went on vacation and purchased the new version of this scale, found here.)
      3. This is my most recent acquisition and I love it like a shiny new convertible (electric, of course): Nicewell 22-lb Digital Kitchen Food Scale

      How to Use a Digital Kitchen Scale

      A digital kitchen scale is useless in your kitchen when used incorrectly. So, to use that scale, you’ll need to do the following:

      • Turn on your scale (I’ve forgotten to do this a number of times)
      • Set your scale to g or kg (this is metric measurement), and not oz (this is volume measurement)
      • Place your bowl or container (I’m particularly fond of these deli cups) atop the scale and press the “zero” or “tare” button. This will reduce the weight back down to zero so that you’re only weighing the ingredient (and not the extra weight from the container)
      • Carefully add your ingredient to your bowl or container. Because spilled ingredients that end up on your scale will still be counted in your measurement, even if they don’t end up in your mixing bowl!
      • Set that ingredient aside and move to the next. I do this procedure for my flour, sugar, butter, liquid, and sometimes my eggs.

      For more on food scales (including a hands on tutorial about how to use one, and step-by-step directions to help you make delicious snickerdoodle cookies), take a look at this video!

      See you soon!