
Hello Friends! Welcome to summer baking! When it is too hot to turn on an oven, but we persist anyway. When our pie crusts melt right underneath us, but we stress out and make them anyway. But this is also a perfect time to work on those techniques that will improve our baking in the fall, so here we are!
I’ve been on a bit of a mission since the beginning of Begin with Butter, to help people reach their personal baking zenith. It’s the central premise of BwB really to leave you a better baker than I found you (hopefully!).

Today, I want to reiterate that there is one technique that, if done correctly, will dramatically improve your baking almost instantly.
What is that step, you ask?
Creaming butter and sugar properly.
In this Post
This, Again?
Yes. Again. Because this oft-overlooked technique is an important key to your baking success. If you want to see the original post about how to execute this fundamental technique, take a look right here! You can read about it, see photos of it, and even watch two different videos.
I…like to be thorough.
Today’s post is more about why it’s important, as well as a deeper dive into how to increase your chances for success with this ultra-important technique.
Y’all. I am on a crusade. Because this is one of the most important keys to good baking.
Why It’s Important
When we cream butter and sugar together, we’re doing a couple of things:
- We are combining the butter and sugar to make a cohesive base for our cake batter or cookie dough; and
- We are filling this mixture with air, to help with the rise and texture of the finished product.
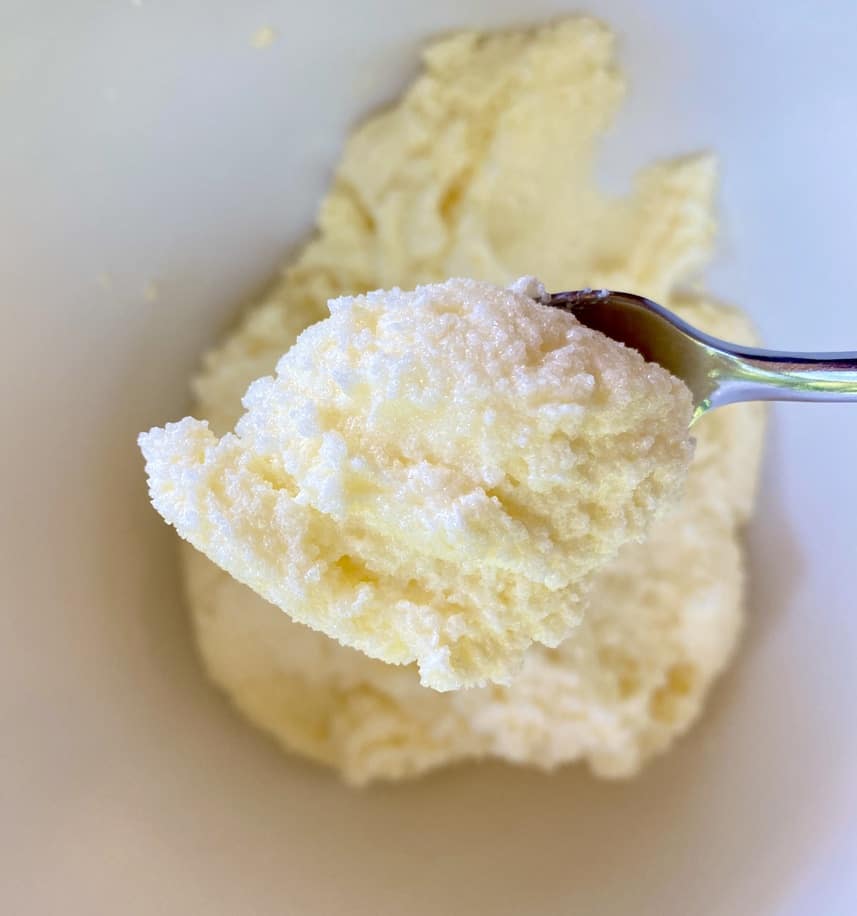
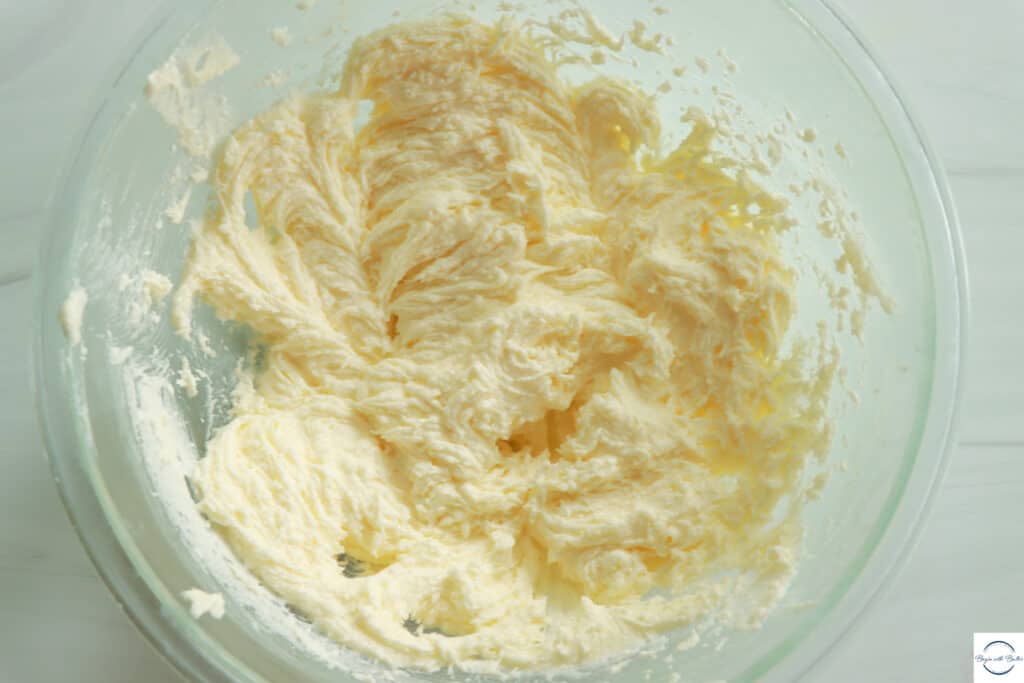
When I say that it should be creamed properly, this is what I mean:

Or this…
And I am NOT talking about this:
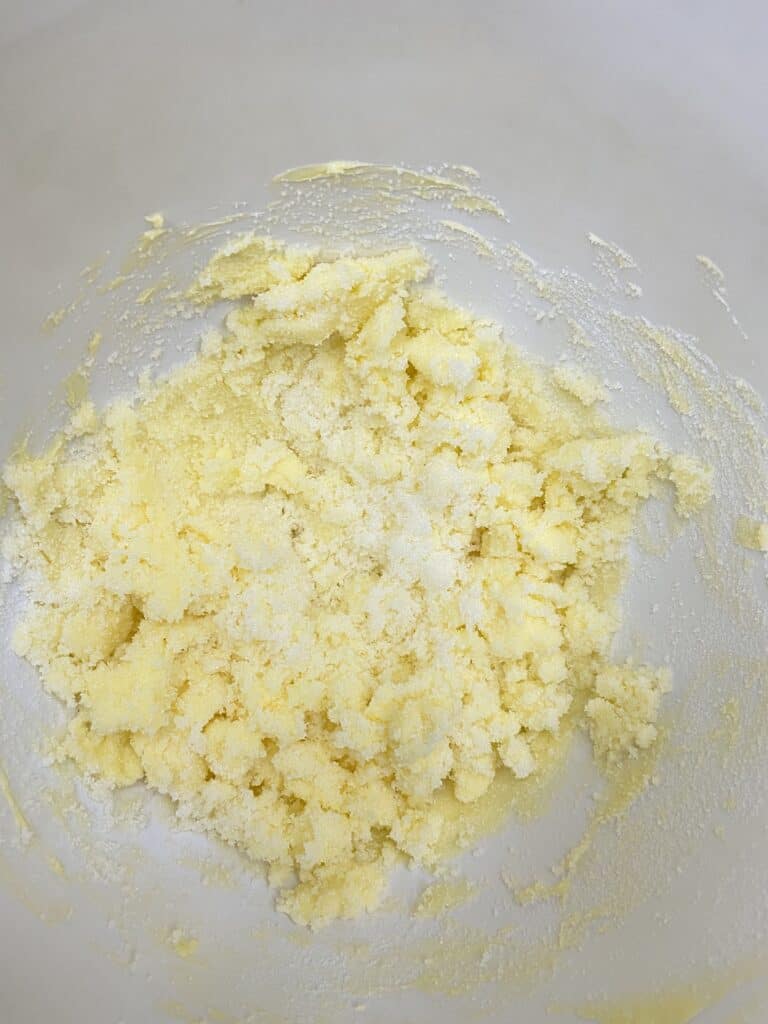
The third picture is completely different from the first two. While it’s the same batch of butter and sugar from the other two pictures, it’s still quite crumbly, and the butter itself is still very yellow.
What’s the Difference and Why Does it Matter?
The third picture is what many people mistake for “creamed” butter and sugar. They start adding their eggs when the butter and sugar are still crumbly, and it’s a huge mistake to do so. Because you’re not going to get the full, glorious impact from the technique, and that’s a shame.
When you cream butter and sugar together properly, you’re creating tiny air pockets where the carbon dioxide from your leavening can get all snuggly. That’s what creates the biggest boost of rise in your cakes and cookies, and helps give you a tremendous texture, or crumb.
Properly creamed butter is: 1) much more voluminous than it was in the beginning; 2) fluffy like a cumulus cloud; and 3) substantially lighter in color than the yellow butter that you started with.
Need a refresher on the actual technique for creaming butter and sugar? I’ve got you! Click here for the blog post, click here to watch a video on how to do this technique with a stand mixer, and click here to watch a video on how to do this technique with a hand mixer.
Now that we know why it’s important, I want to share how to get the best results from this technique.
Start With Just the Butter
I’ve recently (within the last couple of years) started the creaming process by just mixing the butter until it is completely smooth. I am now a full convert to this part of the technique.
I said before that the whole point of creaming butter and sugar together is to force air into your batter or dough. That that impacts the rise of your baked goods during the baking process, and ultimately the texture of your finished product. I’ve found that starting by smoothing the butter all by itself enhances this effect because it forces even more air into the final creamed butter and sugar. And this, Friends, is good.
Adding the sugar to already-smooth butter helps distribute the sugar more evenly, which means an even more uniform mixture during the creaming process. With good technique, that means that the whole mixture will end up uniformly fluffy and perfect.
How Long Does it Take to Properly Cream Butter and Sugar?
It can take anywhere from 2-10 minutes, generally, to properly cream butter and sugar. This depends on a few variables:
- Whether your butter was actually room temperature when you started;
- The specific fat(s) and sugar(s);
- How much butter and sugar you’re creaming together;
- The equipment you’re using (because it will generally take longer with a hand mixer than a stand mixer); and
- The speed of your equipment (I don’t run any mixer over speed 3 or 4 for creaming butter and sugar…there is literally no need to do that).
Stay with me, Friend, because I know you’re looking like this right now:

Your butter needs to be room temperature to start. This is the most important step.
Starting with room temperature butter is of paramount importance for this technique. By “room temperature”, I mean that your mixer beaters should go through your butter very easily without any force. This generally happens for butter that’s been left out for at least an hour.
Starting with cold butter will make it extremely difficult to get the proper fluffy texture in your creamed butter and sugar. If it creams properly, it’s going to take much more effort with your mixer.
And that’s a big “if”.
Don’t worry. We’ve all made this mistake.
I forgot to take out my butter!
I’m going to share a little tip my Mommy shared with me when I was a kid. If your butter isn’t at room temperature before you start baking, put it in your bra for about 15-20 minutes while you grab the rest of your ingredients and check your recipe.
The whole point is to get body heat on the butter so that it can gently come to room temperature in a hurry without melting. If you don’t want to put it in your bra, you can also put it in your waistband. It’s a little unorthodox, but I can confirm that it works.
Of course, you want to keep it in the wrapper when you do this. But, if you forget to take your butter out of the refrigerator at least an hour before baking, putting your butter in your bra or waistband for 15-20 minutes will help get it where it needs to go.
(And by the way, your liquid and eggs should be room temperature too, but please don’t put those in your bra.)
The amount of butter and sugar matters too.
If you’re doubling a recipe, or if you’re working with a recipe that uses a lot of butter and sugar, expect the creaming process to take longer. This is just chemistry and physics at work. It will take longer to cream three sticks of butter and 600 grams of sugar than it will to cream one stick of butter and 200 grams of sugar. Expect it to take at least 2-3 minutes longer, but the other variables could make this process take even longer for large loads of butter and sugar.
Just account for this variable when you’re planning for your bake and you will be fine.
The specific fats and sugars matter too.
The specific fats and sugars definitely make a difference when creaming butter and sugar. While we often refer to butter and sugar when talking about this technique, there are actually multiple types of solid fats that we use in baking. Common fats used are butter, cream cheese, and even vegetable shortening. I often add a tablespoon or two of vegetable oil to the solid fats to give my cakes a big punch of moisture too.
Common sugars for creaming are granulated sugar and brown sugar (light and dark). We cannot use confectioner’s sugar for this step because it won’t create the needed texture. Save the confectioner’s sugar for buttercream!
Now, keeping in mind that all solid fats should be at room temperature, there is absolutely nothing like creaming butter and cream cheese together with granulated sugar. It’s my most favorite combination. No other fat/sugar combination beats the lightness and fluffiness of this mixture.
Creaming butter and brown sugar is different from creaming butter and granulated sugar. First, expect it to take about a minute or two longer to get a brown sugar mixture to a cloud-like state. That’s solely because of the molasses in the brown sugar. Also, if you’re using brown sugar, make sure to scrape the sides and bottom of your bowl more frequently. I scrape the bottom and sides three times on average for a granulated sugar mixture. For a brown sugar mixture, it’s usually at least four, if not five. Be patient with brown sugar. It takes a little more time, but it will get there. And it will be worth it.
Equipment Matters
This one is simple. A stand mixer will generally do this technique more quickly than a hand mixer. It has everything to do with power in the stand mixer, and nothing to do with technique. Expect a stand mixer to take 1-2 minutes less than a hand mixer because of the more powerful motor.

That being said, there’s absolutely nothing that teaches feel for this technique like a hand mixer. With a hand mixer, you can actually feel the moment that the butter and sugar have reached that beautiful, cloud-like texture. Unless you’re standing over your stand mixer (no judgment from me, I’ve done it too), you could miss this crucial window.
The Speed of Your Mixer Matters
A few months ago, I wrote a whole blog post about how I broke my first stand mixer. the TL;DR version is that I burned out the motor by running it too high for too long.
From that agonizing experience, I learned to slow down with my baking. There was absolutely no reason to run that mixer at that speed for extended periods of time. Running a KitchenAid stand mixer on speed 7 for creaming butter and sugar is just…outrageous. It puts way too much unnecessary stress on your motor. That wear and tear builds up over time. And if you bake all the time, you will expedite your mixer’s demise.
Since that unfortunate time, I tell my students that there’s absolutely no need to run your mixer (stand mixer or hand mixer) above speed 3 or 4 to cream butter and sugar. Indeed, you can get through an entire mixing process at this speed. Save your mixer and your sanity and go slowly.
Now…Go Forth and Bake!
Friends, I hope you’ve found this blog post exceedingly helpful for learning about this important baking technique. Mastering this technique taught me that I could be a legitimate baker, and it improved my baking instantly. I hope that it does the same for you.
Until next time!
I used to make big event cakes and teach baking classes. This is absolutely the most underrated technique in baking. So many bakers skip or fail to cream the sugar and butter properly (for the full length of time) and the results are so disappointing. Thanks for this much-needed post!
Thank you Marta! I’m on a crusade to help people reach their full potential!
what are the consequences of over creaming the butter and sugar? will it produces deflated dense cake?
Hi there! It absolutely can produce a flat cake, or, worse yet, one that looks fine and then falls!
what attachment do you use to cream butter with a stand mixer?
Hi there! When I’m using my stand mixer, I use the paddle attachment to cream the butter and sugar. When using my hand mixer, I use the regular beaters. Good question!
Did you possibly mean 15 to 20 seconds? I’m not sure my bra would survive 15 to 20 minutes of butter-warming.
Hi there! Nope! You’ll need 15-20 minutes of body heat on the butter before it’s ready to use. If you don’t want to keep it in your bra, you can always put it in your waistband while you prep all of your other ingredients. Happy baking!
As a novice baker I love your tips, and the science behind them. Thanks, I will indeed go forth and continue to experiment with baking!
I’ve always known that creaming the sugar and butter was important thanks to my late granny but honestly guessed my way through many bakes until finding BwB. The photos in this post were a helpful guide and I checked out your other video, as well. Thank you!
Thanks so much for this tutorial and education! Your tips (with the helpful pictures) really taught me the proper way to cream butter and sugar. Admittedly, I had been doing it wrong, but now understand the right technique and how it can impact baking!
You’re so welcome Geo! I hope you find these tips super helpful!