


Hey BwB Family! Today we’re talking cookies.
Wait…the saying is “talking turkey”, isn’t it…????
Oh well. “talking cookies” works. Friends, the purpose of this post is to give you universal techniques that you can use to make your favorite cookie recipes even better. You don’t need a specific recipe to make amazing cookies!
Let’s go!
In this Post
- Don’t Overmix the Dough
- How to Mix Dough Properly (With A Picture Tutorial!)
- Let the Dough Rest
- Don’t Crowd the (Light-Colored, Parchment-Covered) Cookie Sheet!
- Use the Convection Setting
- Results and Conclusion
There are few things I love baking more than cookies. This post has been a long time coming because cookies are kind of my jam. Let’s get started!
Don’t Overmix the Dough
What does “overmix” mean, exactly? If you’ve done any baking whatsoever (not being dramatic ????), then you’ve seen this word in a cookie recipe or two. Overmixing is literally just the process of mixing something too much, which usually creates texture issues from too much gluten development and leads to tough cookies.
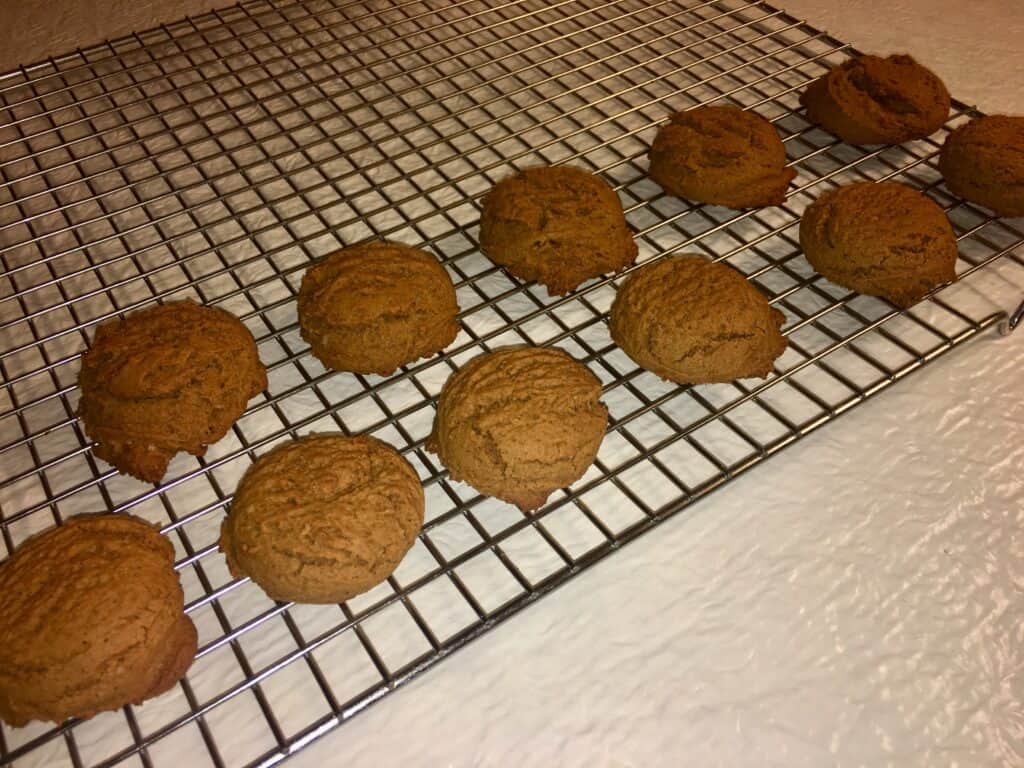
Like these “soft, chewy” cookies from when I first started baking:

In standard cookie recipes, the flour (combined with a leavening/salt mixture) is the last thing added to the recipe; once that comes into contact with your wet ingredients, it starts to form gluten bonds that give structure and texture to those cookies. The more that you physically mix flour with the rest of your wet ingredients (either with a mixer, spoon, or spatula), the stronger those gluten bonds become.
Strong gluten bonds mean chewy texture in breads (yay!), but strong gluten bonds can also mean a brittle, tough texture for cookies (boo!). You don’t want this!
How to Mix Dough Properly (With a Picture Tutorial!)
How do I avoid overmixing cookies? I thought you’d never ask. This is a story that’s best told in photos.
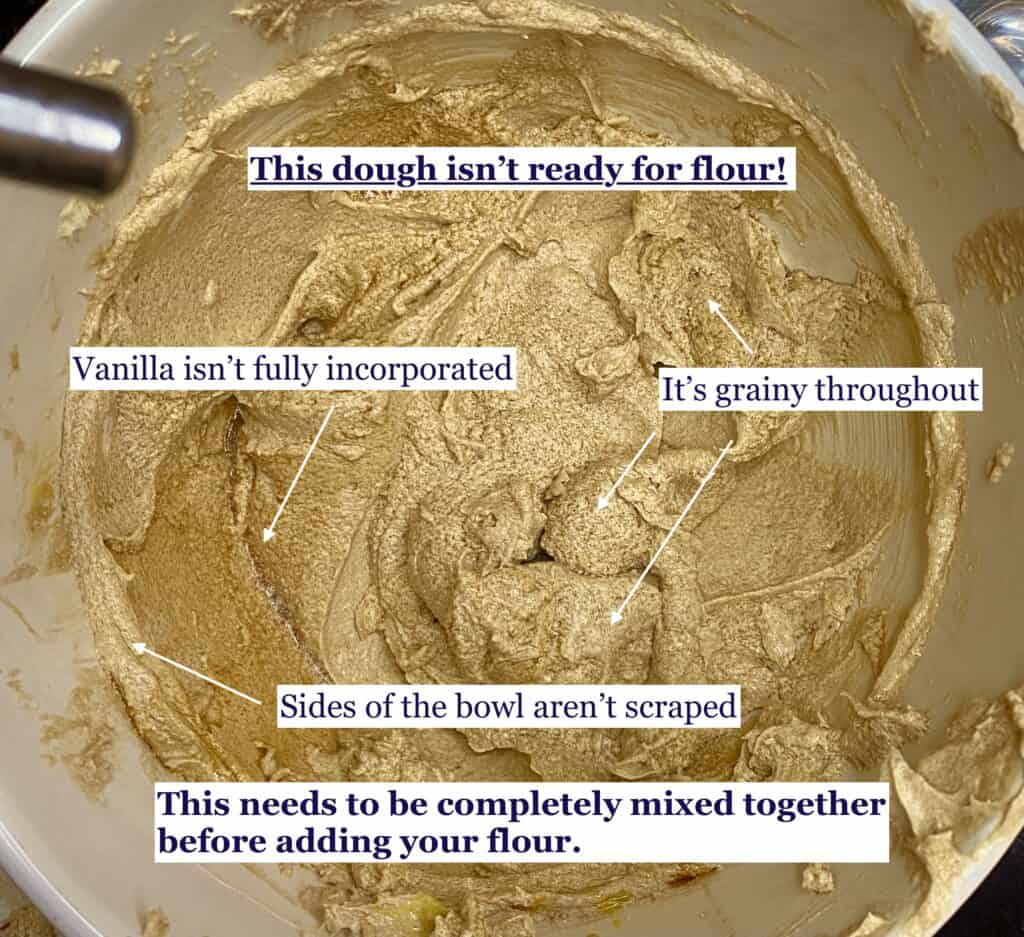
Before you add the flour, you need to make sure that all of your other ingredients are completely incorporated. If they’re completely mixed together, you won’t have to do much more mixing once you add the flour. And don’t forget to cream the butter and sugar properly!
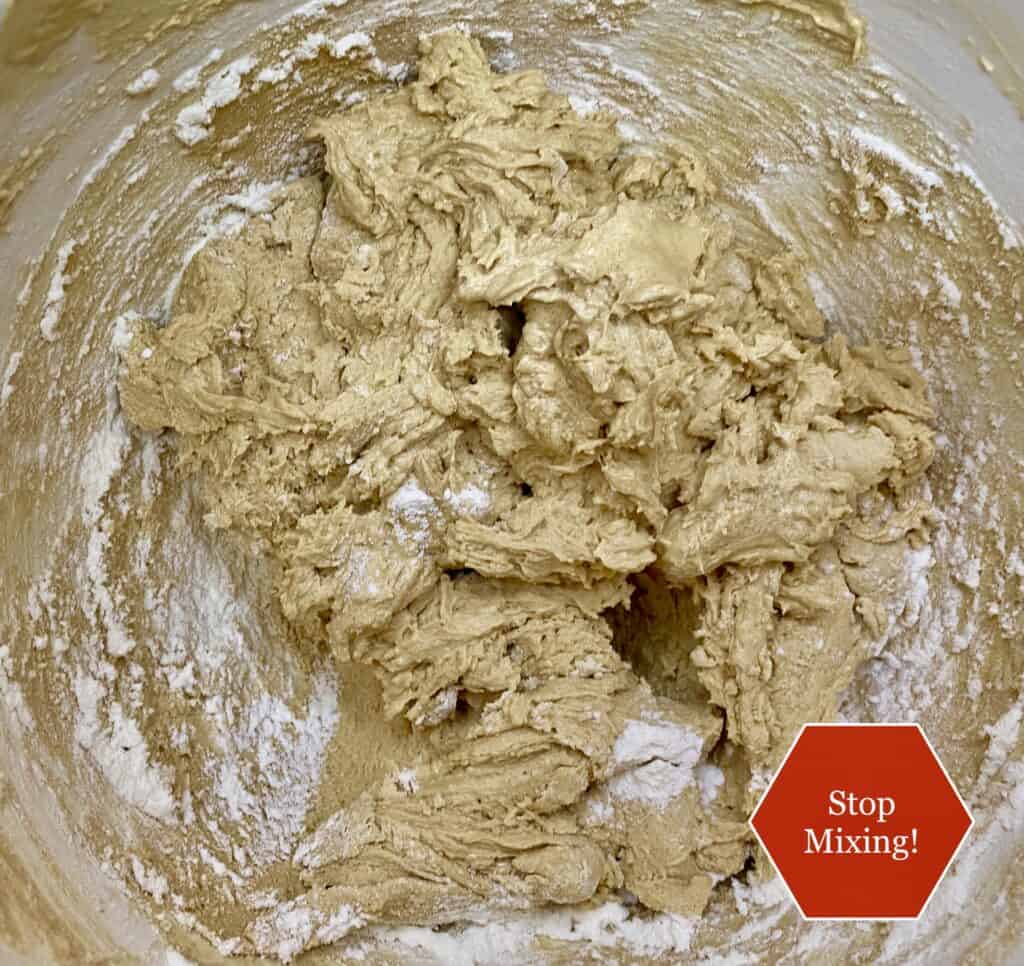
So, instead of this:
You’re looking for this:
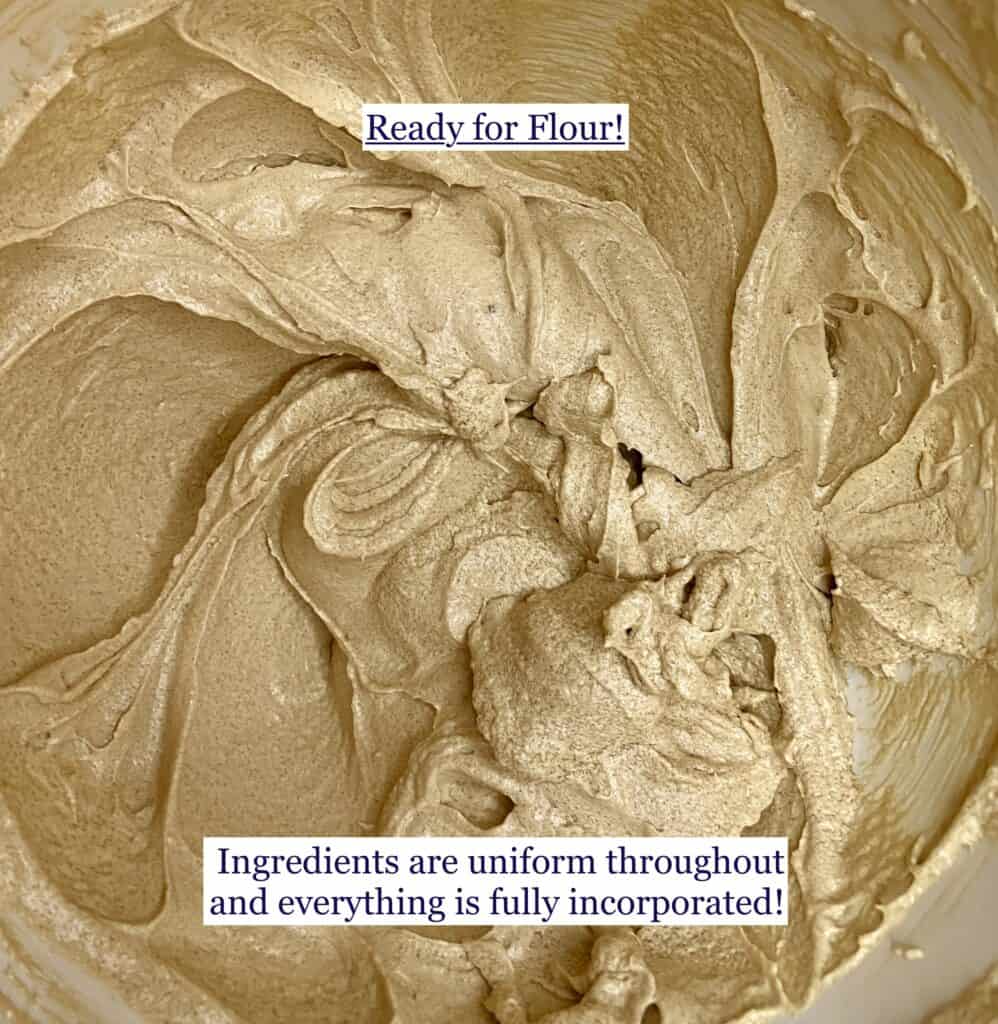
Once the pre-flour ingredients are uniformly combined, that’s when it’s time to add flour. I add flour in batches, even if I’ve scaled my recipe down. Adding too much flour to your recipe at once is a great “recipe” for a giant, magical PUFF of flour right in your face.
That’s…not my favorite. It also means that that flour you’ve meticulously measured for your recipe isn’t going into that recipe.
So, I add a little flour and mix until it’s almost incorporated. Like this!
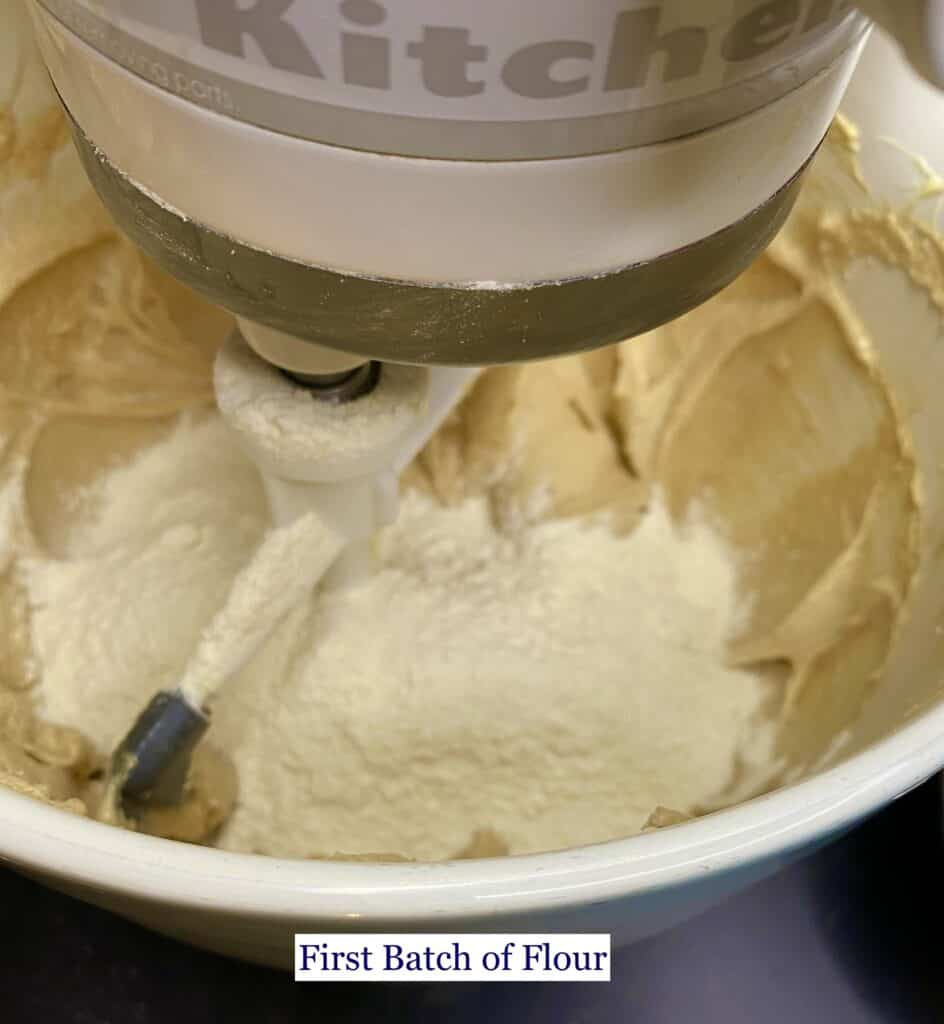
At this point, the objective is not to get every streak of flour incorporated into your dough. The objective is to have your mixer do as few revolutions as possible to combine most of the flour from that first batch. Remember, we want to reduce gluten development! The loose texture is what you want to see at the end of your first batch of flour.
Onto the next flour addition!
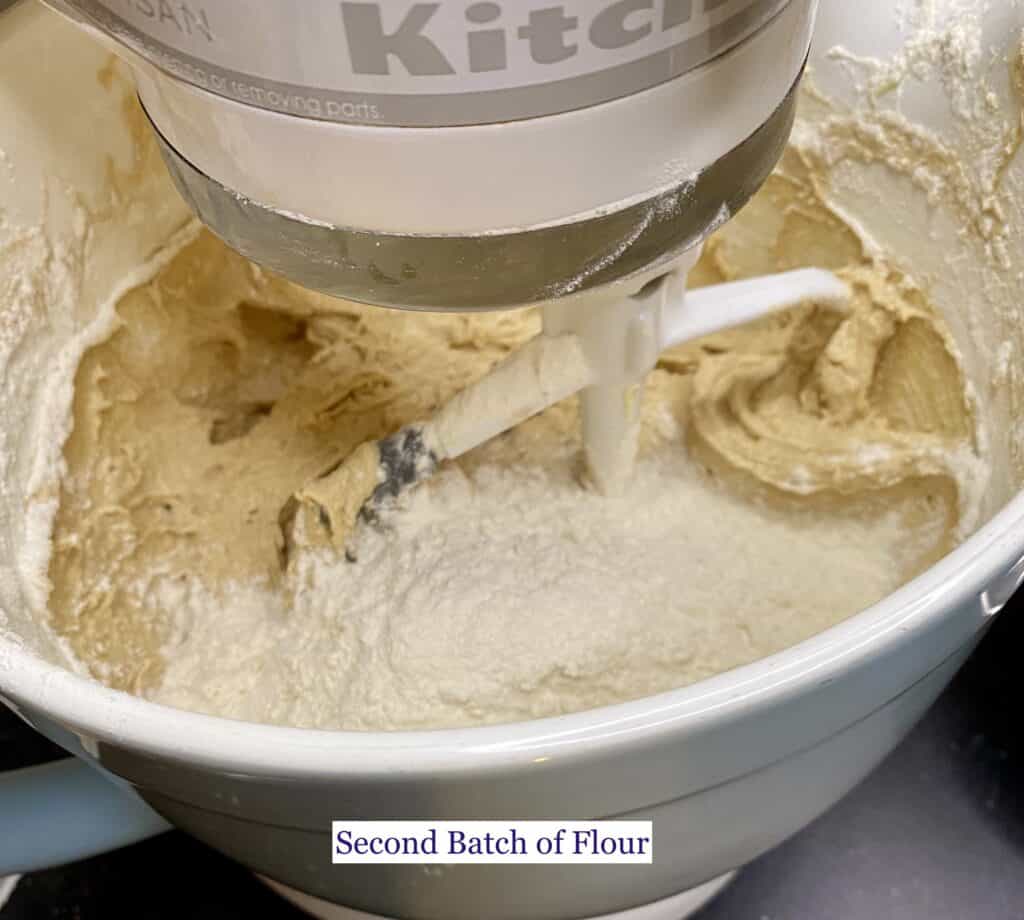
After the second batch, you can see that there’s still flour that’s not fully incorporated. This is okay! We will address all of it!
Third (and final) batch on deck!
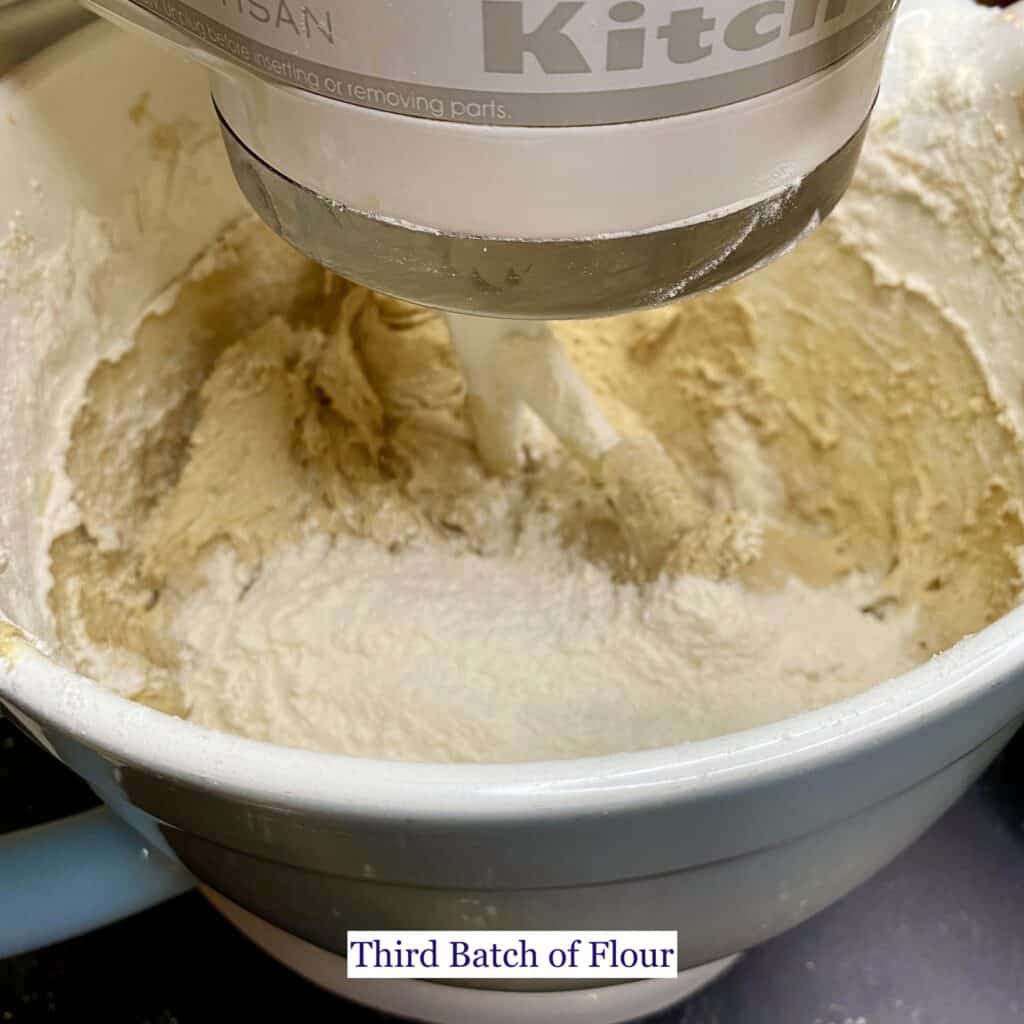
Some of you probably want me to make it make sense at this point. To you I say, Okay!
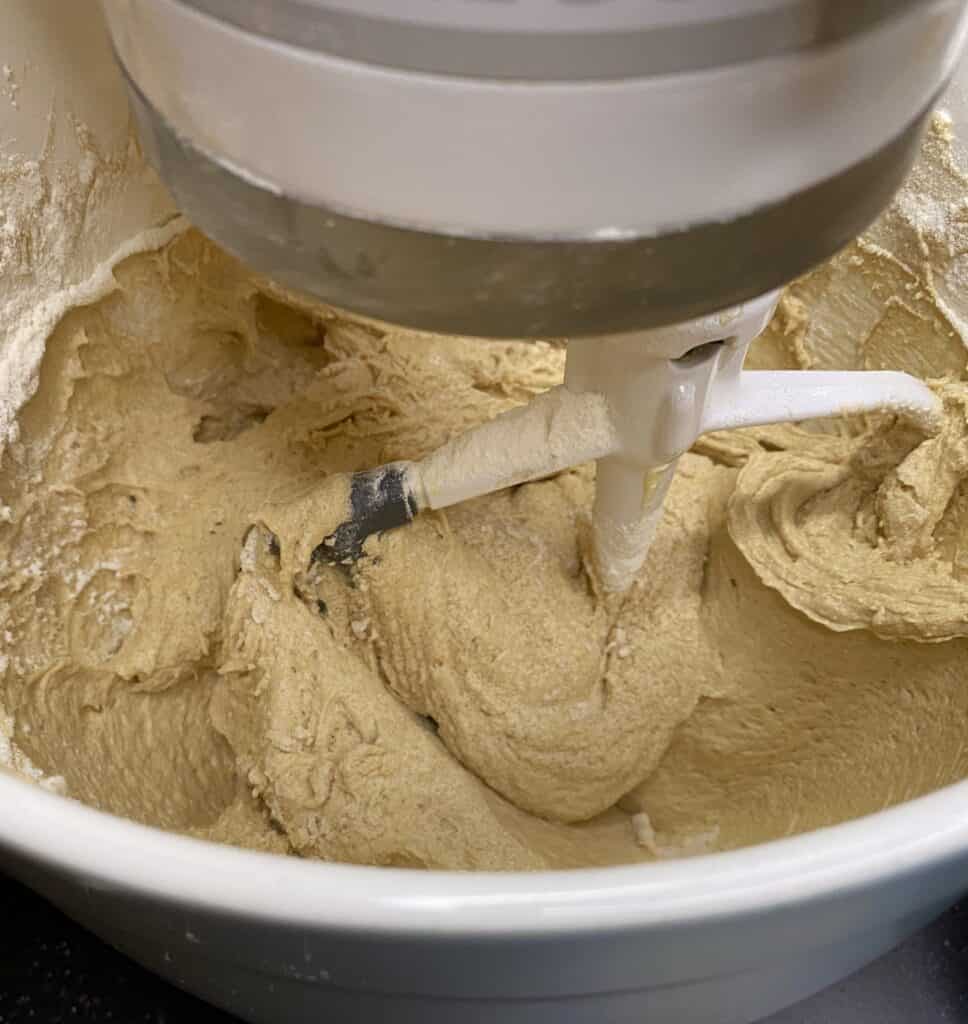
At this point, I stop my mixer completely and finish by very gently mixing with my trusty red spatula.
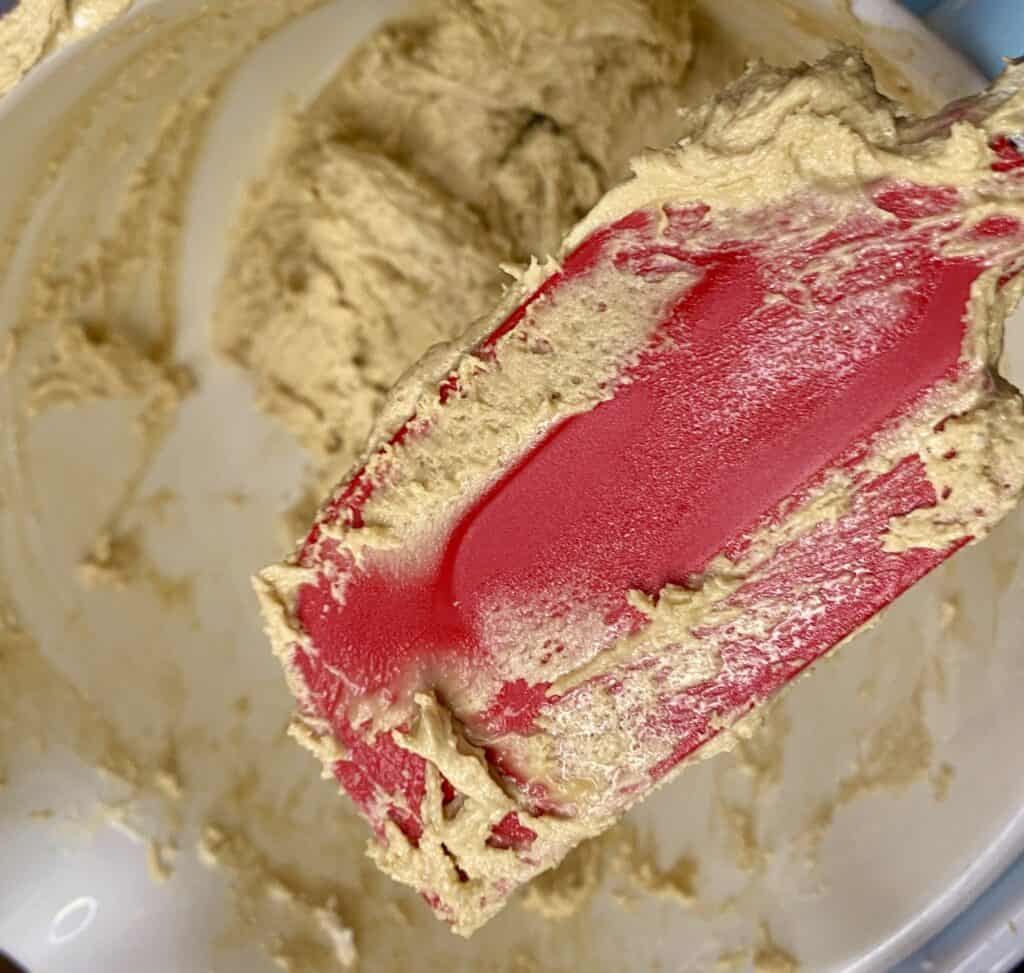
If there are chocolate chips or other accoutrements that have to be added right at the end (like with this batch), I stop mixing with my trusty red spatula just shy of the flour being fully incorporated. This is because there’s still mixing going on when you add the chocolate chips! Luckily, the chocolate chips only need 3-4 turns with your mixer to be fully incorporated into your dough. Or, even better, you can use your trusty silicone spatula to incorporate those chocolate chips and avoid over-mixing!
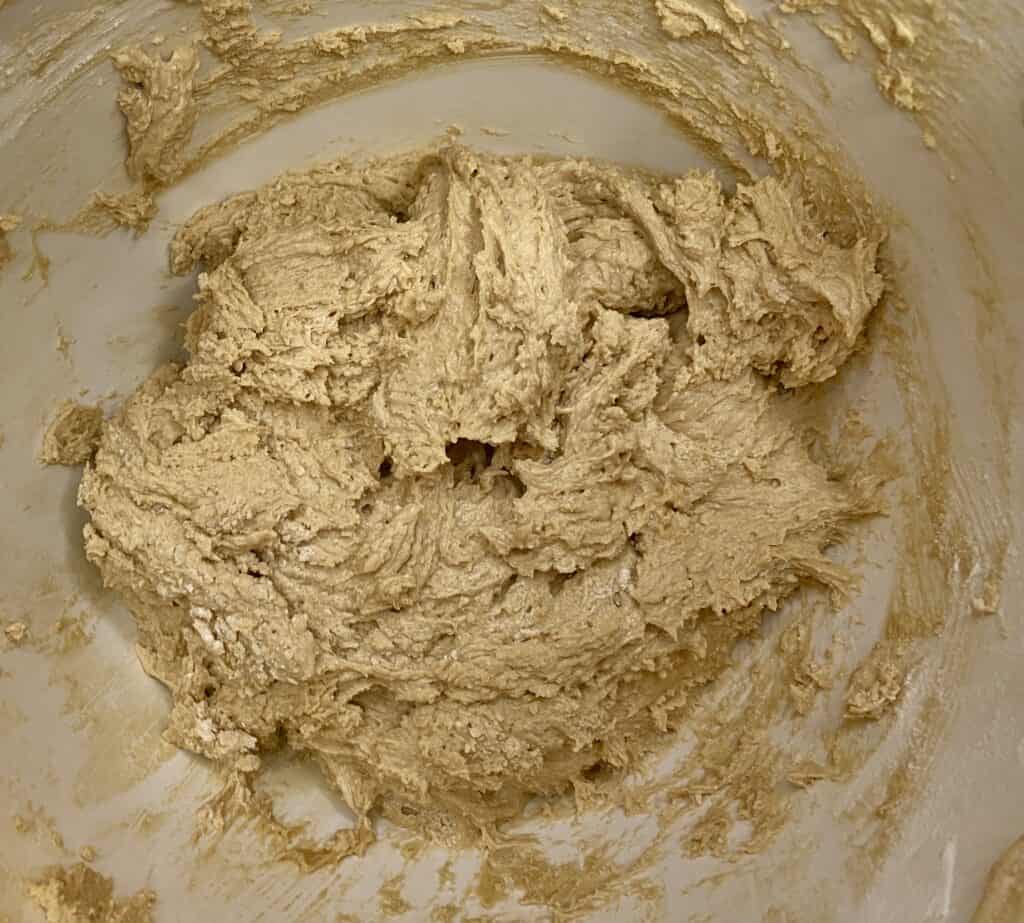
Here’s the finished cookie dough!

At that point the flour is *just* incorporated and your dough is complete.
Let the Dough Rest!
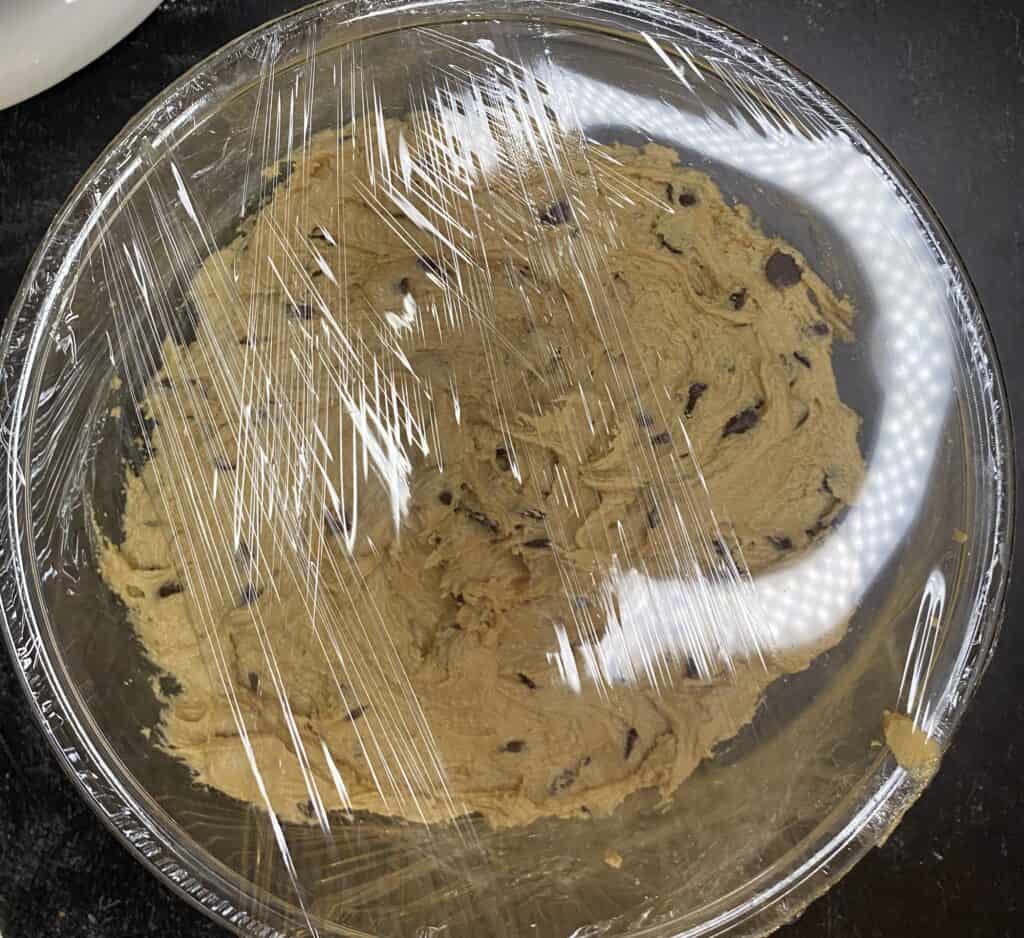
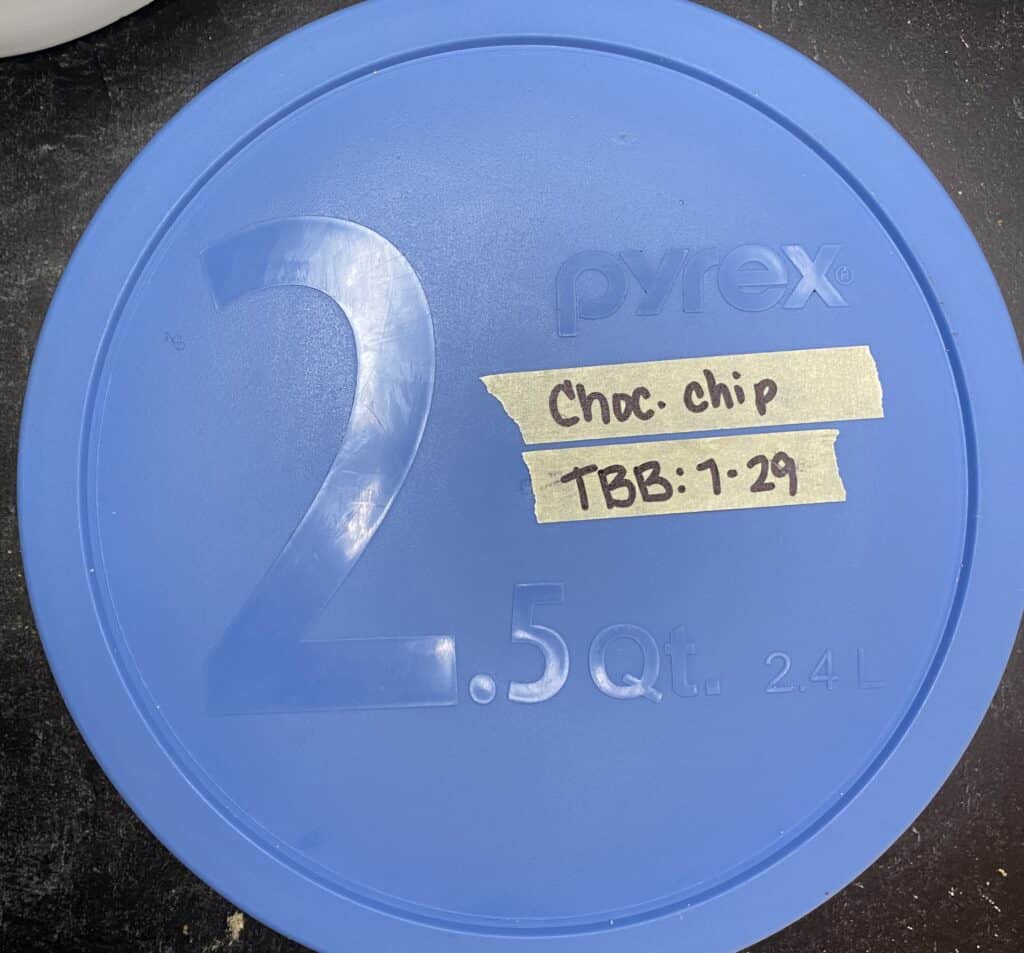
I never, ever bake cookies immediately after making the dough. In fact, I usually don’t even bake cookies on the same day that I make the dough. I put it in a glass bowl, cover the bowl with plastic wrap and a lid, mark it with a “TBB” (To-Be-Baked) date, and put the dough in a refrigerator for anywhere from 8-48 hours. Overnight is my favorite, but if I make cookie dough before the crack of dawn, and if my children give me puppy dog eyes all day, then I’ll begrudgingly bake them off around dinnertime.

When you allow cookie dough to rest, some really good stuff happens:
- The flour gets fully hydrated without additional mixing. This means fewer gluten bonds and a more chewy cookie!
- The fat (usually butter) gets a chance to firm back up, which helps the cookies hold their shape and not get completely flat and burnt around the edges when they’re baked. Because yuck.
- The flavors fully come together, meaning that you’ll be able to really detect the molasses notes that that brown sugar adds to your chocolate chip cookies!
The only downside to resting your cookie dough is…the wait. But it is completely worth it! If you’re truly short on time (shout out to the “Babe, would you mind making cookies for the company potluck this afternoon?” bakers out there), even an hour or two would be better than baking cookie dough fresh from the mixer.
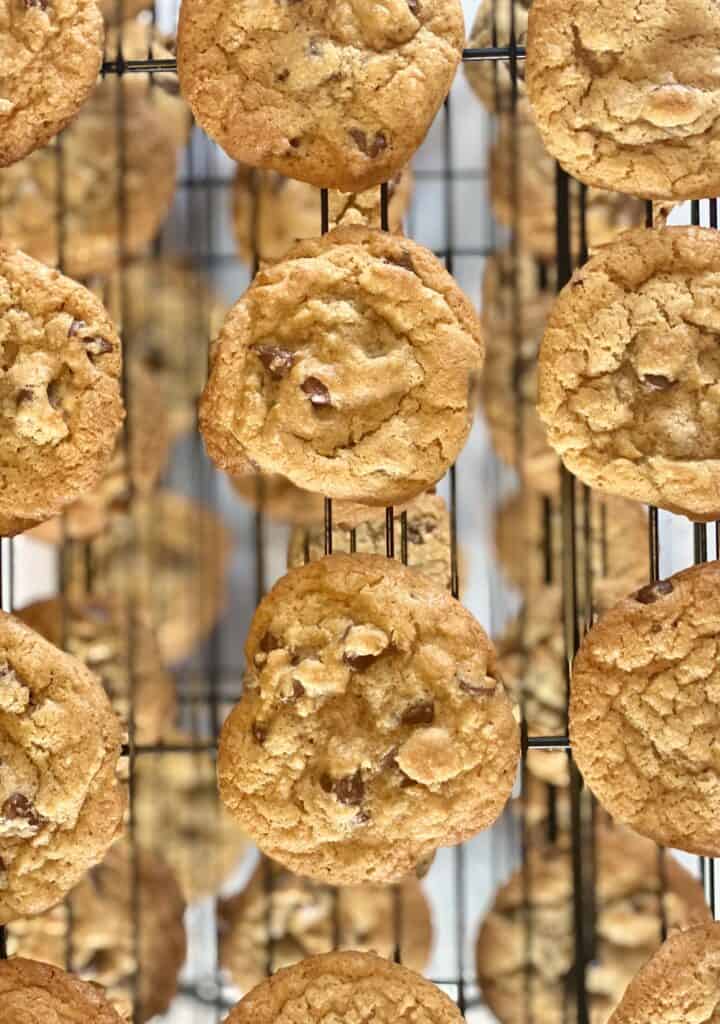
Don’t Crowd the (Light-Colored, Parchment-Covered) Cookie Sheet!
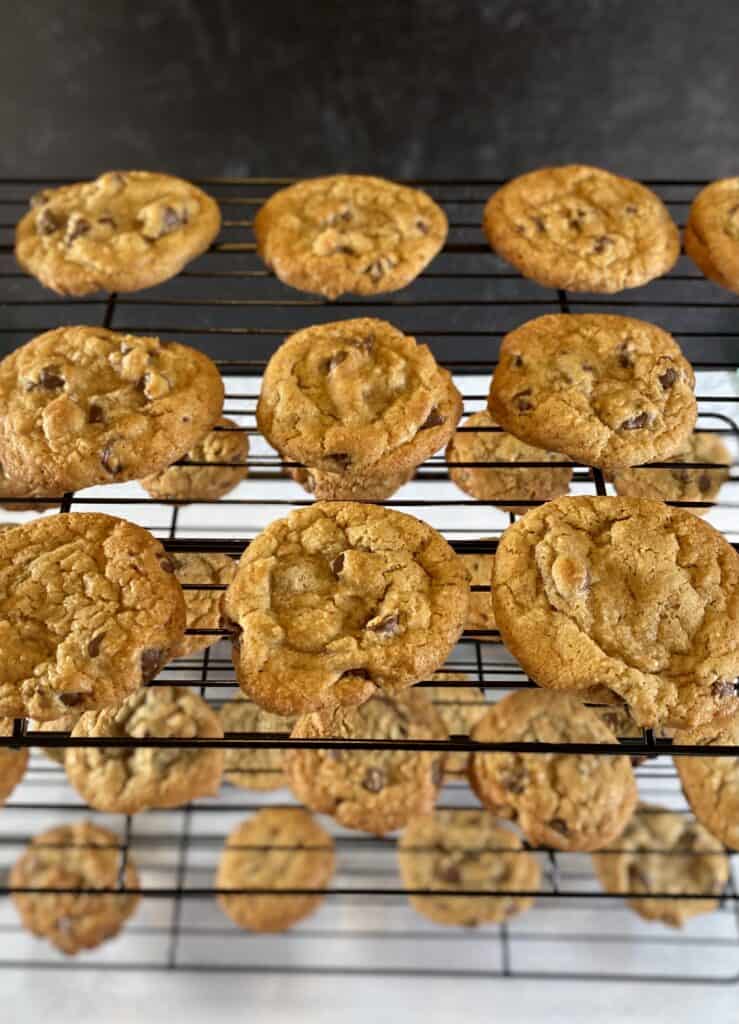
I don’t make huge cookies. Despite that fact, I only put six cookies on a cookie sheet. SIX:
Fewer cookies on the pan means better airflow over each of the cookies. Better airflow over the cookies means more even baking, even if your oven has hot spots!
We do not like the hotspots, Beloved, but they are inevitable in almost any oven. After a while, you’ll think of them affectionately because they’re unique to your oven. More importantly, though, you’ll know how and when to adapt your baking in order to avoid their wrath.
For cookies, I prefer light-colored cookie sheets that are covered in parchment paper. For more about why I prefer light-colored cookie sheets, take a look here!
Fewer cookies on the cookie sheet also gives the cookies a chance to spread out. Because cookies need room to spread into their perfectly imperfect shapes:
Baking fewer cookies on a cookie sheet allows those cookies to spread without blending together into one big, underbaked cookie (unless that’s your thing, of course).
Different bakers have different numbers of cookies that they’re willing to put on a sheet pan. I landed on six and I’m quite comfortable here. As with anything else, practice is key to help you develop your special baking style!
Use the Convection Setting
I love a good turn up.
While I have no idea what that term actually means (what are we supposed to be “turning up”, anyway?), I use it to describe my oven settings for baking. A 350°F oven on the convection setting is my happy place for baking just about any cookie on earth.
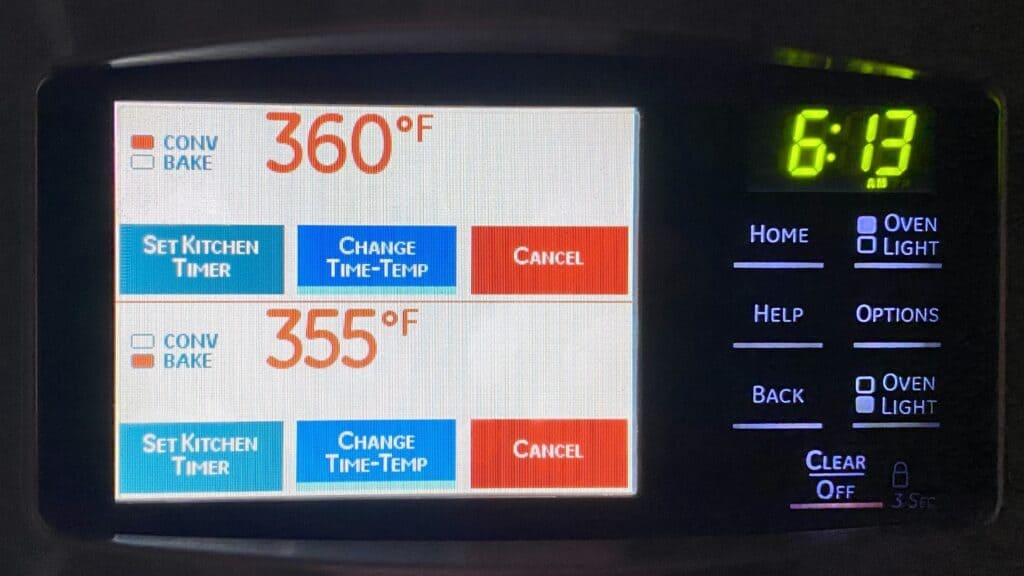
Convection baking simply means that a fan blows heated air around the oven cavity during baking. For cookie purposes, this means that you can bake more cookies at one time and those cookies will bake more quickly and evenly. In theory, it also means that you don’t have to turn your cookie sheets and switch their oven racks during baking. I still do that though. #BecauseMyOvens
For new bakers, the thought of using a convection oven can be terrifying, because convection baking can lead to disastrous results if you’re not paying attention or if you’re unfamiliar with your specific oven. I understand that completely. It took me five years to get comfortable with the thought of convection baking. But Family, once I finally understood what convection can do?

If you are nervous about using the convection setting on your oven, no worries! Just reduce the temperature of your oven by 10-15°F and check a minute or two earlier than you normally would. You’ll develop an understanding for your specific oven’s convection settings very quickly with enough practice.
For cookies, I set my ovens to 350°F and put the oven racks on the fourth and sixth levels so that I can bake two pans of cookies at the same time. This photo is a rush job at the 5:00 minute mark, when I was turning the cookie sheets and switching them on their respective oven racks:
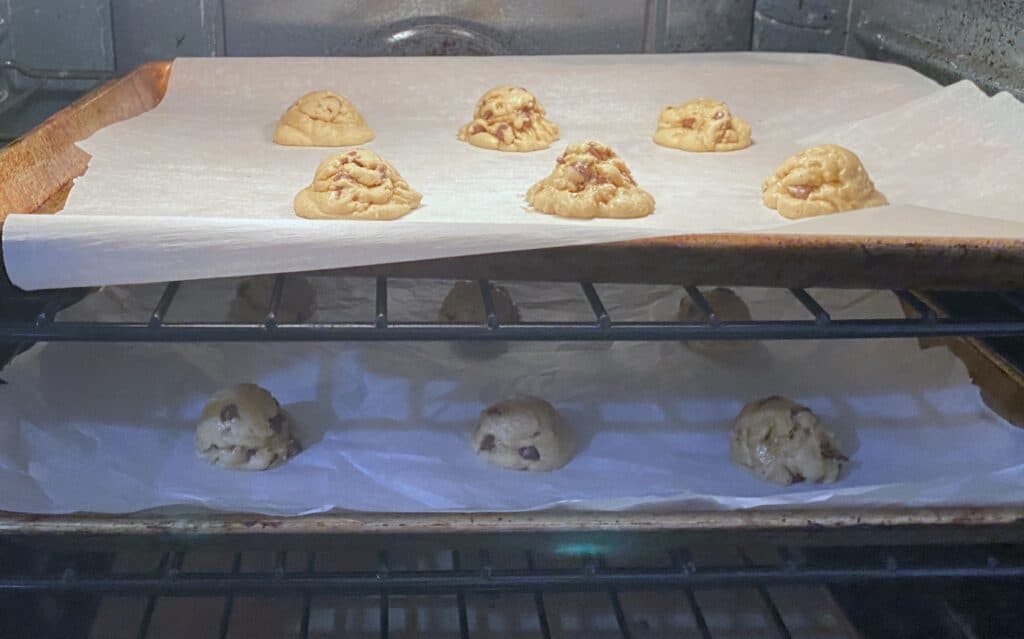
Not every baker will need to turn pans and switch racks. Once you know your oven, you’ll know whether the hot spots are going to dictate this step! For these cookies, I baked on the first rack for five minutes, turned both cookie sheets and switched the racks, and baked for four minutes more.
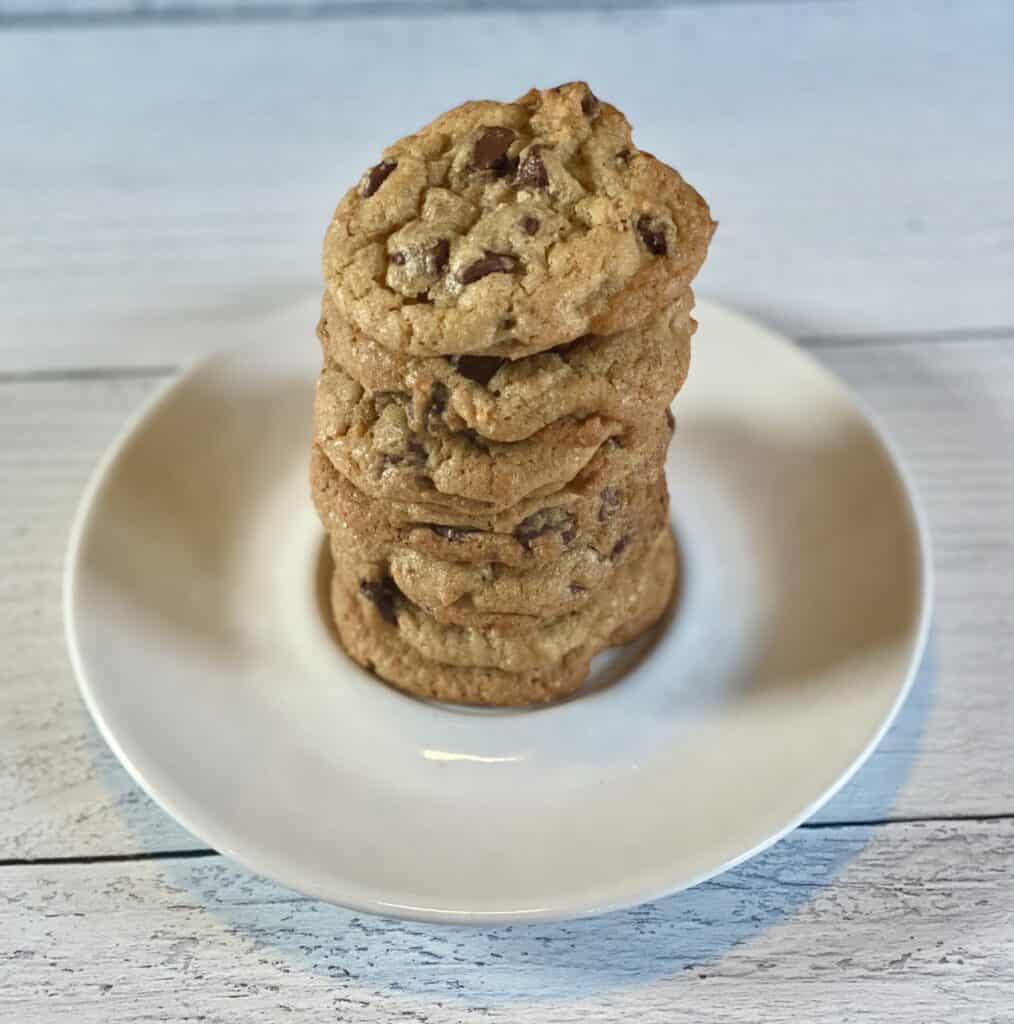
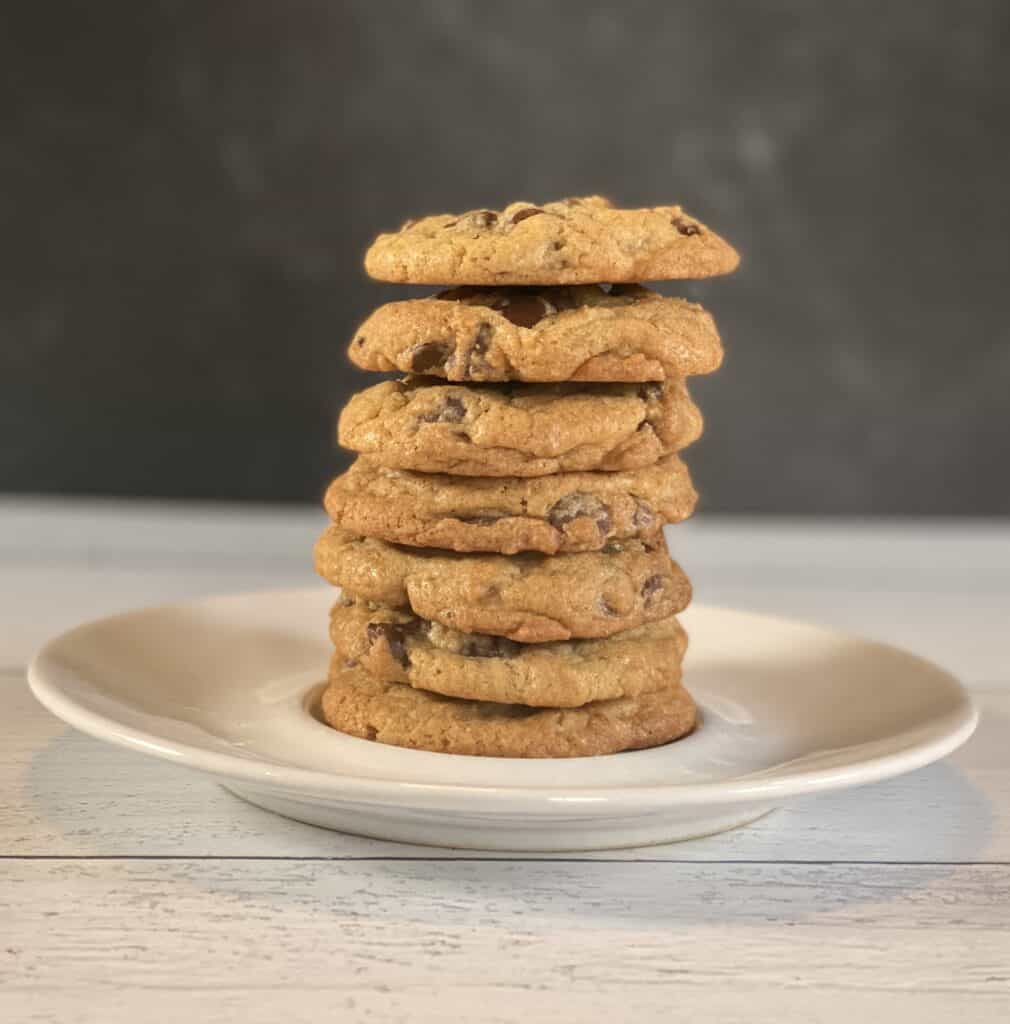
Results and Conclusion
If you hyperlinked to this section, you’re probably looking for proof that all of these tips can work for you. Here it is!
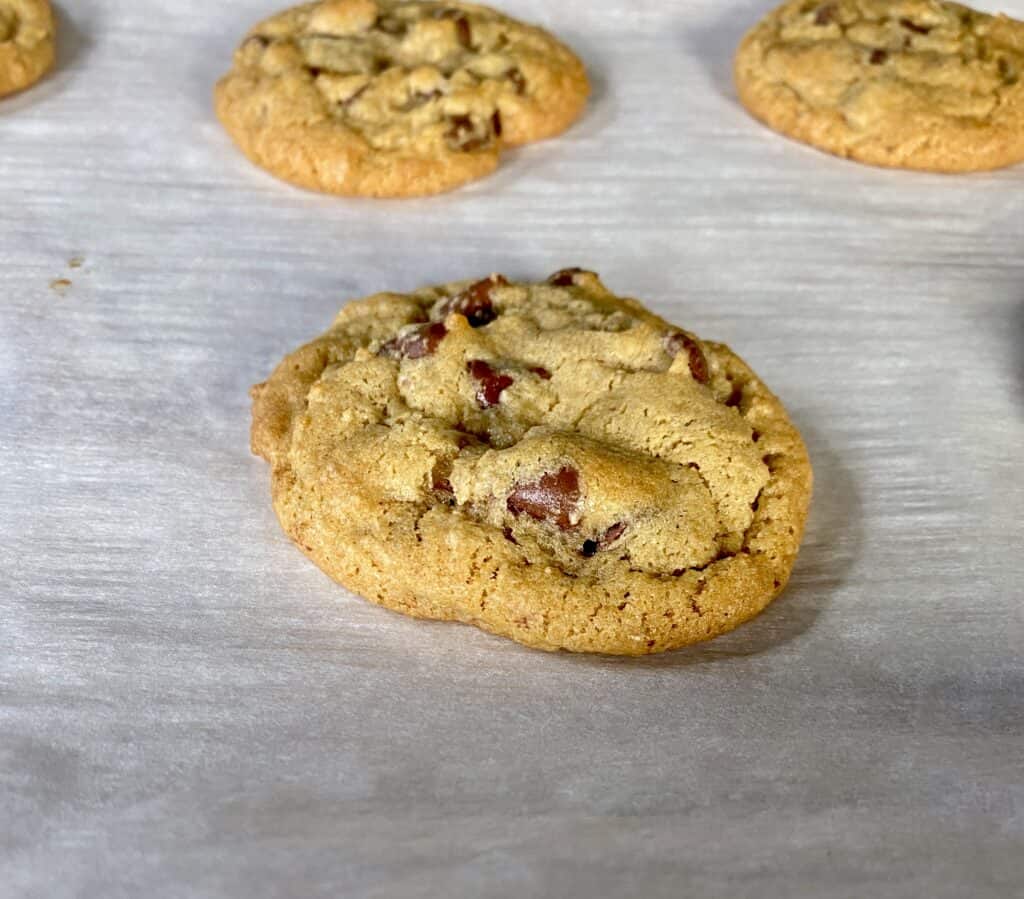
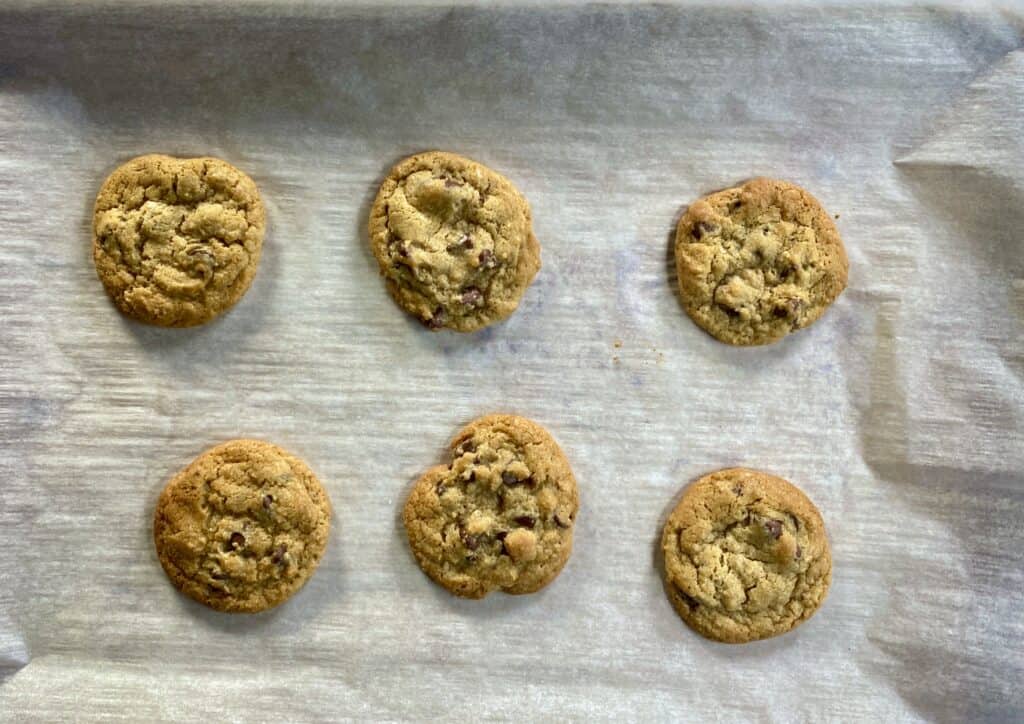
While these finished, cooled cookies take quite a pretty picture, they never look that way immediately out of the oven. Fresh out of the oven, they are very puffy up and look slightly underdone in the center.
That, Friends, is the mythical thing known as the baking “touch”, and that will come to you with practice! The secret is to let them sit for three more minutes on the hot cookie sheet before removing them to a cooling rack. This is totally counterintuitive to watching them bake to a perfect golden brown in the oven, I know. But if they get to that point in the oven, they’ll continue to cook on your countertop and get overdone.
These are my absolute favorite chocolate chip cookies that I developed for my custom bakery. But you can have amazing results with any cookie recipe if you use these techniques. I want to see you be successful with your family recipe or your favorite blogger’s recipe, and these tips universally apply to standard cookie recipes!
Those of you who are searching for cookie recipes can find unbelievable ones here (the world-famous Jacques Torres recipe) or here (on handletheheat.com). But try these techniques with as many recipes as your heart desires!
For those of you who’ve told me before that you can’t bake, I’m here to help you bust every barrier imaginable so that you can. So, today, if I’ve helped you bust any barriers to making decadent, delicious, chewy, perfect cookies, I am grateful that you’ve given me the opportunity to do so.
Keep being great and KEEP PRACTICING! I’m an email away if you have questions, or feel free to leave a comment below.
Until next time!