
My friends, it’s summer. It’s been HAWT. And while I will always bake something, no matter what the temperature outside, it’s sometimes good to make something quick and delicious that doesn’t involve an oven. And this Salted Caramel No-Churn Ice Cream fits the bill perfectly.

About No-Churn Ice Cream in General
No-churn ice cream is popular because it is quick. It is simple. And it is delicious. There are any number of ways that you can personalize no-churn ice cream once you have the basic ice cream base down. Making the ice cream itself only takes a few minutes of your time, and you can go on about your day while it firms up for use later.
If you made the Classic Salted Caramel Sauce that I recently posted, you’re already halfway there! Just allow it to cool completely (for about two hours), and it will be ready to mix into this delicious ice cream.
How to Make This Ice Cream
*Friends, this post contains affiliate links. If you purchase directly from those links, I get a small commission, but they are products that you will find in my very own kitchen!*
To make this specific no-churn ice cream, you’ll need to start by making the Classic Salted Caramel Sauce. Caramel sauce is molten hot when it’s done, and it will completely melt your ice cream if you add it too soon.
I forgot to mention that the most important ingredient in this ice cream is…patience. ????
Once you’ve made the salted caramel sauce, carefully remove it to a heat-proof jar immediately (I love these Ball Jars for heat-proof storage), and allow it to sit on the countertop for about two hours. At that point, unless your kitchen is on the Equator, it should be cool enough to use.
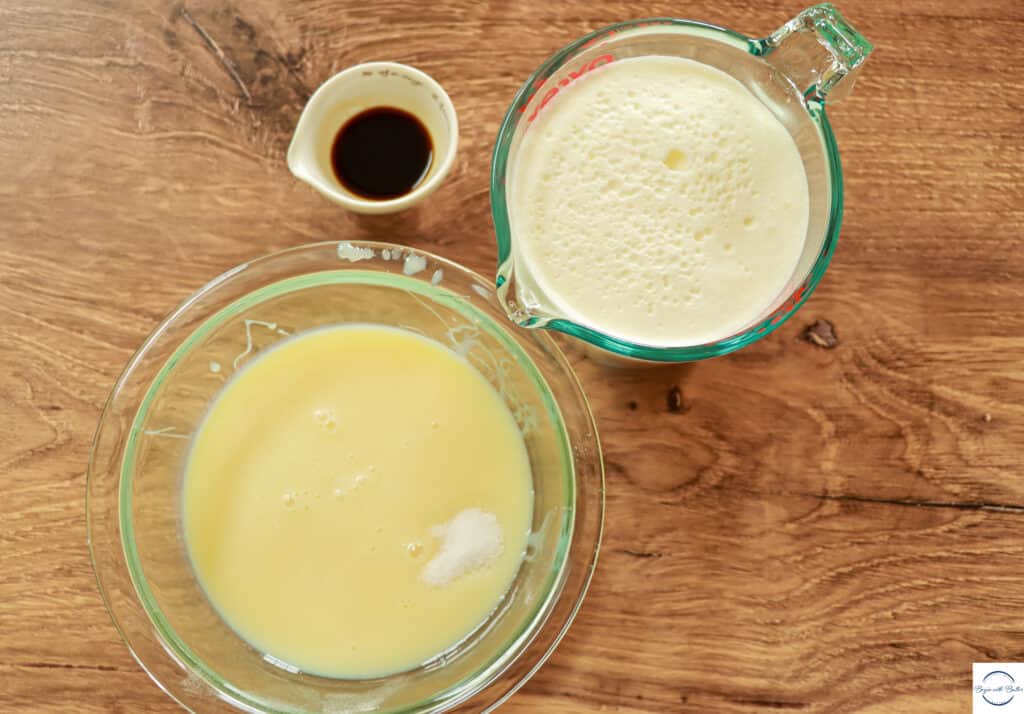
Start this ice cream by combining the sweetened condensed milk, vanilla extract, and 1/2 tsp of fine salt in a medium-sized bowl. Once it’s completely combined, set it aside.
Place the heavy whipping cream in a large bowl. Using a balloon whisk or a hand mixer, whip the heavy cream to stiff peaks. Make sure to start off slowly with this, or else you’ll splatter heavy whipping cream everywhere!
After about 4-5 minutes, you’ll have a luscious, decadent, absolutely divine whipped cream that looks like this:
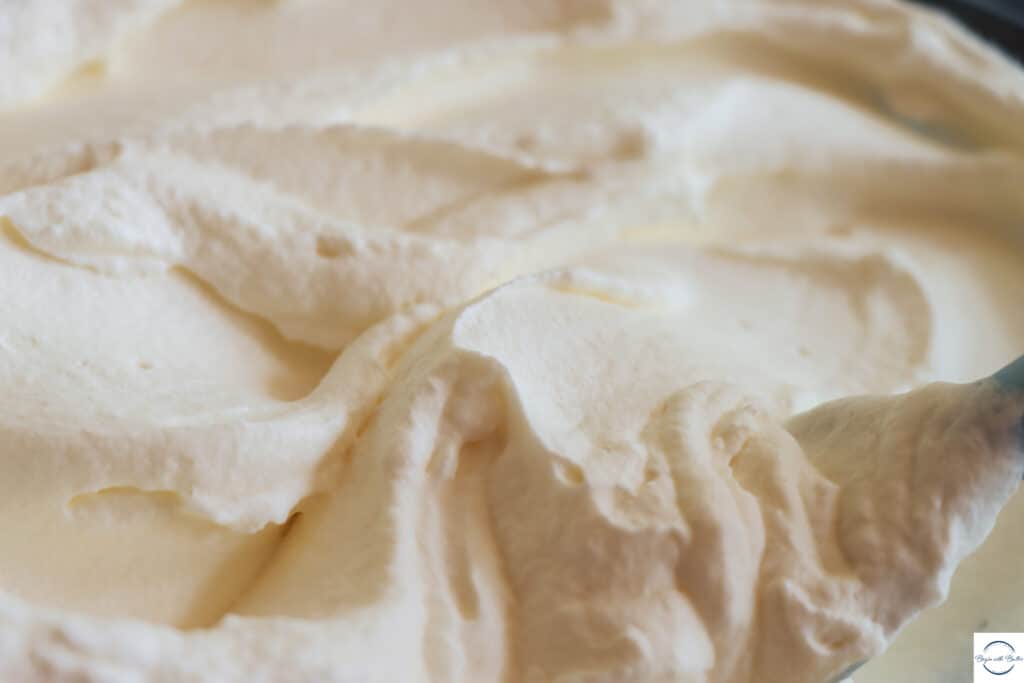
It might seem hard to believe that this is the outcome at the beginning, but keep with it!
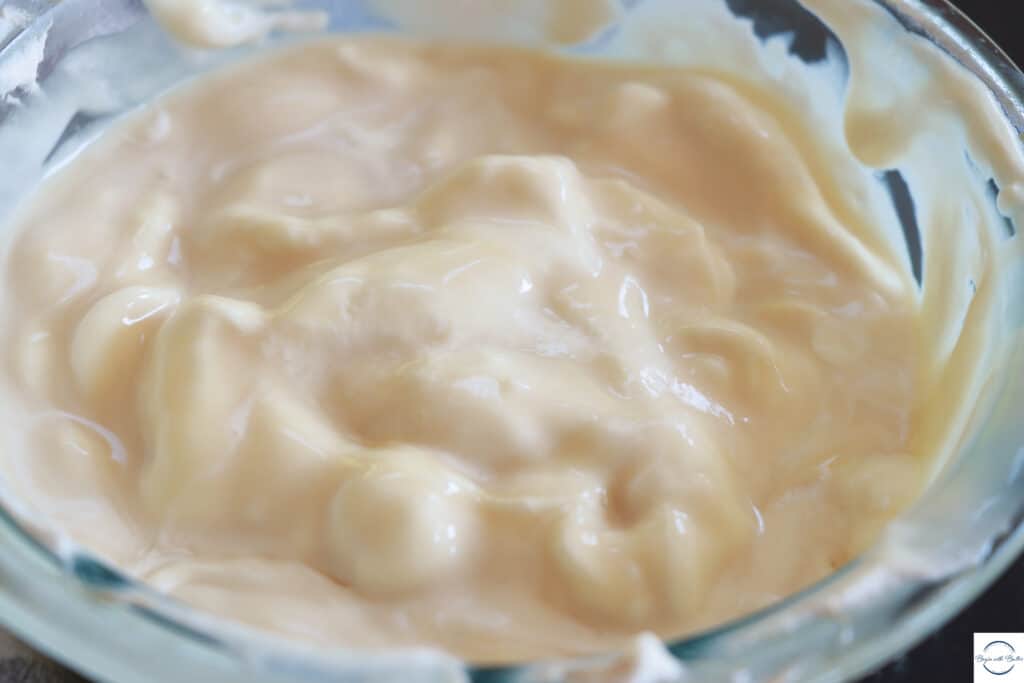
Once you’ve reached this point with your whipped cream, add half of the whipped cream to the ice cream base. Fold together until you get a lumpy, bumpy mess.
Yes. A lumpy bumpy mess. We don’t want to mix completely at this point because we don’t want to deflate all of that yummy air from the whipped cream.
So we’re looking for this:
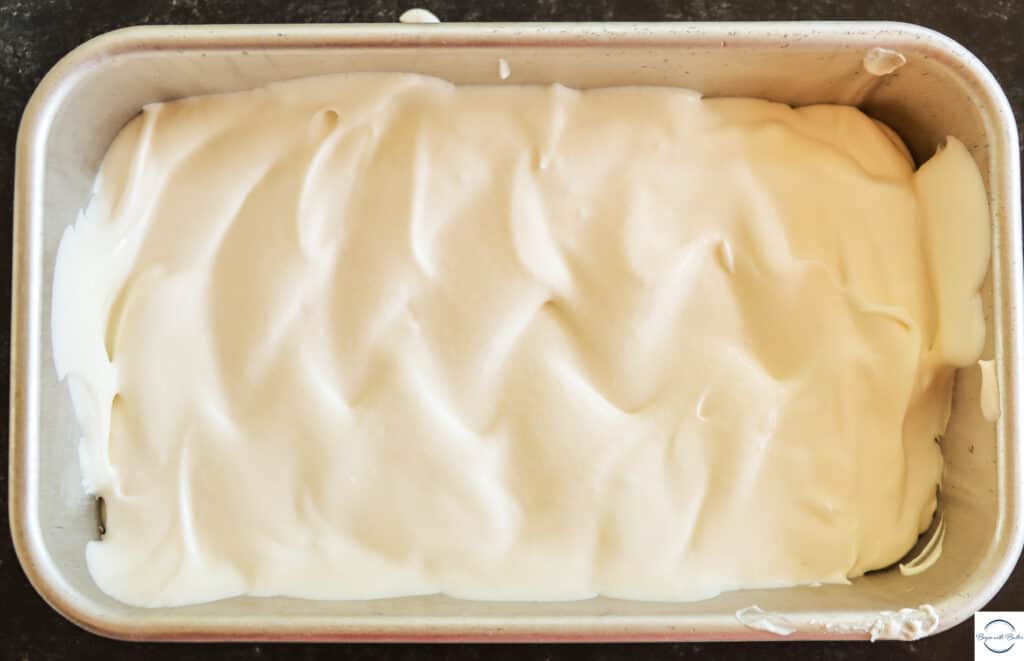
Next, fold the lumpy, bumpy mess into the remaining whipped cream. Gently continue folding until you have a smooth, combined mixture. Place half of the ice cream in a 9×5″ loaf pan:
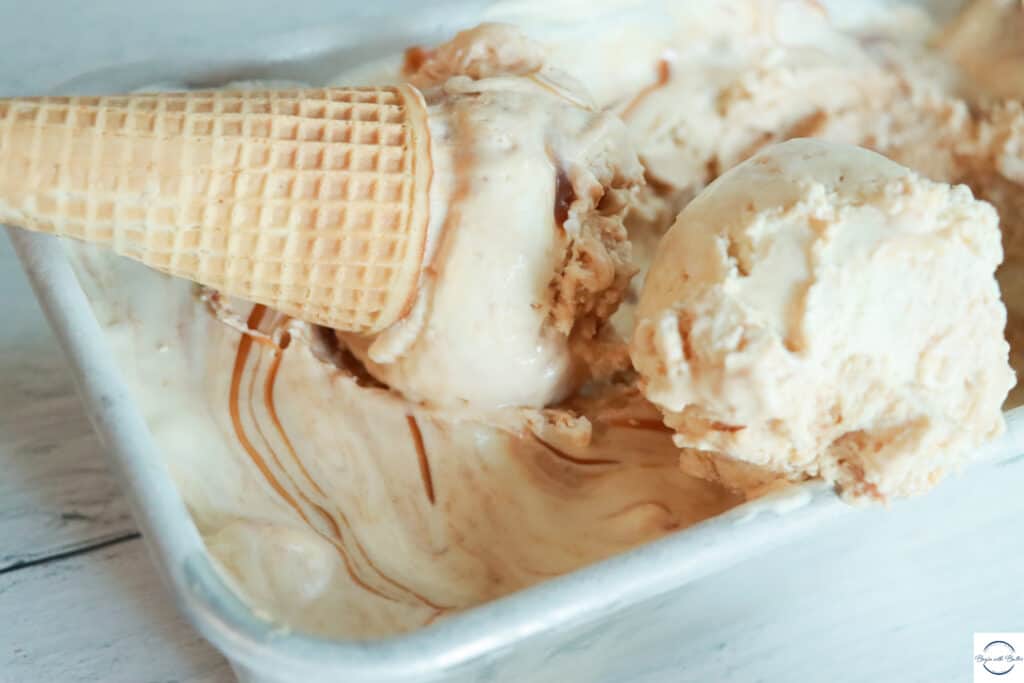
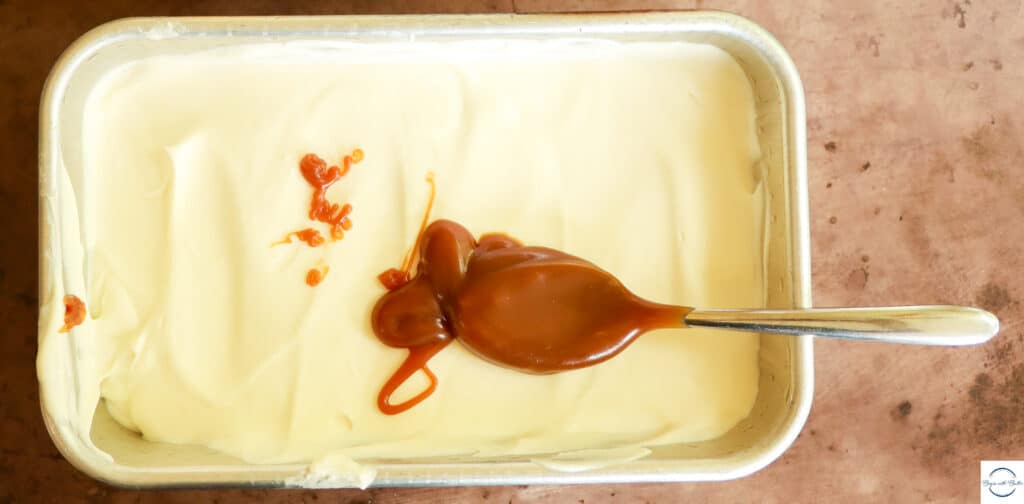
Add half of the salted caramel to the top of the ice cream base. Then layer with the remaining ice cream base and the remaining salted caramel. Using a toothpick, skewer, or even the handle of a spoon, gently swirl the salted caramel into the ice cream base.
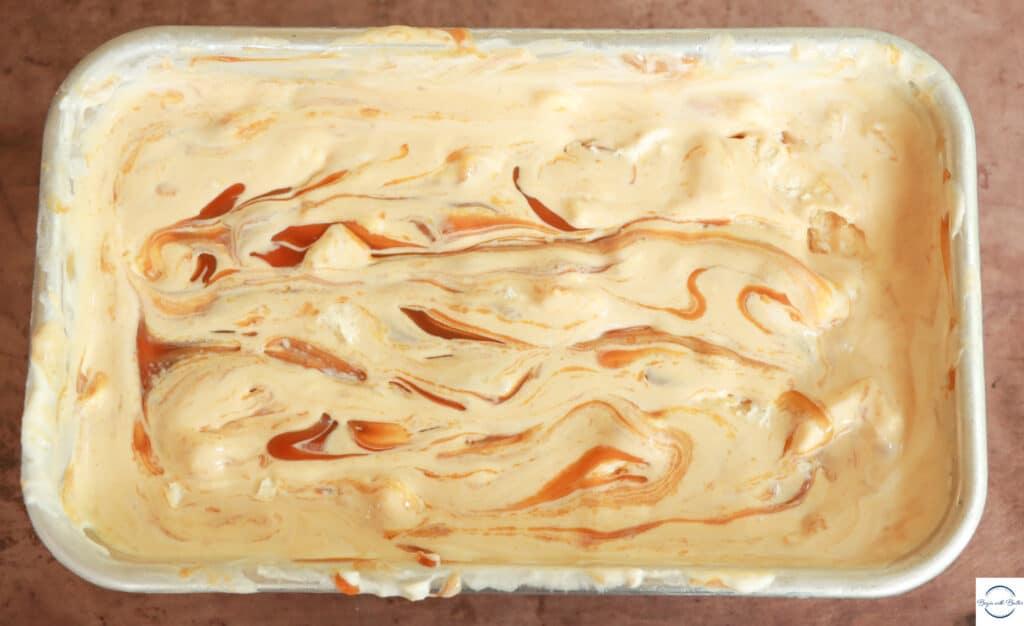
You want to have lovely thick swirls of caramel throughout the ice cream, so the goal is not to mix the two textures. Rather, you’re trying to create a two-textured dessert: the crisp cool texture of the ice cream and the rich, sticky sweetness of the salted caramel are what makes this dessert a true delight. The key to getting that two-textured dessert to is not to mix too much with your swirling utensil!
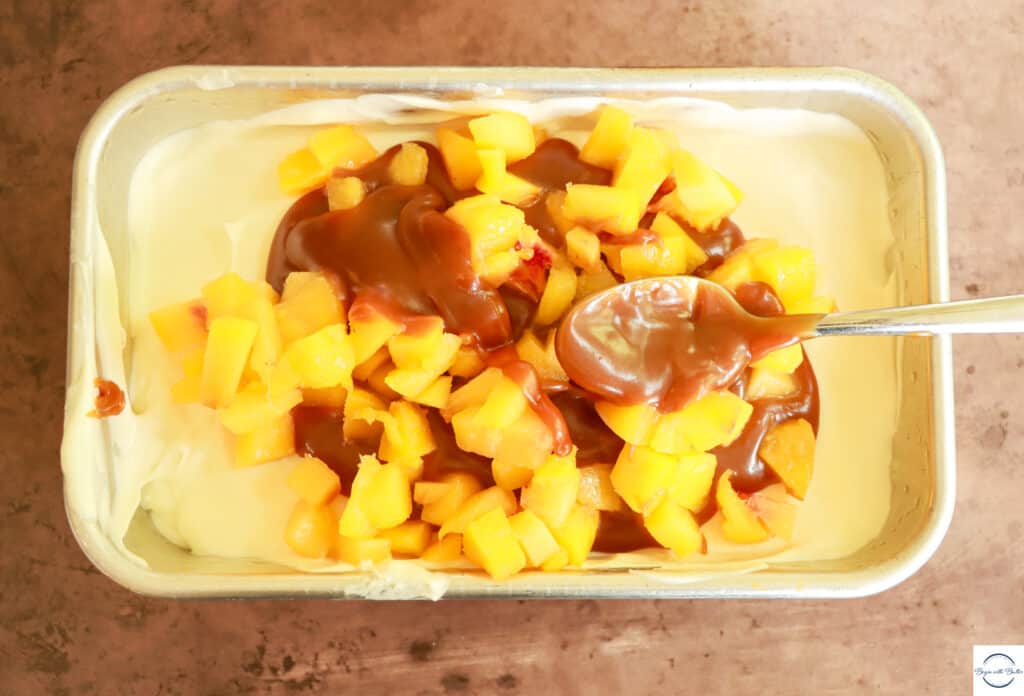
Once you’ve finished the initial swirl of the ice cream and the salted caramel sauce, do a final drizzle of the salted caramel sauce on top of the ice cream. This adds a lovely finishing look to the ice cream and gives you additional caramel. So, bonus! You can even add fresh fruit (like the peaches that I added, here) to bring a hint of acidity to this über rich dessert.
Once everything’s all swirled together, place the ice cream in the refrigerator for at least six hours (did I mention that you need to be patient?) to allow it to firm up properly.
Then enjoy with reckless abandon, knowing that you’ve made the perfect ice cream for these late summer days.
Want to see how I made this recipe during Office Hours? Check it out here!
Enjoy this recipe my friends!
Print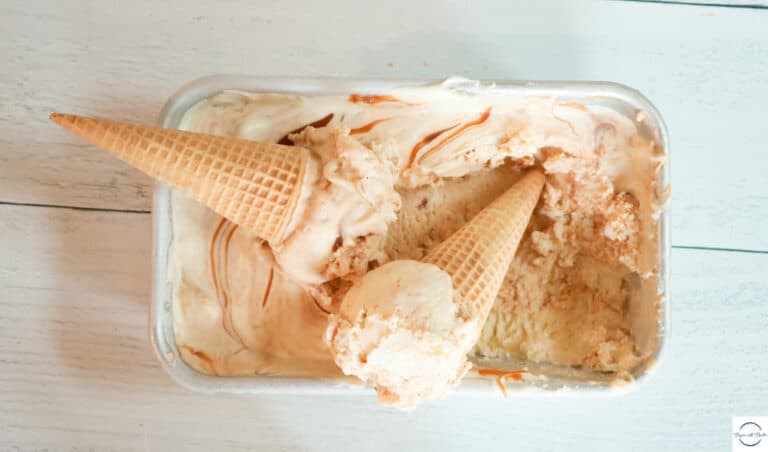
Salted Caramel No-Churn Ice Cream
This Salted Caramel No-Churn Ice Cream is deceptively easy to make and is so incredibly delicious!
- Total Time: 15 minutes, plus 6 hours chilling
- Yield: 10 servings 1x
Ingredients
- 500 g heavy whipping cream, chilled
- 397 g sweetened condensed milk (one 14-oz can)
- 1/2 tsp fine salt
- 2 tsp pure vanilla extract
- 215 g (2/3 c) Classic Salted Caramel Sauce
- Up to 1/2 c chopped fresh fruit, optional
Instructions
- Make the Classic Salted Caramel Sauce. Allow to cool in a heat-proof container on your countertop for at least two hours before adding it to your ice cream.
- Add the sweetened condensed milk, pure vanilla extract, and fine salt to a medium bowl. Combine completely.
- Add the heavy whipping cream to a large bowl. Using either a balloon whisk or a hand mixer, whip the heavy whipping cream until it reaches stiff peaks.
- Place half of the whipped cream into the bowl with the sweetened condensed milk mixture. Fold gently until a few lumps and bumps remain.
- Add all of the sweetened condensed/whipped cream mixture to the bowl with the second half of the whipped cream. Fold gently until the mixture is completely smooth.
- Add half of the vanilla ice cream mixture to a chilled loaf pan or ice cream storage container (like this one from Tovolo). Top with half of the Salted Caramel Sauce. Repeat with the ice cream layer and Salted Caramel Sauce.
- Using a toothpick, skewer, or the handle of a spoon, gently swirl the mixture together. The goal is not to combine the salted caramel sauce with the ice cream. The goal is to have ribbons of salted caramel throughout your ice cream. So be gentle and stop long before you think you’re done. Because you’re done!
- If desired, add another spoonful to the top of the ice cream and gently turn 2-3 times with your utensil.
- Allow to cool for at least six hours before devouring. This is the most difficult part.
- Enjoy!
Notes
- Fresh fruit is optimal (if using), since frozen fruit will create hard frozen lumps in your ice cream.
- This ice cream can remain in your freezer for up to a week.
- Prep Time: 5 minutes
- Cook Time: 10 minutes
- Category: dessert
You said put in in the refrigerator not the freezer when you mix everything in? Omg I am
Confused how can ice cream be ive cream if refrigerated!
I loved your comparison on King Arther vs Lily flour because I am a northern girl and just moved FL 12 yrs ago ! Omg my husband is 13 yrs older and that man is always playing pranks ! We were driving for hours reached S Carolina and all fast food joints close real early so we saw a restaurant packed w cars ! I said “ I bet the food is great let’s stop” so it was a buffet but not a thing was marked ‘ I saw a lot of fried foods but at night no matter get GERD ! Then my husband said look here is some meat and brown gravy ! You know you love gravy and meat I said yeah I think I will get that but as I was scopping it out I said look at this what the heck it is like meat rings ! He said get it you’ll love it so I got a big helping on fake mashed potatoes and a veg ! So I was 3/4 done with my chewy meat gravy “ how is ur meat abd gravy. “ I said good but I don’t know what the meat Is but it is chewy” he started laughing “ your eating intestines but he called it something else ! I almost lost my gastric contents on him as I swore him out then I looked and the whole resturaunt who were busy eating stopped to hear this trashy talking women calling her husband every filthy name she could come out with ! 47 years with this joker !
Hi Cathy! Thanks for responding! When I mention refrigeration in the recipe, it means the freezer part of the refrigerator. I’ll make sure to clarify that!