
This Goat Cheese Skillet Focaccia post is sponsored by Vermont Creamery. However, all of the opinions are my own.
* Also, this post contains an affiliate link for the oven thermometer that I use and love in my kitchen. *
I have such a love for fresh bread, Family.
When I first began baking, bread SCARED me. It took an incredibly long time for me to become proficient with yeast and bread shaping techniques. I am now confident and proficient with yeast bread (and you can read more about yeast right here), but it was a bumpy road.
This focaccia from Alexandra’s Kitchen is the bread that I wish I learned first. But, of course, because I like to do things the hard way, I decided to bump along the curriculum at the Culinary School of Hard Knocks instead.
It’s my process really.

Now, I’m so happy to be able to share this Goat Cheese Skillet Focaccia with you! It’s inspired by the Alexandra’s Kitchen focaccia and scaled to fit in my favorite cooking vessel: my cast-iron skillet. It also features my absolute favorite goat cheese from my friends at Vermont Creamery, and it is beyond easy! Fresh bread? Little effort? Check and check.
Why Vermont Creamery Goat Cheese?
I actually fell head over heels in love with Vermont Creamery Goat cheese late last year, after I spread some on a piece of warm baguette. It…was so decadent. Perfect texture. Perfect salt level. So creamy and dreamy.
I could not wait to eat it with everything. ???? So, when I recently partnered with Vermont Creamery and got the green light to develop a recipe that features their goat cheese, I jumped at the opportunity!
How to Make this Goat Cheese Skillet Focaccia (With Video Tutorial!)
When I say this is easy, Family…
The bread itself has FOUR ingredients. Flour. Water. Salt. Yeast. It’s a lean dough and a no-knead dough at that!

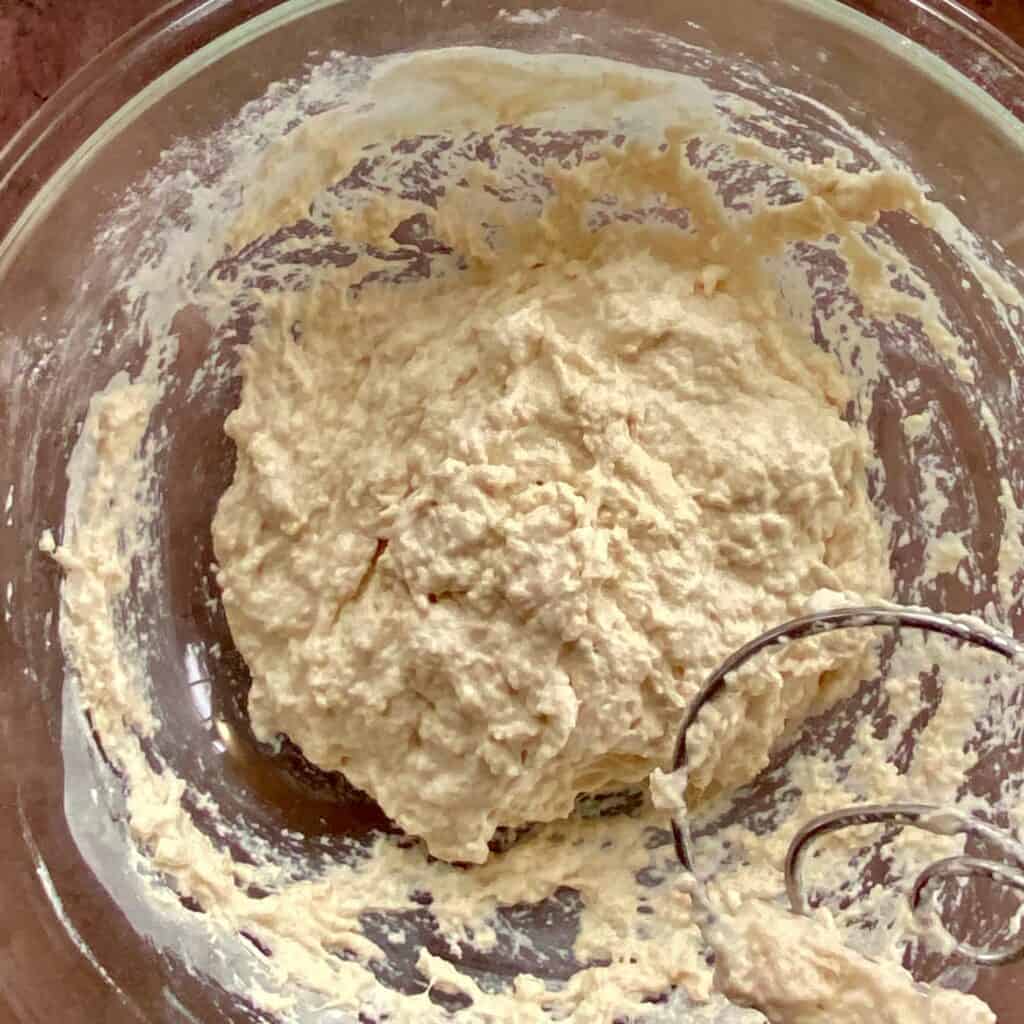
Whisk or stir the dry ingredients together, then add the water and stir.
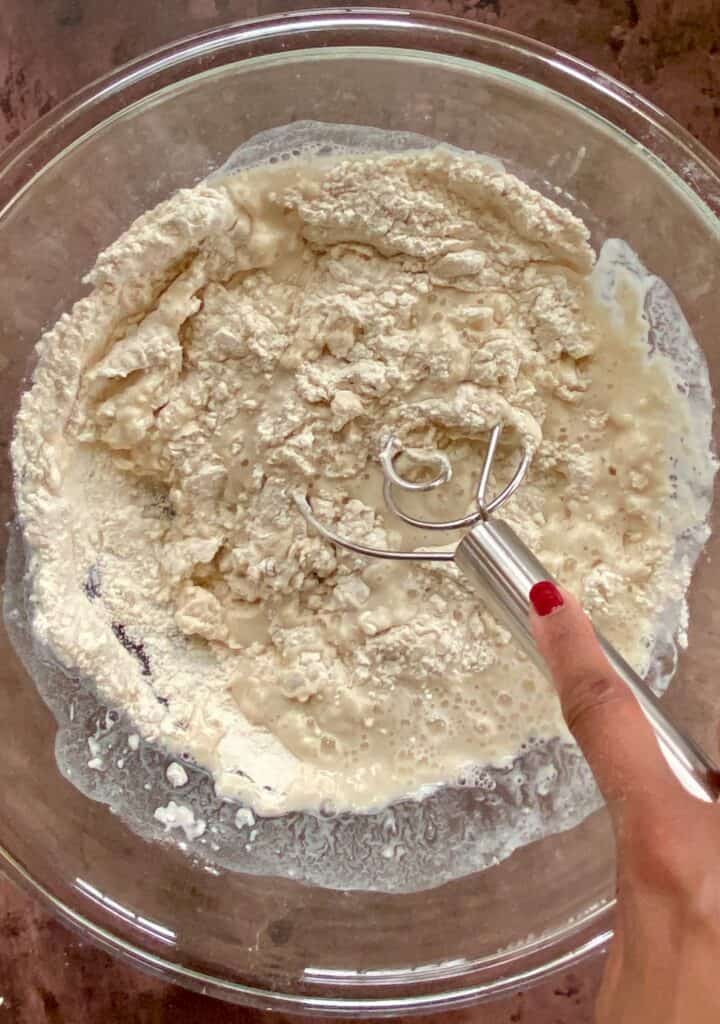
The dough will originally look very dry. Keep stirring until it looks like this!
Then, cover it and leave it alone for two hours. Really! Let it rise at room temperature for 1.5-2 hours, or until it has doubled in size.
After the initial rise, place the dough in the refrigerator for at least 12 hours, but up to 24 hours. Remove from the refrigerator and get ready for fun!
Place olive oil on your hands and fold the focaccia in on itself four times.
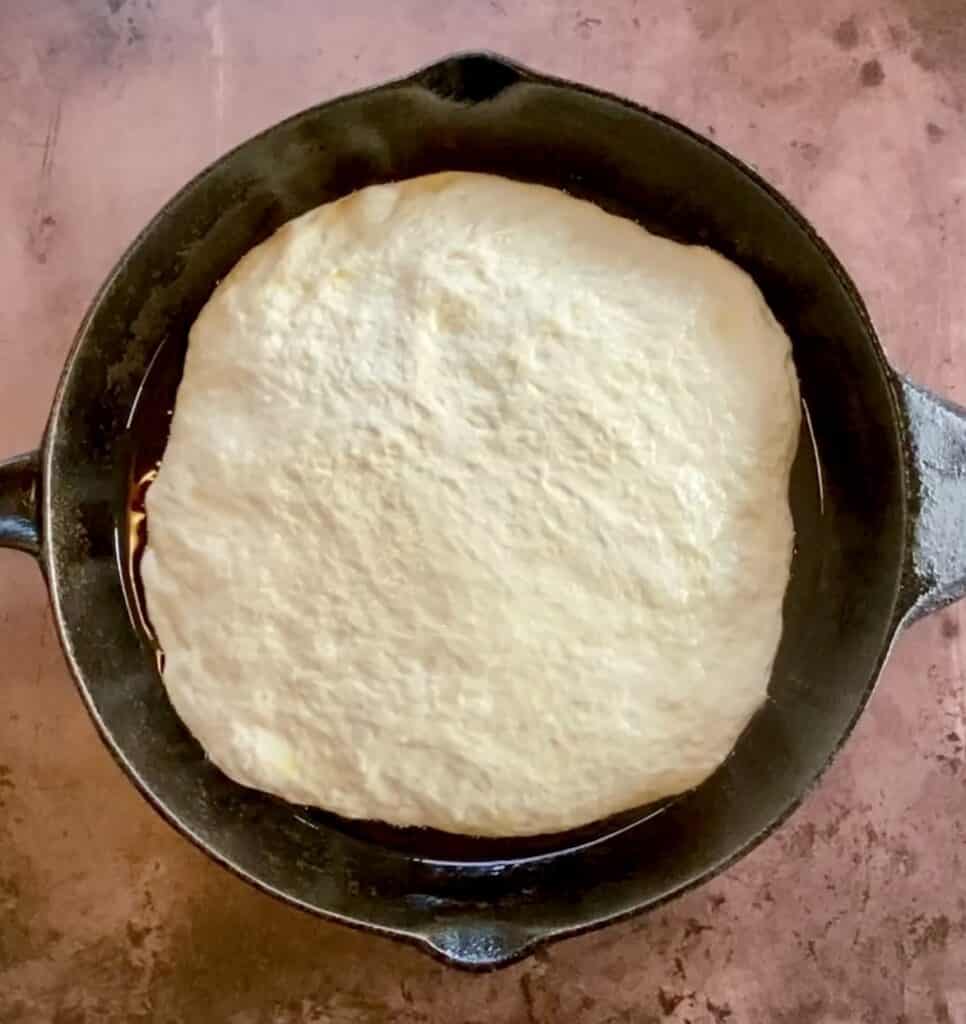
Place two tablespoons of olive oil in your cast iron skillet and cover the whole surface with it. There will be extra oil in your skillet. Don’t worry about wiping it out!
Turn the focaccia around in the oil, covering all sides. Make sure that the entire surface of the dough is covered in oil; small pockets of oil are okay!
Allow the dough to rise, uncovered for 2-3 hours, or until the focaccia looks like this:
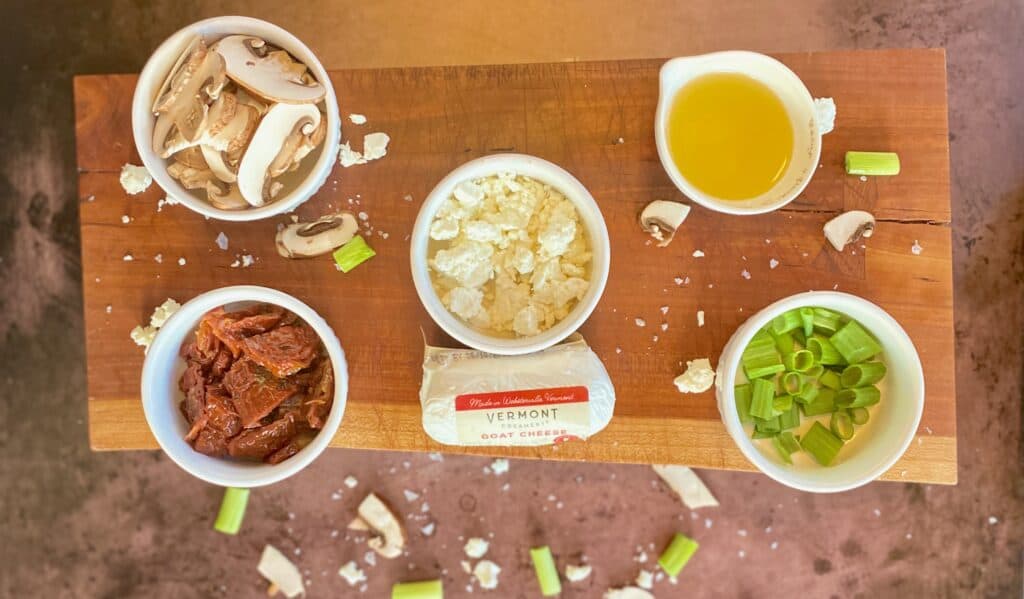
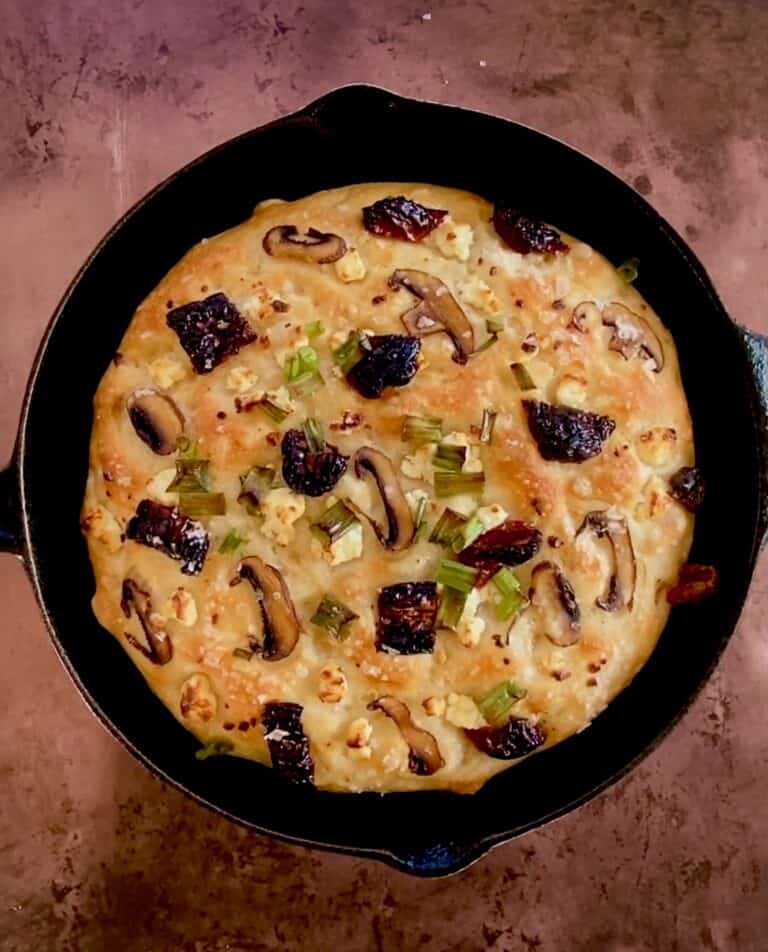
While the focaccia is rising, prep your ingredients. In addition to the Vermont Creamery Goat Cheese (a must), I added sun-dried tomatoes and mushrooms when building the focaccia, and scallions at the end of the baking time.
45 minutes before baking, pre-heat your oven. It’s important to make sure that your oven is a real 425°F when you bake this focaccia, so give it enough time to get there! An oven thermometer takes the guesswork out of oven temperatures as well.
Once the dough has finished rising, oil your hands and dimple the dough. Make sure that you go all the way to the bottom of the skillet!
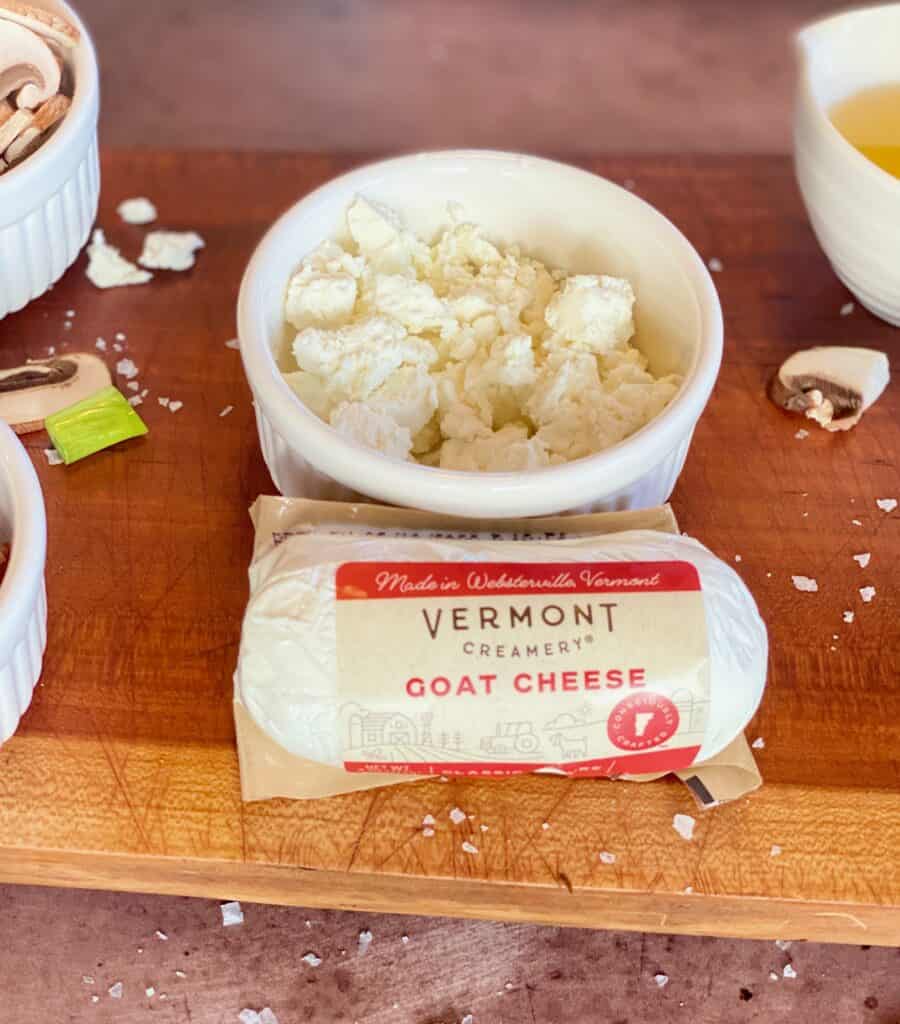
Add your toppings. I’m telling Y’all, don’t skimp on the goat cheese. During *ahem* copious amounts of testing, I found that crumbling the goat cheese worked better than using large chunks of goat cheese.
I love this goat cheese so much.
Bake in a 425°F oven for 18 minutes. If you’re adding scallions, add them at the 18-minute point. Be careful! Cast iron is incredibly hot! After adding scallions, bake for another 8-10 minutes, checking frequently. The focaccia is done when it looks like this:


When safe to do so, remove the focaccia from the skillet and put on a cooling rack. This bread is ready to cut in 30-45 minutes, or when it is slightly warm. It’s best on the same day that it’s made, but I have frozen it as well.
This bread is so amazing. I’ve tested it over and over again and it still usually disappears the same day that it was made. In my house, that’s saying something!
I hope you all love this recipe that’s so dear to me. Cast iron skillet cooking is my preferred method, and finding new uses for my favorite cooking vessel is so cool to me!
Want to check out the Instagram post to see how I made this amazing bread? It’s right here!
Enjoy the recipe!
Do you love baking cookies? Ever wonder why your cookies are sometimes perfectly, and sometimes a crumbly mess? Click here to download my FREE guide, “Five Easy Tips for Chewy Cookies!”
Goat Cheese Skillet Focaccia
- Wonderfully chewy, perfectly salty, incredibly easy fresh bread? Yes please!
- Total Time: 0 hours
- Yield: 12 1x
Ingredients
For the Dough:
- 384 g bread flour (I used King Arthur Baking)
- 342 g warm water (105°F)
- 1 tbsp fleur de sel, divided
- 2 tsp instant yeast
- 7 tbsp olive oil, divided
To Top the Focaccia:
- Vermont Creamery Classic Goat Cheese (but do try their other flavors as well!)
- Sun-dried Tomatoes
- Thin-Sliced Mushrooms
- Scallions
Instructions
- Add the bread flour, 1/2 tbsp fleur de sel, and instant yeast to a large bowl. Whisk to combine.
- Add the warm water to the flour mixture. Using a wooden spoon or Danish dough whisk, stir until completely combined. The dough will be very loose and sticky. Do not add any more flour.
- Cover loosely with plastic wrap or a clean tea towel and allow to rise for 1.5-2 hours, or until doubled in size.
- Place in the refrigerator and refrigerate dough for 12-24 hours.
- Remove dough from the refrigerator. Oil your hands with 1 tbsp of olive oil and form a ball with the dough by gathering dough in both hands and pulling to the center. Do this four times, turning the bowl a quarter of a turn each time. (see video, above)
- Place 2 tbsp of olive oil in a 10″ cast iron skillet. Spread oil around the entire inside of the cast iron skillet. Don’t worry if there is some oil pooled in the skillet.
- Turn the dough ball around in the cast iron skillet, making sure to cover every surface of the dough ball in oil.
- Allow the dough to rise, uncovered, for two hours. Preheat your oven to 425°F with 45 minutes left in the rise time.
- Oil your hands with 1 tbsp of olive oil. Dimple the dough, making sure that your fingers go all the way to the bottom of the skillet. The dough will stretch to the edges of your skillet during this process!
- Add goat cheese, sun-dried tomatoes and mushrooms to the top of the focaccia. Cover the top of the focaccia with another 1.5-2 tbsp of olive oil and the other 1.5 tbsp of fleur de sel.
- Bake in a 425°F oven for 18 minutes. If adding scallions, at at that point.
- Bake another 5-10 minutes, checking frequently for doneness.
- Remove the focaccia from the oven and place on a cooling rack.
- Focaccia is best eaten on the same day, but it can be frozen for a couple of days.
Notes
- You can top the focaccia to your taste, but be mindful of loading too many toppings on the focaccia.
- Prep Time: 25 minutes (active)
- Rise Time: 15-27 hours
- Cook Time: 25 minutes
- Category: Bread
Nutrition
- Serving Size: 1 slice
- Calories: 190
- Sugar: 0.1 g
- Sodium: 11.7 mg
- Fat: 8.8 g
- Carbohydrates: 24 g
- Protein: 4.2 g
- Cholesterol: 0 mg