
Friends.
Today, I’m going to admit to y’all that I am a complete and utter fool for my husband and children. If I might…
This past Saturday, my husband told me that our dear friend Bernie had a birthday coming up. I was prepping something totally different for my Sunday Session at the time.
Bernie’s birthday was on Monday.
So of course I wanted to bake a cake for Bernie’s birthday. On Monday.
“What kind of cake does he like?” I asked. I got raised eyebrows and shrugged shoulders in response.
“What kind of cake would you like to take?” I tried, hoping for something more than raised eyebrows. I got the raised eyebrows and only the raised eyebrows.
“I’m just the delivery guy,” he finally responded.

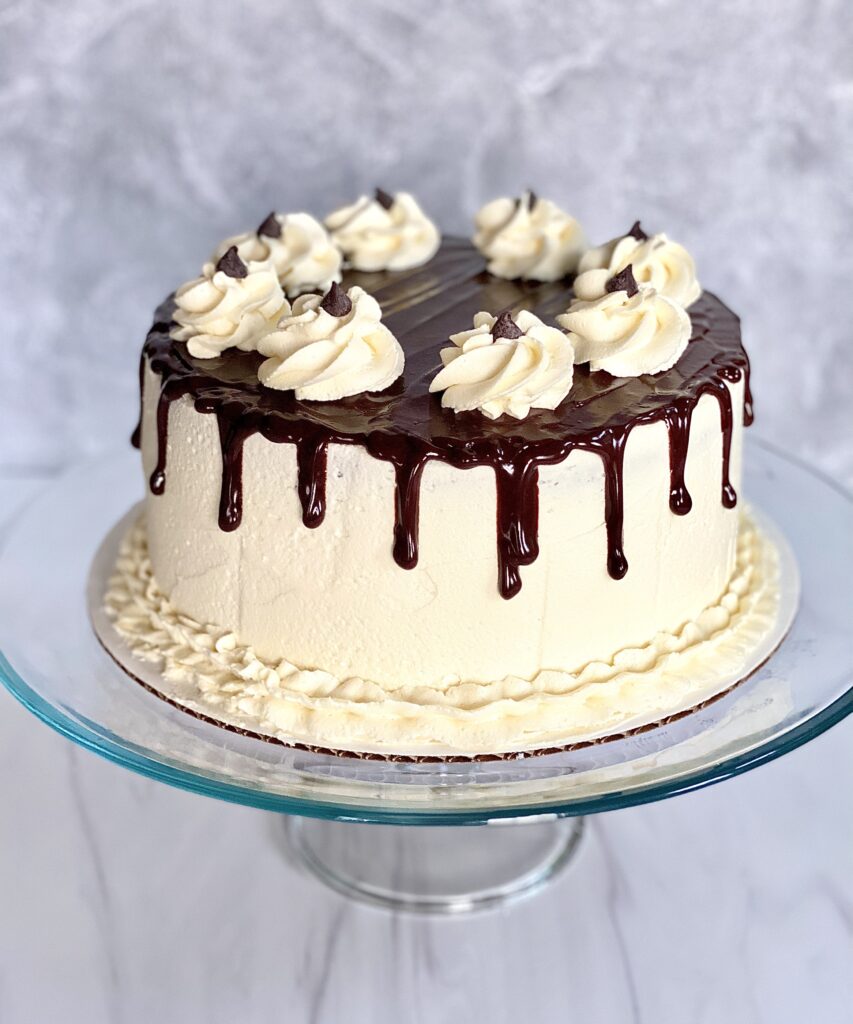
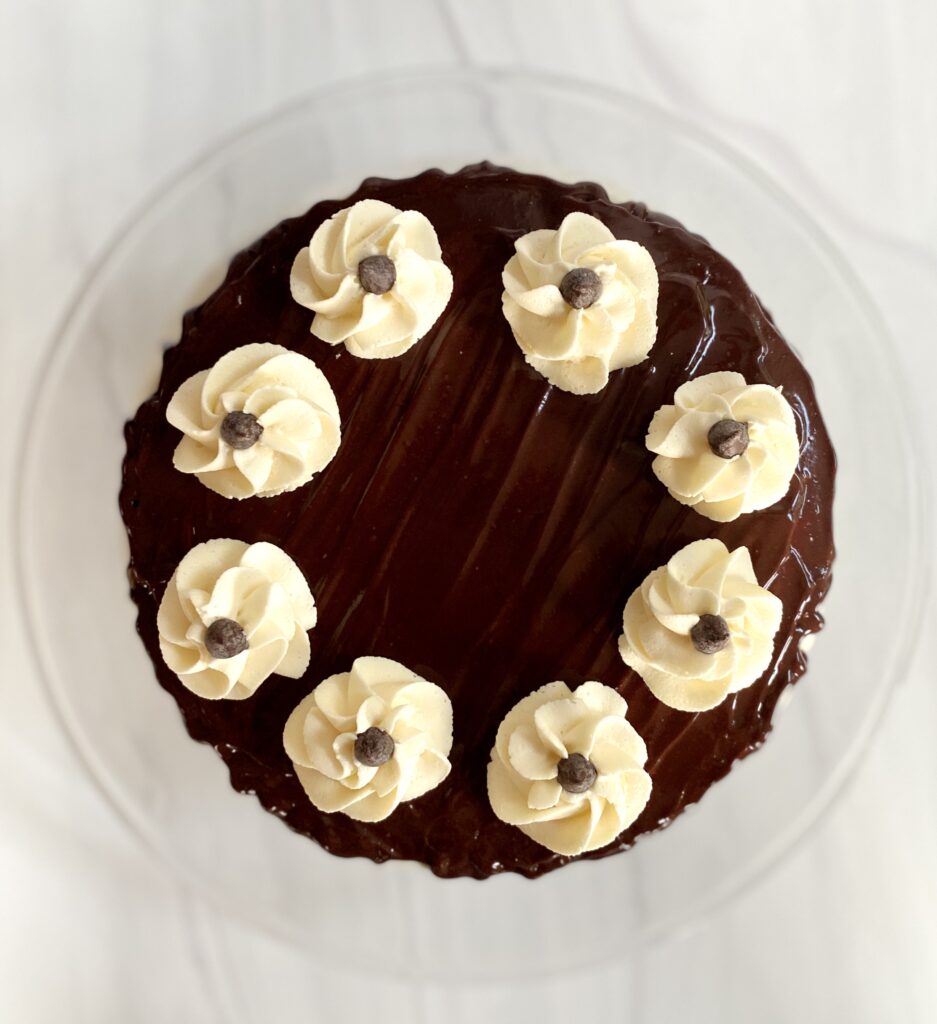
I adore Bernie, so I decided to follow my spirit on this one. My spirit chose this double chocolate cake with vanilla buttercream, garnished with chocolate chips. I finished it 6:40 on Monday morning.
Want to see some techniques so that you can replicate them in your own kitchen? Let’s go!
Techniques Featured:
- All-in-One Cake Technique
- Crumb Coat Technique
In this Post:
The Setup
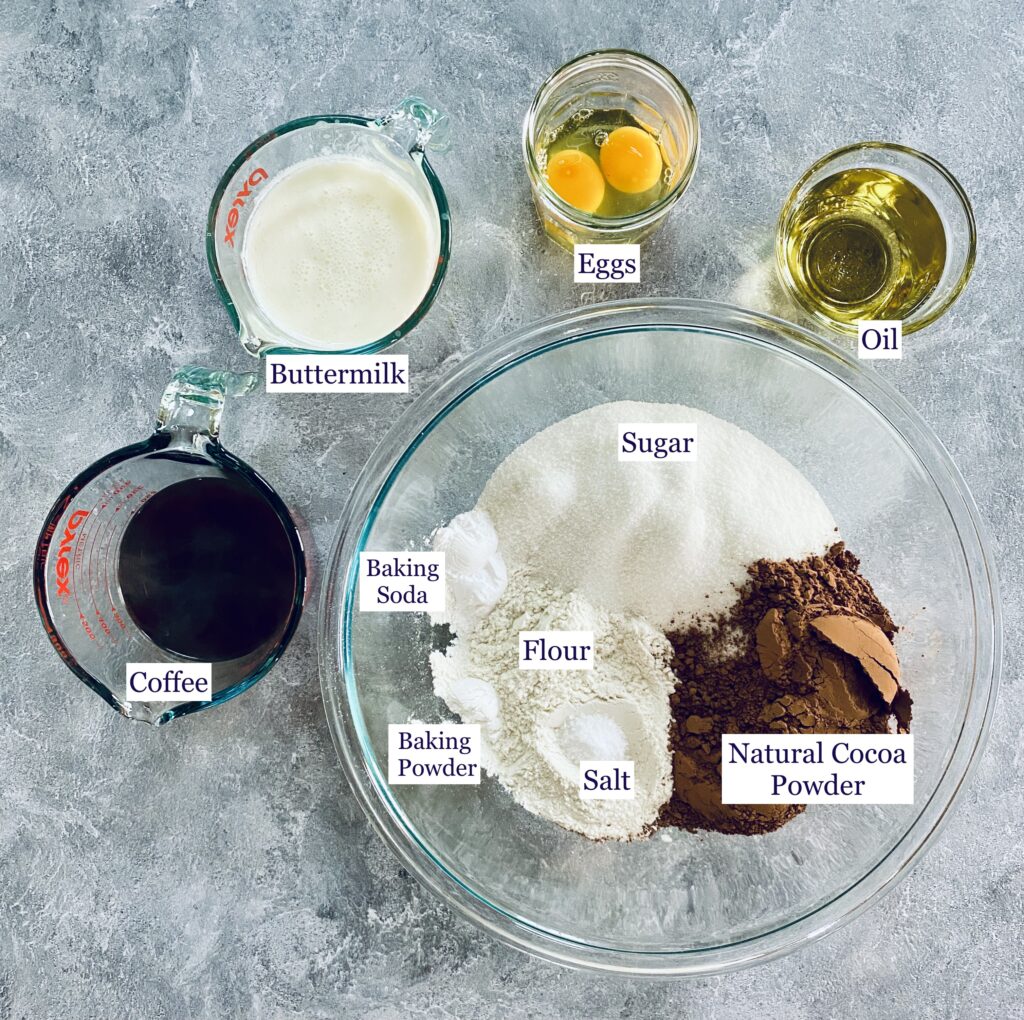
As usual, I began my baking session by gathering ingredients and prepping my mise en place. If you’re looking for immediate transformation from non-baker to baker, prep your mise en place first! You can read much more about it here, but the TL;DR version is that prepping your ingredients beforehand will make you a more confident, controlled baker in one shot.
Here’s my mise!
For this cake, I modified the technique in Ina Garten’s Beatty’s Chocolate Cake Recipe by omitting my stand mixer. I also opted for natural cocoa powder when I made this cake. The original, as written, is an exceptional cake and I highly recommend it for beginning bakers.
While the recipe doesn’t specify whether to use natural cocoa powder or Dutched cocoa powder, I used natural cocoa powder since there is more baking soda than baking powder in the recipe. Want to know the difference between baking powder and baking soda, and why I chose natural cocoa powder for this recipe? Take a look here!
Onto technique!
The All-in-One Technique
“All-in-one” is exactly as it sounds. For this technique, you whisk the combined wet ingredients from one bowl into the combined dry ingredients in another bowl and mix until combined. This technique usually makes a more dense, moist (I know) cake than the creaming method. But, with chocolate cake, dense and rich is it.
The original recipe requires a mixer to get everything combined. But Family, one of my favorite things to do on Sunday morning is mix batters and doughs by hand when possible. The sweet repetition of kneading dough or the simple satisfaction of folding fruit into a muffin batter while I’m listening to Sam Cooke just feels good to me. So, a good all-in-one cake on Sunday makes my heart happy, whether it’s for a friend or my family’s Sunday dinner.
For this recipe, I used my whisk to thoroughly combine the dry ingredients in my biggest glass bowl. Then, in a medium-sized bowl, I thoroughly combined the buttermilk, eggs (you need extra large, or 112 grams of eggs for this recipe), and oil with the same whisk. I then added the wet ingredients to the dry ingredients and gently stirred only until I couldn’t see any more streaks of dry ingredients.
Finally, I carefully added the hot coffee and stirred gently until it was just combined. You’ll know when it’s done because it will be a luscious, velvety brown.
Once the batter was done, I prepped two 8″ cake pans and divided the batter evenly, using my digital kitchen scale and a ladle. If you’d like to see how I prep my pans, take a look at this video at the :35 second mark.
The Bake
Once prepped, I popped the two cakes into into a 350° oven. I checked them at the 37-minute mark using an instant read thermometer, and let them bake for about three minutes more. Once they hit 210° in the center, they were ready!
After they were done, I let the cakes sit in their pans for about 30 minutes, and then inverted them onto cooling racks. For more on this technique, check out the “Three Tips for Amazing Cakes” video above at the 3:08 mark. In the meantime, here are the baked cakes, fresh from the oven.

The Crumb Coat
Beloveds, a crumb coat is a thin layer of buttercream that you add while building a cake. The purpose of a a crumb coat is two-fold:
- Like the name suggests, a crumb coat catches any crumbs that might come loose when you’re frosting. If you want a finished frosting without bits of cake in it, then a crumb coat is key.
- A crumb coat helps stabilize the structure of your cake (to a point…a thick three-tier still needs help). For normal cakes out of a normal home kitchen, kept at a normal room temperature, a crumb coat helps keep the cake level and prevents the cake layers from sliding around.
I wanted a clean buttercream on the cake, so I froze the cakes overnight and took them out first thing in the morning. When I’m not going to frost a cake right away, I wrap the cake layers in kitchen wrap, freezer paper, and freezer bags and then pop them into the freezer for anywhere from an hour to overnight.
These cakes stayed overnight because I WAS TIRED on Sunday evening and I didn’t want to commit an act of violence against them.
So, I woke up before the rooster on Monday and got right to it.
For a detailed explanation about how to crumb coat a cake, the “Three Tips for Amazing Cake” YouTube video at the 5:11 mark is GOLD. For the one-minute TL;DR version (with music!), take a look at this actual footage of me crumb coating this cake.
Sound on if you want to shimmy with me.
After crumb coating the cake, I popped it into the refrigerator to set for about fifteen minutes. With the buttercream on top, I didn’t worry about the cake drying out. The longer the crumb-coated cake stays in the fridge, the more stable the cake will be. You can leave a crumb-coated cake in the fridge overnight with absolutely no issues. But since I was short on time, the fifteen minute set up was all I could do.
It was enough though!
Finishing Touches
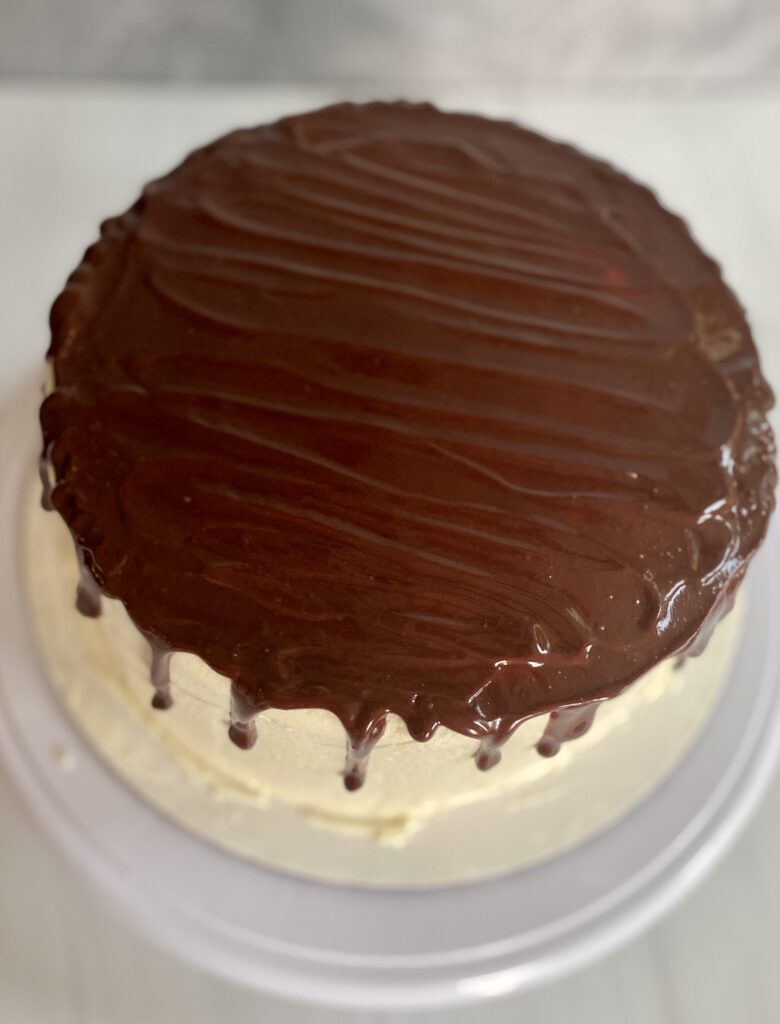
After letting the cake set, I did the final touches. For this cake, that meant another layer of buttercream and a dark chocolate ganache topping.
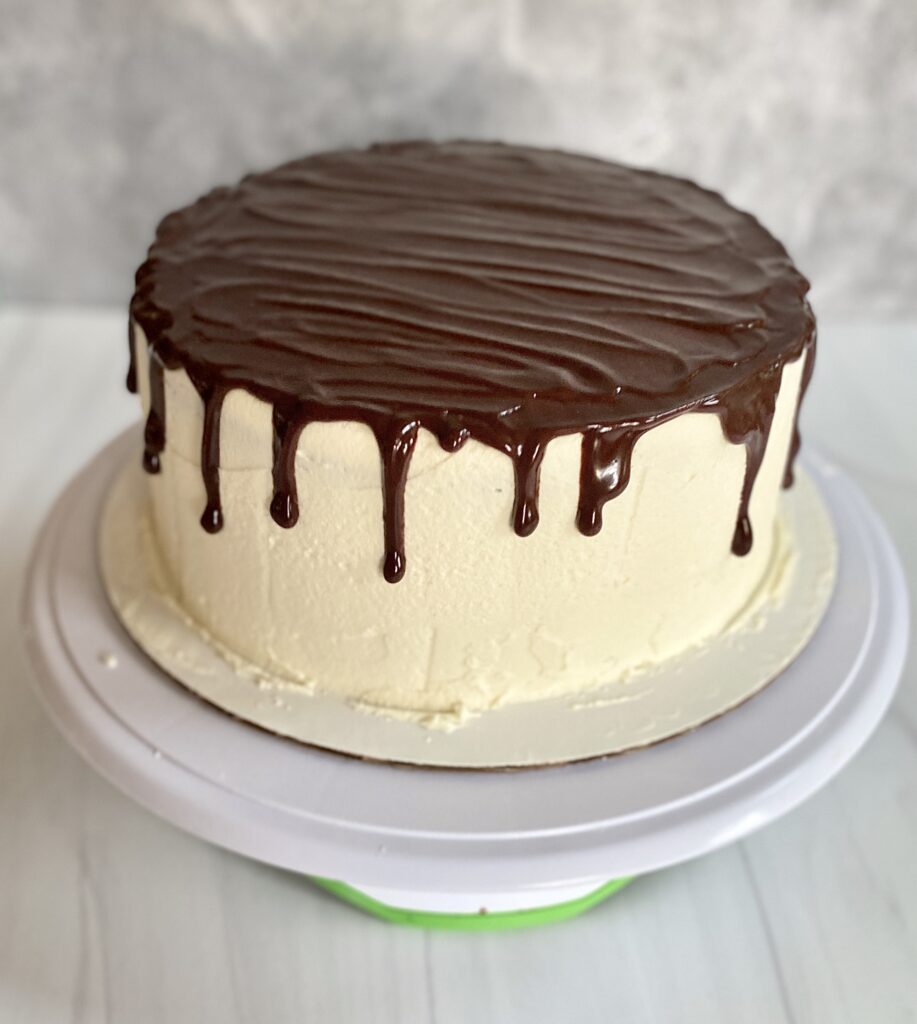
I honestly could have stopped here, but because this was for Bernie I wanted a finished cake, I pressed on and did some buttercream swirls on top, a border at the bottom, and garnished it with some chocolate chips.
So here’s the final product:
Happy birthday to one of the dearest men we know. Happy birthday, Bernie, and cheers to many more.
I hope you enjoyed this Sunday Session! See you next time and don’t forget to subscribe for the latest and greatest content!