Ingredients
Scale
For the Cake:
- 192 grams (1 1/2 cups) all-purpose flour
- 1/2 teaspoon kosher salt
- 1/4 teaspoon baking soda
- 1/2 vanilla bean, or 1/2 tablespoon pure vanilla extract
- 250 grams (1 1/4 cup) granulated sugar
- 114 grams (1/2 cup) unsalted butter, room temperature
- 3 eggs, room temperature
- 125 grams (1/2 cup) buttermilk, room temperature
For the Glaze:
- 120 grams (1 cup) confectioner’s sugar
- 1 1/2 tablespoons whole milk
- 1 tablespoon corn syrup
- 1/4 teaspoon vanilla, or 1/4 vanilla bean
- 1/8 teaspoon fine sea salt
Instructions
To Make the Cake:
- Before you begin, preheat your oven to a true 325°F. An oven thermometer will help you determine if your oven is the right temperature when it’s time for baking.
- Sift the flour, kosher salt, and baking soda in a medium bowl. Set aside.
- Use a sharp knife to carefully split the vanilla bean pod. Carefully scrape the vanilla beans from the vanilla bean pod. Add granulated sugar and vanilla beans to a medium bowl or a large deli container. Either use your fingers to massage the vanilla beans into the granulated sugar, or place the top on the deli container and shake vigorously. This massage/shake process helps to release oils from the vanilla beans, and gives huge flavor to this cake.
- Place butter in a large mixing bowl, or the bowl of a stand mixer. Blend on medium speed until combined and smooth. Scrape the sides and bottom of the bowl to ensure even mixing.
- Add the vanilla-infused sugar to the butter and cream until light and fluffy. (Not sure what “cream until light and fluffy”? I’ve got you! I wrote an entire blog post about this necessary step to baking proficiency!) Scrape the sides and bottom of the bowl at intervals to ensure even mixing.
- Add eggs, one at a time, taking care to scrape the sides and bottom of the bowl as needed. Mix thoroughly.
- Add pure vanilla extract (if using) and mix thoroughly. If using vanilla bean, you can skip this step.
- Add half of the flour mixture to the batter. Mix on low speed just until the flour is almost incorporated.
- Add all of the buttermilk to the batter. Mix on low speed until nearly incorporated.
- Sift the second half of the flour mixture into the bowl and mix on low speed until almost combined. Stop mixing just before the mixture is fully together.
- Using a rubber spatula, gently mix the batter until it is smooth and consistent. Make sure to fully scrape the sides and bottom of the bowl.
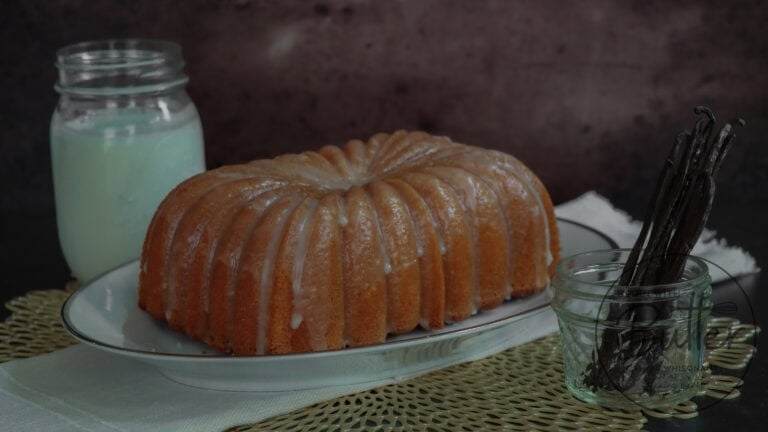
- Prep a loaf pan as you normally would (the Nordic Ware Classic Fluted Loaf Pan is beautiful for this cake), and place the batter into the pan. Smooth the top of the batter to even it out, and tap the pan gently on the countertop several times to remove any large air bubbles.
- Bake in a 325°F oven for 50-60 minutes, or until an instant-read thermometer reads 210°F in the center.
- Remove the pan from the oven and allow it to cool for ten minutes, the invert the pan onto a cooling rack. If using a standard loaf pan, carefully invert again to return the cake to its original orientation (this second move isn’t necessary if you use a decorative loaf pan!).
To Make the Glaze:
- Add the confectioner’s sugar, fine sea salt, vanilla extract (or vanilla beans, if using) corn syrup, and whole milk to a medium mixing bowl. Stir to combine.
- The final glaze will be the consistency of maple syrup, and not honey.
- Immediately after turning out the cake on a cooling rack, slowly and carefully pour the glaze over the top of the cake. The goal is to create a glazed donut appearance for the cake, which is especially nice if you’re using the Nordic Ware Classic Fluted Loaf Pan that I used for this recipe.
Notes
- For clean slices, allow the cake to cool completely before moving it from the cooling rack and cutting. Be careful when moving it, as you don’t want to crack that beautiful donut glaze!
- Use a fine mesh strainer or sifter to sift dry ingredients for a uniform crumb.
- The cake is versatile—serve it plain, with whipped cream, or alongside macerated peaches.
- Prep Time: 20 minutes
- Cook Time: 50-60 minutes
- Category: Dessert