

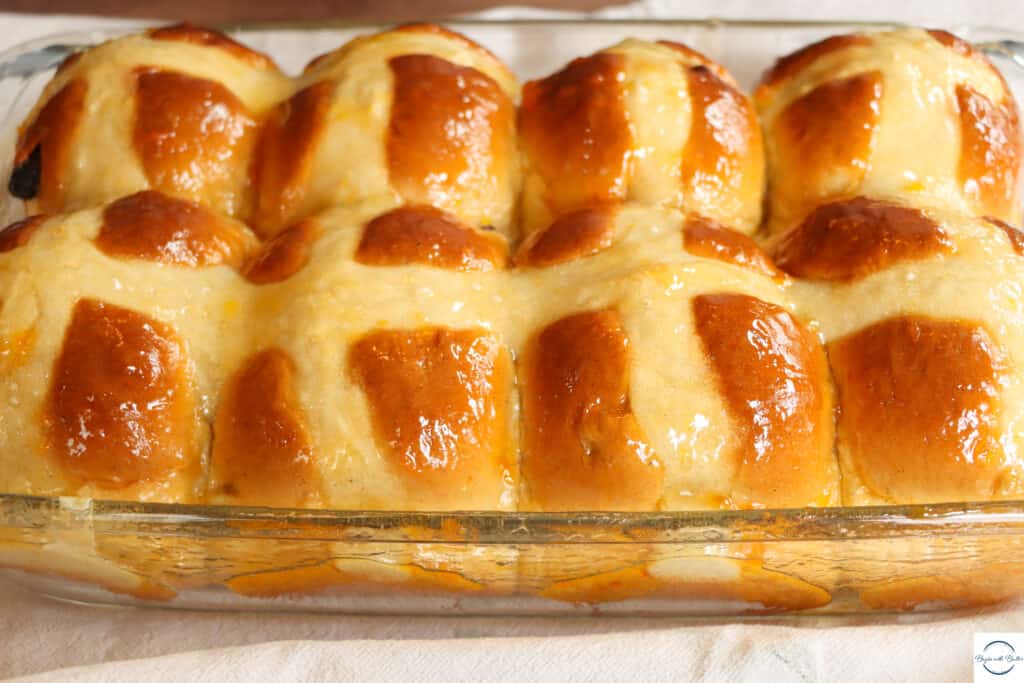
It is not right how quickly I just ate two Hot Cross Buns. Just back to back. They are sweet and slightly spicy and sticky and just…perfect.
But, as I’ve said before, quality control is one of the most important parts of my job. So, of course, that’s why I did it.
About These Hot Cross Buns
Hot Cross Buns are traditional for Easter, and these deliver on that classic tradition. They contain cinnamon, nutmeg, and cloves, which make them a beautifully spiced treat. They have brown sugar, which gives an additional level of decadence that cannot be matched. They are literally packed with plumped raisins, which delighted my adult and child testers alike.
In other words, these Hot Cross Buns are literally meant to disappear from sight in record time.
You’ll love adding these to your Easter table. I can’t wait for you to make them! Prepare yourself…the ingredients list is long, but I assure you that these Hot Cross Buns are beyond worth it.
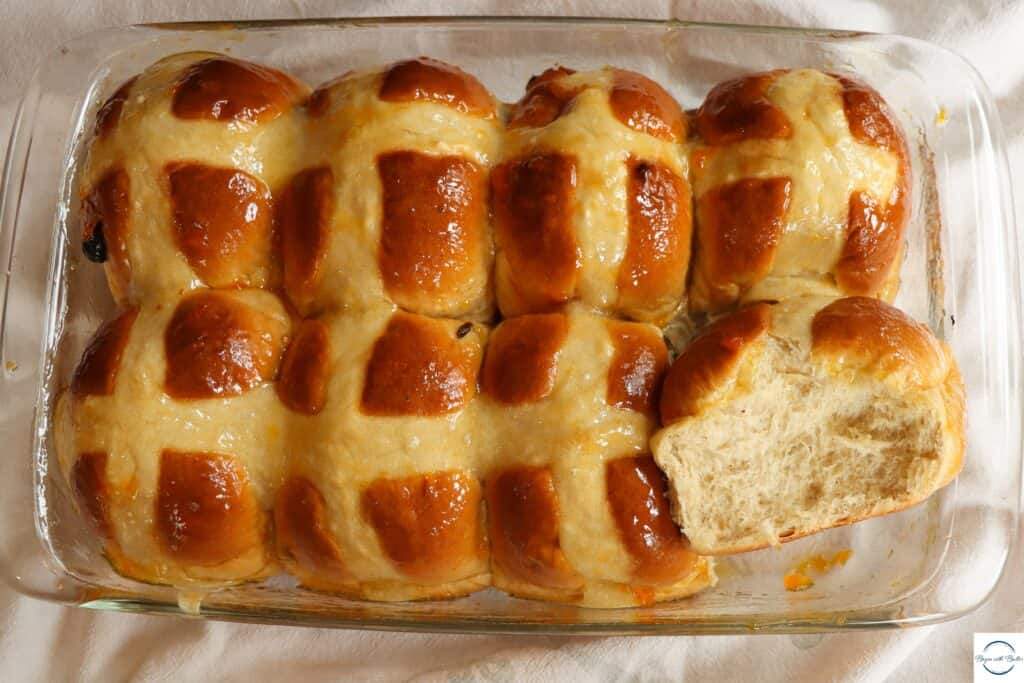
Also, the recipe makes either 8 or 12 Hot Cross Buns. The technique is exactly the same, but expect the larger buns to take 3-5 minutes longer in the oven. Oh, and the XL version is SUPER impressive!
Hot Cross Bun Dough Ingredients
Raisins: You’ll plump up the raisins before using them to give them an extra delicious texture in these Hot Cross Buns.
Whole Milk: You’ll want to use whole milk in this recipe, to take advantage of the full fat content. You can use 2% in a pinch, but I wouldn’t use 1% or skim in this recipe.
Yeast: Yes! These are yeast rolls! But don’t worry. You can absolutely accomplish these incredible, impressive rolls. Feeling a little timid about yeast? You can check out Bread Bootcamp for 50% off right now with code SPRING! You’ll never feel insecure again about working with yeast!
All-Purpose Flour: I tried this recipe with both all-purpose and bread flour. I preferred the texture of the finished buns just a bit more with all-purpose flour. You could absolutely use bread flour for these incredible buns; just expect a bit more chew!
Kosher Salt: Salt is very important in any dessert or bread. It helps develop flavor and also counteracts the sugar in your recipe, to keep the finished product from being too sweet.
Cinnamon: These Hot Cross Buns benefit from a kiss of cinnamon. It adds such a special flavor to this recipe and it makes the finished product truly irresistible.
Nutmeg: The slight amount of nutmeg in this recipe adds a big hit of warmth to these buns, and makes them super homey.
Cloves: Cloves are a super hero in these hot cross buns! The tiniest amount of clove gives a big punch of spice. So use it sparingly!

Brown Sugar: The brown sugar adds some sweetness, but also a depth of flavor from the molasses!
Granulated Sugar: Granulated sugar adds sweetness and caramelization to these Hot Cross Buns! I tried this recipe without the granulated sugar, and found that the sweetness level was a bit lacking. Granulated sugar saved the day!
Orange Zest: Want that je ne sais quois in your recipe? The thing that nobody can place (but keeps them coming back for more and more Hot Cross Buns)? Use the orange zest. It’s worth the additional effort.
Egg: The protein in the egg adds structure, while the fatty yolk adds delicious flavor.
Pure Vanilla Extract: Make sure to use the good stuff, like Nielsen-Massey, for this incredible recipe! Whatever brand you use, make sure you use pure vanilla extract! “Vanilla flavoring” is NOT THE SAME THING.
Unsalted Butter: While I treat the dough like a brioche (from a technique standpoint), it’s not, in fact, a brioche dough. However, the butter in this recipe will really shine, so use your absolute favorite baking butter for this recipe.
Beginners Start Here
If this is your first time baking bread, or you’re intimidated by yeast, or if it’s been a while since you baked, here are some resources from the BwB website and the BwB Home Baking Academy that will help you be successful with these Hot Cross Buns!
- BwB Bread Bootcamp Replay! Get 50% off with code SPRING!
- Yeast Basics for Beginning Bread Bakers
- Baking 101: How to Measure Ingredients
- Better Baking Basics–Learning About Mise en Place
- The Five Flours I Keep Handy in My Kitchen
- Meet your Kitchen BFF–Your Digital Kitchen Scale!
While these aren’t mandatory reading, they are extremely helpful resources that will definitely help you execute this recipe to a T.
Important Tools Used in these Hot Cross Buns
Below, you’ll find some tools that I used for these Hot Cross Buns. These are the tools that I use all the time in my own kitchen.
**I get paid a small commission if you purchase directly from these links, but they are truly amazing products that you’ll find in my kitchen.**

If you have them already, great! Think of this as a checklist to help you build the confidence that you’ll need to execute this recipe!
- 9″x13″ Glass Baking Dish
- Digital Food Scale
- KitchenAid Hand Mixer
- KitchenAid Stand Mixer
- Stainless Steel Mixing Bowl Set
- OXO Spatula Set
I hope you enjoy these Hot Cross Buns this Easter! Happy baking, Friends!
Print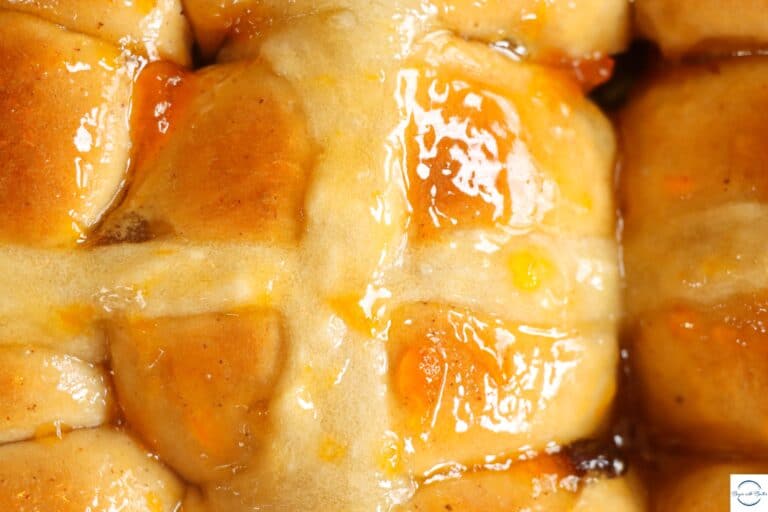
Classic (and XL!) Hot Cross Buns
These Hot Cross Buns are an incredible addition to your Easter table!
Ingredients
For the Dough:
- 217.5 g (1.5 c) raisins
- 500 g (2 c) boiling water
- 325 g (1.33 c) whole milk
- 1 tbsp yeast (instant or active dry)
- 1 tsp sugar
- 512 g (4 c) all-purpose flour
- 1.5 tsp salt
- 1/2 tsp cinnamon
- 1/4 tsp nutmeg
- 1/4 tsp cloves
- 50 g (1/4 c) brown sugar
- 50 g (1/4 c) granulated sugar
- 1 tbsp orange zest (optional)
- 1 large egg
- 1 tsp pure vanilla extract
- 57 g (1/4 c) butter
For the Flour Cross:
- 100 g flour
- 125 g water water
To Finish:
- 1/2 c Apricot Preserves (I love Bonne Maman)
Instructions
- Place the raisins in a heat-proof bowl. Carefully pour the boiling water over the raisins. Set aside for 10 minutes. Drain the water from the raisins and place the raisins in a single layer on a clean dish towel or some paper towels. We want dry raisins for this recipe!
- Warm the milk to 113°F to 115°F. Add the yeast and 1 tsp of granulated sugar. Combine thoroughly. Allow yeast to bloom for 8 minutes.
- Place flour in a container by itself and set aside.
- Cut butter into 1 tbsp-sized pieces.
- Once the yeast has bloomed, add yeast mixture, salt, cinnamon, nutmeg, cloves, brown sugar, granulated sugar, orange zest (if using), egg, vanilla, and ~450 g of flour to the bowl of a stand mixer. Using the dough hook, combine the ingredients until a dough ball begins to form. Add flour, one tablespoon at a time, if the dough remains sticky after five minutes. The dough should pass the windowpane test before adding the butter. At most, this recipe will require 1-2 additional tablespoons of flour, beyond the original 512 grams. However, it’s possible that you won’t need all of the flour!
- Once the dough passes the windowpane test, add the butter, one tablespoon at a time. Mix each pat of butter until it’s fully incorporated into the dough.
- After all the butter has been added, knead with the dough hook until a supple dough forms. The dough should not be shiny and it should again pass the windowpane test.
- Add the raisins to the dough. On lowest speed, combine the raisins until they are uniformly incorporated into the dough. This could take 1-2 minutes on lowest speed. Don’t increase the speed of your mixer, because the raisins might break into pieces. Patience, Friend.
- Place the dough in a greased bowl and loosely cover it with plastic wrap. Allow to rise for an hour and ten minutes, or until it passes the finger poke test.
- Split the dough into either eight (for XL) or twelve equal pieces (a digital kitchen scale works amazingly for this task!) and shape into balls. Place each ball 1″ from its neighbor in a 9″x13″x baking dish. Need help with shaping? Watch my video that shows my techniques for bread making by hand here!
- Cover loosely with plastic wrap and allow the rolls to rise for 45 minutes. While the dough is rising, make the flour paste for the crosses and heat your oven to a true 375°F.
- To make the flour paste, add the 100 g of flour and 125 g of water to a small bowl. Stir until completely combined. The final texture of the flour paste should be thick, but pipeable.
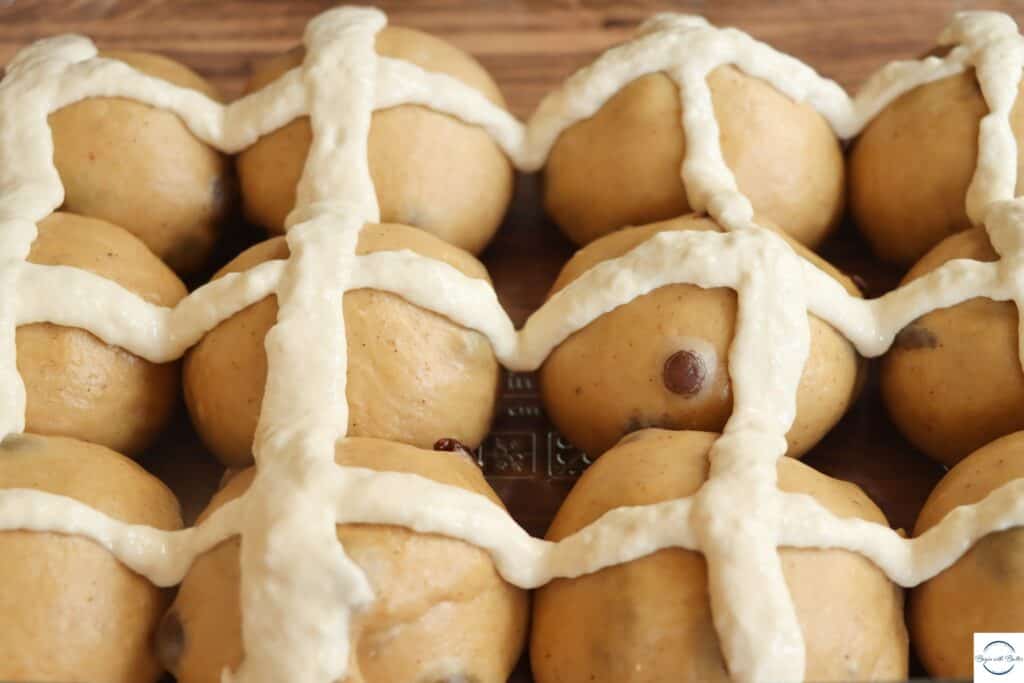
- Place the flour mixture in a gallon-sized freezer bag. Cut a tiny hole at the tip of the bag. Smaller than you think you need! Pipe crosses onto the buns and bake immediately.
- Bake at 375°F for 25-30 minutes (28-35 minutes for XL buns), or until the buns are a deep golden brown. While the buns are baking, prepare the apricot preserves.
- To prepare the apricot preserves, place them in a microwave-safe container. Microwave until melted, or about a minute.
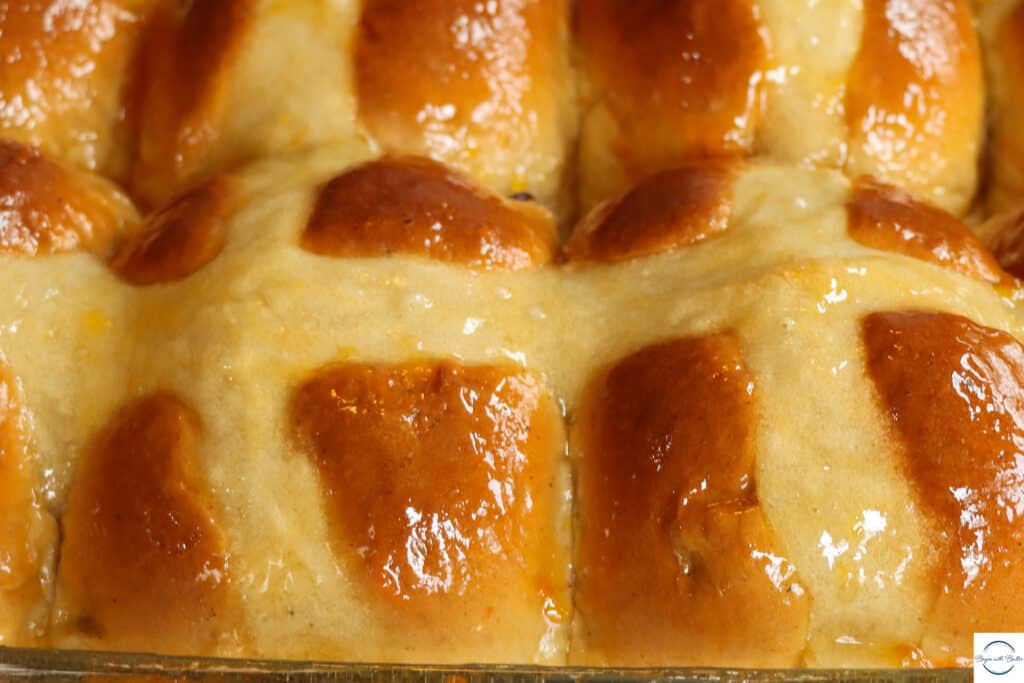
- Once the buns are out of the oven, brush them immediately with the apricot preserves.
- Enjoy warm!
Notes
- Bread baking is as much an art as a science. So, the amount of flour that you need for this recipe might vary. Variations in humidity, protein content, and many other things will impact how much you need. BUT you should not need more than 1-2 tbsp more than the recipe calls for. Want to be absolutely confident with your flour? Use a digital kitchen scale to measure it!
I love the sound of this recipe and am keen to try it. I was just wondering at which point does one add the raisins?
Probably a silly question, the answer to which I can’t see for looking, but I would appreciate the clarification.
Thanks for another great recipe.
Cheers!
Marco
Good Morning Marco! Thank you for pointing out that oversight. I fixed it for you! Have a wonderful day and an even better bake!
Best Hot-Cross Buns EVER!
So easy (&fun) to make and the results are sensational! Oh…& that orange zest tip is just brilliant! It really does take them to a whole different level of deliciousness.
Thanks Shani for another wonderful ‘keeper’ ?
You’re so welcome! Thank you for this wonderfully “sweet” compliment!
These sound wonderful; I may try them this Easter.
As an aside, and I’m sure you didn’t mean to sound that way, but I felt that you sounded elitist–or snobbish–in telling people: “Whatever brand you use, make sure you use pure vanilla extract! ‘Vanilla flavoring’ is NOT THE SAME THING.”
Not everyone at every stage of life can afford the miniscule bottle that costs 10x more than the 8oz. bottle, even if it’s far superior. We know it is. They know it is. But sometimes “milk for the kids” trumps flavoring for baking. I was there before, I know this to be true, and I wouldn’t have wanted to miss out on a great recipe because the author insisted I use “the real stuff” when I just couldn’t afford it.
Again, I’m positive you had no ill intent, but you might try to remember to choose your words as carefully as you measure your flour: weigh them well.
I’m looking forward to trying this recipe!
Sorry you feel that way! We are firmly anti-elitism here. I am particularly invested in teaching readers and students about ingredients, and the vanilla extract/vanilla flavoring distinction is an important one that can impact the final product in any baked good.
Hi,
Thank you for this recipe. Can the dough be frozen and defrosted on the day it is needed to bake.?
Hi there! I haven’t tried that method specifically, but it should be fine, as long as the dough is frozen properly!
Hello! I’m excited to try this recipe however I do have a question… can I omit the raisins? Majority in my house do not like raisins. :-/ and if I can substitute them, what would you recommend?
Hi there! You can absolutely omit the raisins! You might need just a little more flour, but you absolutely might not! I hope you love this recipe as much as I do.
Hi,
I want to go all the way through the 2nd rise, but not bake it until morning so I can eat them warm. Should I refrigerate it overnight? If so, should I let it sit out for a few minutes before baking them? About how long? By the way, I halved the recipe because it’s just my hubby and I. It still made a lot. The dough was a little wet, but the rise was awesome. I plan to try to perfect the smaller amount. They smell so good.
Hi there! Thanks for reaching out! You can absolutely do an overnight refrigerator rise. To compensate for the additional time in the fridge, I would reduce the yeast by half. This will give you amazing flavor and, along with the refrigerator rise, will allow the dough to rise without rising too much. If you do a refrigerator rise, a good rule of thumb is to allow it to rise on the countertop, covered, for 1-4 hours after removing it from the fridge. Best of luck to you!