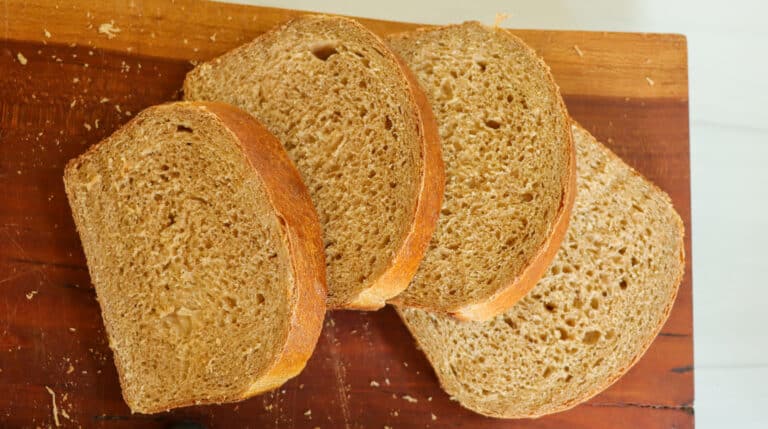
Ingredients
Units
Scale
- 582.5 g (2.33 cups) water
- 1.5 tbsp instant yeast
- 1/2 tbsp turbinado sugar
- 384 g (3 cups) bread flour (ended up using close to 3 cups!!)
- 452 g (4 cups) whole wheat flour
- 1 tbsp salt
- 2 tbsp vital wheat gluten
- 156 g (1/2 cup) maple syrup
- 1 large egg, for egg wash
- 1 tsp water
Instructions
- Warm water to 110°F-115°F. Add instant yeast and turbinado sugar and stir to combine completely. Allow yeast to proof for 8-10 minutes, or until it becomes foamy on top. If yeast does not become foamy, then try again with new yeast.
- Add whole wheat flour and bread flour to a large bowl and combine with a whisk.
- Add yeast/water mixture, salt, Bob’s Red Mill vital wheat gluten, and about 4 cups of the flour mixture to a large mixing bowl (or the bowl of a stand mixer). Use a wooden spoon or the flat beater of your stand mixer to mix on low speed until flour is completely combined. The dough will be very loose and sticky at this point.
- If using a stand mixer, switch to the dough hook attachment. If making by hand, you can continue using a wooden spoon, or switch to a Danish dough whisk at this point.
- Add flour mixture, 32 grams (1/4 cup) at a time, adding more once the previous addition is fully incorporated into the dough. You might not need all of the flour mixture. The dough is ready when it pulls away from the sides of the bowl and does not leave dough residue on the sides of the bowl.
- Turn the dough out onto a very lightly floured work surface and knead by hand for about two minutes before adding any additional flour. The kneading process itself helps gluten development and sometimes you don’t need additional flour! You can also continue kneading with a stand mixer, but I don’t recommend leaving the mixer at this point.
- If you use all of the flour mixture and the dough still hasn’t come away from the sides of the bowl, add additional bread flour, one tablespoon at a time, then knead by hand for at least a minute after each addition. This dough should not need more than 3-5 tablespoons of additional flour.
- You’ll know the dough is done when it passes the windowpane test. The dough should be tacky, but not sticky when it is done.
- Spray the mixing bowl with a light coat of nonstick spray. Shape the dough into a ball and place into the mixing bowl. Cover loosely and allow to rise in an area free of drafts for about 50-60 minutes, or until the dough has doubled in size. Alternately, you can check your dough by doing the finger poke test, which is my favorite way to test bread dough!
- Use a digital kitchen scale to separate the dough into two equal halves. Use your fingers to shape the first half into a rough rectangle. Fold the short end of the rectangle up 1/3 of the way and use the heel of your hand to seal the dough. Fold the resulting triangular-shaped sides of the dough into the loaf and use the heel of your hand to seal. Repeat this two more times, until you have a loaf shape. Then, pinch the final seam and roll gently over the seam to form the final seal. (Confused about how to shape sandwich bread loaves? Check out my video tutorial on YouTube!)
- Place the loaf into an 8.5″x4.5″ loaf pan, seam side down, and repeat step 10 with the second half of the dough.
- Allow the loaves to rise for another 35-45 minutes, or until the loaves are roughly 1” over the top of the loaf pans.
- During the final rise (proofing) time, preheat your oven to a true 400°F. A long preheat time is essential to getting a beautiful loaf! Also, during this time, add the egg and one teaspoon of water to a small bowl and scramble thoroughly.
- When the loaves are finished proofing, gently brush egg wash over both loaves. Bake at 400°F for 20-25 minutes. Loaves are done when they reach an internal temperature of 190°F, or when the loaves sound hollow when thumped on the bottom.
- Remove loaves from their pans immediately after baking and place on a cooling rack.
- Allow loaves to cool for at least 45 minutes before slicing.
Notes
- You might not need all of the whole wheat flour/bread flour mixture for this recipe! It will depend on a lot of factors! You’ll know the dough is done kneading when it is tacky, but not sticky to the touch, and when it forms a very elastic dough ball.
- Prep Time: 25
- Cook Time: 20
- Category: Bread
