


Friends, this summer has been an absolute dream. I’ve spent so much time with my family, had an incredible vacation, and smiled until my cheeks and head hurt. But reality is upon me now, and that means it’s time for back to school! With a third grader and a sixth grader who are very *ahem* secure about their food likes and dislikes, back to school means lots of sandwiches. And lots of sandwiches for them means lots of sandwich bread for me.
So…welcome to my sandwich bread series! In this series, you’ll learn the four types of sandwich bread that I make for my family. And today, we’re starting with my classic sandwich bread.
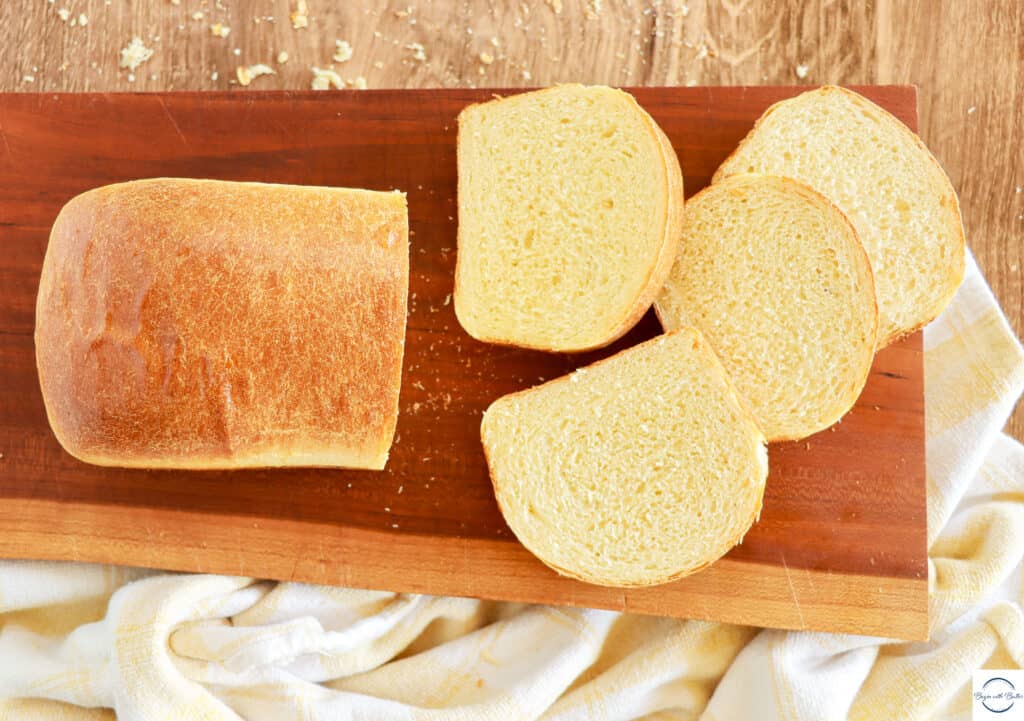
This recipe is for a classic white sandwich bread, and, while it does take practice to master, it is so worth the learning curve! The recipe makes two loaves, which is just about enough for a full week of kid sandwiches in my house.
Because did I mention there are lots of sandwiches around this time of year?
The Set Up for Classic Sandwich Bread
To make this sandwich bread, you need just a few ingredients!
*Please note that this post contains affiliate links to the ingredients and products that I use in my own kitchen.*

Whole Milk: whole milk adds flavor, color, and protein to the dough. It’s also the liquid for this particular dough.
Instant Yeast: instant yeast helps this dough to come together a little more quickly than active dry yeast. You can substitute active dry yeast, but you’ll have to extend the rise and proofing time by a few minutes. I exclusively use SAF Instant Yeast for sandwich bread.
Turbinado Sugar: yeast is a living organism and it likes to eat sugar. So I give it a little turbinado sugar snack to help the initial proofing process.
Egg: This simple recipe uses one egg. The egg helps create the most luscious and soft bread texture ever. If you choose to omit the egg, remove 32 g (1/4 c) of the flour to start.
Bread Flour: I prefer bread flour in this recipe, due to the higher protein content. You can substitute all-purpose flour, but your bread will not rise as high. Also, depending on the protein content in your all-purpose flour, the texture might be noticeably softer. For this recipe, I used King Arthur Baking’s Bread Flour.
Kosher Salt: salt is the major flavor driver in any bread. Without salt, bread is often left tasteless. I prefer kosher salt for bread, due to the larger granules. If using table salt, cut the amount in half.
Vital Wheat Gluten: vital wheat gluten (also known as vital wheat gluten flour) is a high-gluten dough enhancer. Coming in at 80% protein, it’s an important ingredient for great crumb in sandwich loaves. You can absolutely omit vital wheat gluten if you wish; the outcome, however, will be a more dense loaf. I use Bob’s Red Mill for Vital Wheat Gluten.
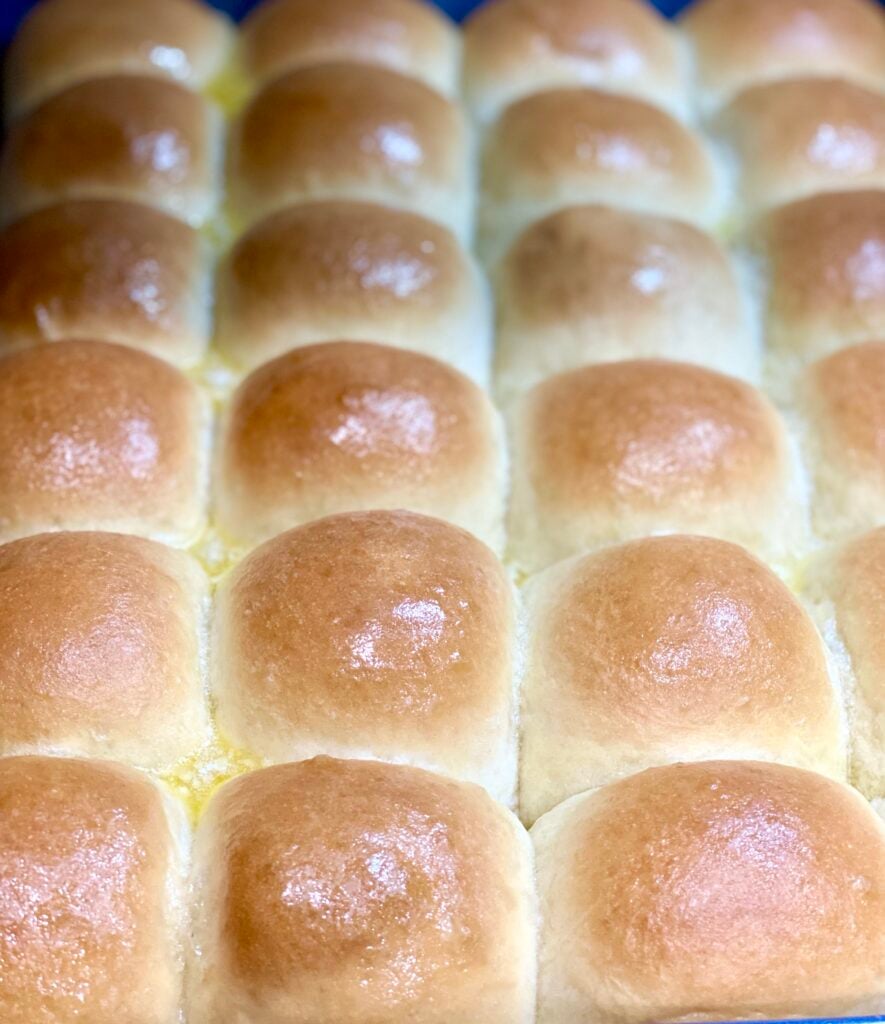
Egg Wash: I use a whole egg for my sandwich bread egg wash. Egg wash creates an amazingly beautiful shine on sandwich bread, making it much, much more enticing!
Beginners Start Here
If you’re new to baking, or this is your first foray into bread, check out some of these BwB resources to help you become more confident with this classic sandwich bread!
- Meet Your Kitchen BFF-Your Digital Kitchen Scale!
- Baking 101: How to Measure Ingredients
- Yeast Basics for Beginning Bread Bakers
- Knowing When to Stop a Technique
- The Five Flours I Keep Handy in My Kitchen
- How to Test Bread Dough
And, BONUS, I recently posted a video on the BwB YouTube channel about how to shape sandwich bread dough! You can check it out right here!
These resources aren’t mandatory, but they can help answer some burning bread questions for you!
BREAD BOOTCAMP IS LIVE!
Do you have lots and lots of questions about how to make incredible bread? Join us on September 17 and September 18 for BwB Bread Bootcamp! During this special, live, interactive event, your bread will be transformed from passable to predictably AMAZING!
Click here for details! Purchase early for 10% off with code BREAD10!
I’m so excited about this sandwich bread series! My kids are not much for bento box lunches, so when they don’t have hot lunch through their school program, I can feed them this bread and know exactly what’s in it.
And for this mom, that’s a big win.
Enjoy the recipe, friends!
Print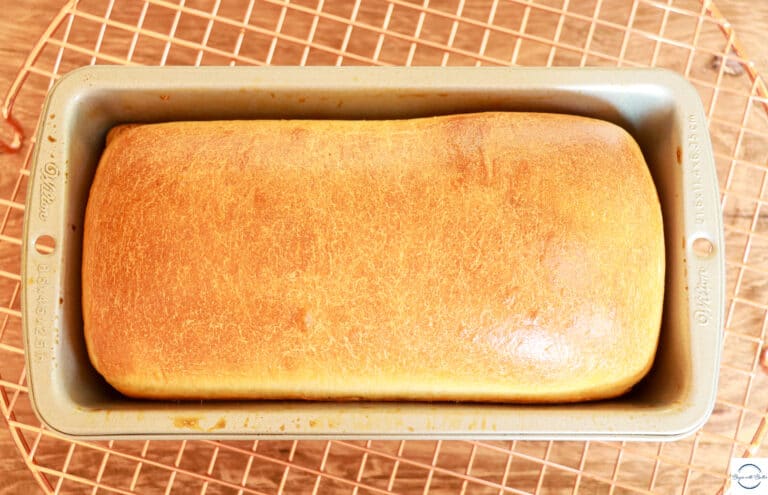
My Classic Sandwich Bread
This classic white sandwich bread has just a few ingredients, and it tastes better than anything store-bought!
- Total Time: 2.5-3 hours
- Yield: 2 loaves 1x
Ingredients
- 532 g whole milk (2 cups plus 2 tbsp)
- 1 tbsp instant yeast
- 1/2 tbsp turbinado sugar
- 736 g (5.5 c) Bread Flour, divided
- 1 tbsp salt
- 1.5 tbsp vital wheat gluten
- 2 eggs, divided
- 1 tsp water
Instructions
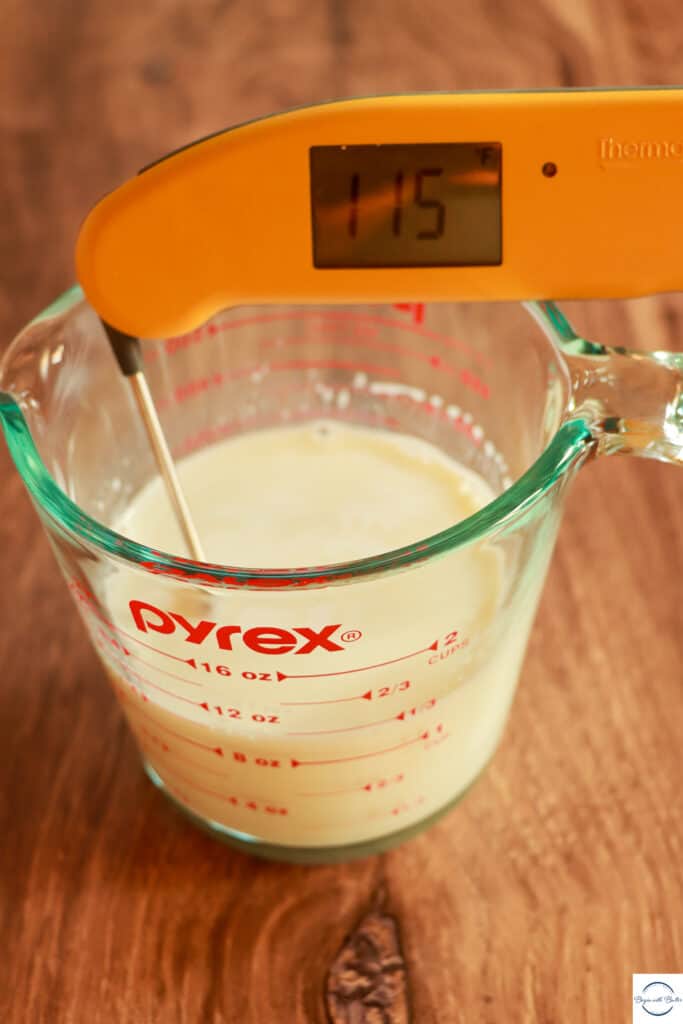
- Warm milk to 110°F-115°F. Add instant yeast and turbinado sugar and stir to combine completely. Allow yeast to proof for 8-10 minutes, or until it becomes foamy on top. If yeast does not become foamy, then try again with new yeast.
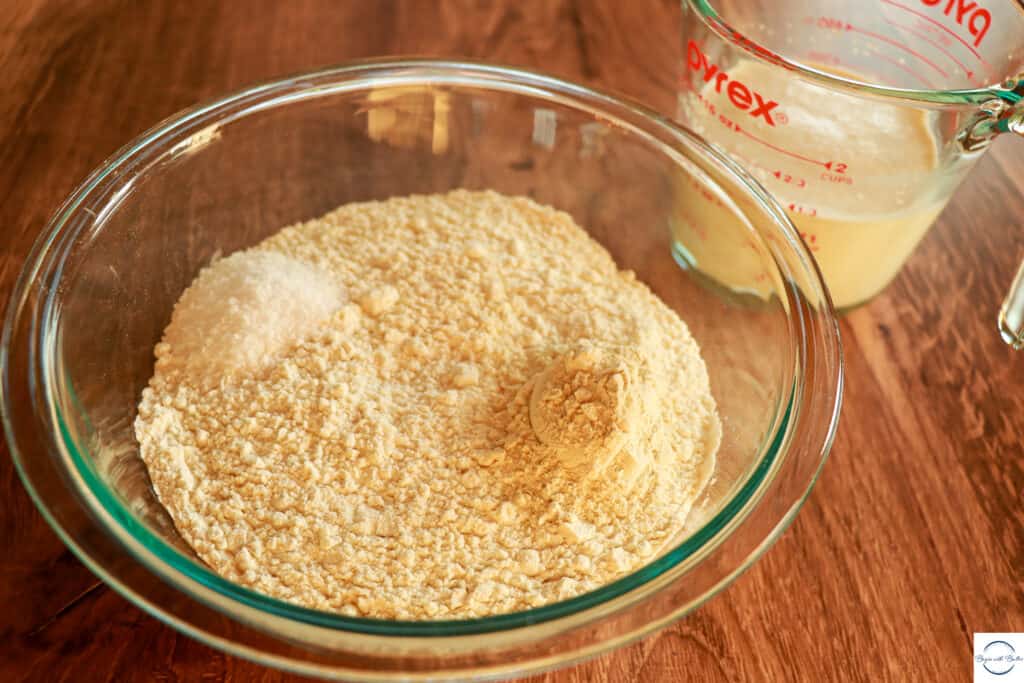
- Add yeast/milk mixture, salt, vital wheat gluten, one egg, and 576 grams (4.5 cups) of bread flour to a large mixing bowl (or the bowl of a stand mixer). Use a wooden spoon or the flat beater of your stand mixer to mix on low speed until flour is completely combined. The dough will be very loose and sticky at this point. This is fine!
- If using a stand mixer, switch to the dough hook attachment. If making by hand, you can continue using a wooden spoon, or switch to a Danish dough whisk at this point.
- Add flour, 32 grams (1/4 cup) at a time, adding more flour once the previous addition is fully incorporated into the dough.
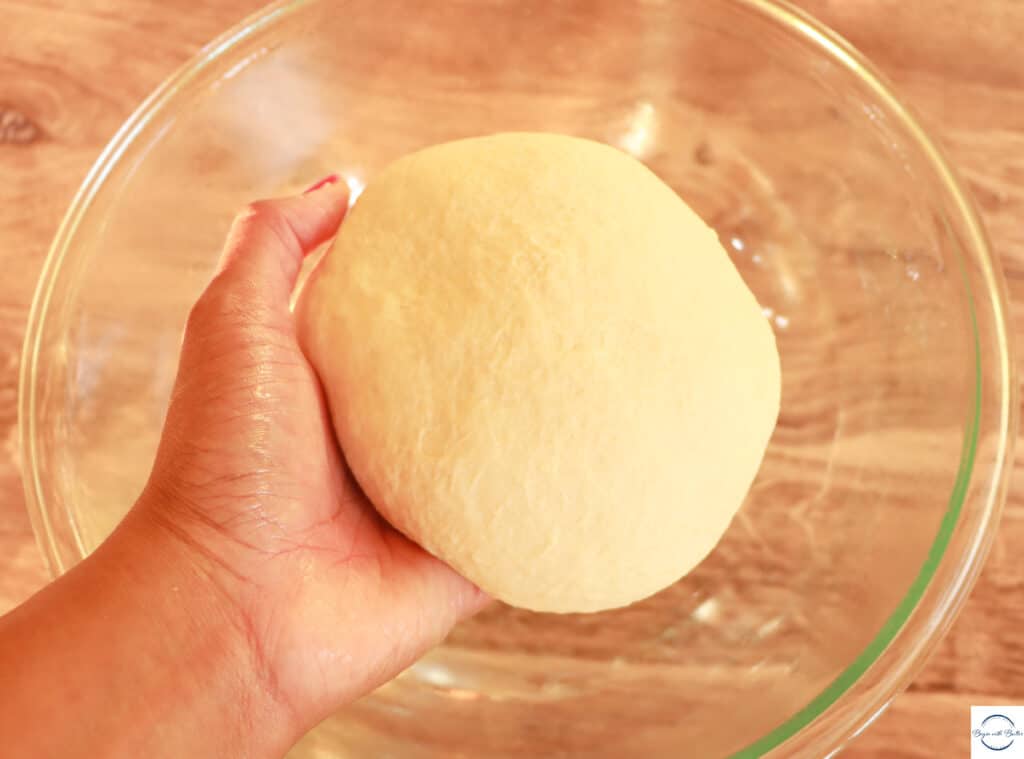
- Once all of the recipe flour is incorporated and the dough is in the shape of a rough ball, turn the dough out onto a very lightly floured work surface and knead by hand for about two minutes before adding any additional flour. The kneading process itself helps gluten development and sometimes you don’t need additional flour! You can also continue kneading with a stand mixer, but I don’t recommend leaving the mixer
- If necessary, add additional flour, one tablespoon at a time, then knead by hand for at least a minute after each addition. This dough should not need more than 3-5 tablespoons of additional flour.
- You’ll know the dough is done when it passes the windowpane test. The dough should be tacky, but not sticky when it is done.
- Spray the mixing bowl with a light coat of nonstick spray. Shape the dough into a ball and place into the mixing bowl. Cover loosely and allow to rise in an area free of drafts for about 45 minutes, or until the dough has doubled in size. Alternately, you can check your dough by doing the finger poke test, which is my favorite way to test bread dough!
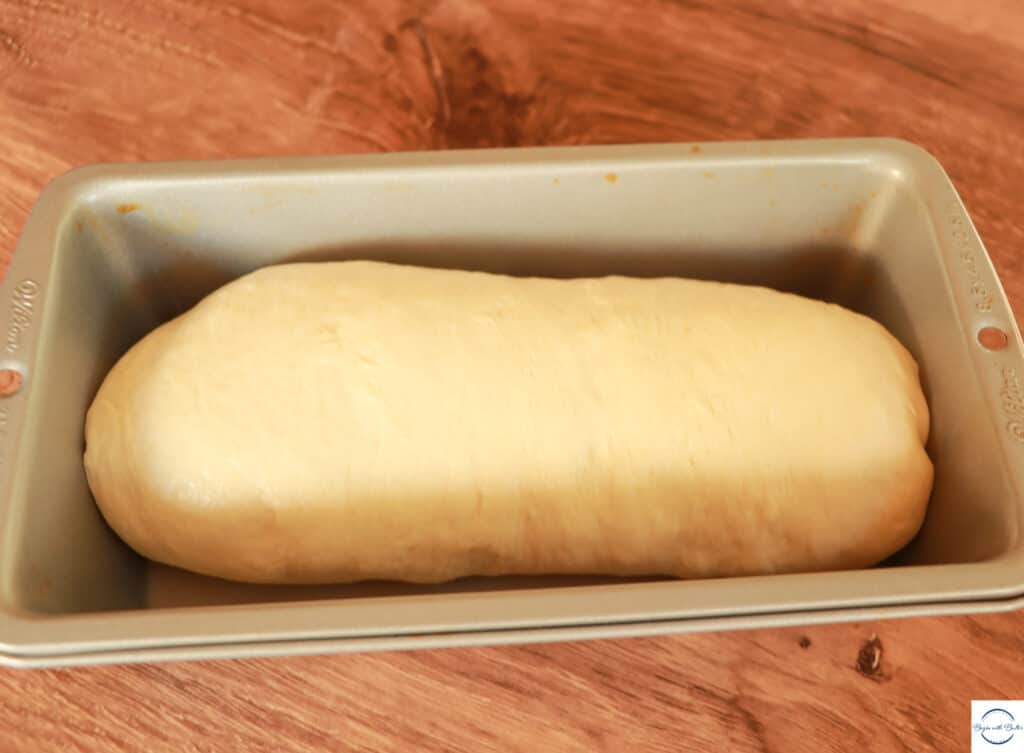
- Use a digital kitchen scale to separate the dough into two equal halves. Use your fingers to shape the first half into a rough rectangle. Fold the short end of the rectangle up 1/3 of the way and use the heel of your hand to seal the dough. Fold the resulting triangular-shaped sides of the dough into the loaf and use the heel of your hand to seal. Repeat this two more times, until you have a loaf shape. Then, pinch the final seam and roll gently over the seam to form the final seal. (Confused about how to shape sandwich bread loaves? Click here for a video tutorial!)
- Place the loaf into an 8.5”x4.5” loaf pan, seam side down, and repeat step 9 with the second half of the dough.
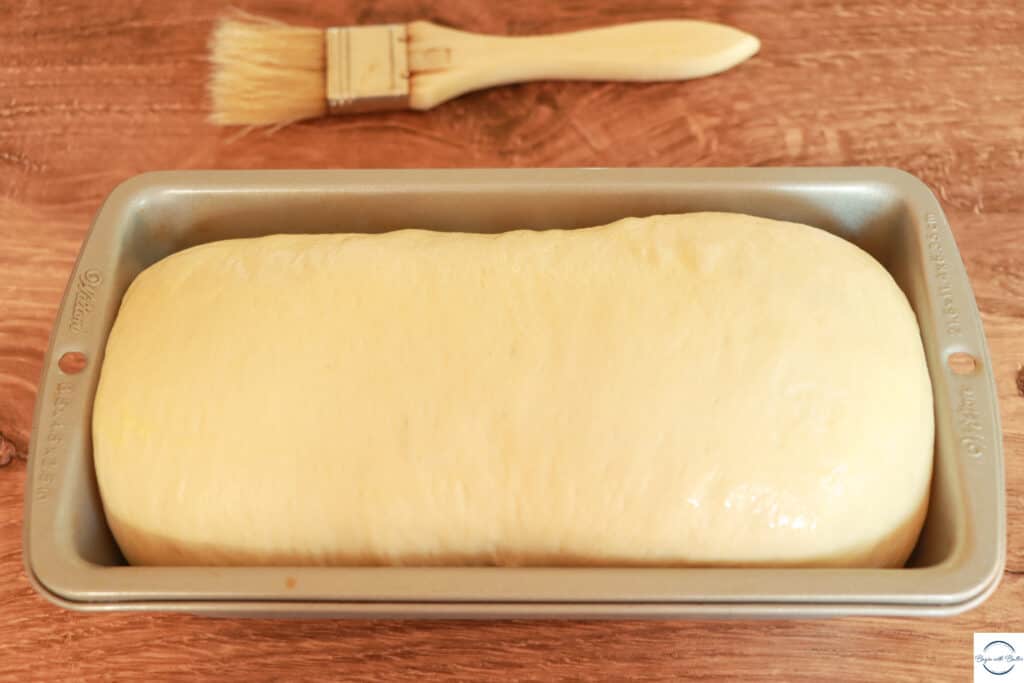
- Allow the loaves to rise for another 45 minutes, or until the loaves are roughly 1” over the top of the loaf pans.
- During the final rise (proofing) time, preheat your oven to a true 400°F. A long preheat time is essential to getting a beautiful loaf! Also, during this time, add the egg and one teaspoon of water to a small bowl and scramble thoroughly.
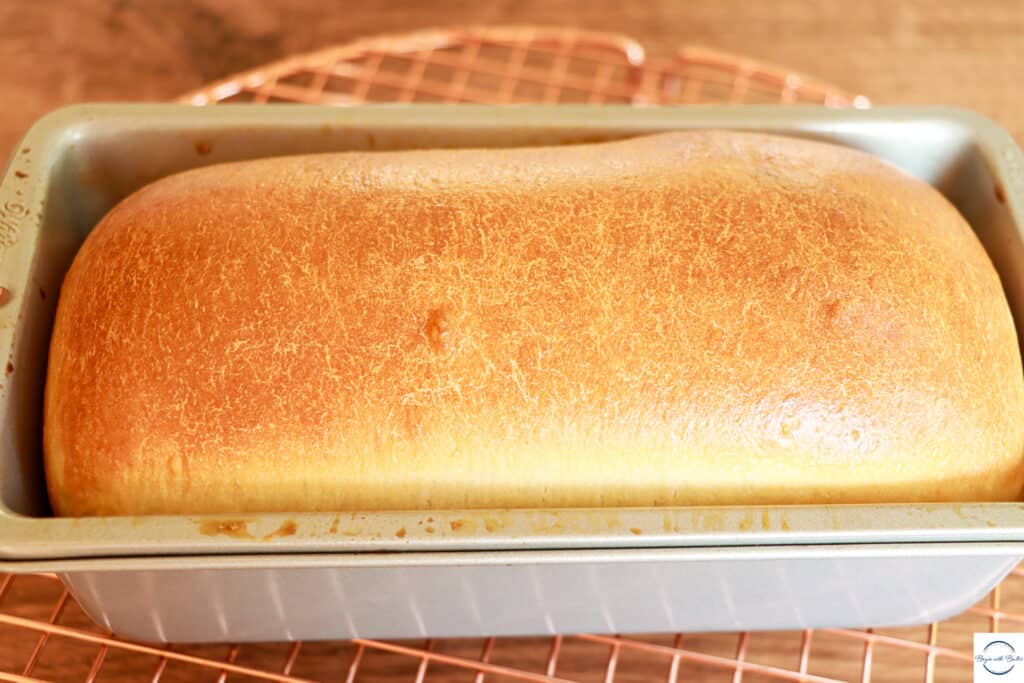
- When the loaves are finished proofing, gently brush egg wash over both loaves. Bake at 400°F for 18-25 minutes. Loaves are done when they reach an internal temperature of 190°F, or when the loaves sound hollow when thumped on the bottom.
- Allow loaves to cool for at least 45 minutes before slicing.
- Allow loaves to cool completely before freezing for storage.
Notes
- This bread can last in the freezer for up to a month.
- This bread is best eaten within 48 hours of making it, if it’s left out at room temperature.
- Plastic wrap is great for bread storage, and will give you another day of freshness if used properly.
- Prep Time: 30 minutes
- Rise Time: 1 h 45 minutes total
- Cook Time: 18-25 minutes
See you next time!
Can’t wait for the next installment of the sandwich bread series? Don’t forget to sign up for the email list so that you can be among the first in the know!
Ready to start making the best bread of your life? Sign up for BwB’s Bread Bootcamp today and save 10% with code BREAD10! This special LIVE event is only available once a year, and you don’t want to miss this one!